

Your walls are the biggest unused surface in a small home, and they make the perfect place for a Christmas tree when the floor is full. These wall christmas tree ideas turn a blank wall into the holiday focal point with garland, lights, wood, paper, and fabric. Most take an afternoon or less, come down with zero holes, and cost far less than a real tree. Pick the one that fits your wall, and you will have a tree nobody needs to walk around.
Quick Idea Summary
- The key takeaway: Every wall tree is the same three steps in different materials: tape the triangle template first, mount hardware rated for the weight, then build the tree along the outline. The material changes the look; the method keeps it on the wall.
- The detail most people miss: Weight is the whole game. A garland tree weighs under 5 pounds and lives on small adhesive hooks, while a wood plank tree can hit 20 pounds and needs studs or heavy anchors. Match the mount to the weight and nothing ends up on the floor at 2 a.m.
- What it costs or how long it takes: Most ideas below cost $5 to $60 and take 15 minutes to 2 hours. A full wall tree project fits into one Saturday afternoon.
At a glance
| Zone | Ideas | Budget |
|---|---|---|
| The classic green wall trees | 01–06 | $15–$60 |
| Lights and outlines | 07–12 | $5–$45 |
| Wood and built trees | 13–18 | $20–$90 |
| Paper, photos, and cards | 19–23 | $5–$40 |
| Fabric and hanging trees | 24–28 | $10–$55 |
| The right wall for the job | 29–32 | $10–$80 |
The ideas
01
The Classic Garland Zigzag Tree
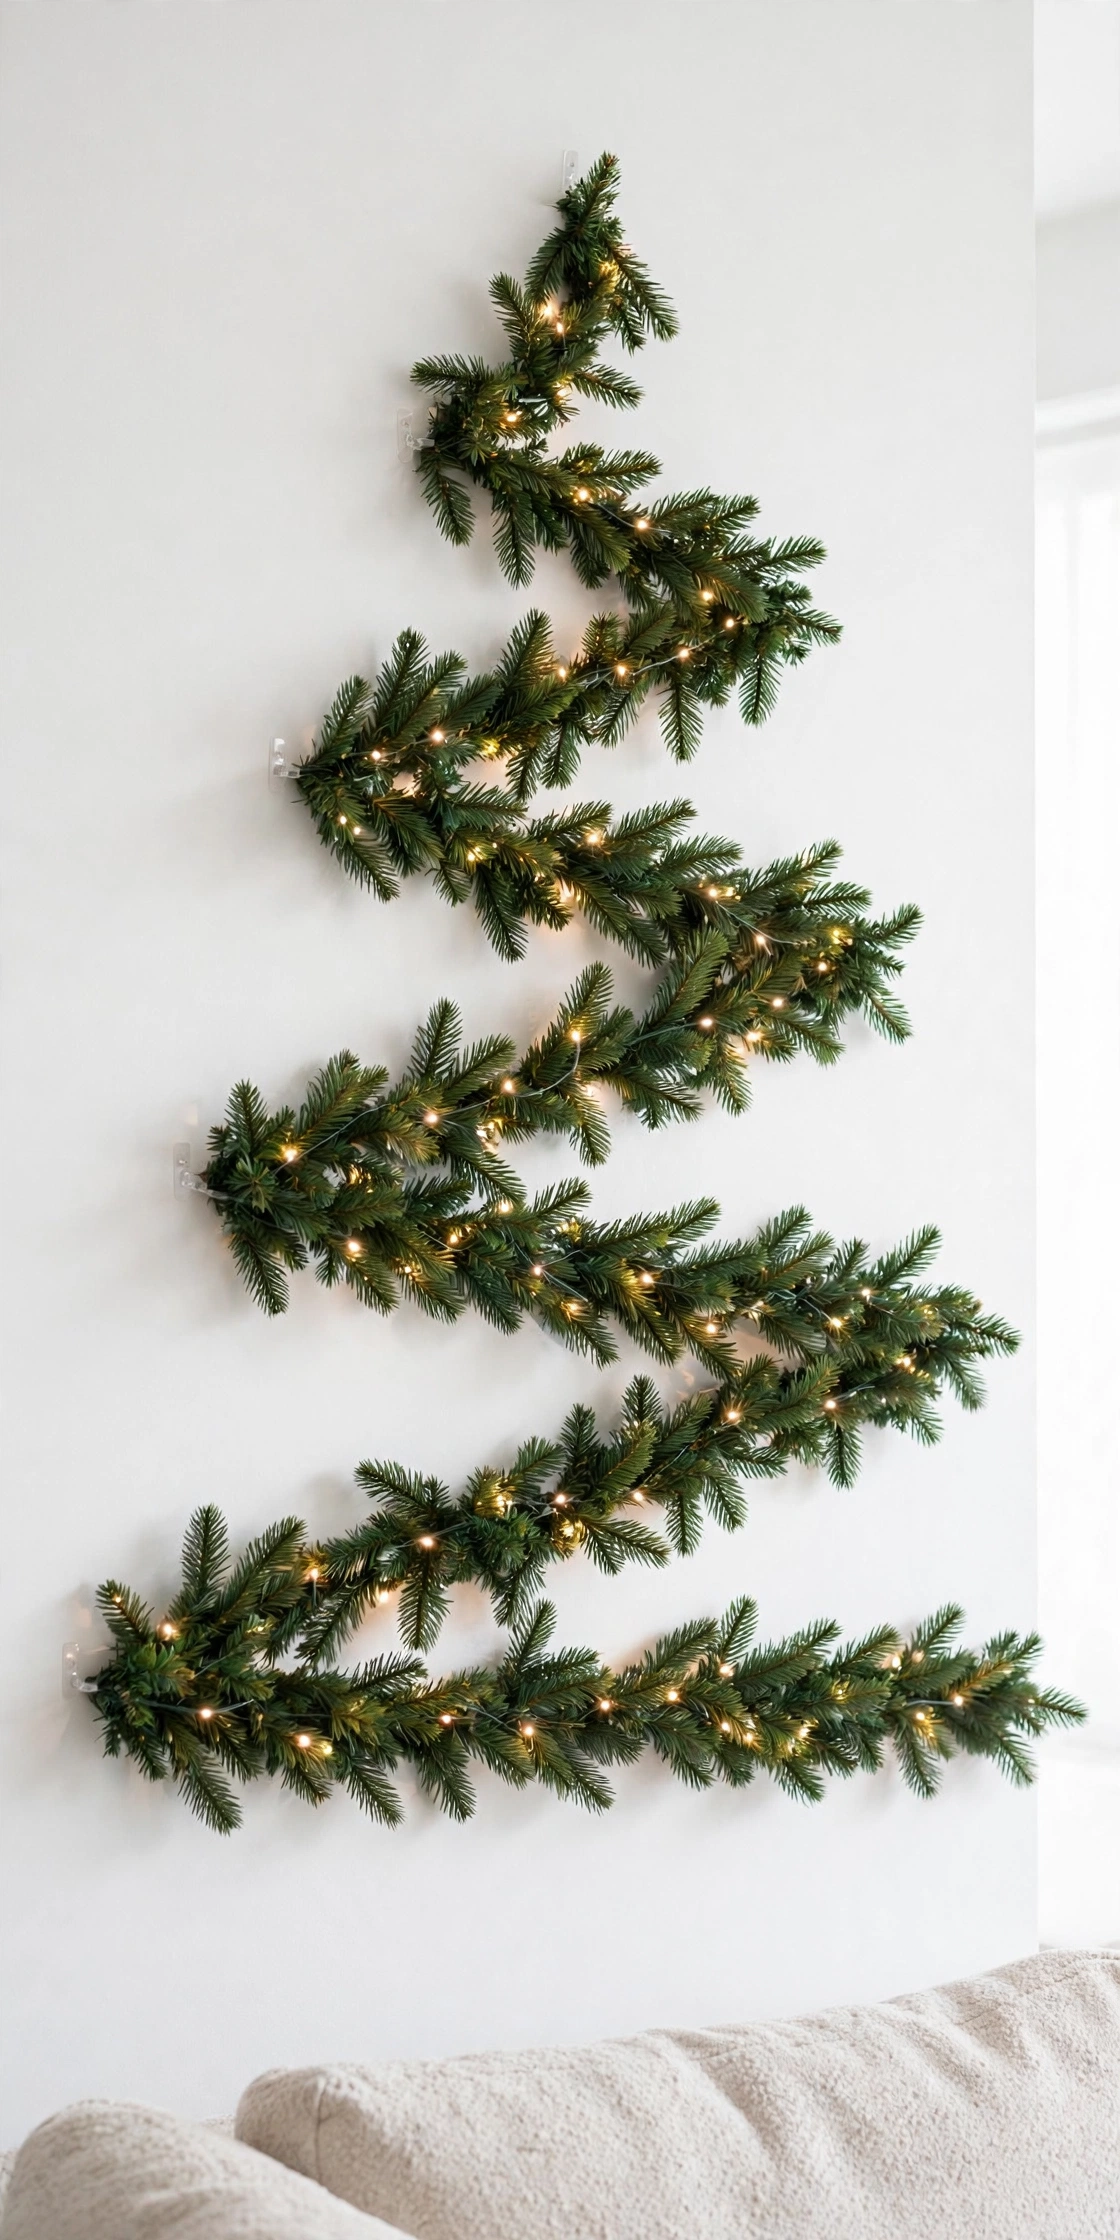
Build the tree silhouette by zigzagging artificial pine garland back and forth across a wall. Mark the triangle with painter’s tape first: top point about 5 feet high, base about 3 feet wide. Press garland along the tape lines, weaving one strand of warm white lights through as you go.
Try it: Hang the garland with clear removable hooks every 12 inches. One hook at the end of each zigzag row keeps the lines straight instead of sagging.

02
Garland Outline Tree With Filled Center
Once the zigzag outline is up, fill the inside of the triangle with a second layer of garland draped in shorter scallops. Two layers look lush from across the room; one layer reads flat. Tuck lightweight shatterproof ornaments into the center layer so they sit deep like a real tree.
Try it: Keep every ornament under 2 ounces on a garland tree. Twelve 2-ounce ornaments add a pound and a half to the total load, which is about what a row of small hooks can handle.
03
Real Branch Ladder Tree
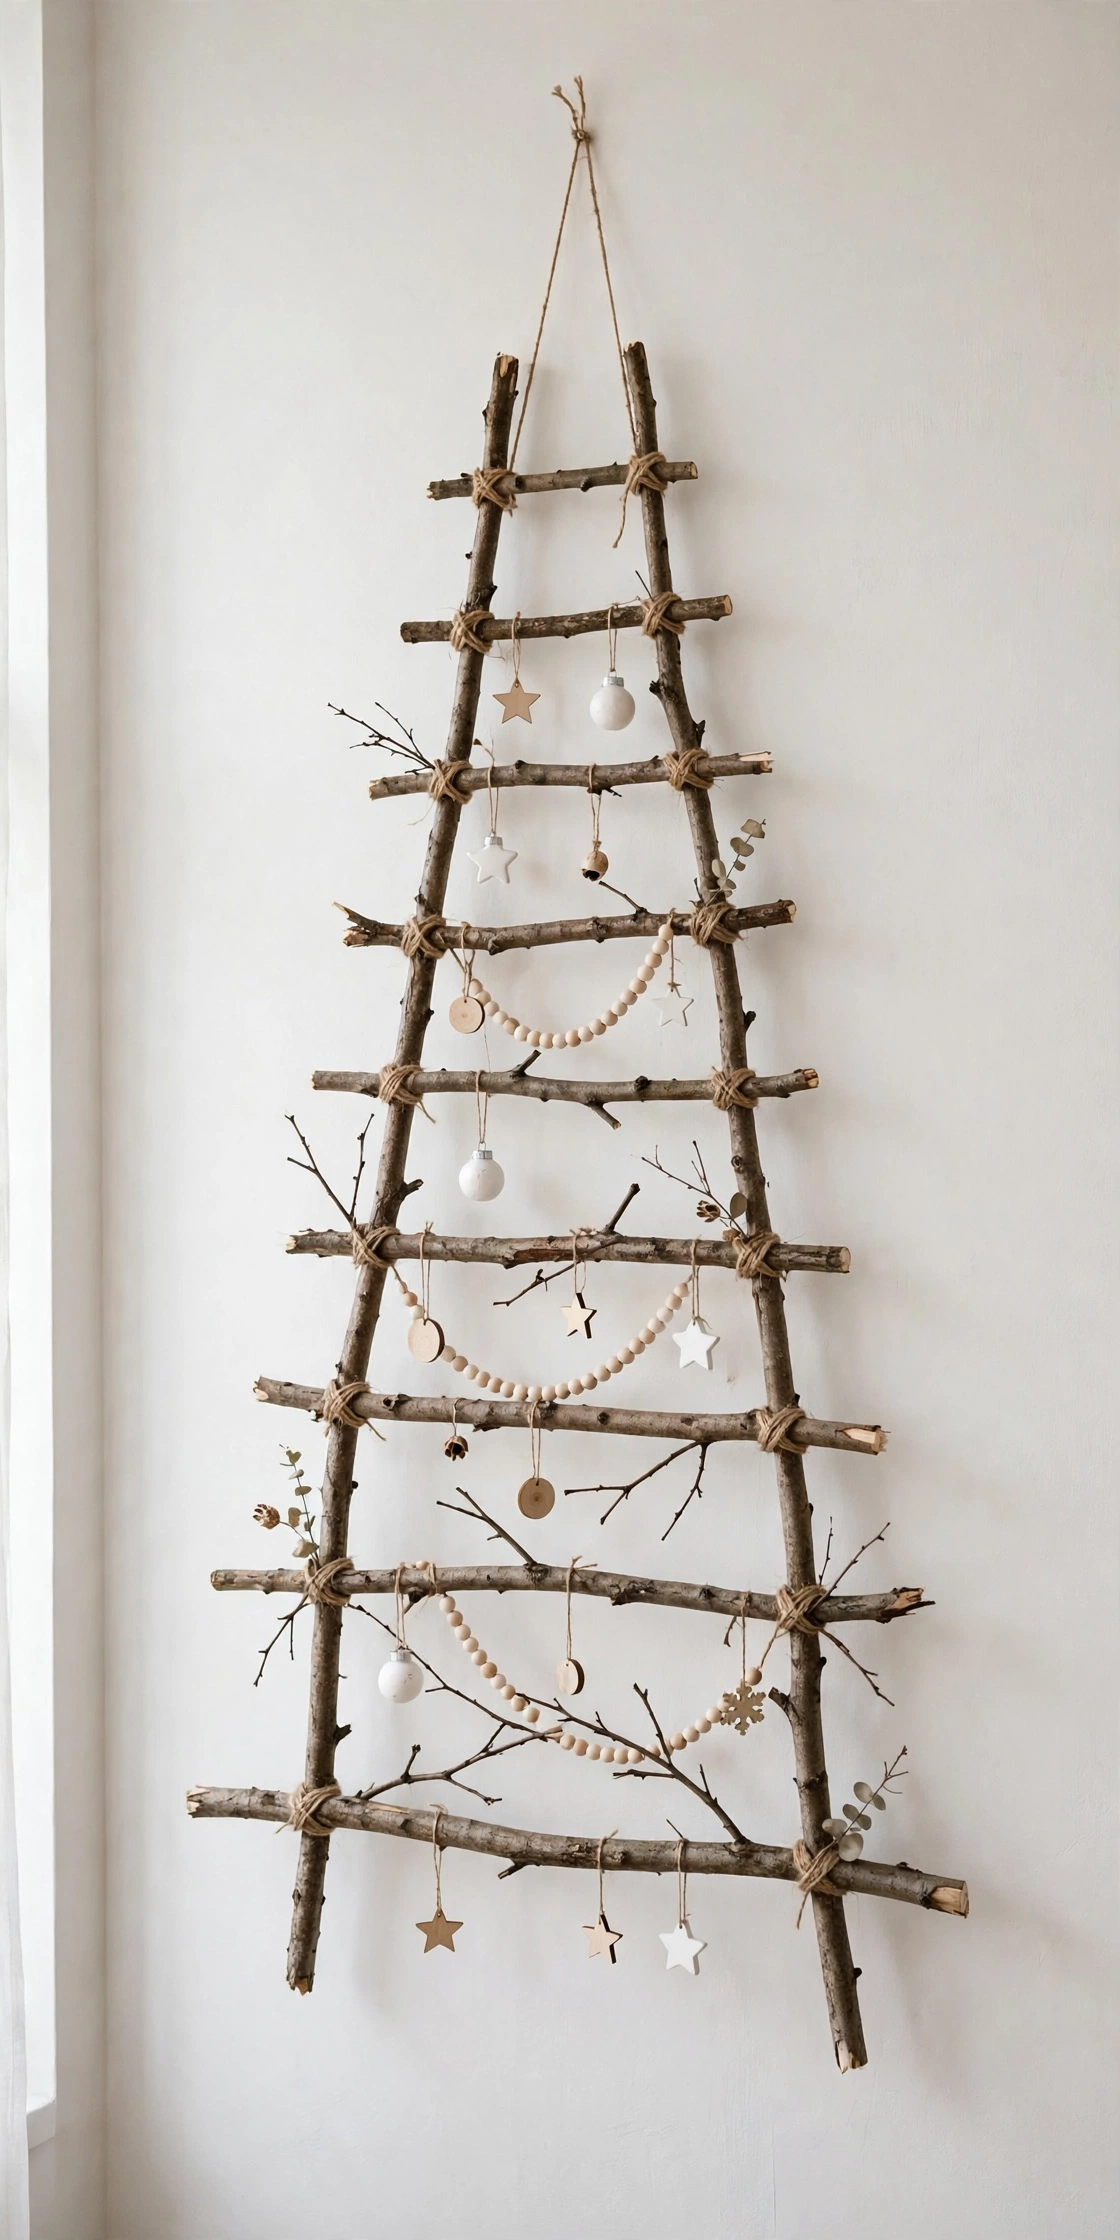
Collect clean branches in graduated lengths, longest at the bottom, shortest at the top, and connect them with natural twine on each side. Sand the rough ends, hang the ladder on two sturdy hooks, and add lightweight ornaments. It smells faintly of the woods and costs almost nothing.
Try it: Keep branch lengths staggered 6 inches per row. A 4-foot tree wants rows of roughly 48, 42, 36, 30, 24, and 18 inches for the classic taper.
04
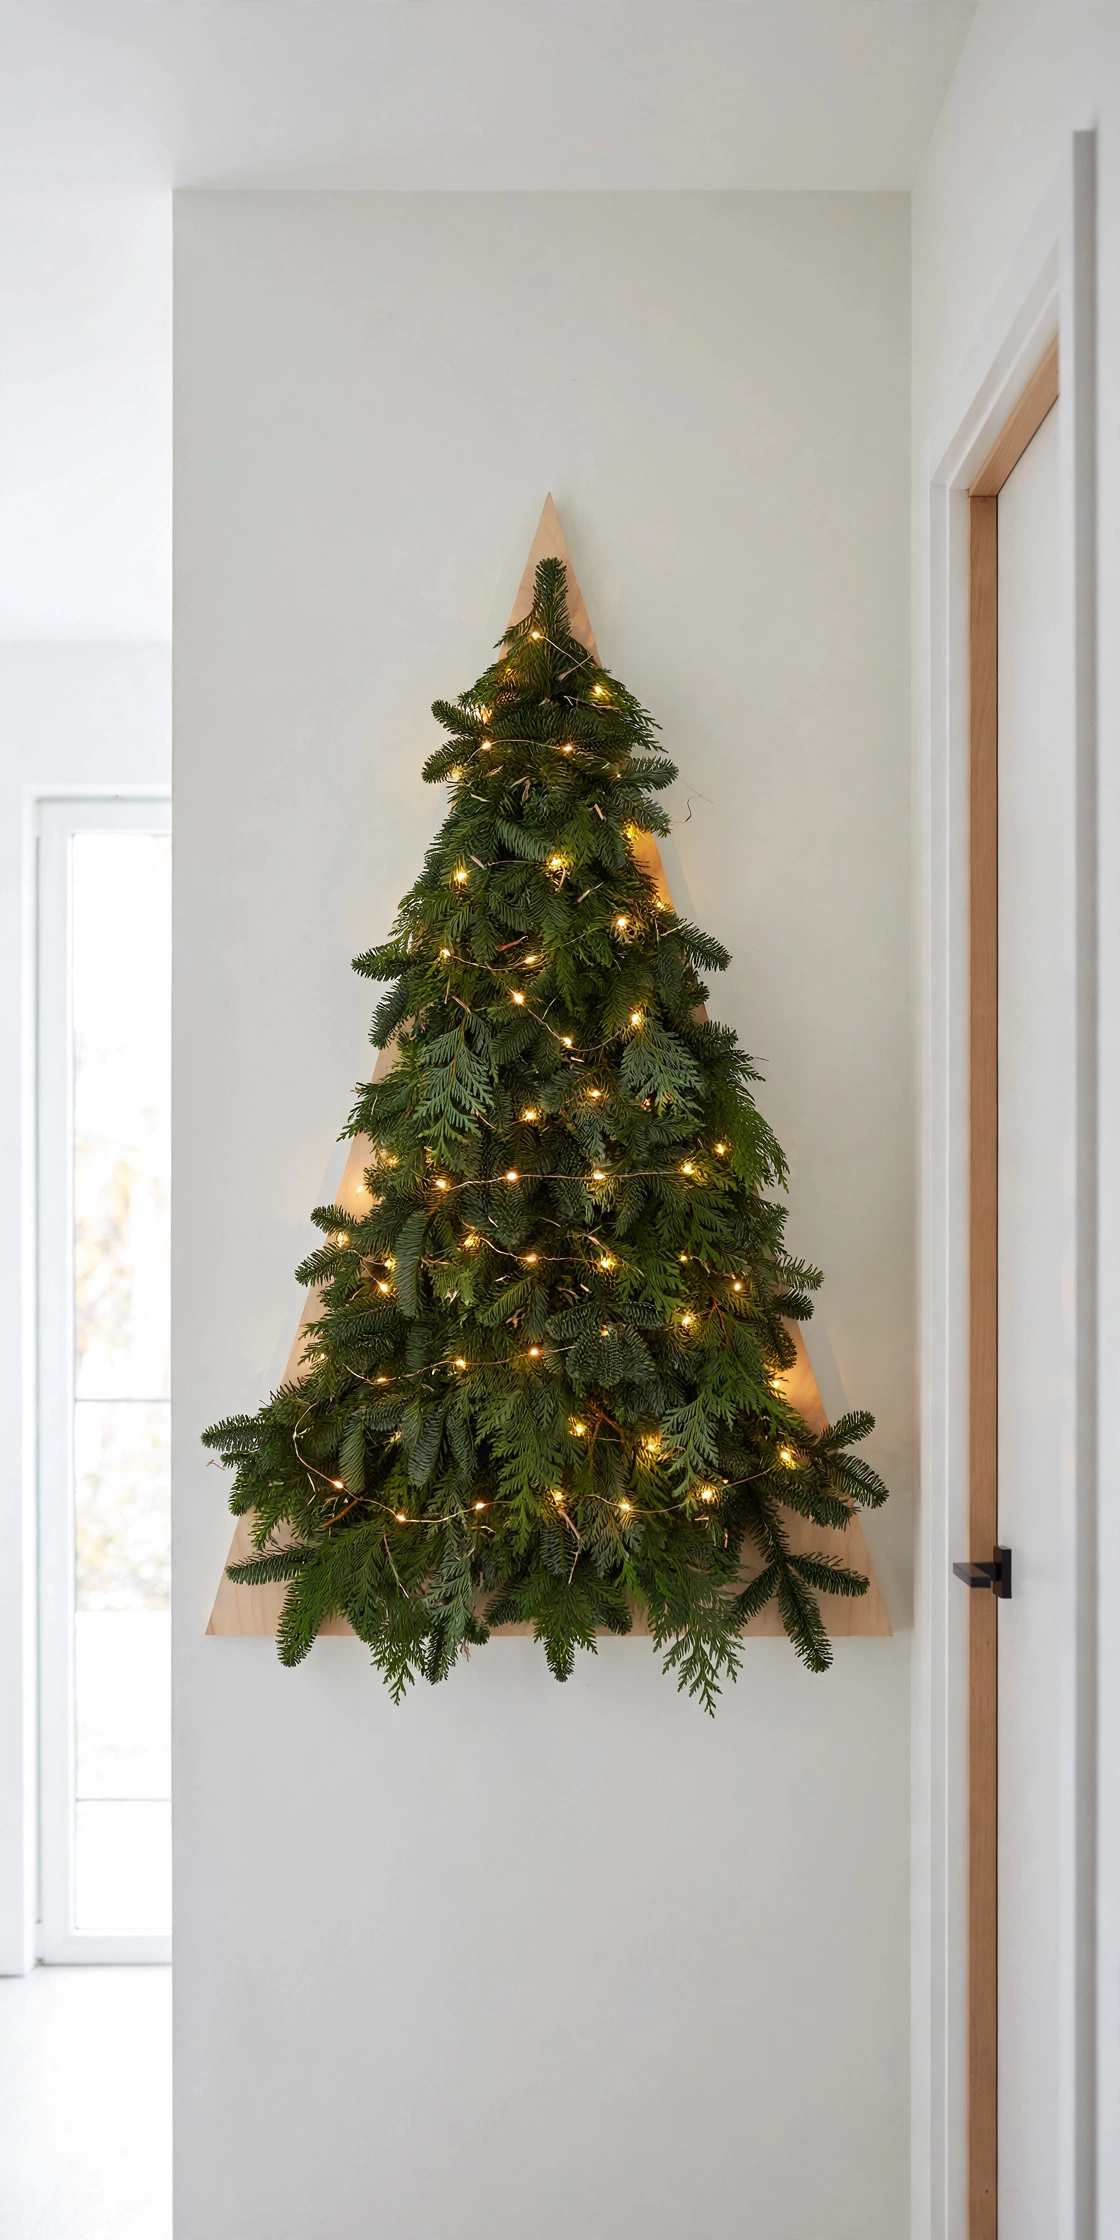
Fresh Evergreen Clippings on a Backing Board
Wire bundles of fresh fir and cedar clippings to a flat plywood triangle cut to your wall size. The board carries the weight, so one French cleat holds the whole tree. Mist the clippings every few days and the tree stays fresh for three weeks with real pine scent. Before you hang fresh greens indoors, review the NFPA’s christmas tree fire safety basics and keep the board away from heat sources.
Try it: Use battery lights only on fresh clippings. Hot plug-in strands plus dry greens are a fire combination you never want in a bedroom or hallway.

05
Tinsel Garland Tree for a Retro Wall
Zigzag silver or gold tinsel garland instead of pine for a wall tree that glows like a vintage holiday card. Tinsel is feather-light, so tiny adhesive tabs hold the whole tree. Add colored baubles in two colors max, and a star on top made from wired tinsel.
Try it: Buy tinsel at least 4 inches thick. Cheap thin tinsel disappears against the wall; thick tinsel reads as real branches from six feet away.
06
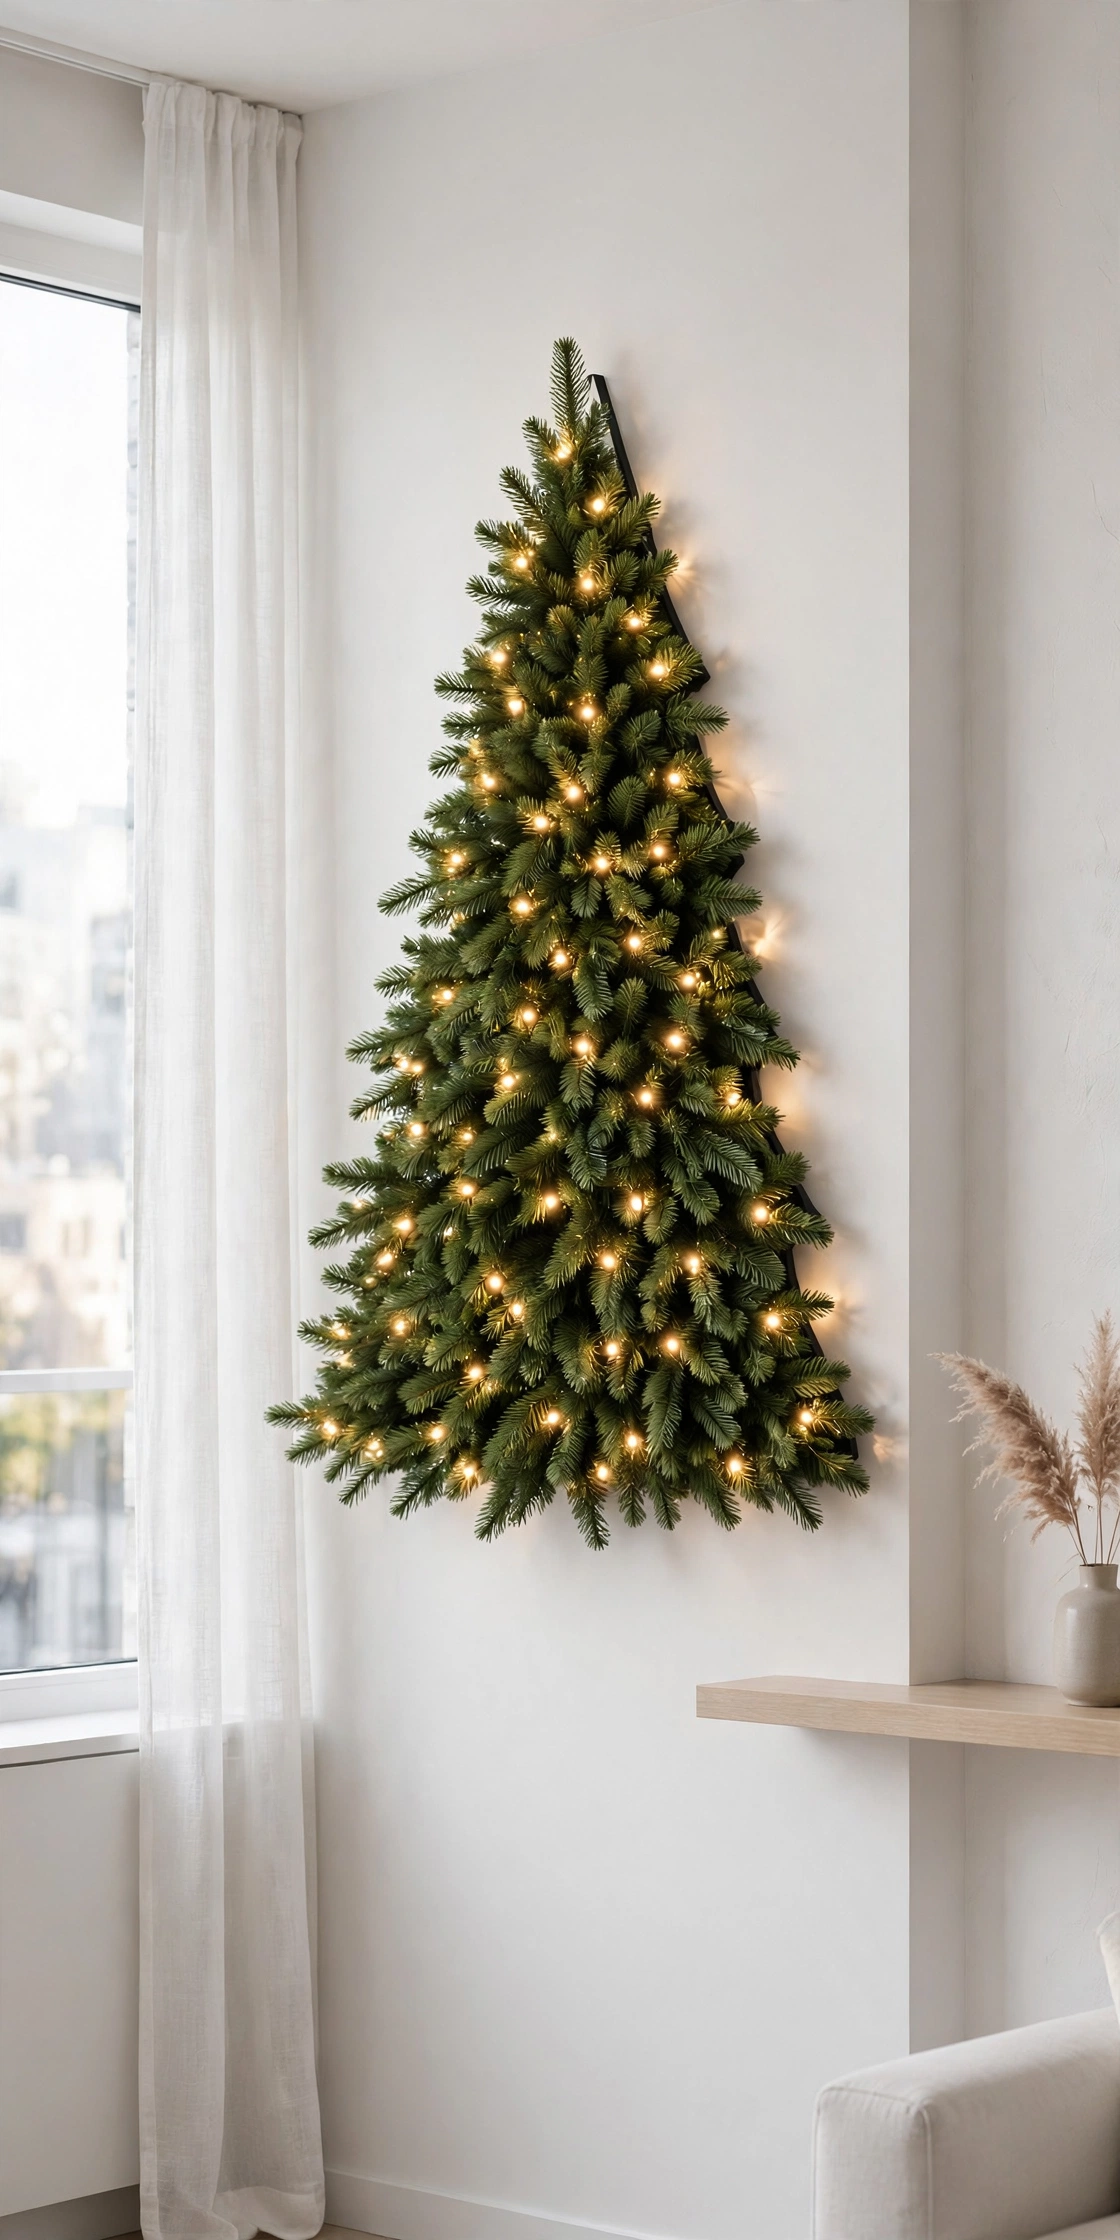
Buy a Pre-Lit Wall Tree Kit
If DIY is not your thing, several brands sell wall tree kits: shaped greenery panels with built-in lights that hang like one flat piece. They cost $40 to $80, go up in 20 minutes, and pack flat. Look for a fold-out accordion style that stores in a garment bag.
Try it: Check the panel depth before buying. Under 6 inches of depth counts as a true wall tree; deeper ones start eating the room they were meant to save.
07
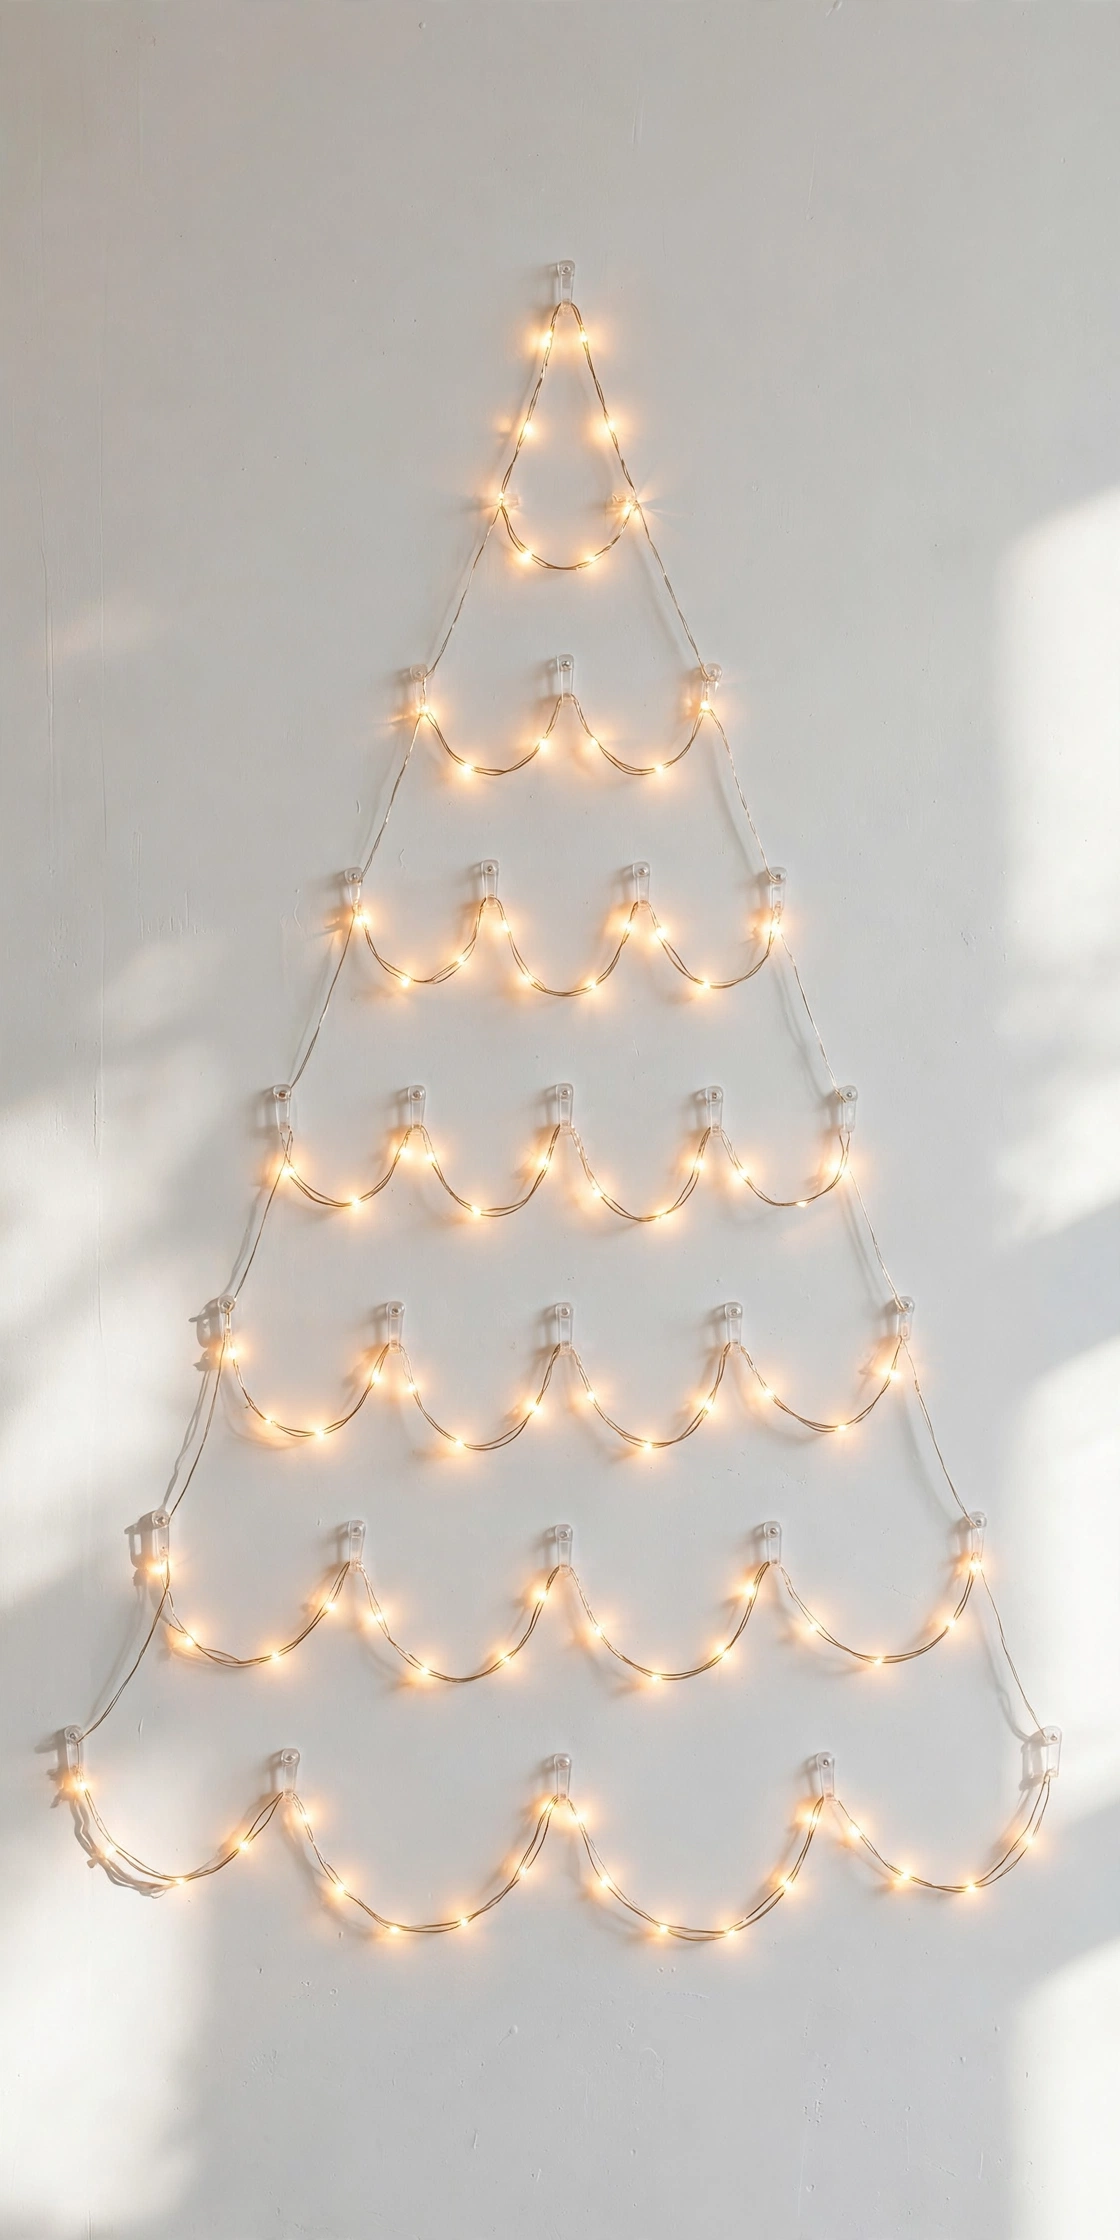
String Light Tree With Scalloped Swags
Screw or stick a row of small clear hooks in a wide triangle, then drape one long warm white strand from hook to hook in scallops that widen toward the bottom. The result is a glowing tree drawn in light. One 200-light strand covers a 5-foot tree beautifully.
Try it: Start hanging from the top point and work down. The first scallop should be the smallest, about 12 inches wide; widen each row by roughly 6 inches as you descend.
08
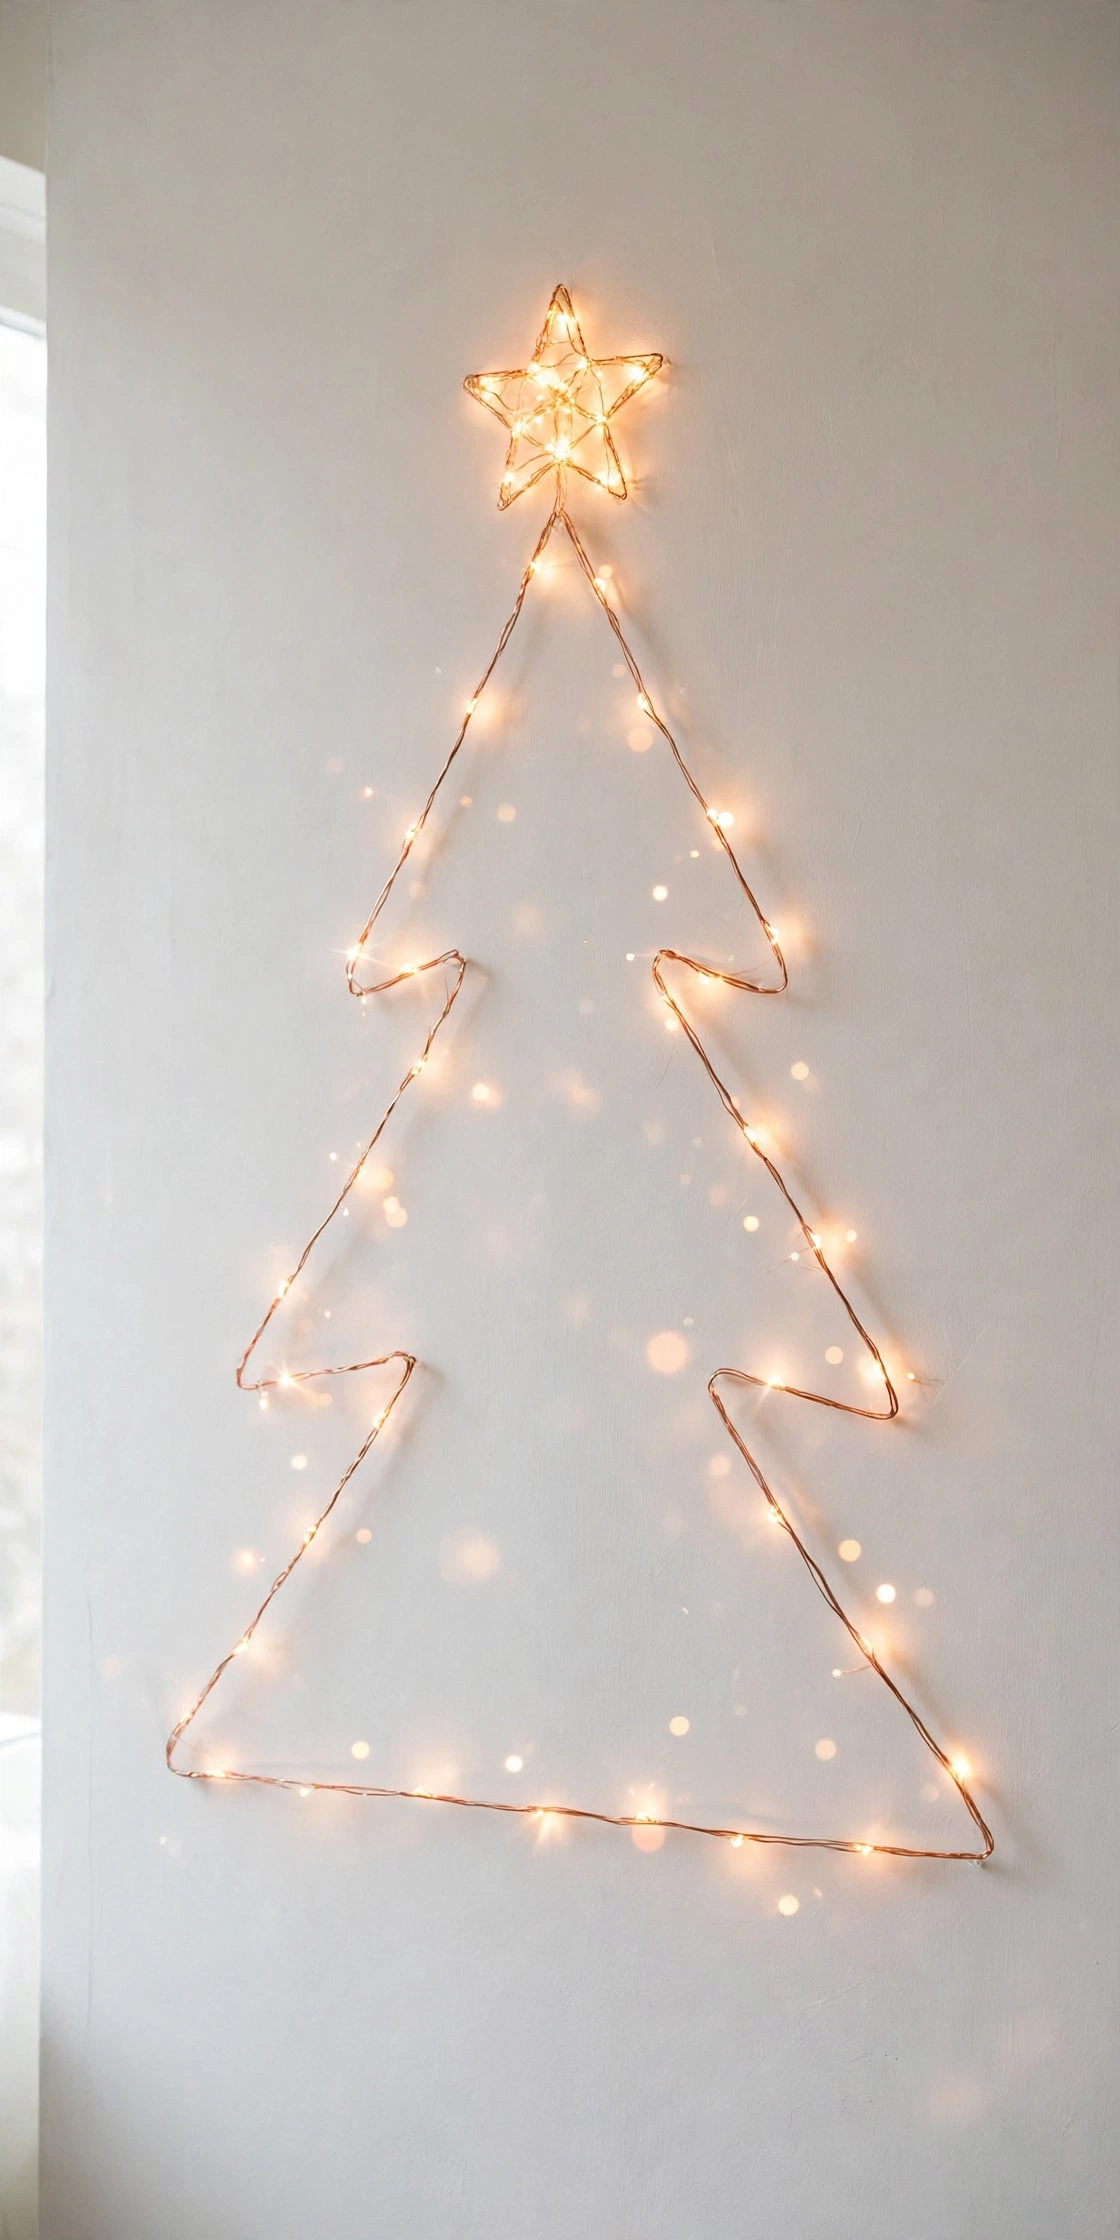
Fairy Light Outline With a Lighted Star
Trace just the tree’s outline with copper-wire fairy lights clipped along painter’s tape guides, and crown it with a lighted star topper. The outline reads minimal and modern, and the star is the payoff. Battery fairy lights with a 6-hour timer make it completely wireless.
Try it: Use one continuous wire if you can. Three separate wires means three battery packs to hide; one wire means one pack tucked behind the star.

09
Neon-Look LED Rope Light Tree
Bend a flexible LED rope light into a tree outline on a dark accent wall. Against charcoal or navy paint, warm white rope light glows like neon signage. Secure it with clear cable clips every 8 inches so the rope stays tight against the wall.
Try it: Choose 2700K to 3000K rope for warmth. Cool white rope on a dark wall reads as a storefront; warm reads as Christmas.
10
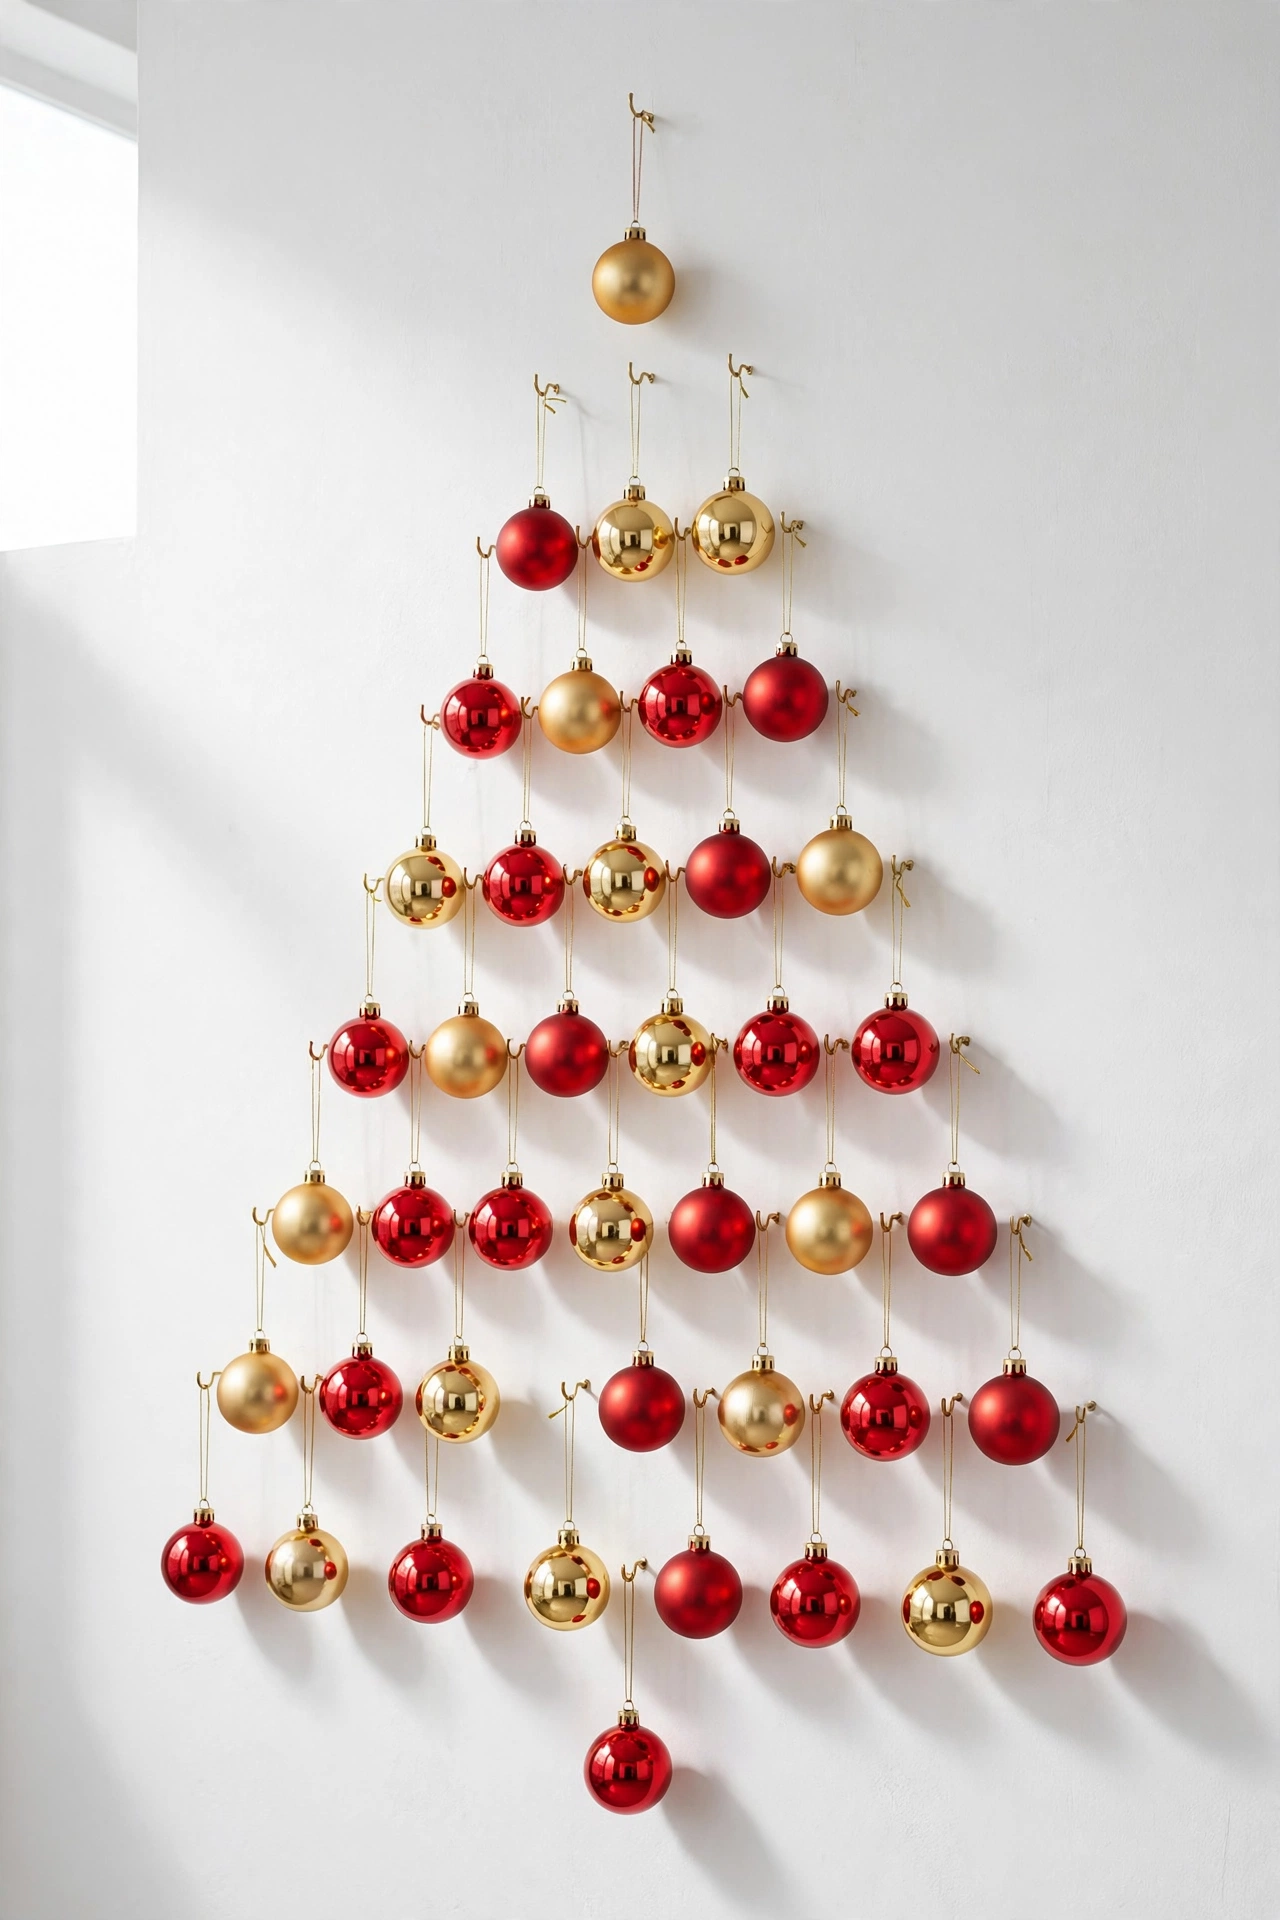
Ornament-Only Tree on Hooks
Mount small removable hooks in a tight triangle grid and hang shatterproof baubles from each one at graduated lengths. From across the room it reads as a floating tree made of ornaments; up close it is a tidy grid. Use one bauble color family for the cleanest look.
Try it: Plan for about 60 baubles on a 5-foot tree, spaced 4 inches apart. That sounds like a lot, but bulk boxes of 100 shatterproof balls cost under $20.
11
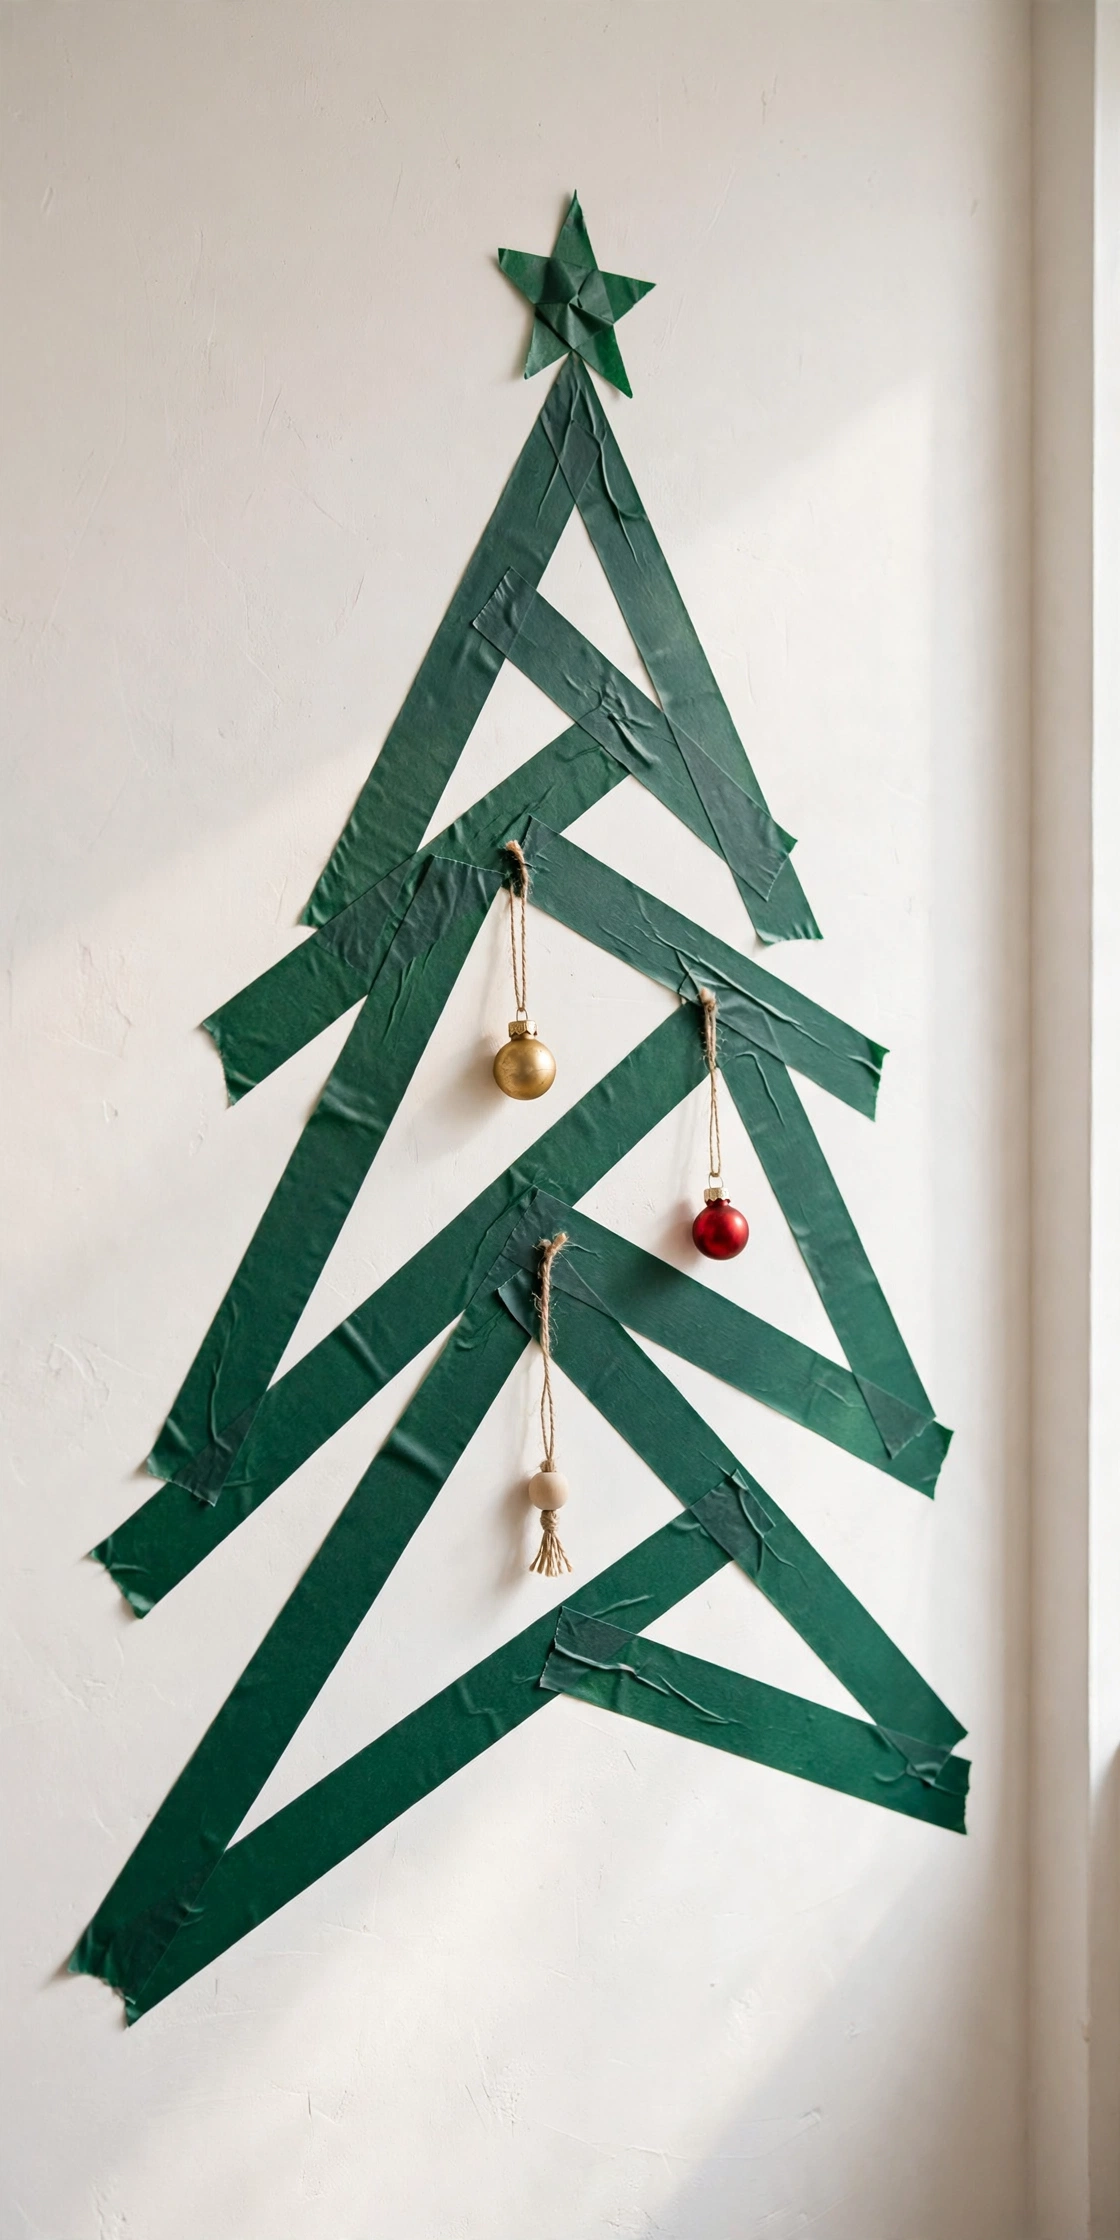
Washi Tape Tree
Draw a bold geometric tree directly on the wall with wide washi tape. Keep the branches at a 60 to 70 degree angle and space rows 2 to 3 inches apart for rhythm. Hang three to five mini ornaments from micro adhesive tabs inside the outline for dimension.
Try it: Use matte tape in deep green, gold, or soft black. Glossy tape glares under lamplight and cheapens the look.
12
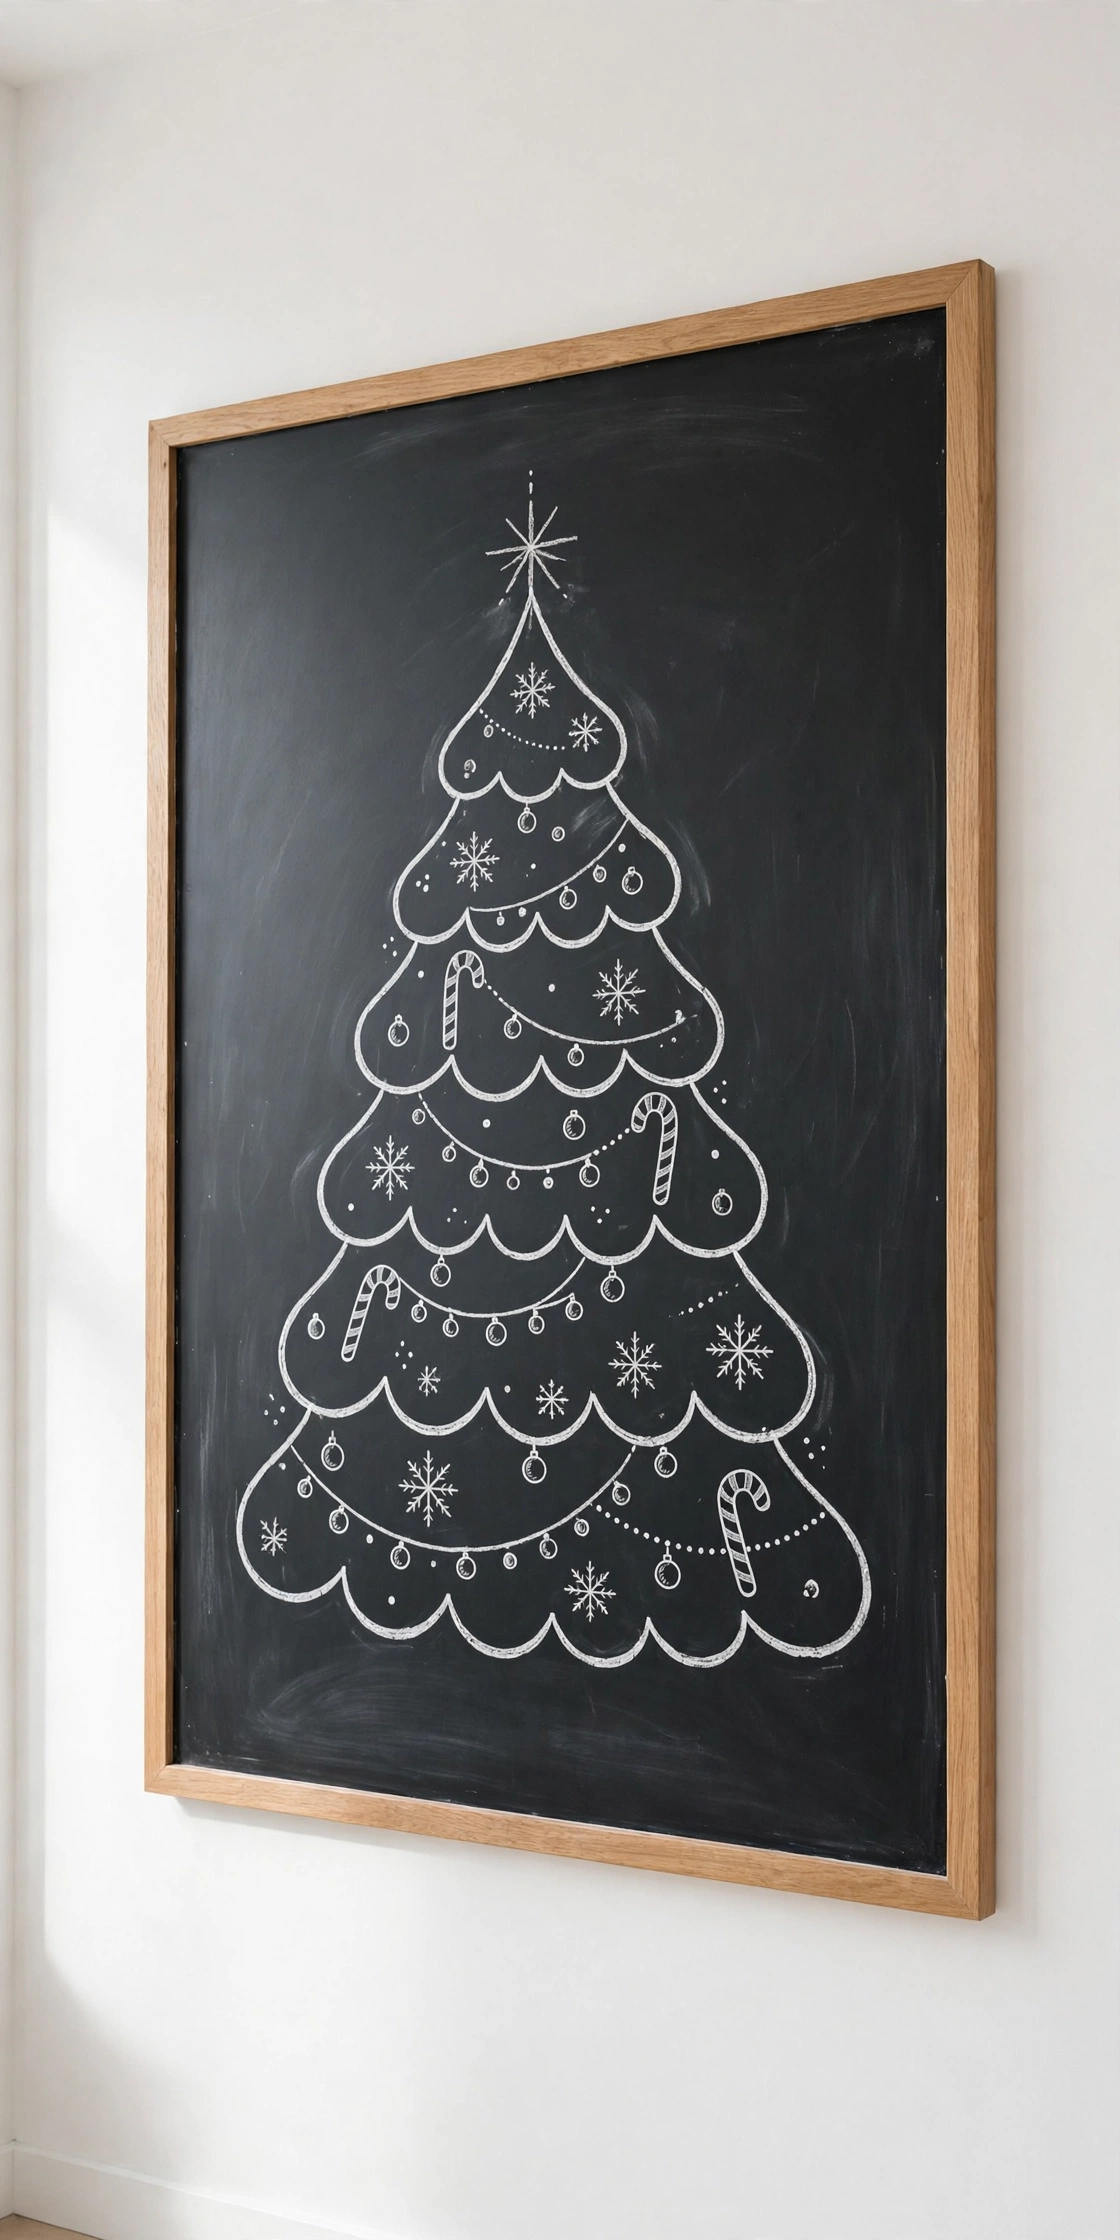
Chalk-Drawn Tree on a Chalkboard Wall
If you have a chalkboard wall or can hang a large framed chalkboard, draw the whole tree in white chalk: scalloped branches, snowflakes, ornaments, candy canes. It is the most renter-friendly tree of all, zero hardware, and the kids can redraw it weekly.
Try it: Season the chalkboard first by rubbing chalk over the whole surface and wiping it off. Otherwise the first drawing leaves ghost lines that never quite erase.
13
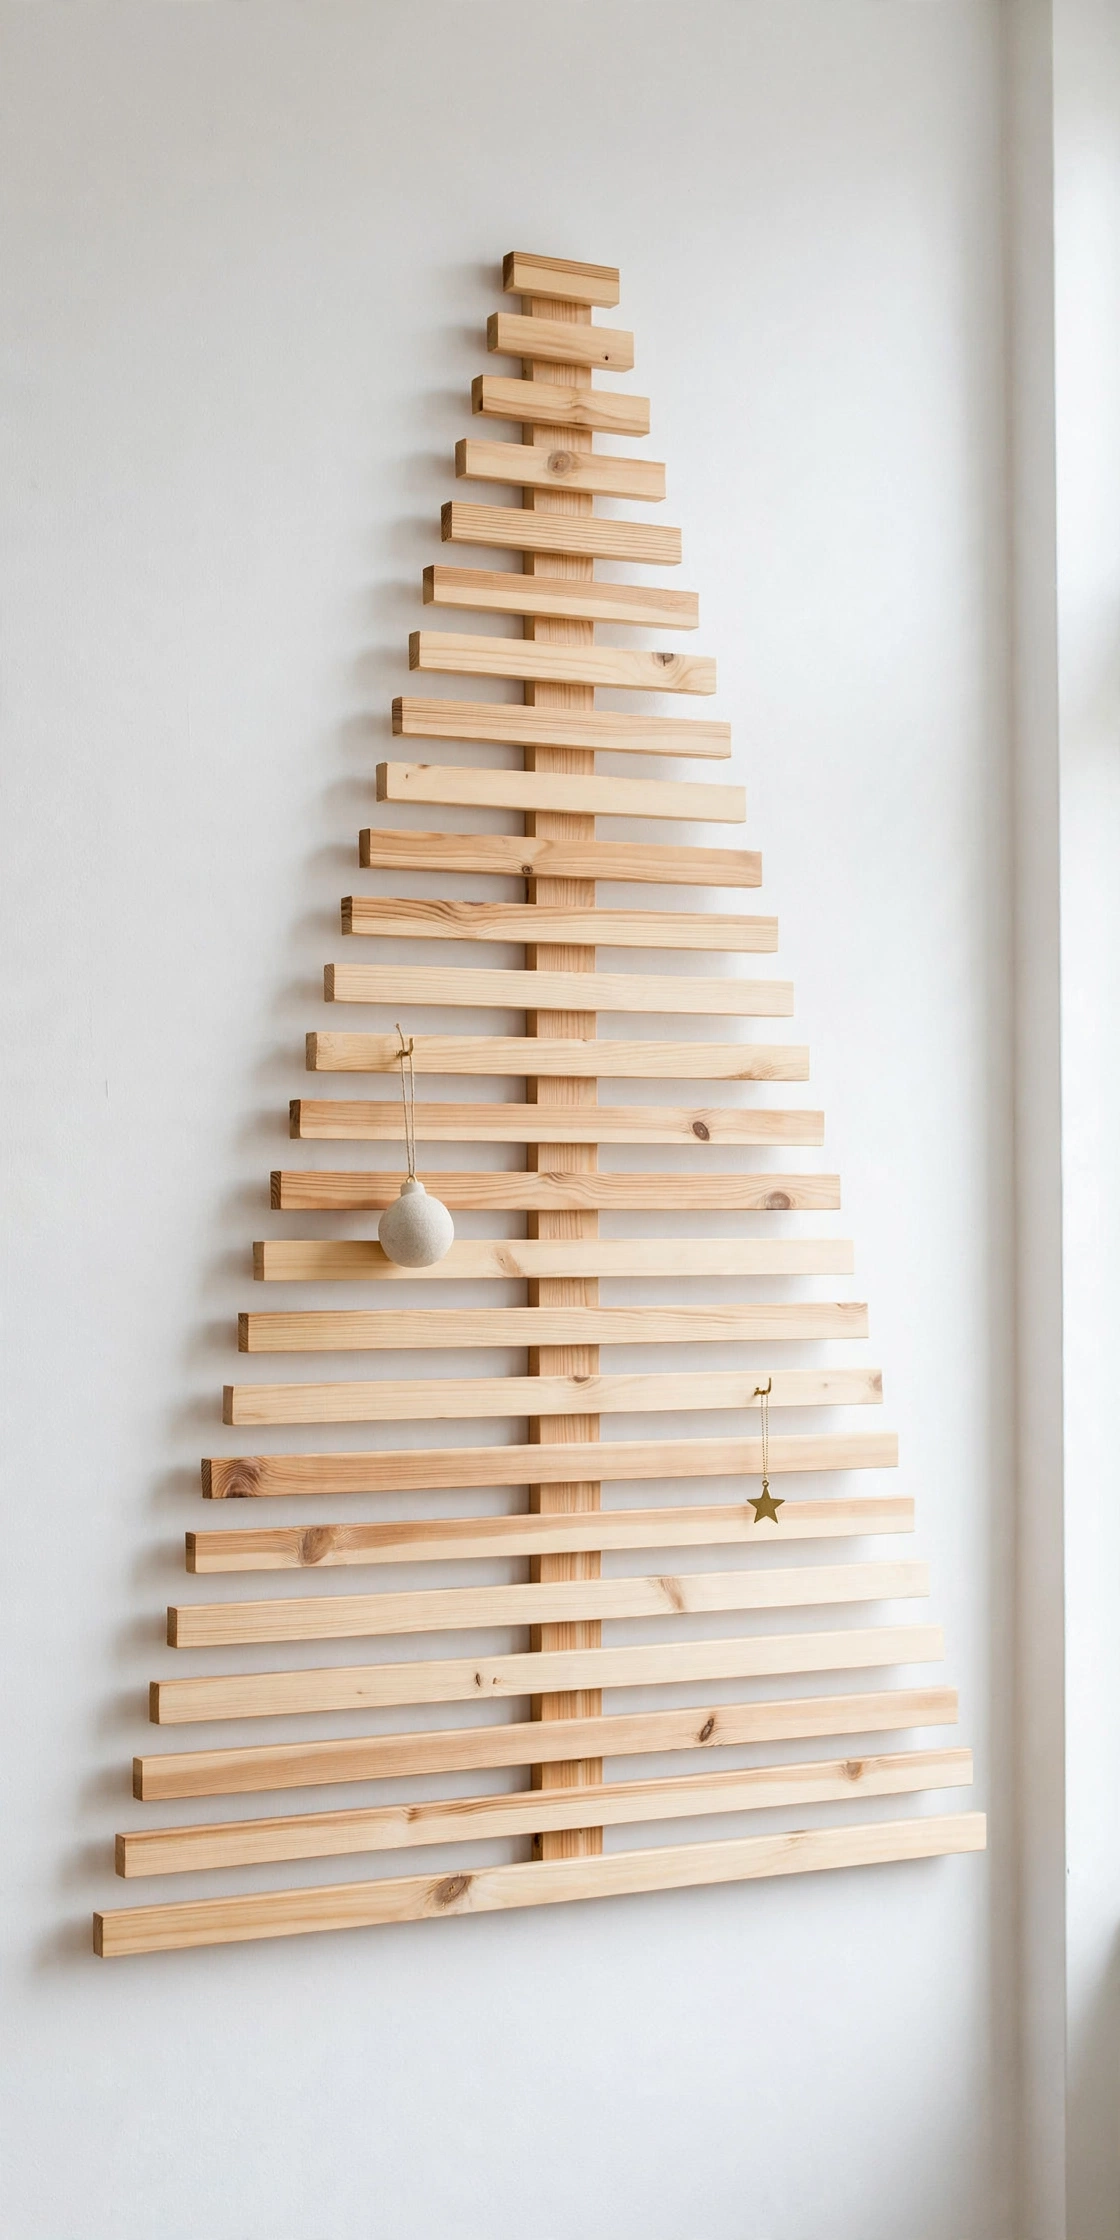
Wooden Plank Tree, Scandinavian Style
Mount horizontal wood slats at descending lengths, longest at the base, to form the triangle. A 1 to 1.5 inch gap between slats creates shadow lines that look architectural. Natural oil finish plus tiny brass hooks for a few ornaments keeps it minimal.
Try it: Cut slats at 36, 30, 24, 18, 12, and 6 inches for a 4-foot tree. Two people and a level make the difference between “Scandinavian” and “crooked.”
14
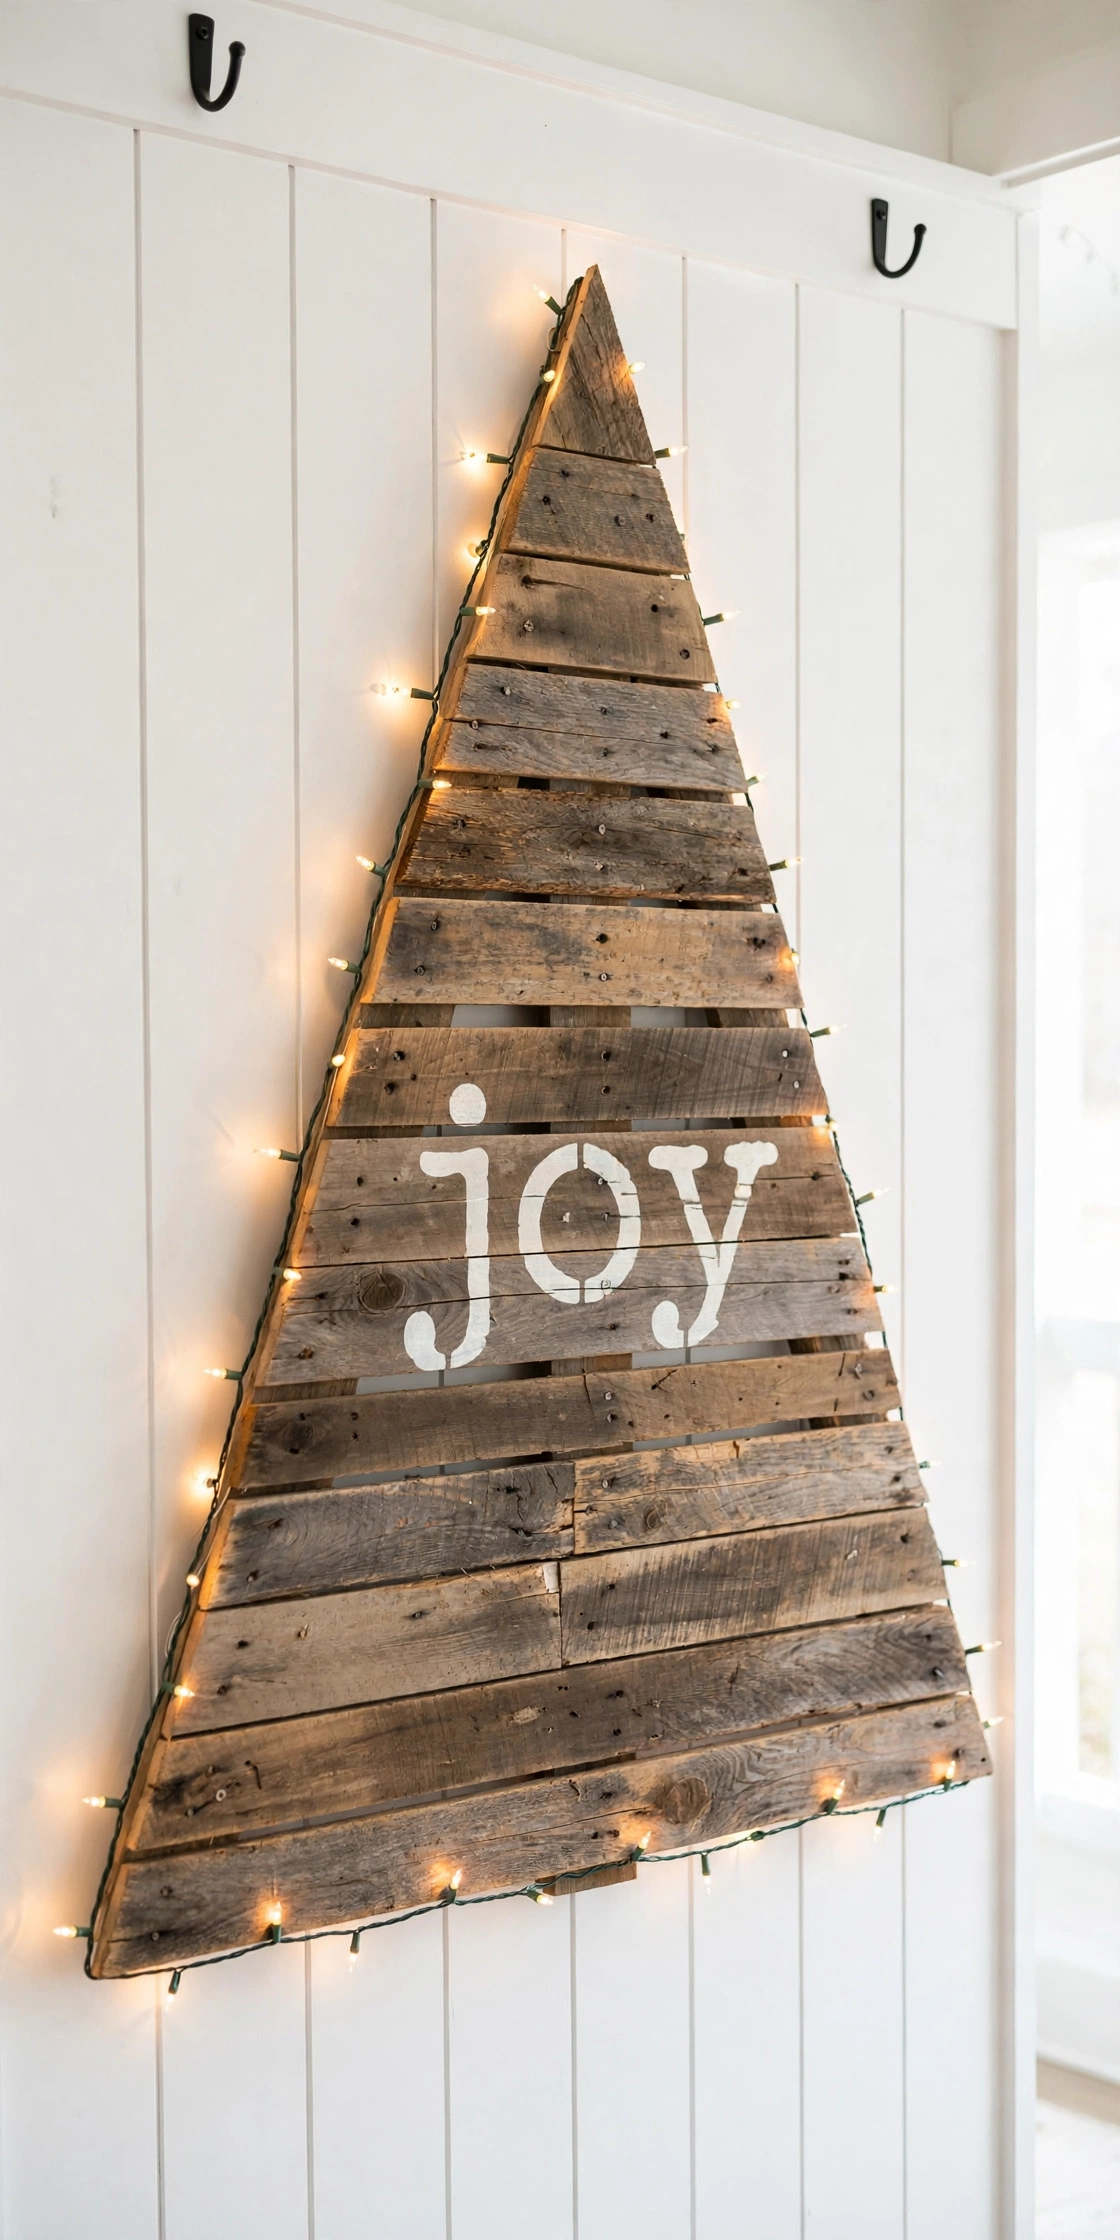
Full Pallet Tree
Screw together reclaimed pallet boards into a solid tree silhouette, stencil a tree shape or the word “joy” across it, and lean it on the wall. A pallet tree has presence, it is furniture, not decoration. Wrap one strand of lights around the edges.
Try it: A solid pallet tree can weigh 20 pounds. Mount it into studs or use heavy-duty drywall anchors rated for 50 pounds, not adhesive hooks.
15
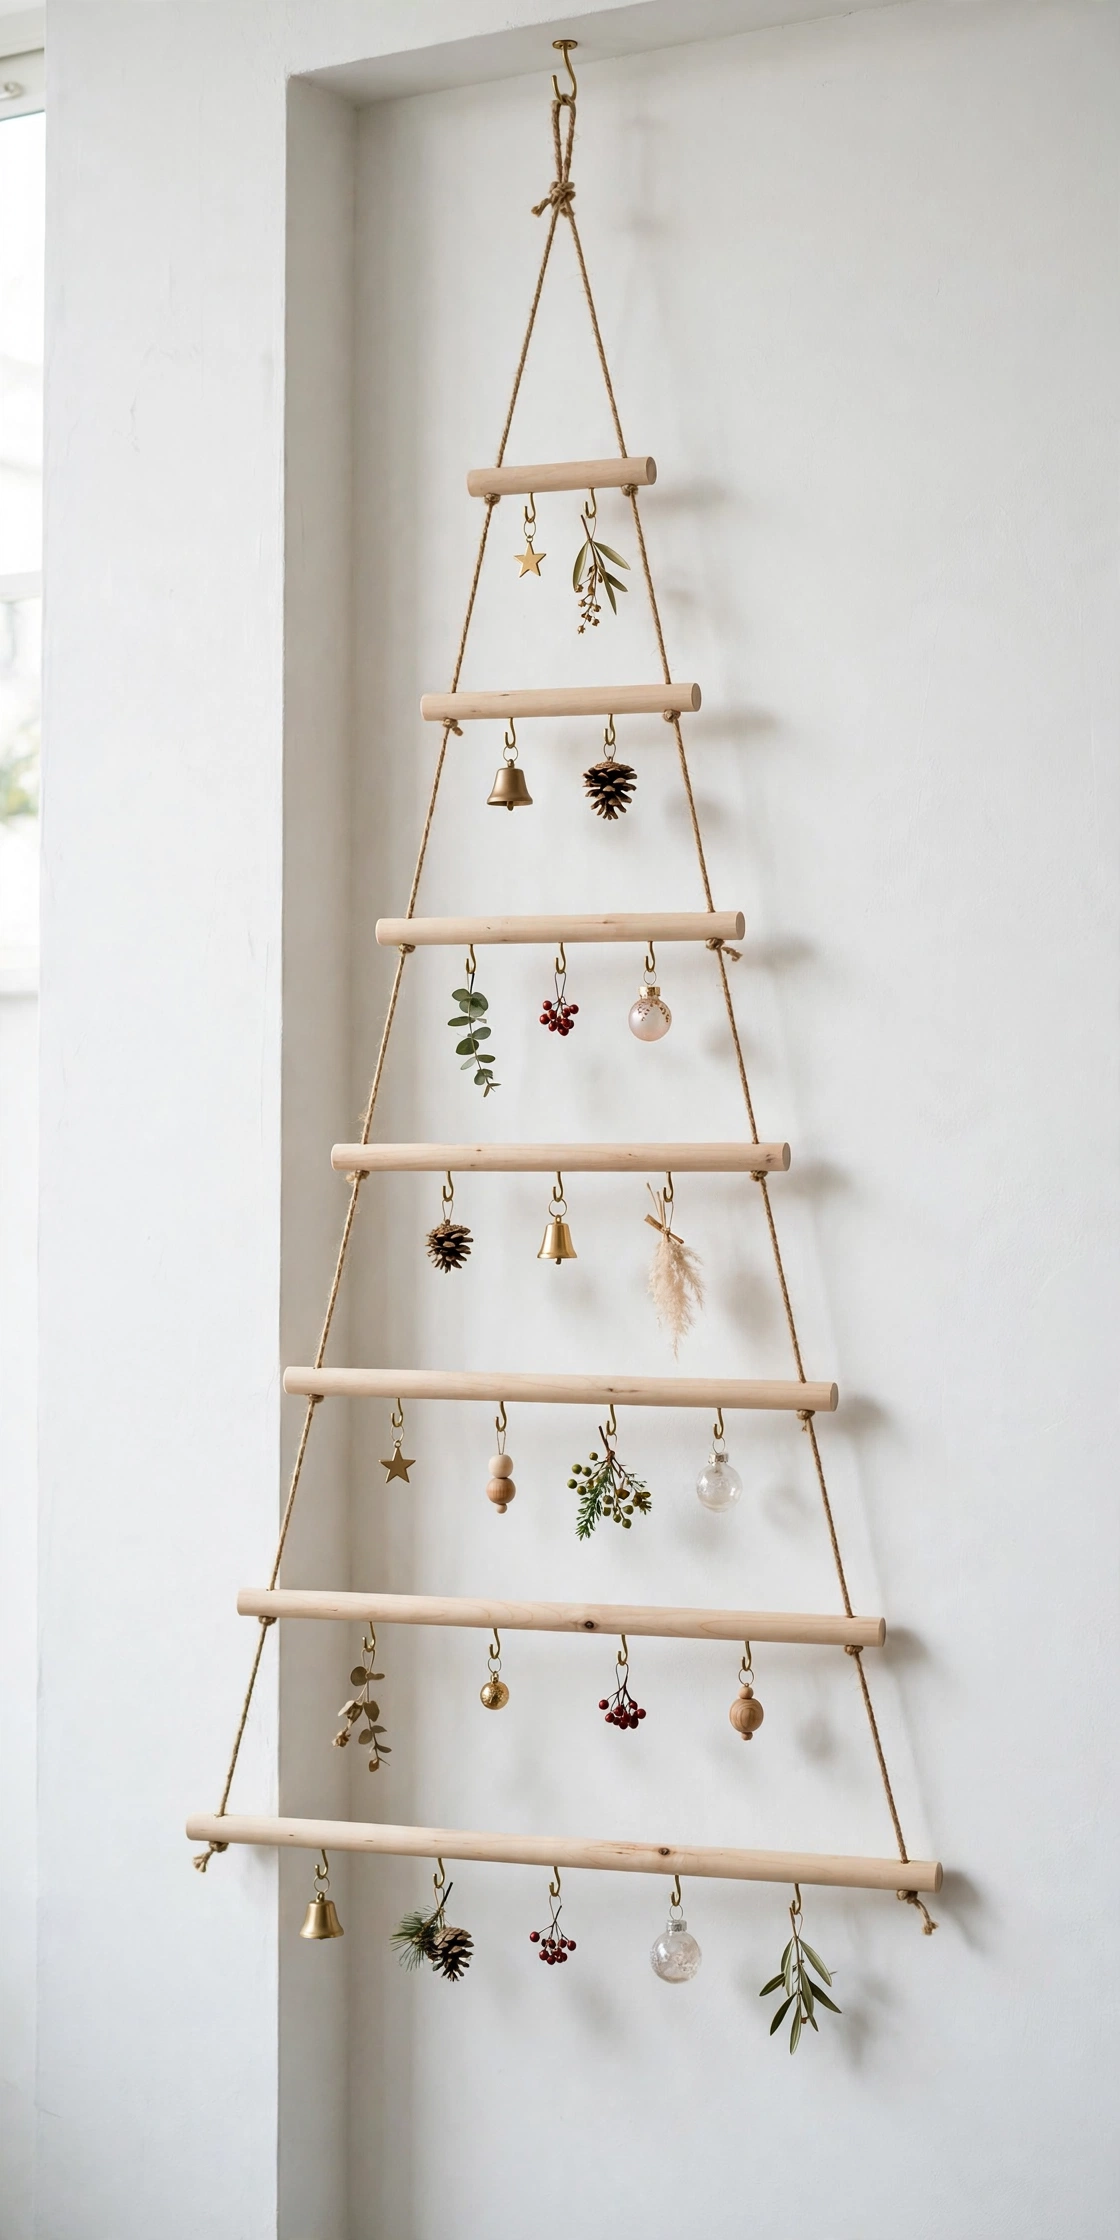
Branch and Dowel Suspended Tree
Drill small holes through graduated wooden dowels, thread them on two vertical twine cords, and let the ladder float 2 inches off the wall. The float creates a shadow gap that makes it look gallery-installed. Hang light ornaments from tiny cup hooks on each dowel.
Try it: Space the dowels 8 inches apart vertically. Wider spacing suits bigger ornaments; tighter spacing suits a fuller look with small balls.
16
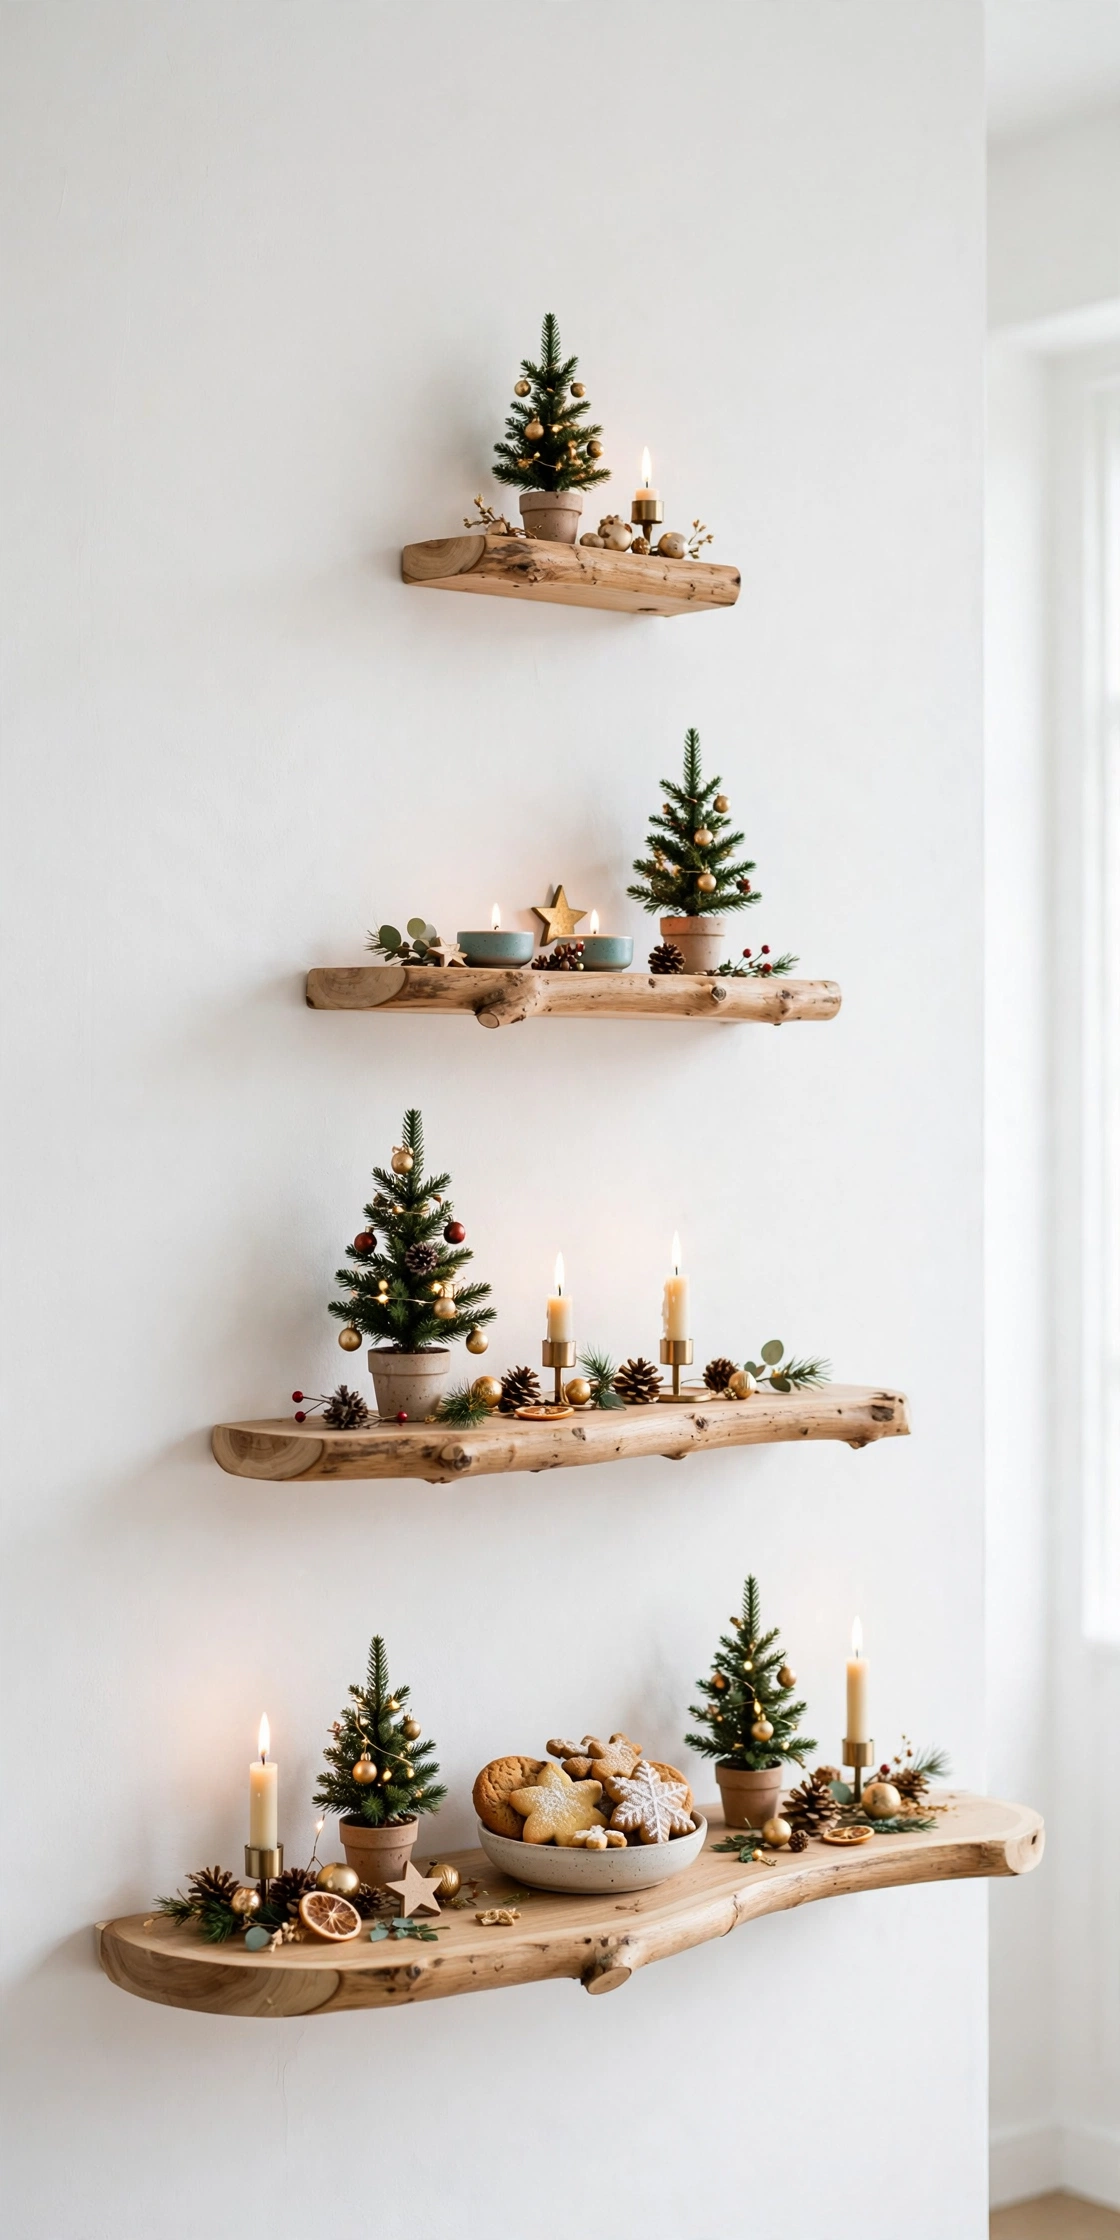
Floating Shelf Tree
Mount three to five short floating shelves in a triangle, widest at the bottom, and style each shelf as a branch: mini trees, candles, tiny ornaments, one bowl of Christmas cookies on the widest. It is part tree, part display, and it stays up as shelving year round.
Try it: Keep the shelf brackets in the wall’s studs or use toggle bolts. Shelves plus decor can hit 10 pounds per shelf, which adhesive strips cannot do.
17
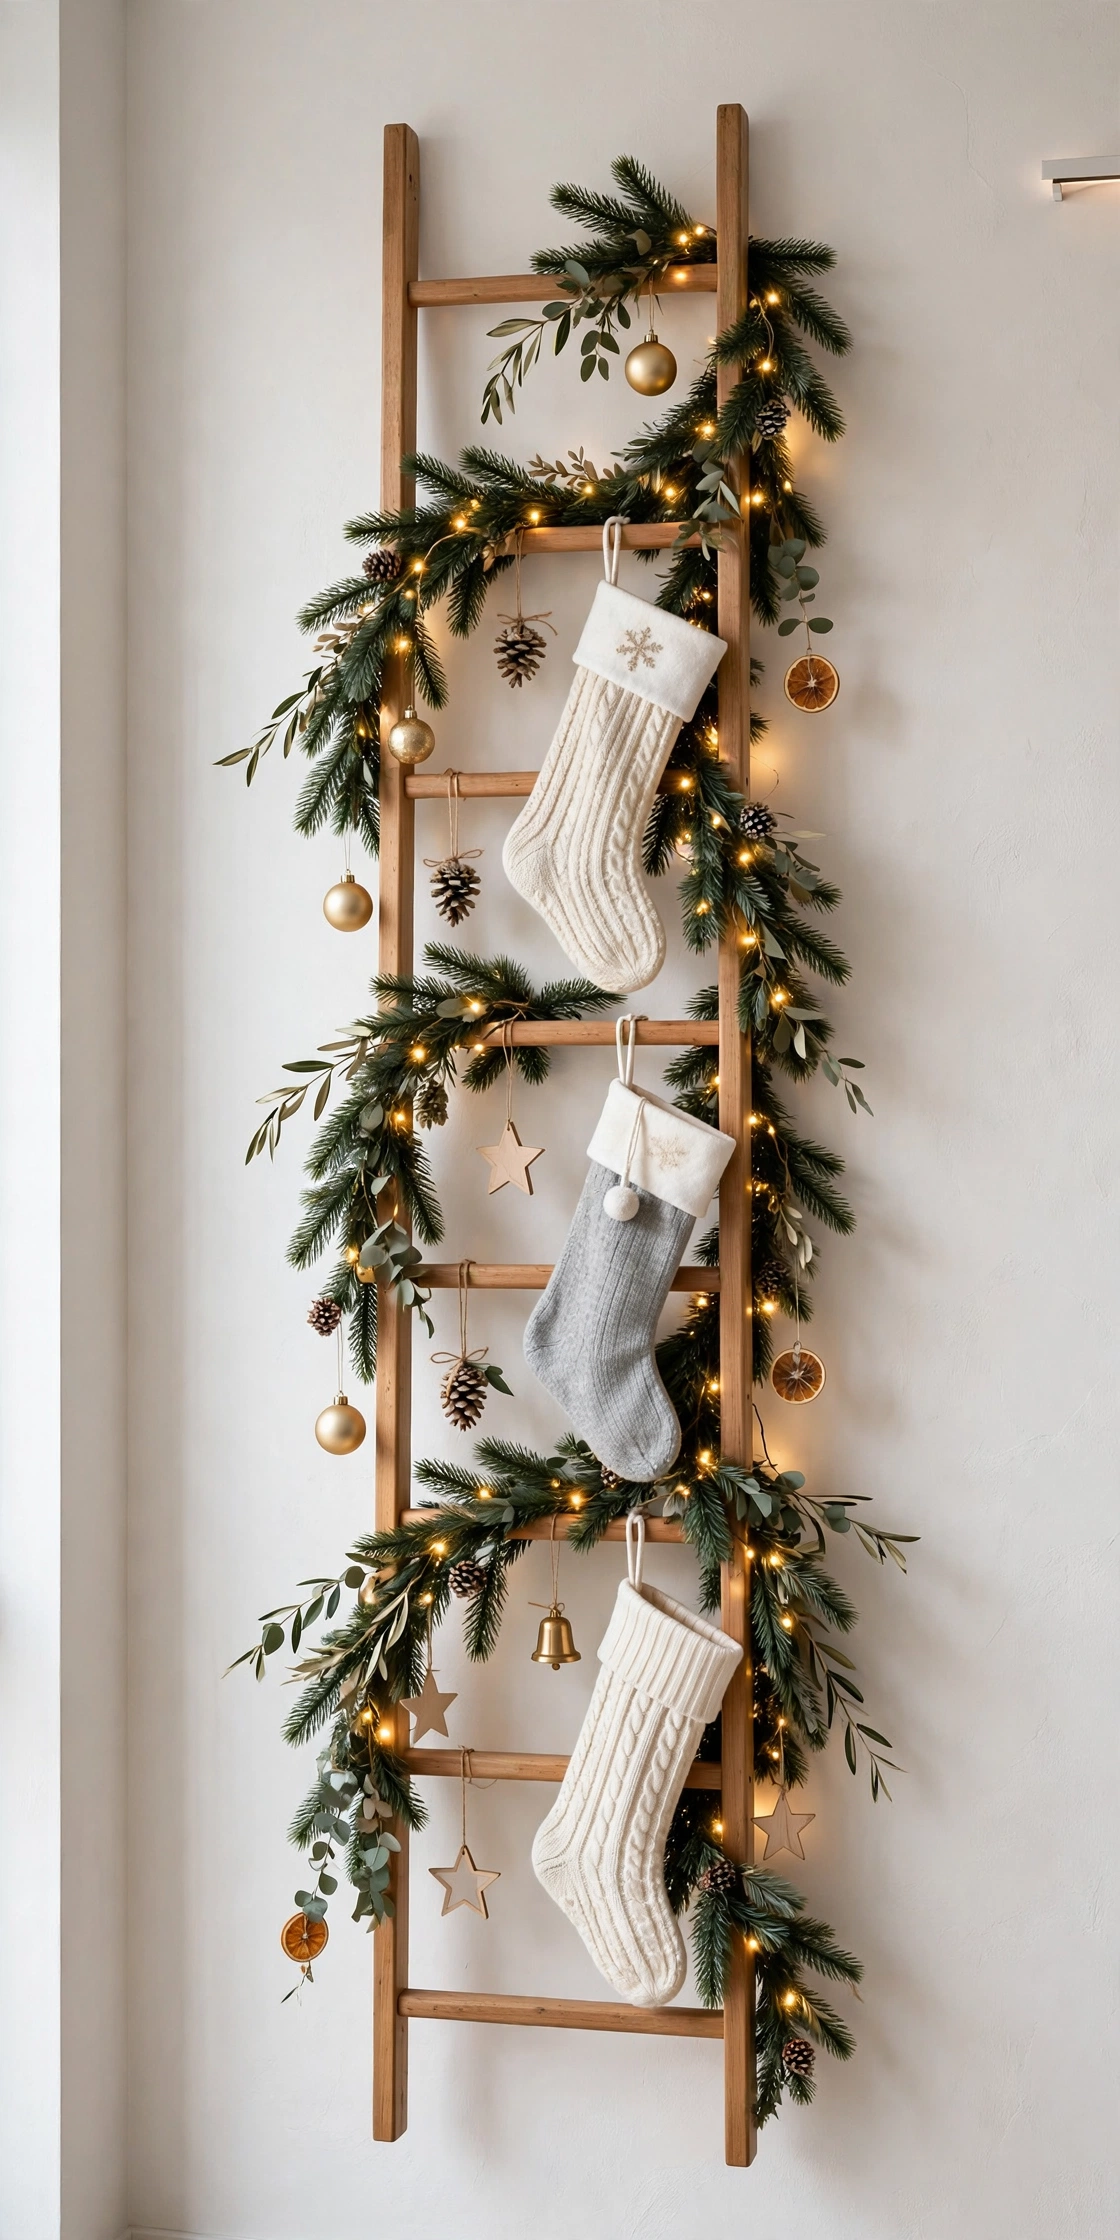
Ladder Tree Against the Wall
Lean a decorative wooden ladder against the wall and wrap it with garland and lights. Hang stockings and ornaments from the rungs. A ladder tree packs completely flat in a closet, which no other “real feeling” tree can do.
Try it: Put felt pads under the ladder feet. The top rail needs one strap or hook into the wall or it can walk sideways when the cat climbs it.
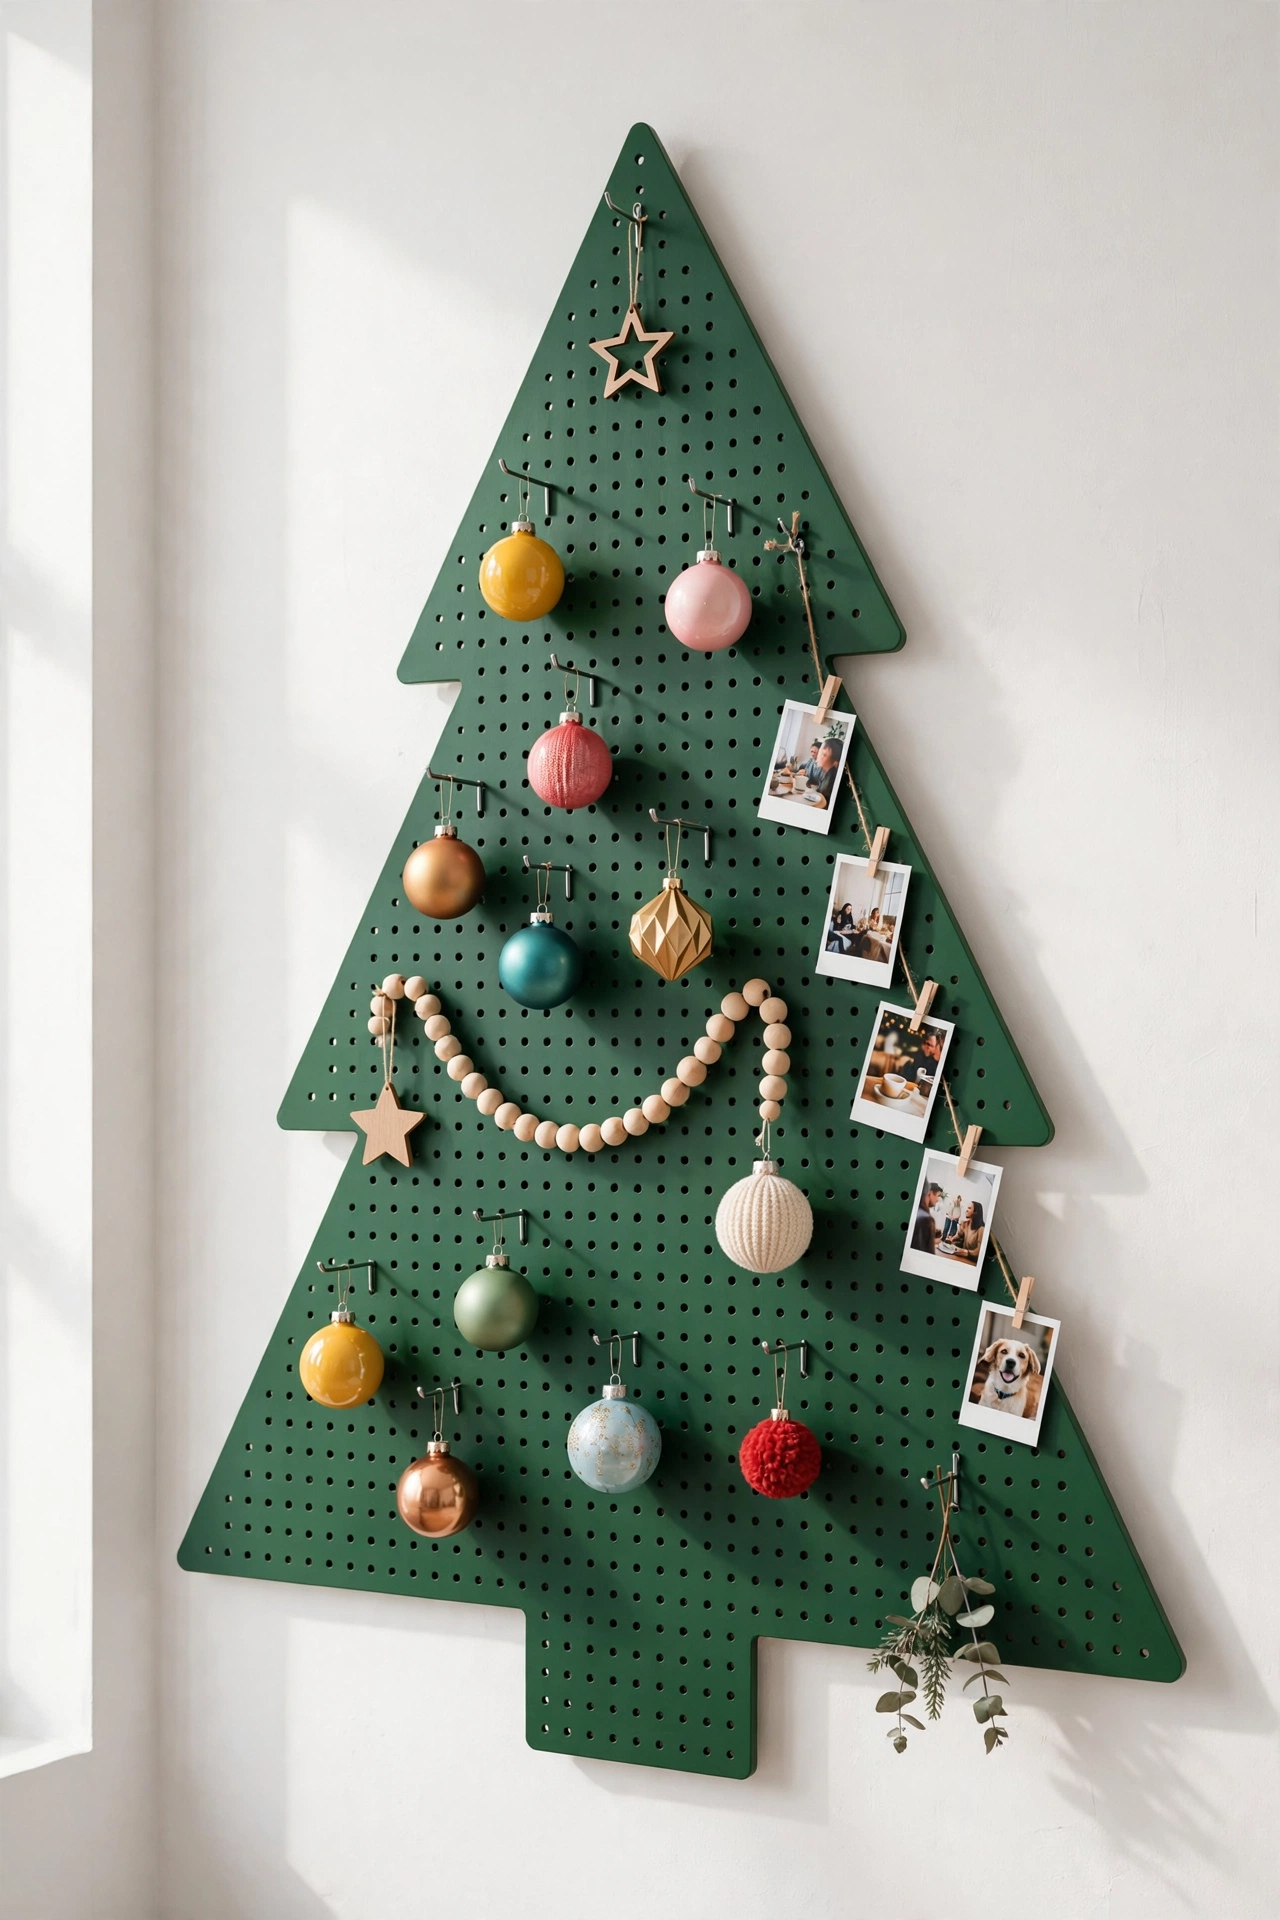
18
Pegboard Tree
Hang a pegboard cut into a tree silhouette, then rearrange hooks and ornaments all season. The pegboard is the most interactive tree here: move the ornaments weekly, add a photo strand, swap in gifts as they arrive. Paint it deep green for the classic look.
Try it: A standard pegboard in a tree shape holds about 15 pounds of decor on hooks. Keep the heavy ornaments low, near the base, where leverage is lowest.
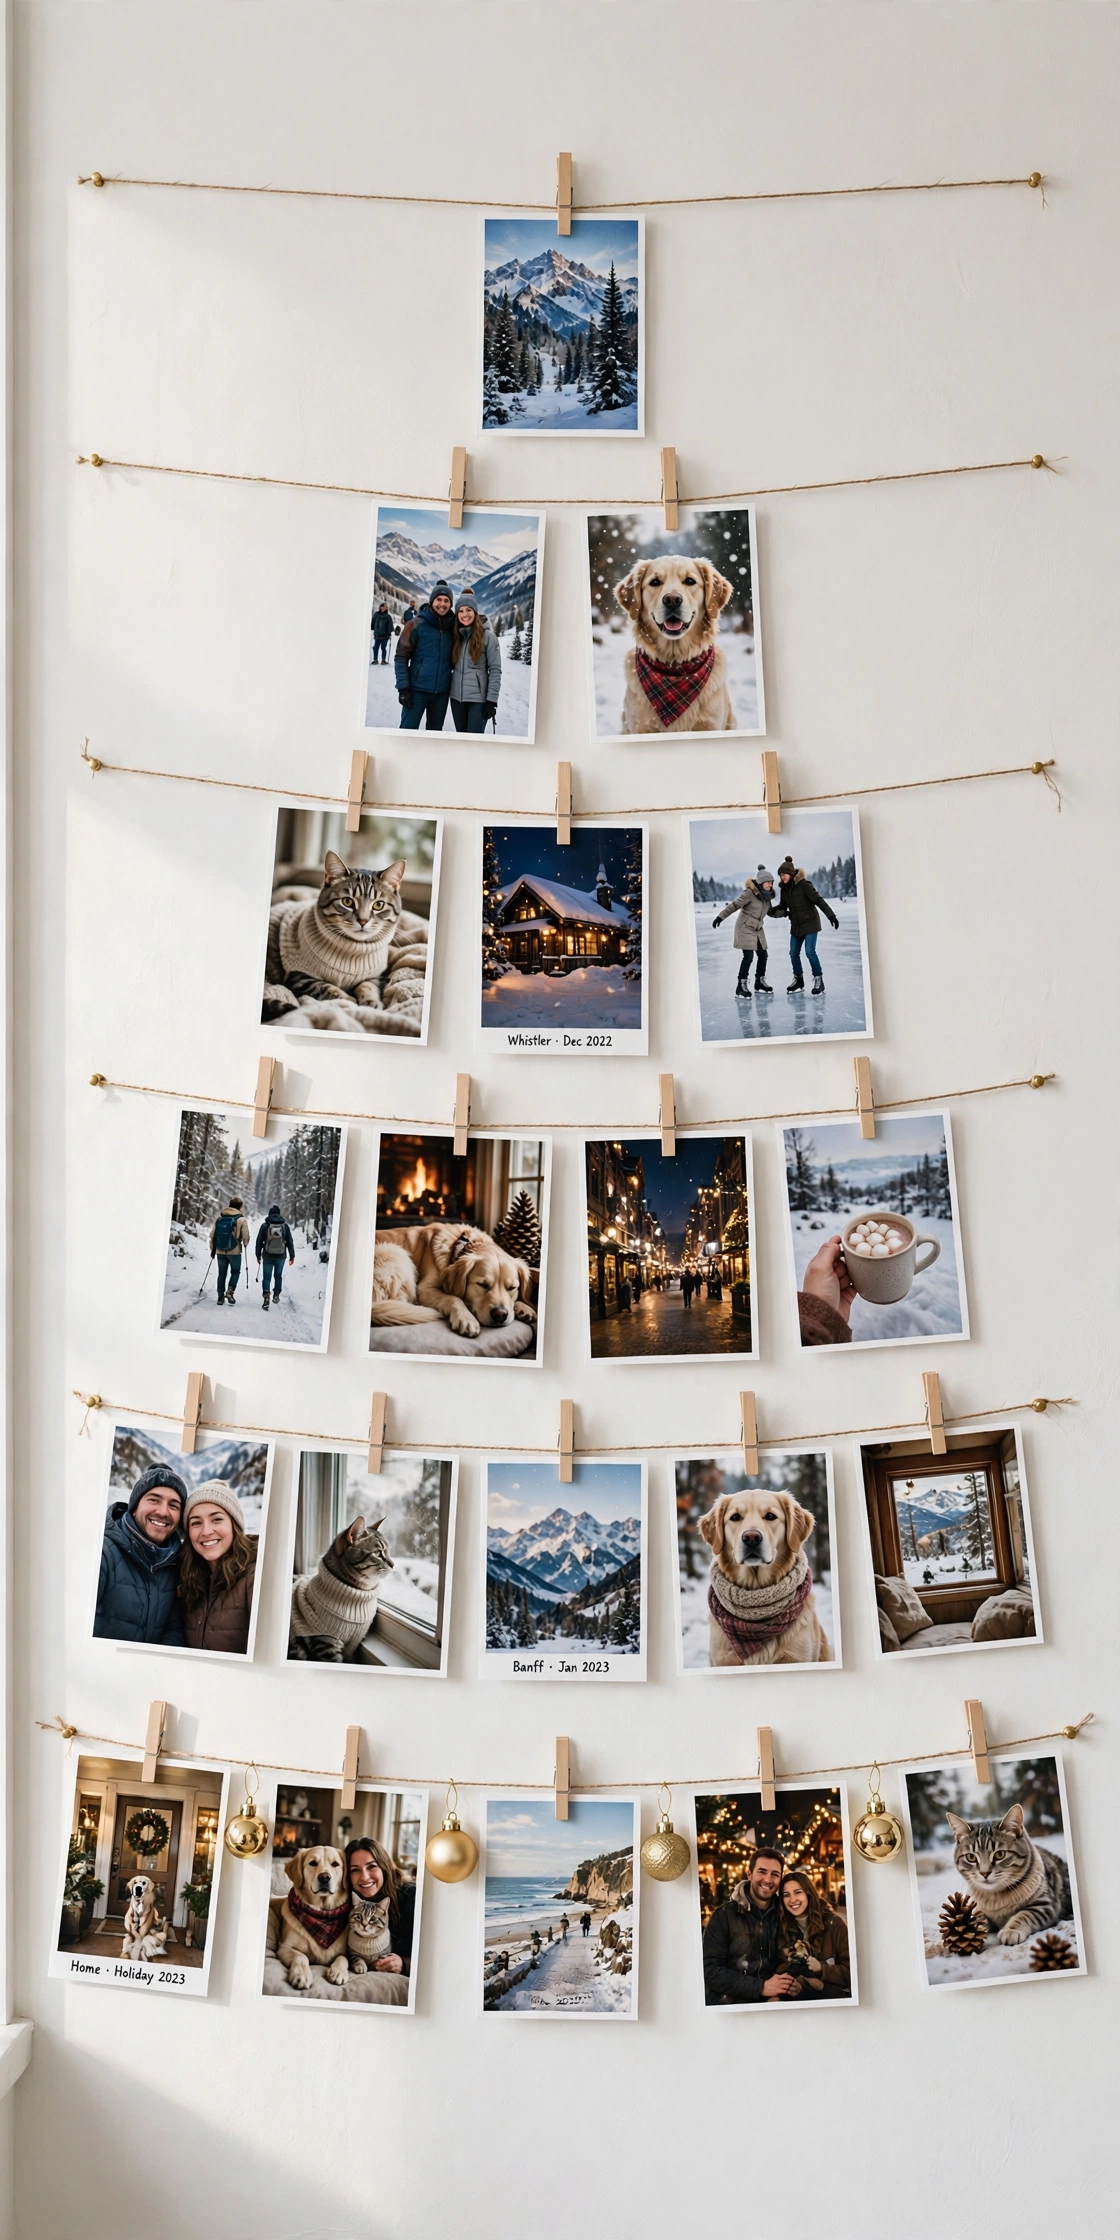
19
Photo Memory Tree
Clip printed photos in a triangle on twine rows stretched between two wall hooks. Winter trips, pets, family moments, the tree becomes a gallery of your year. Mix in a few real ornaments on the bottom rows for sparkle.
Try it: Print photos 4 by 6 inches and space rows 8 inches apart. Smaller prints blur into clutter; 4×6 reads clearly from across the room.
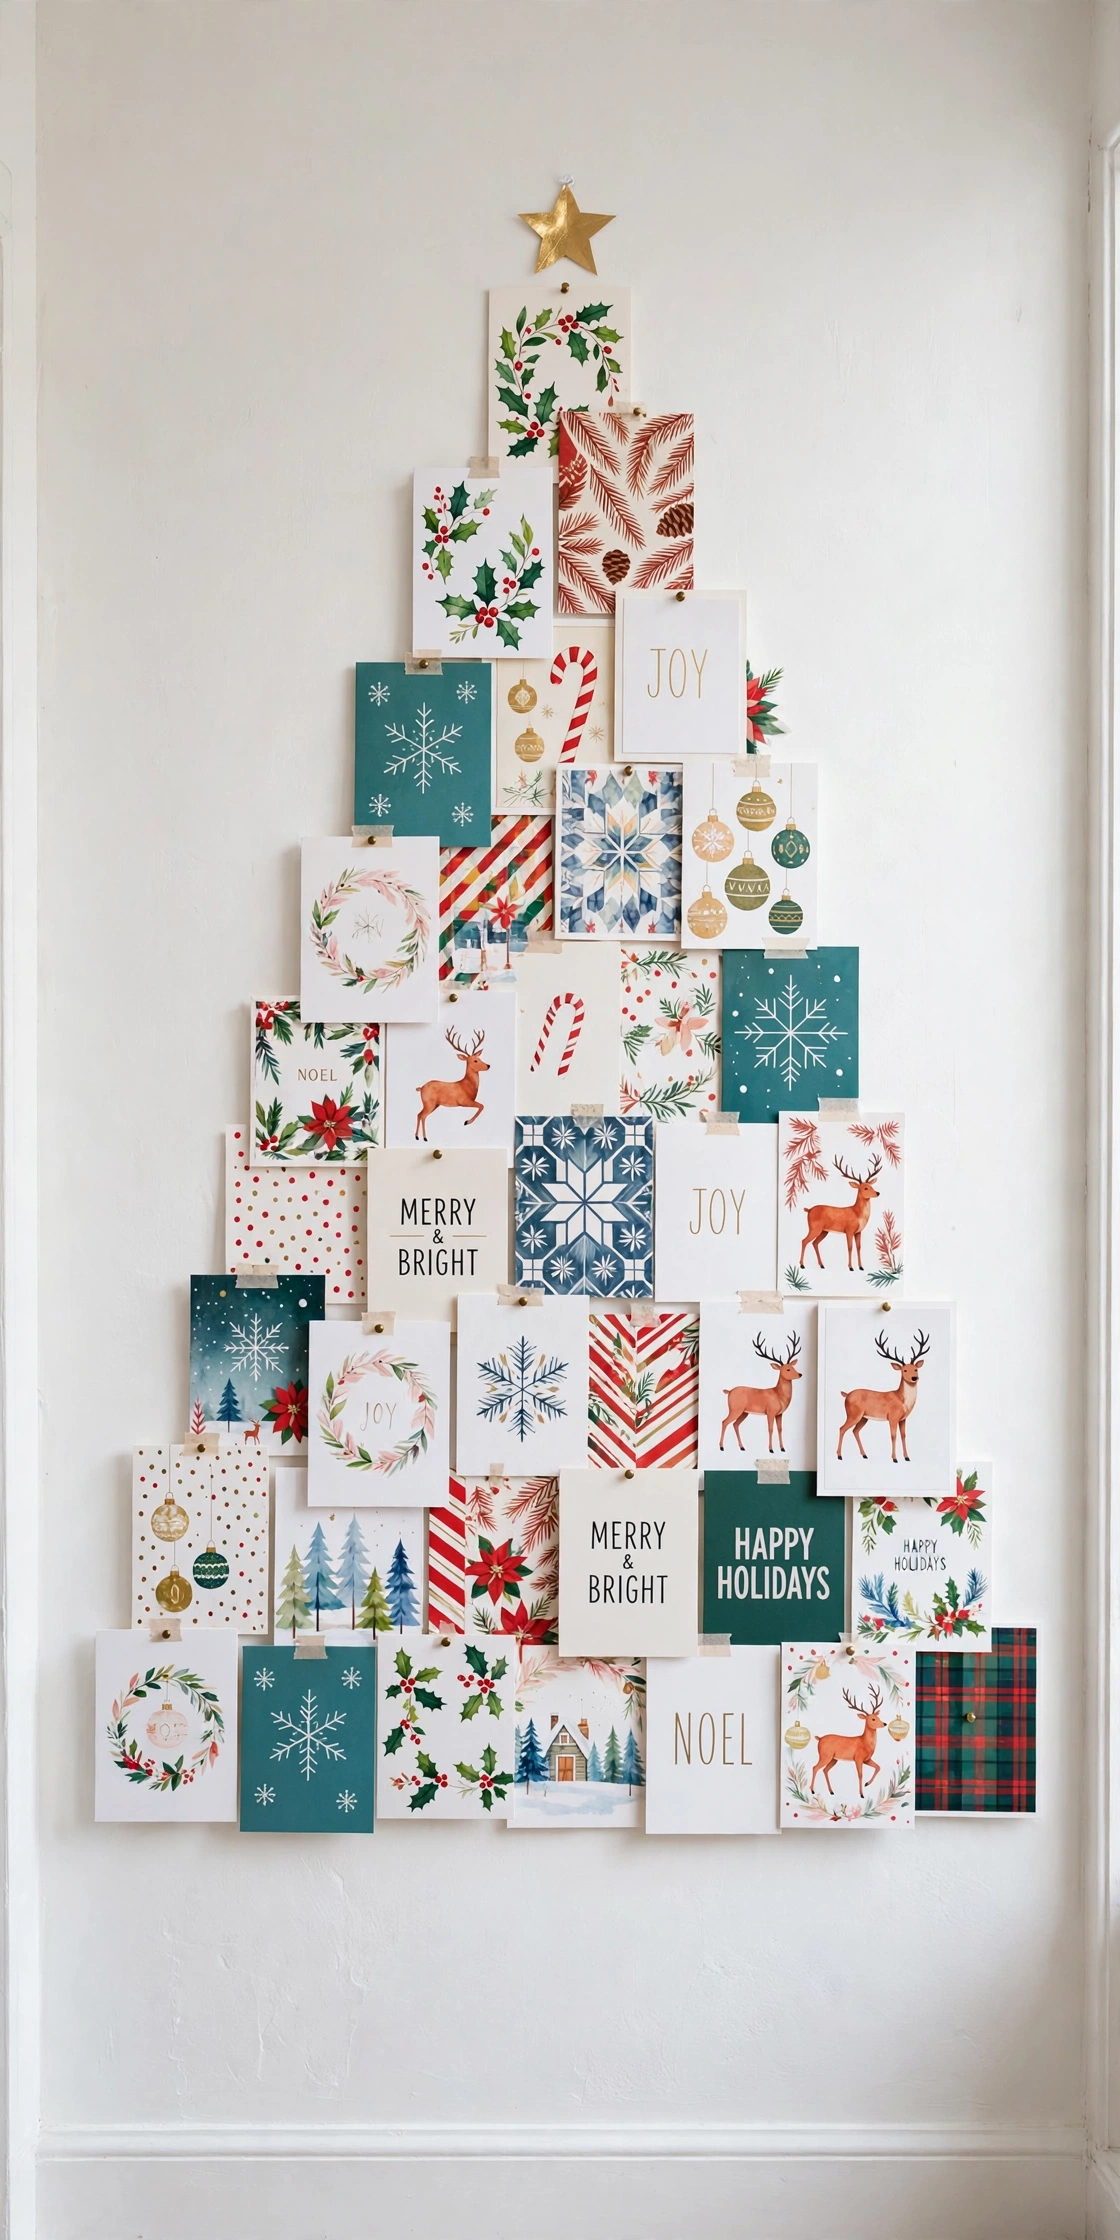
20
Christmas Card Tree
Arrange the holiday cards you receive in a tree shape on the wall with removable photo tabs. It solves the eternal “what do I do with these” problem and the tree grows more decorated every day of December. Start with your own cards as the base rows.
Try it: Sort cards by size before you start: tallest in the back row, shortest at the front. Layered cards read as texture instead of chaos.
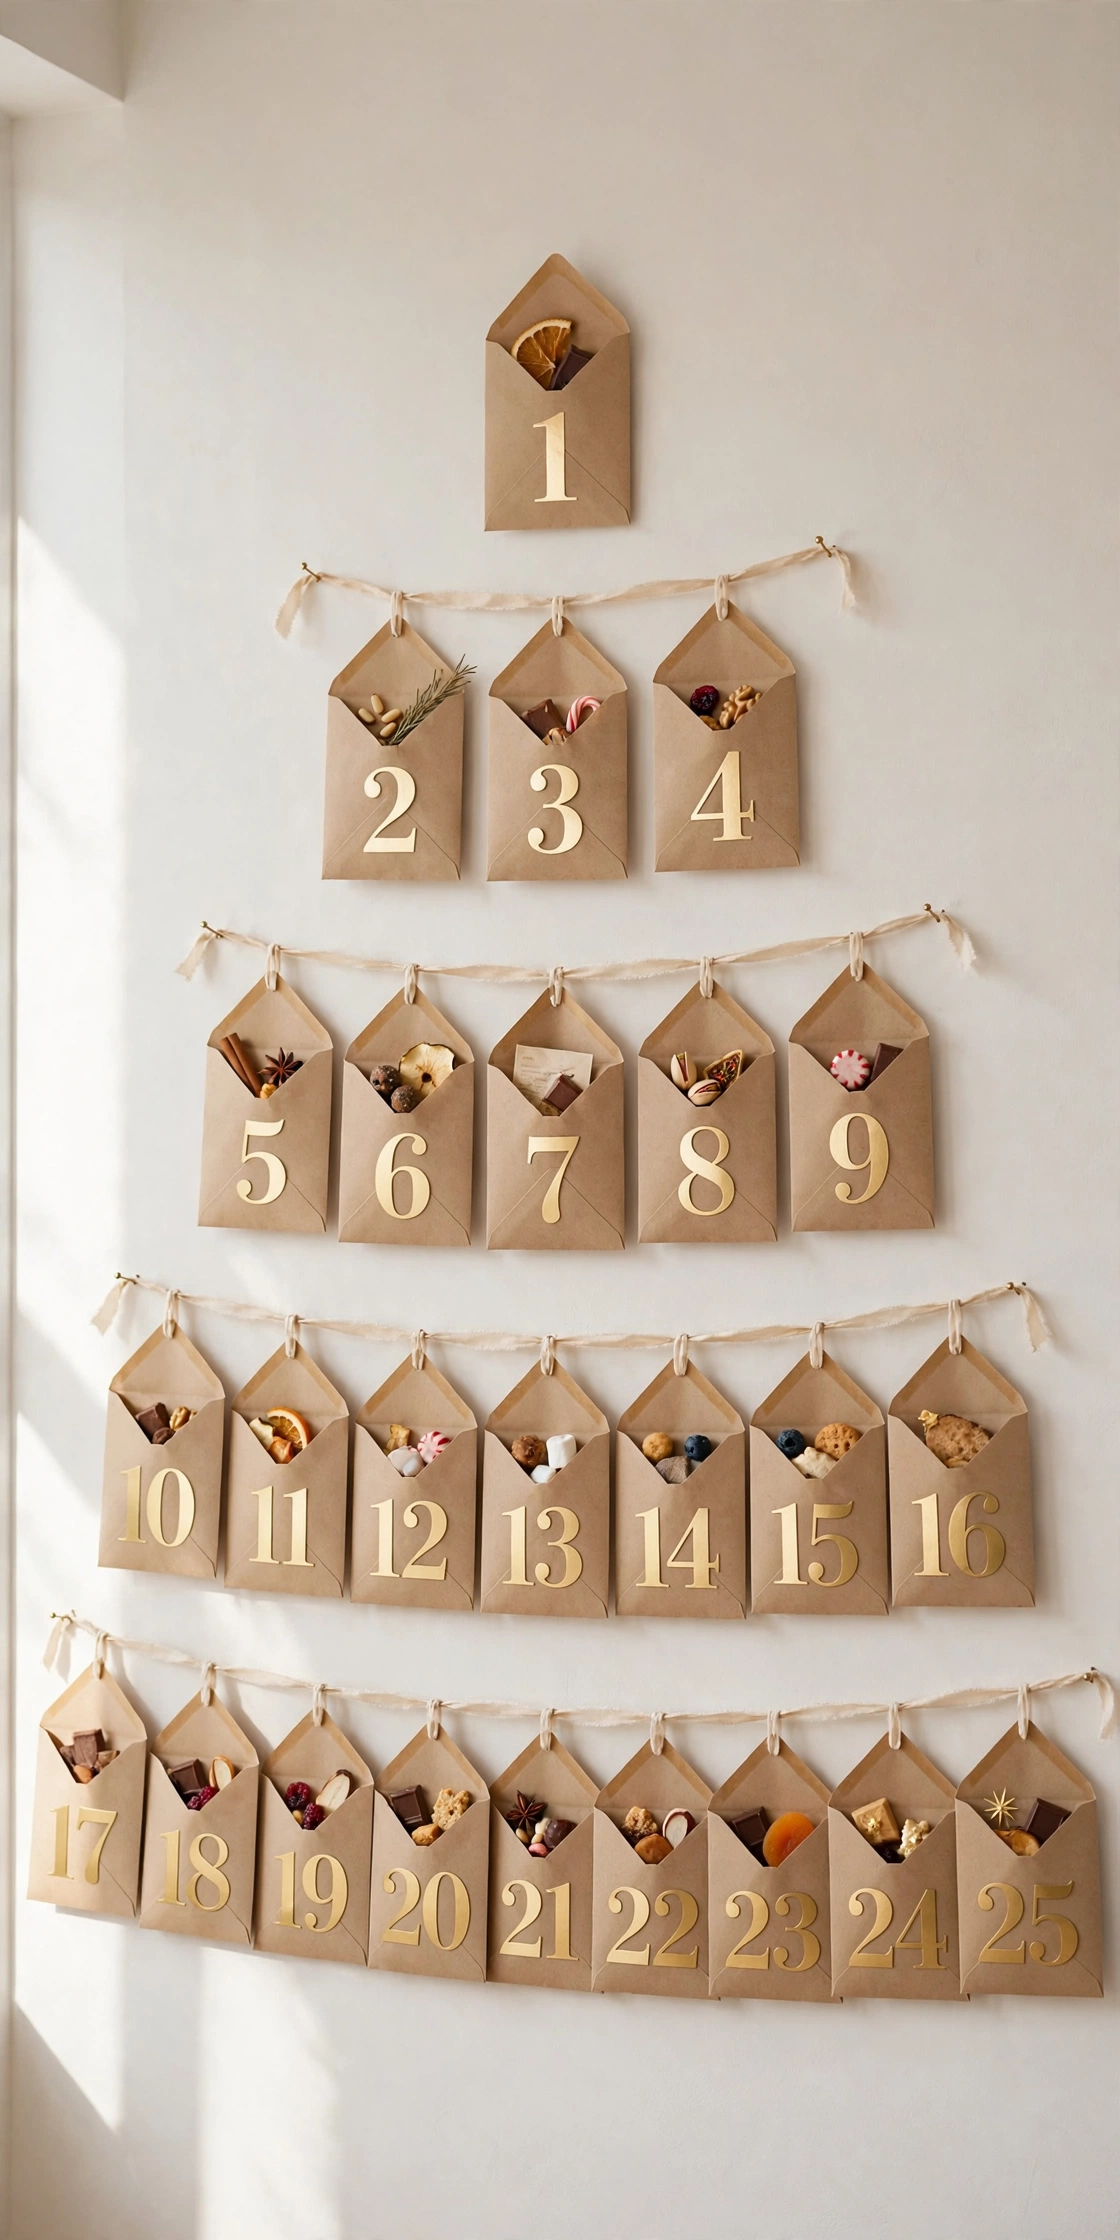
21
Advent Calendar Wall Tree
Hang 25 small numbered envelopes or pockets in a triangle, each holding a treat, a joke, or an activity. The tree is also the countdown. Sew or clip the envelopes to ribbon rows, and by Christmas Day the tree is bare, which is its own kind of satisfying.
Try it: Number the pockets on the outside in gold marker. The numbers become the decoration, so make them big and confident.
22
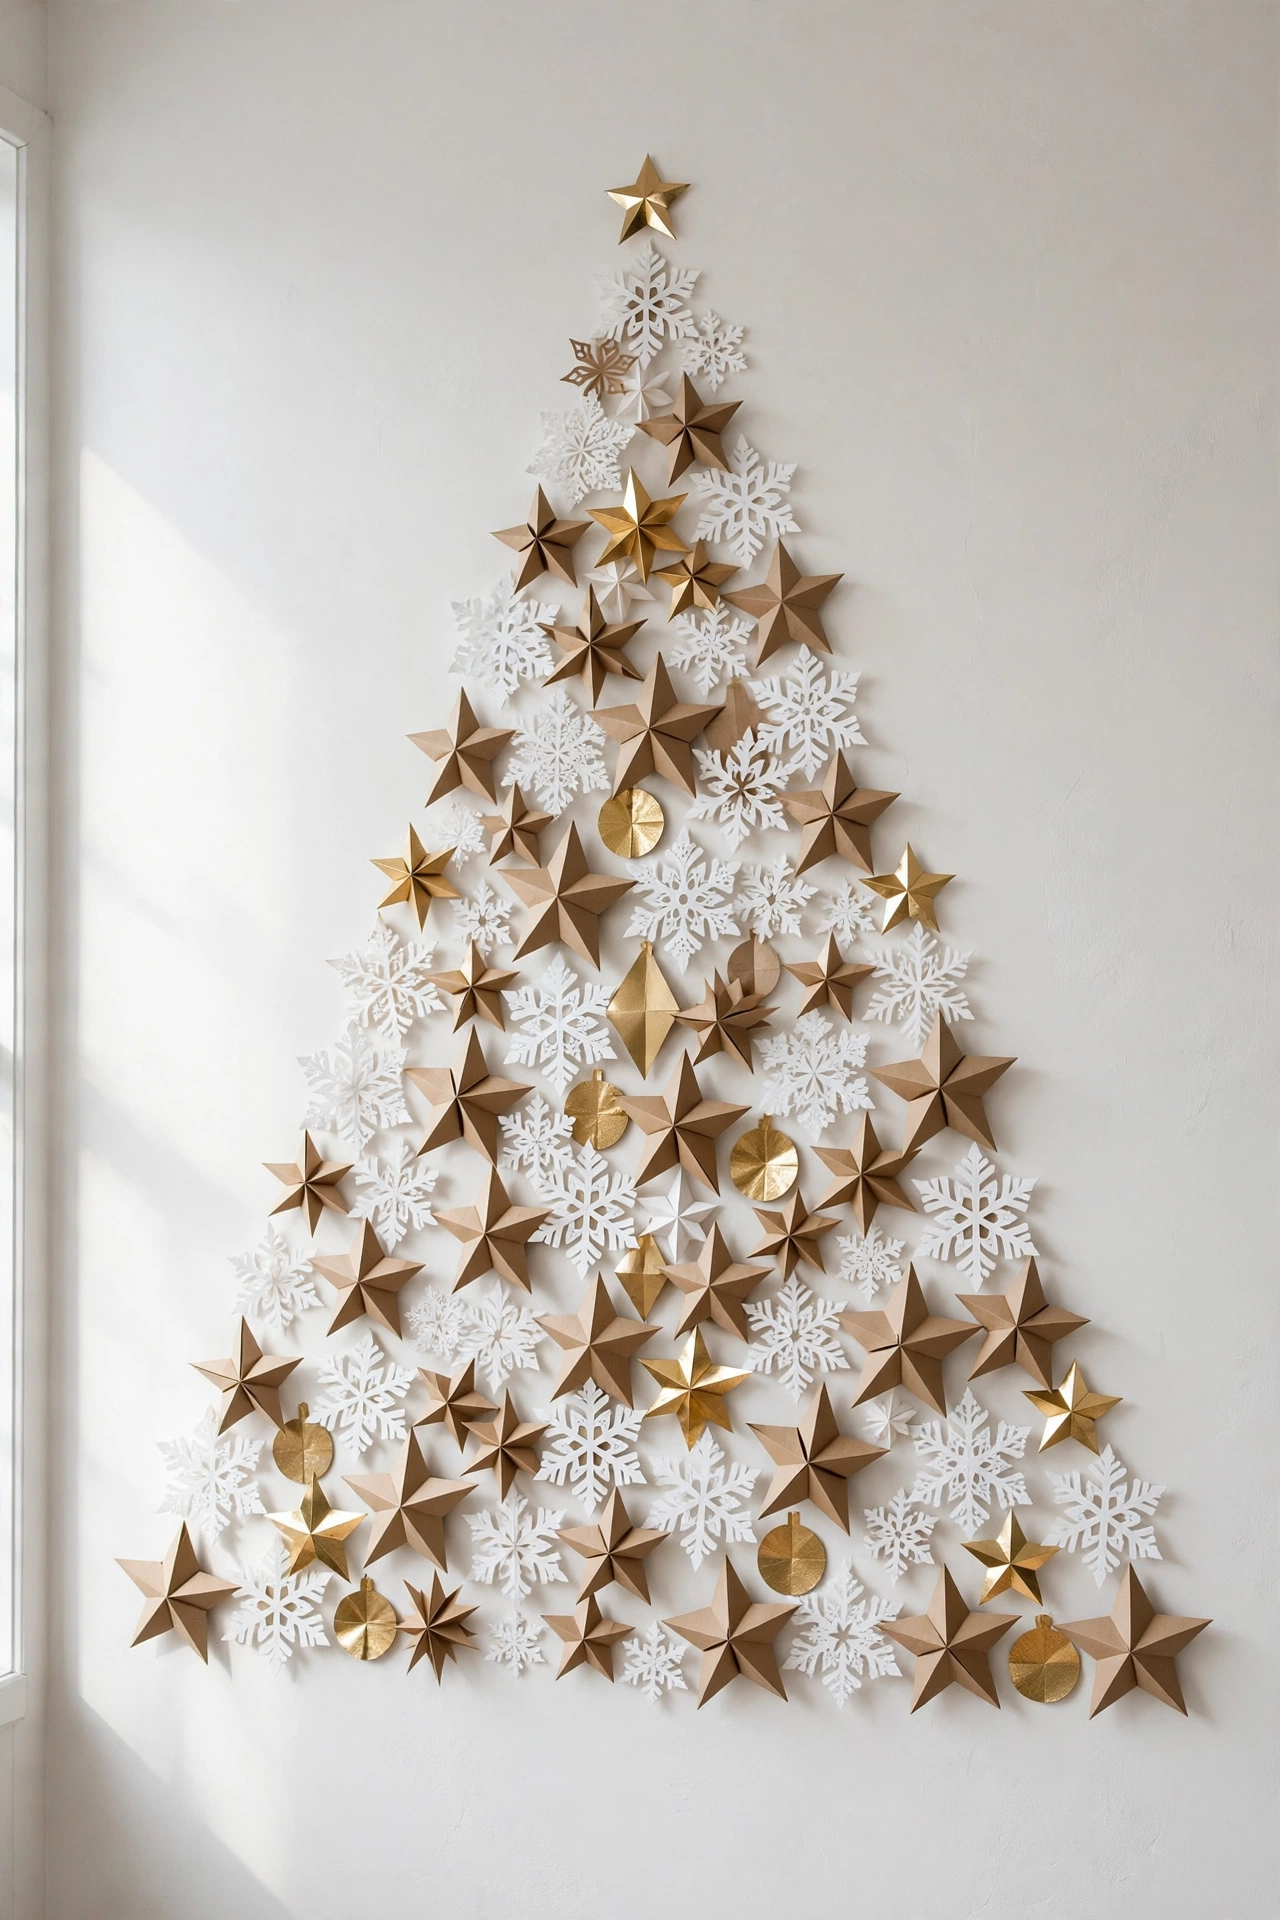
Paper Stars and Snowflakes Tree
Cut paper stars, snowflakes, and ornaments and mount them in a dense triangle with removable tabs. All paper, all flat, total cost under $10, total weight near zero. It is the cheapest tree in this guide and one of the prettiest in daylight.
Try it: Use three paper tones, white, kraft, and one metallic. Single-tone paper trees look flat; three tones give it depth.
23
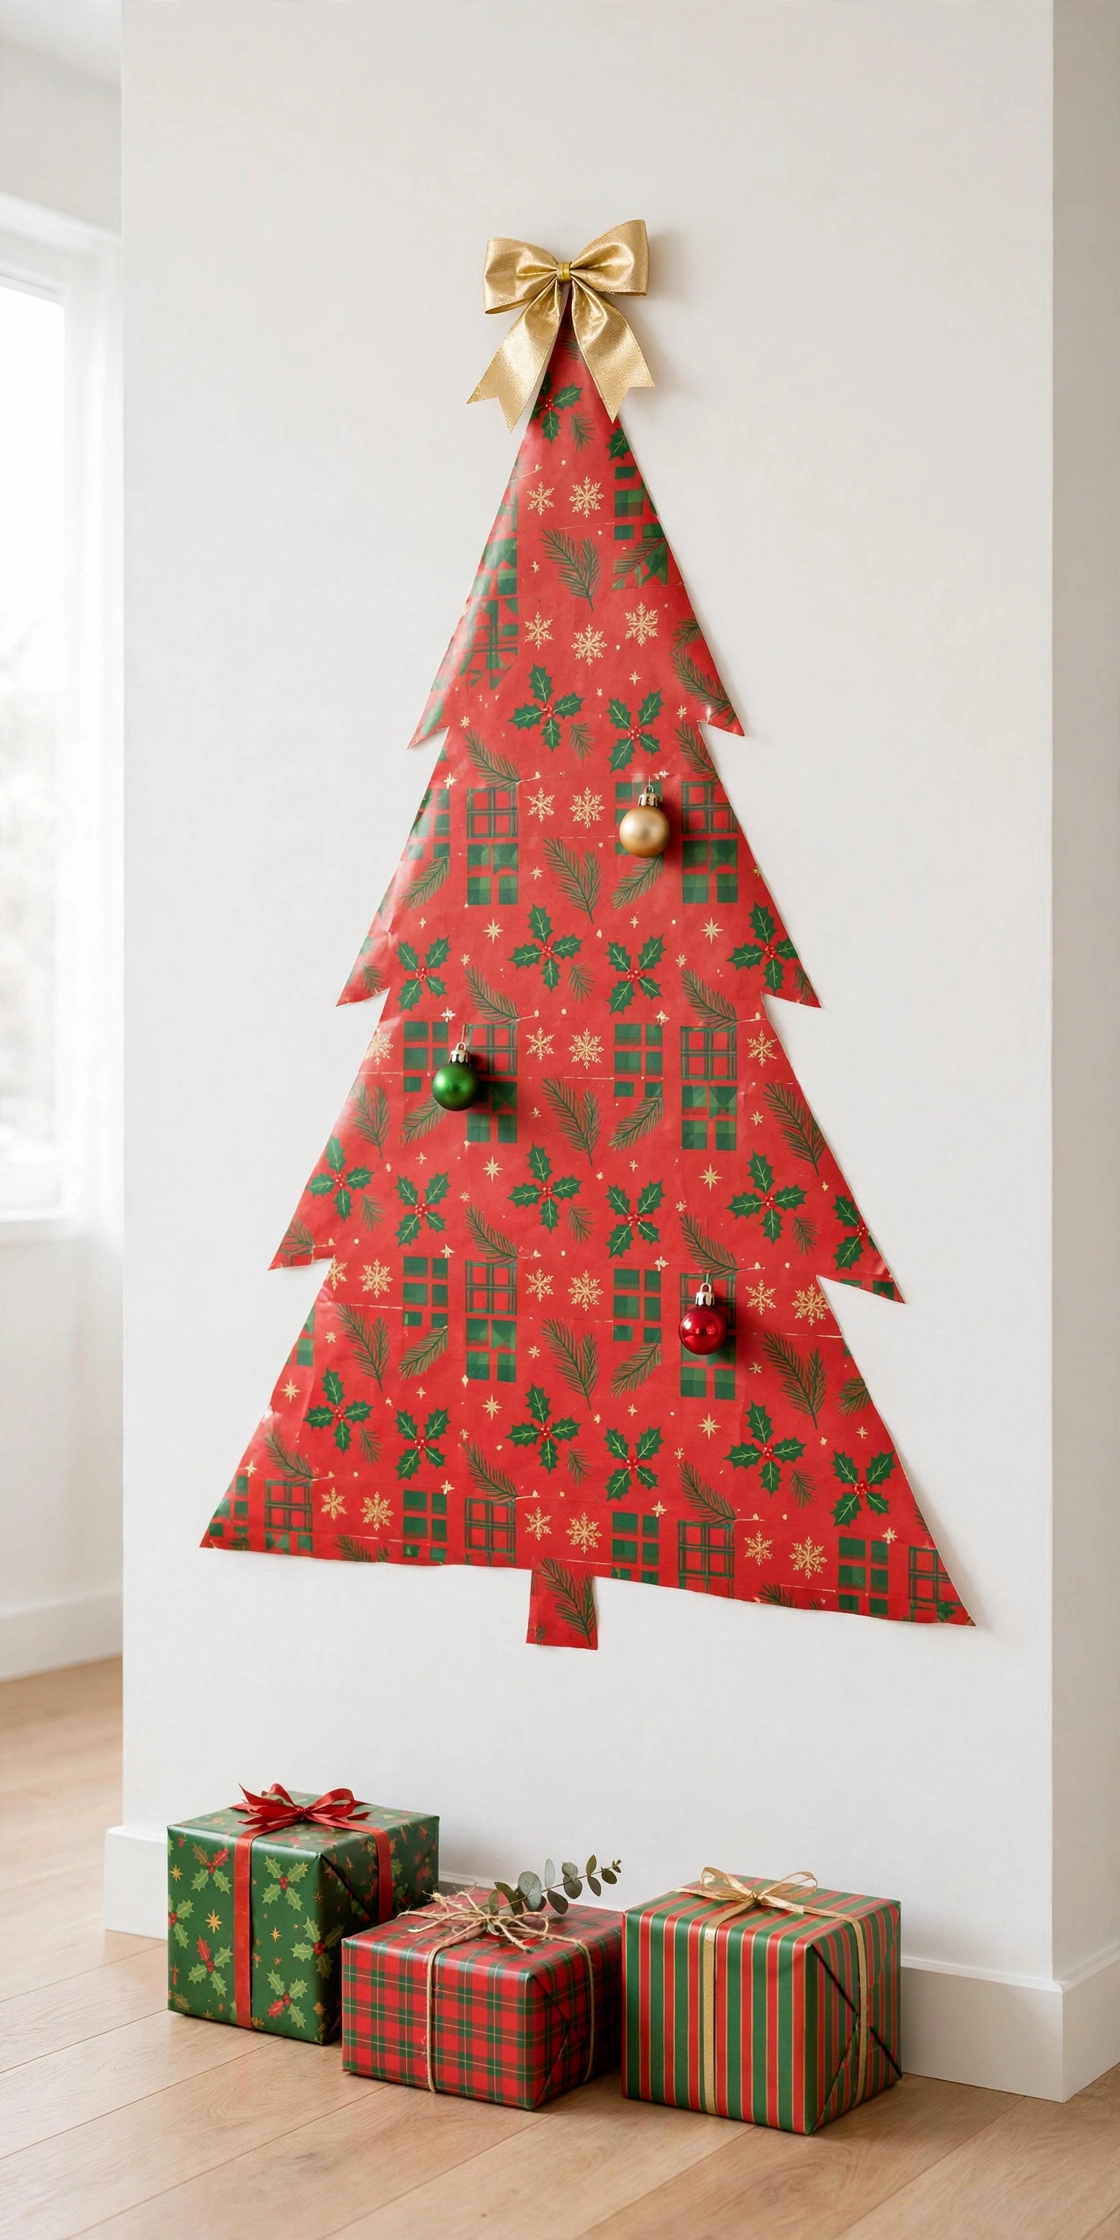
Wrapping Paper Cutout Tree
Cut a big tree silhouette from holiday wrapping paper and mount it flat on the wall, then add a real bow or star on top and a few lightweight baubles. Match the paper to your gift wrap and the whole room coordinates. Rolls of quality paper cost $8 to $12.
Try it: Choose paper with a medium pattern scale. Tiny patterns vanish at distance; giant patterns look wrong cut into a tree shape.
24
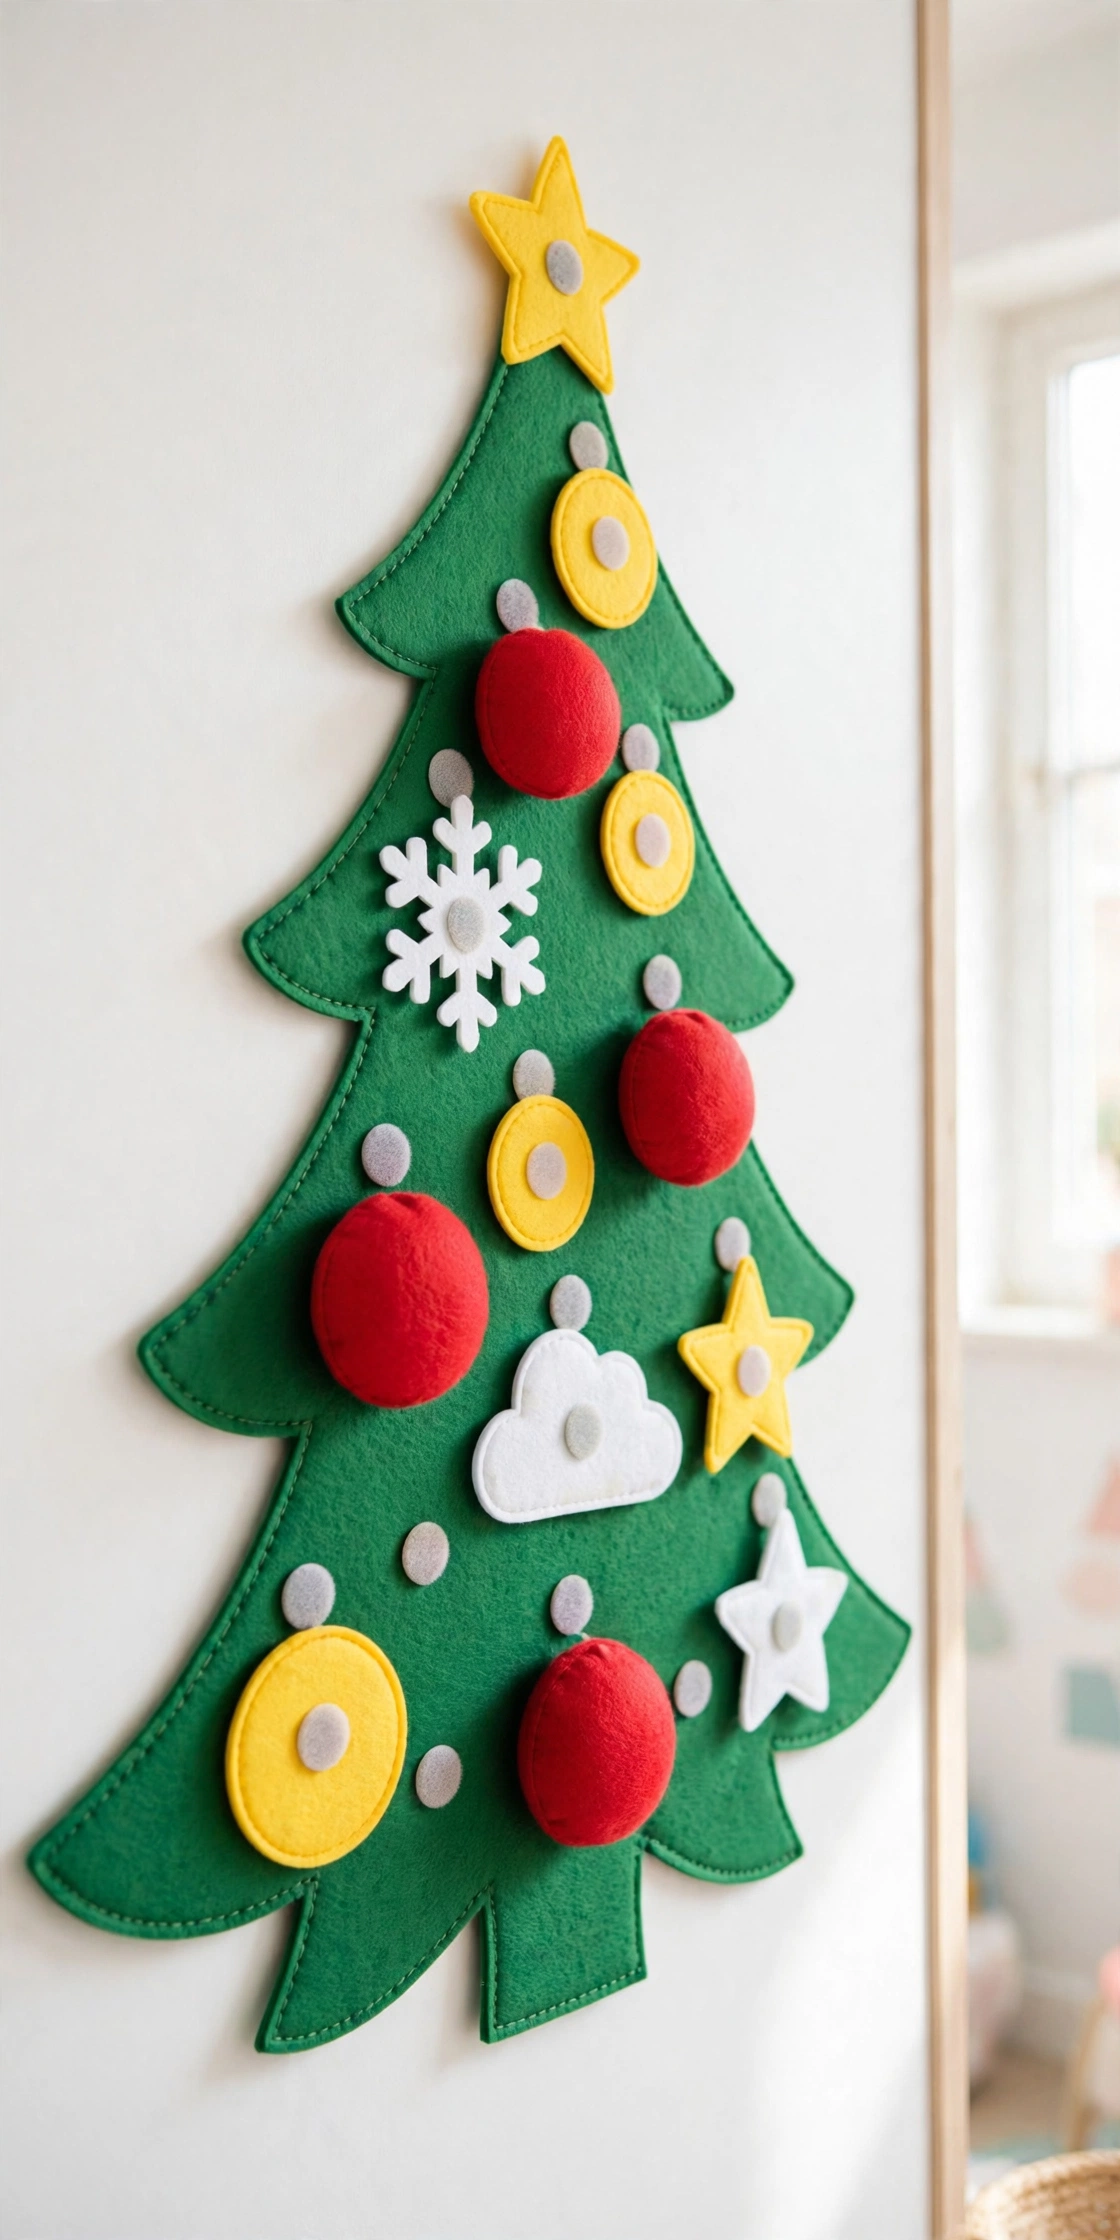
Felt Tree for Toddlers
Cut a large tree from green felt and stick felt ornaments on with adhesive Velcro dots. Toddlers redecorate it a hundred times a day, nothing breaks, and it is the only tree in this guide that doubles as a toy. Mount the felt with picture-hanging strips.
Try it: Make ornaments at least 3 inches wide for little hands. Tiny felt ornaments frustrate toddlers and end up on the floor.
25
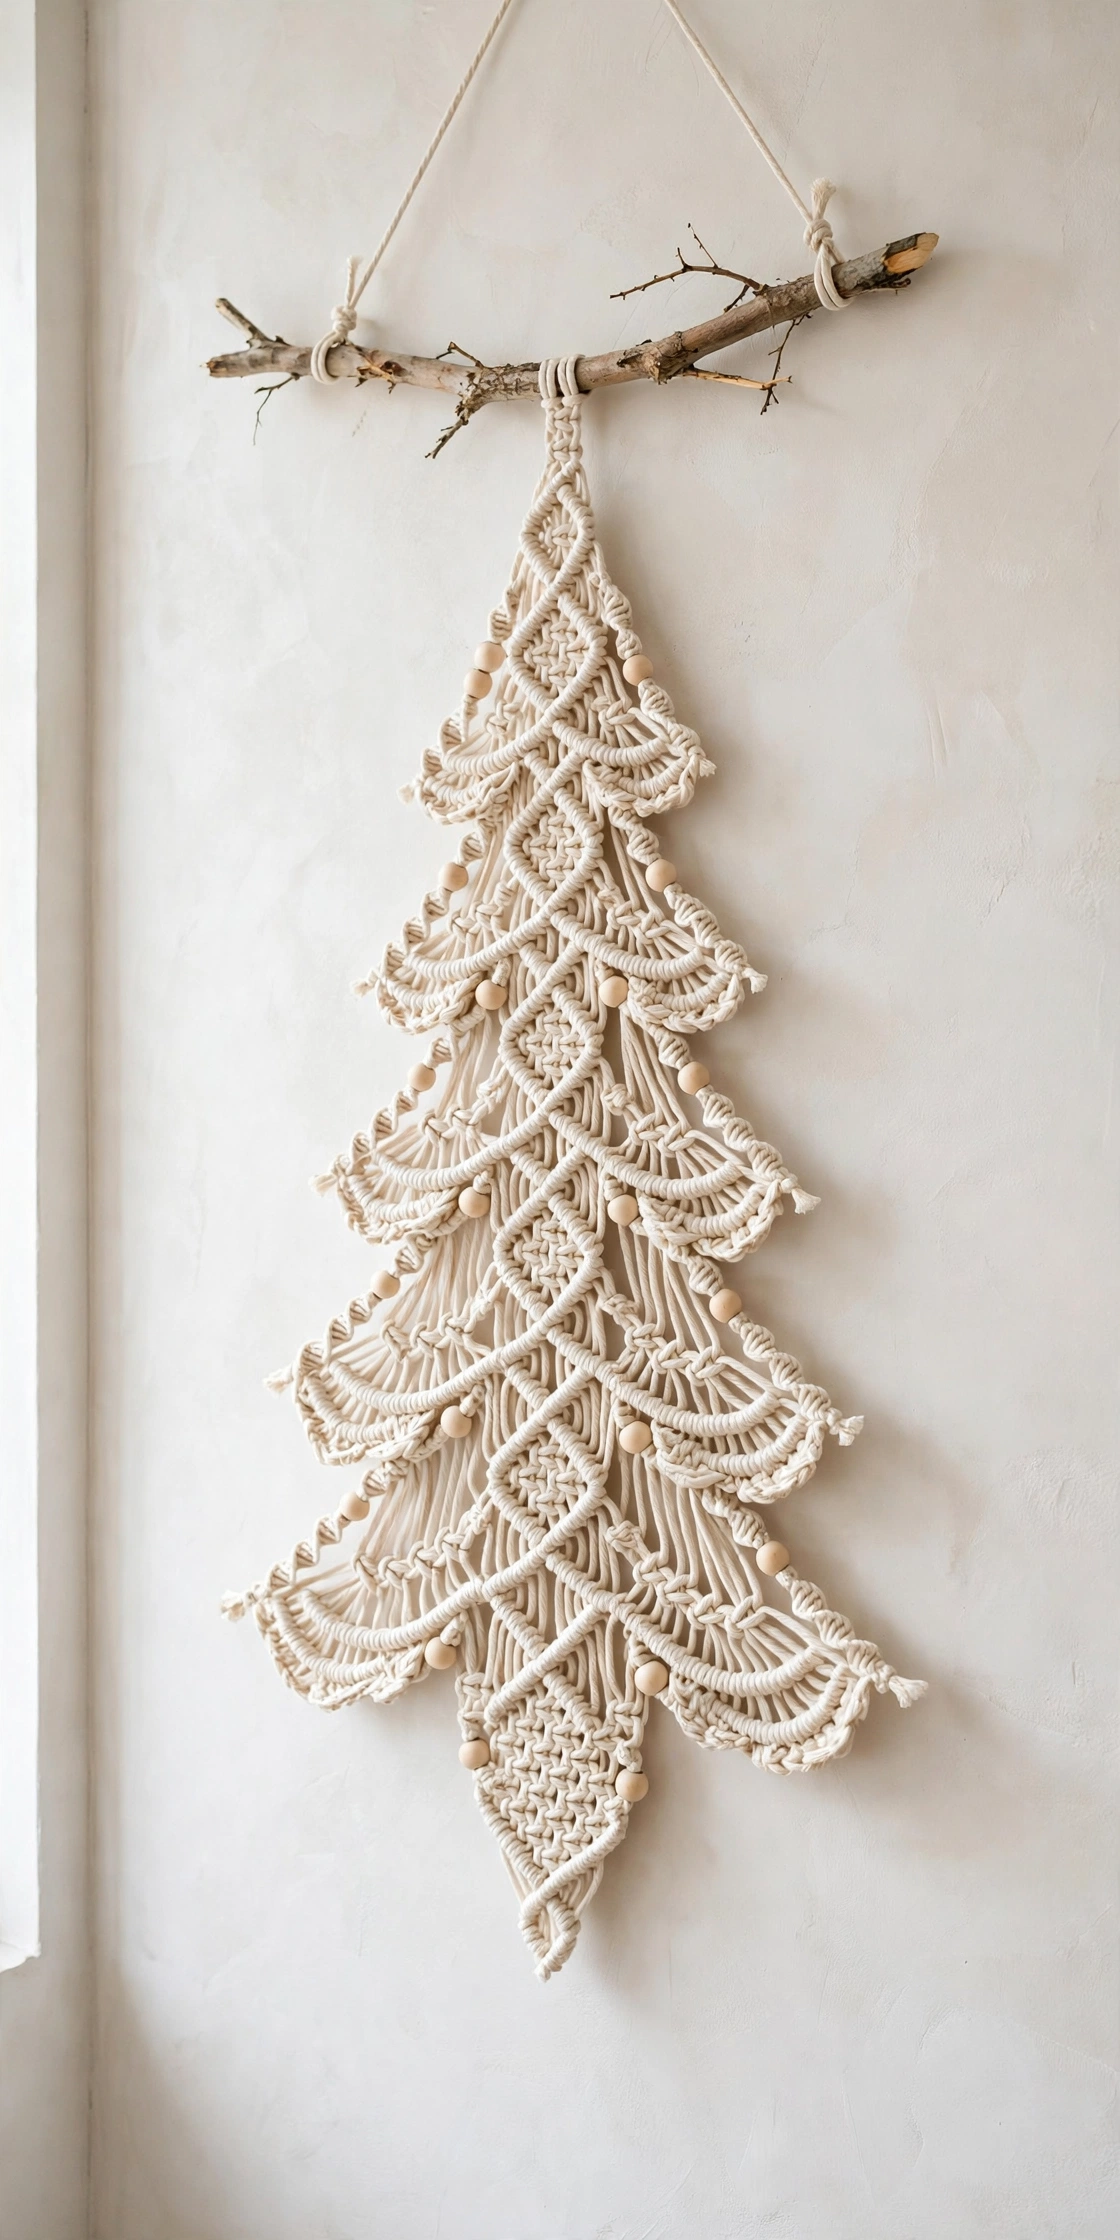
Macrame Wall Hanging Tree
Knot cotton cord into a tree-shaped wall hanging with wooden beads woven in. It is calming to make, boho to look at, and weighs almost nothing. Hang it from a natural branch for the full handmade feel.
Try it: Use 3mm cord for the structure and 5mm for the decorative knots. The thickness difference gives the piece its texture.
26
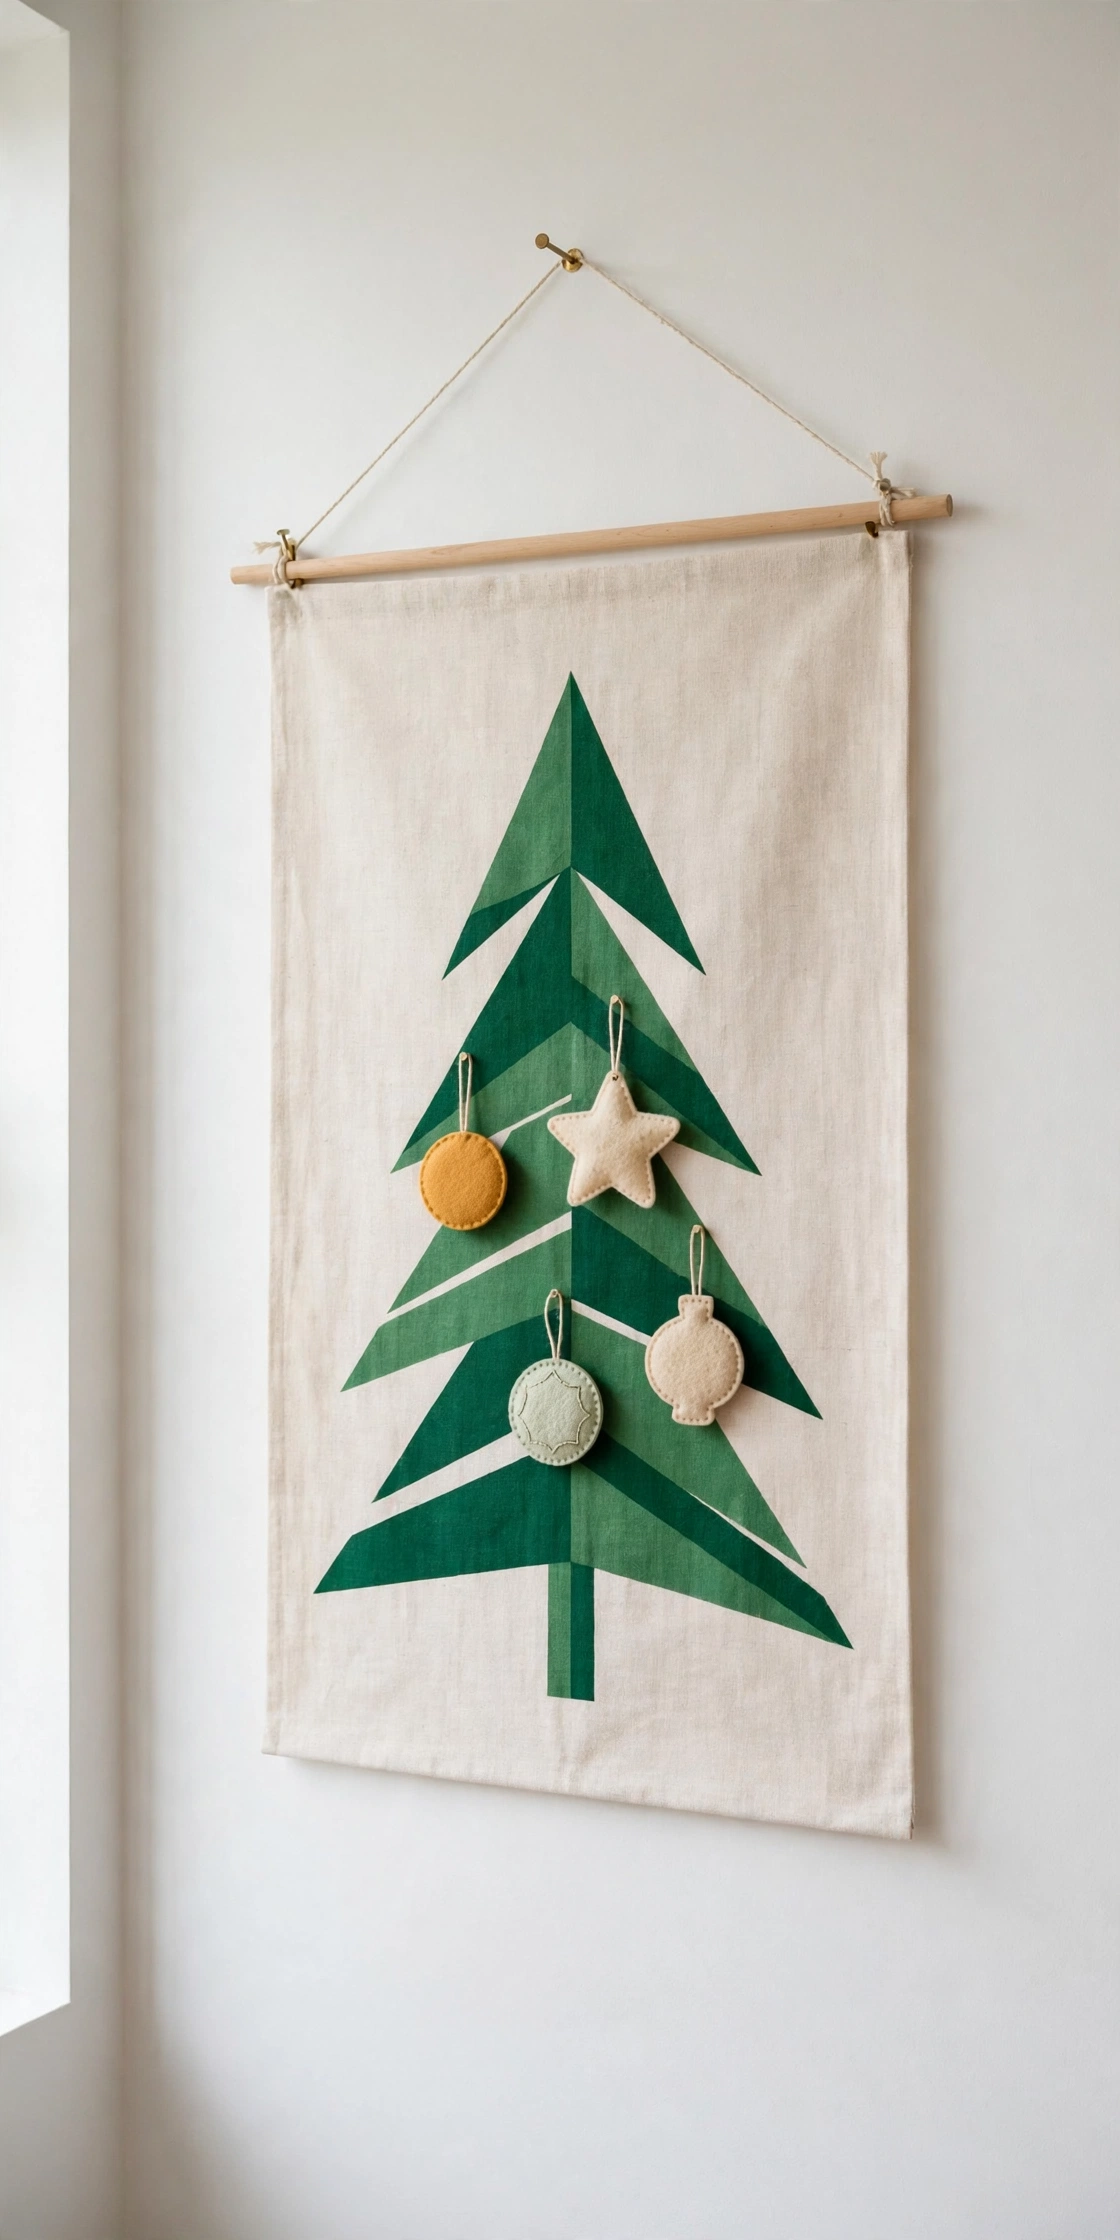
Fabric Tree Panel
Buy or sew a tree-printed fabric panel and hang it like a tapestry on a slim dowel. Add flat felt ornaments that stick to the fabric, or leave it graphic. It folds into an envelope for storage, the smallest storage footprint in this guide.
Try it: Hang the panel with a dowel pocket at top and bottom. The bottom dowel weights the fabric so it hangs perfectly flat.
27
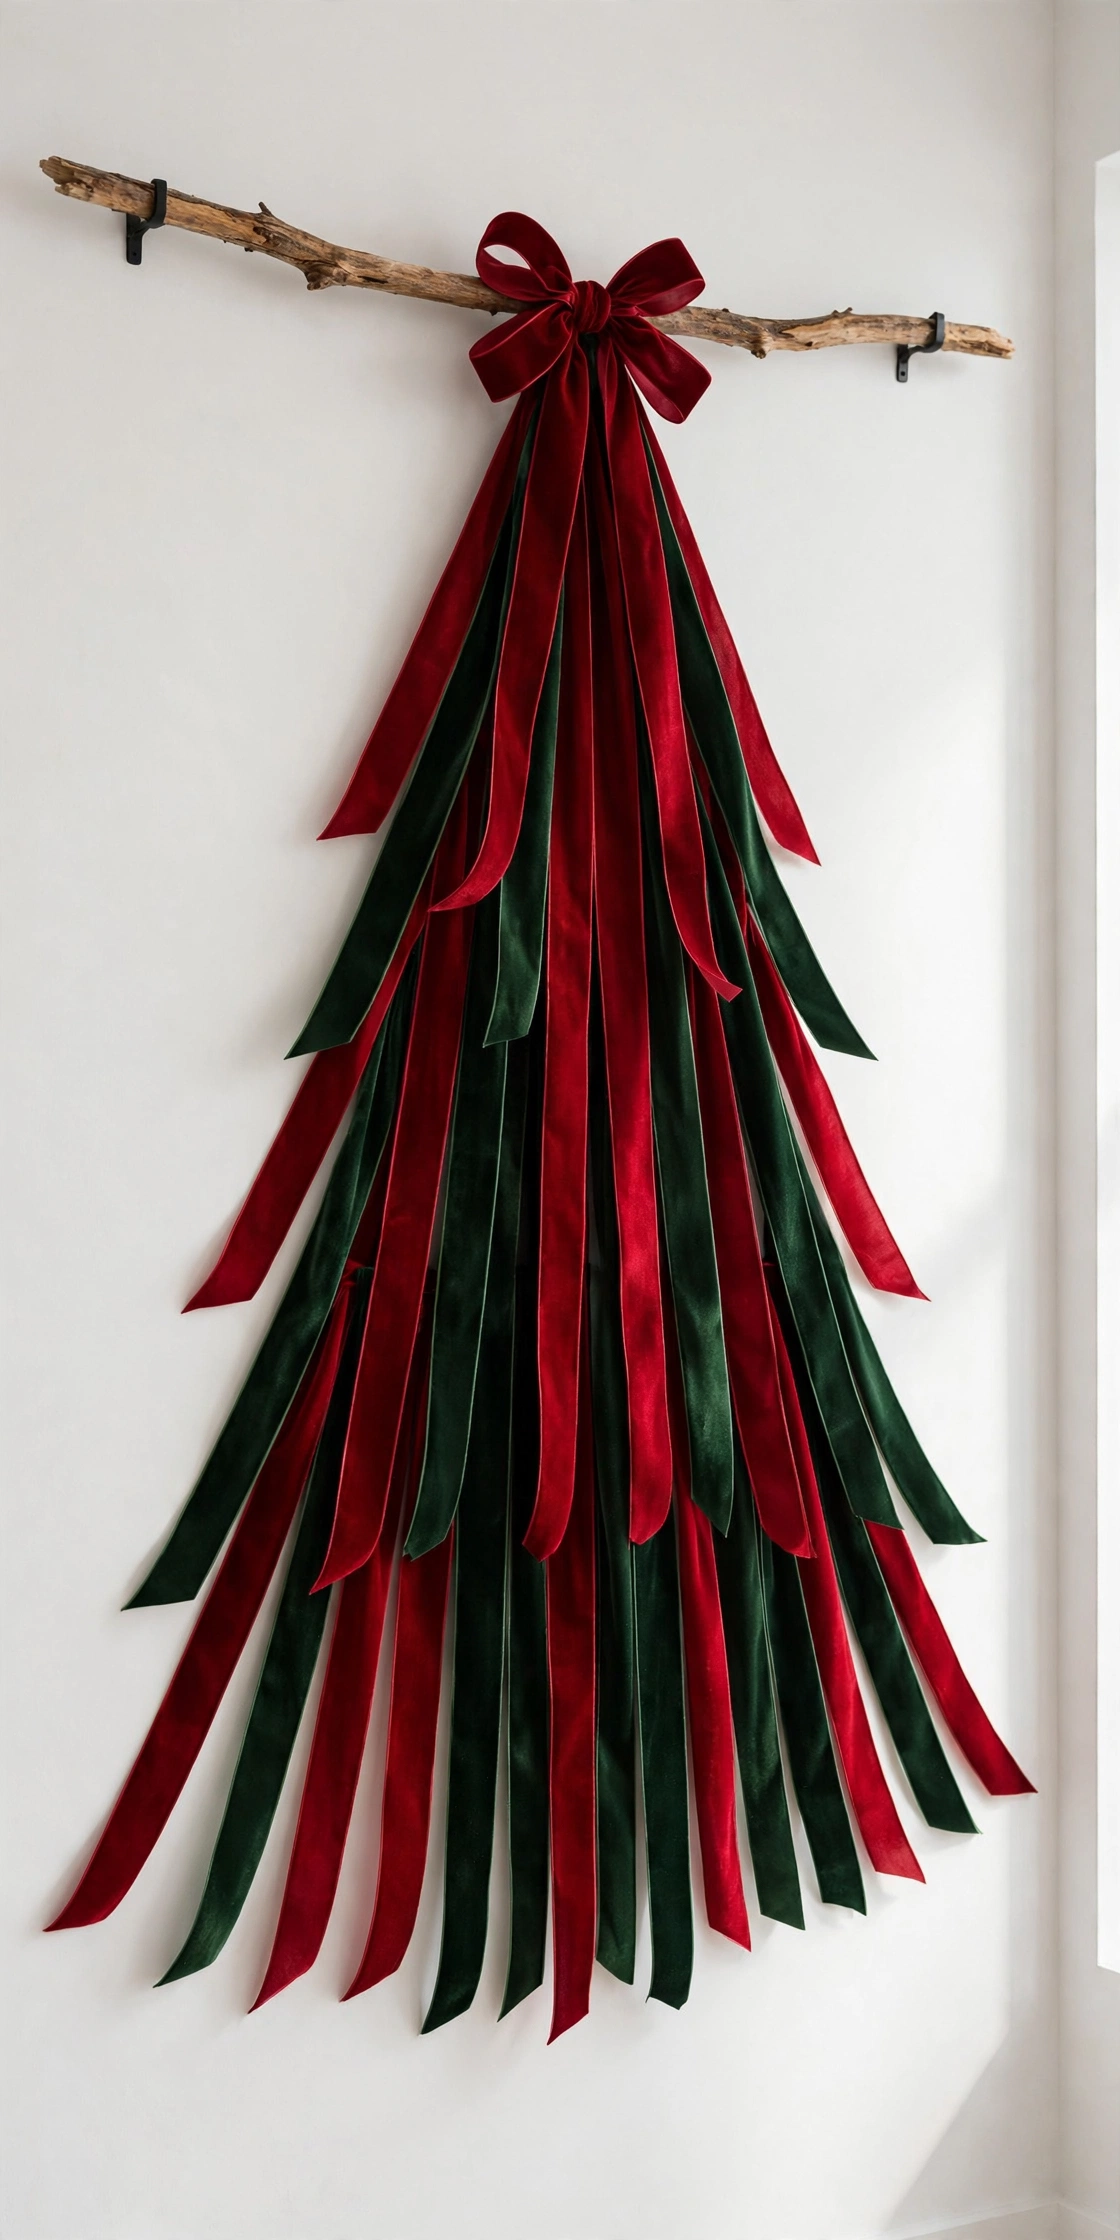
Ribbon Streamer Tree
Hang graduated ribbon streamers from a horizontal branch or dowel, longest in the center, shorter at the edges, to form the tree. Wide velvet ribbon in deep red or forest green looks rich; alternate matte and satin ribbons for texture. Add a wired bow as the topper.
Try it: Cut ribbons at least 2 inches wide. Skinny ribbon streamers read as party decor, not a tree.
28
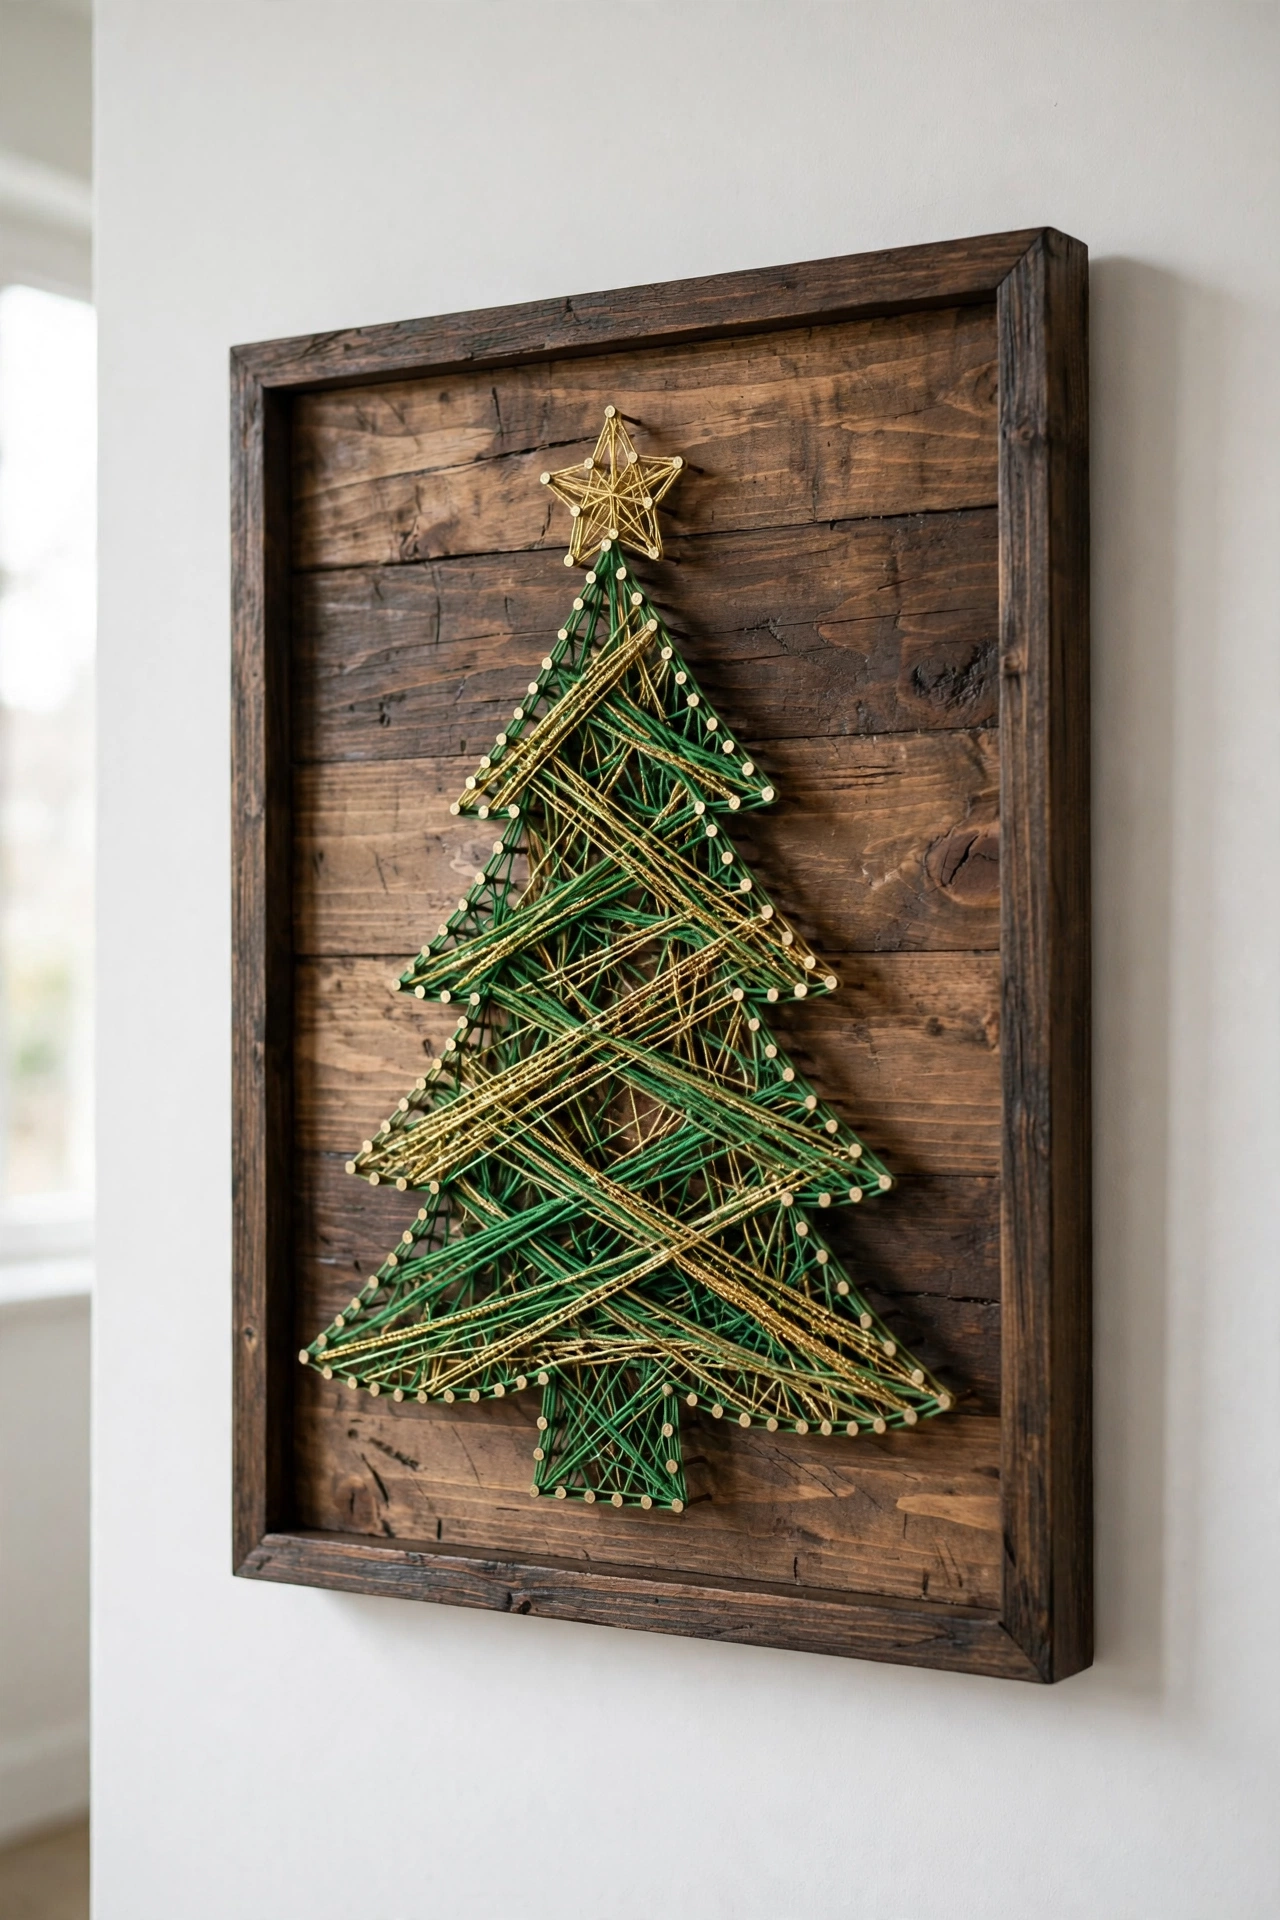
String Art Tree on a Board
Hammer small nails into a board in a tree pattern and weave green and gold string between them. It is an evening project that looks like craft-store art. Frame the board in stained wood and it is permanent decor you will reuse for years.
Try it: Place nails 1 inch apart along the outline. Closer nails give you a dense weave; wider nails look sparse and unfinished.
29
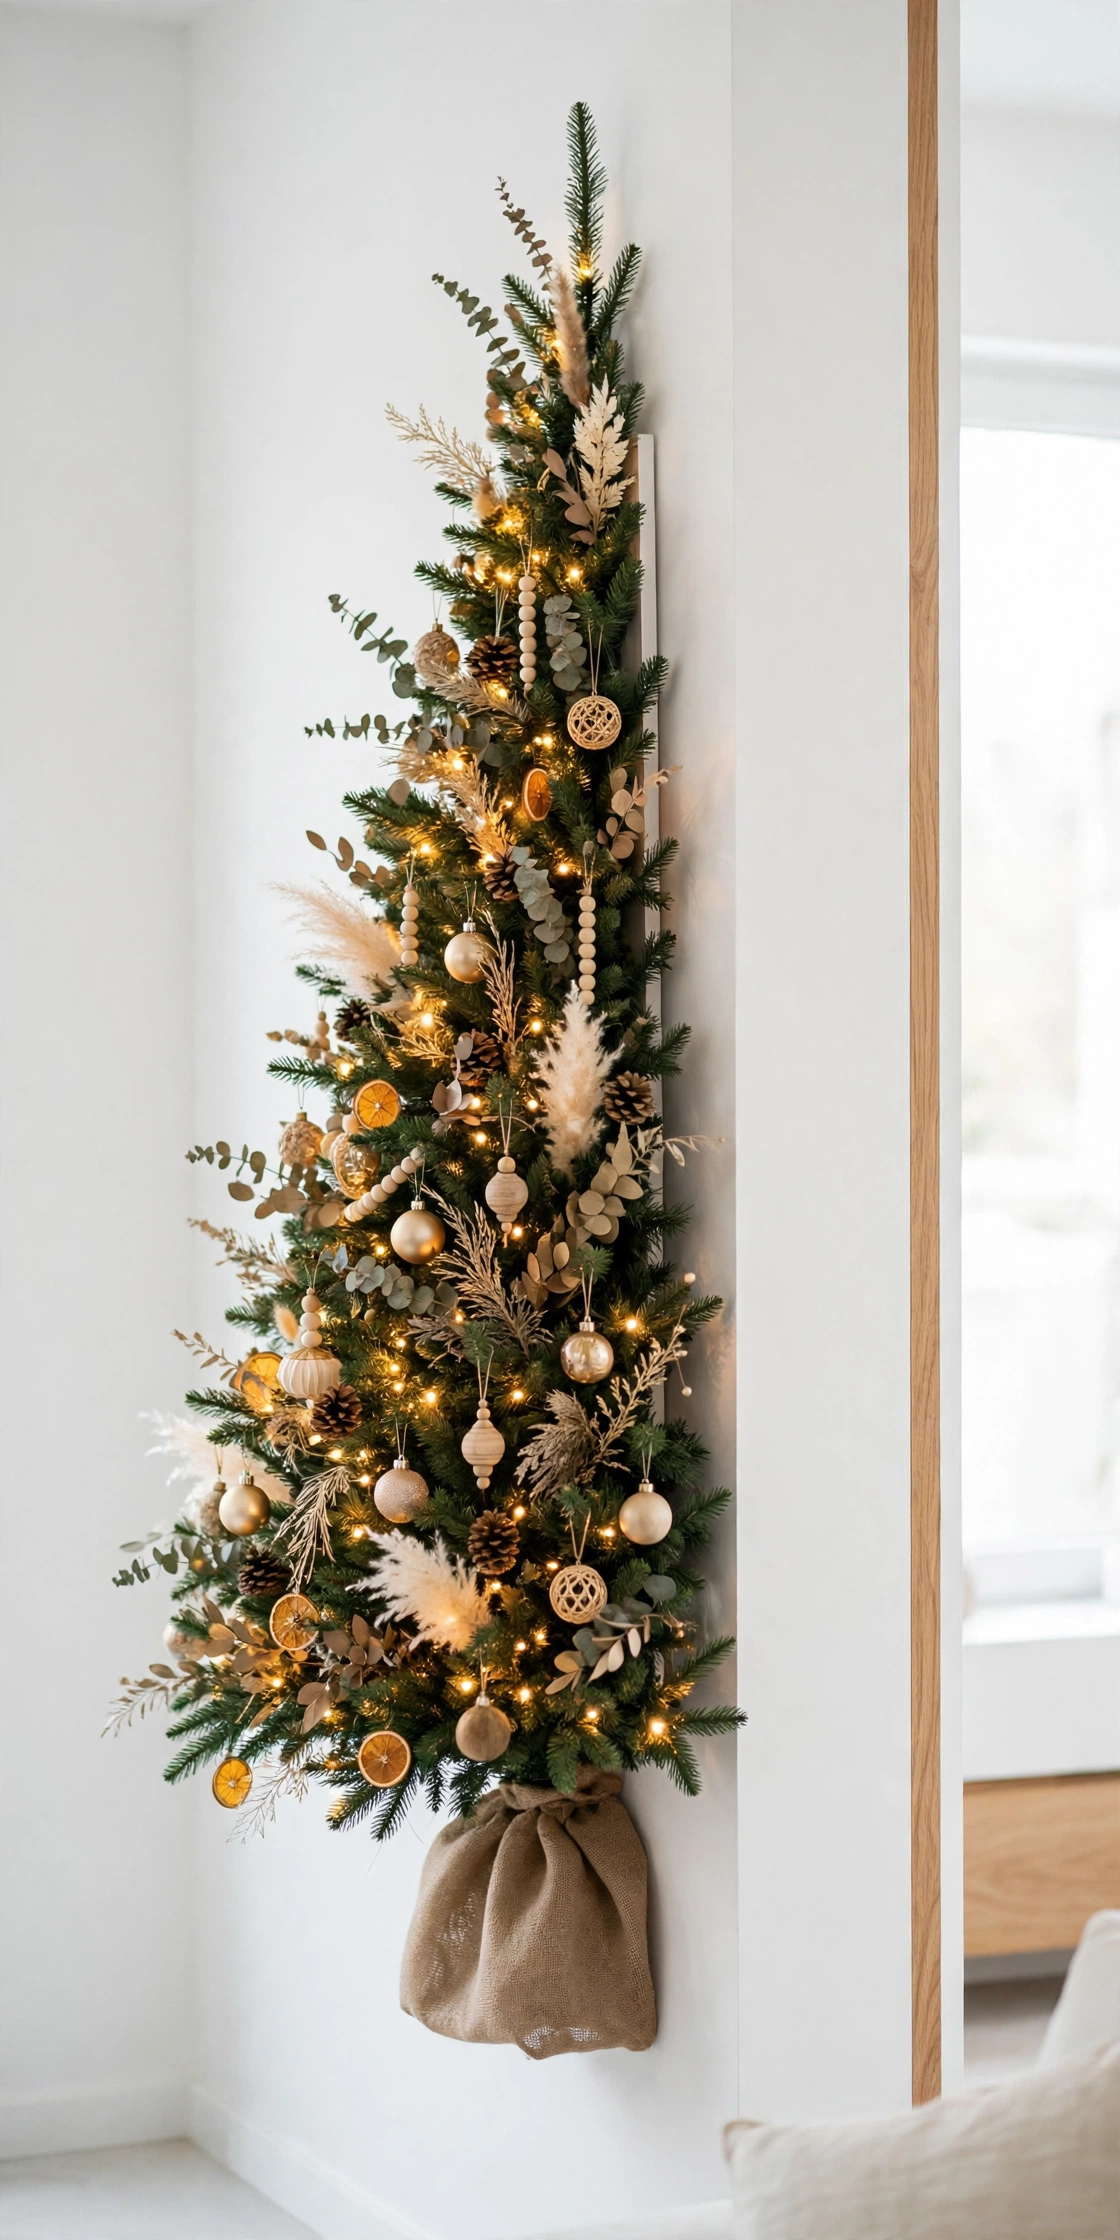
Half Tree Flat Against the Wall
Buy a flat-back half tree, the kind designed for tight spaces, and set it flush to the wall. It looks like a full tree from the front and needs half the floor space. This is the best wall-adjacent option if you still want a “real” tree silhouette.
Try it: A 7.5-foot half tree needs about 3 feet of width but only 20 inches of depth. Measure the wall, not the room, and center it.
30
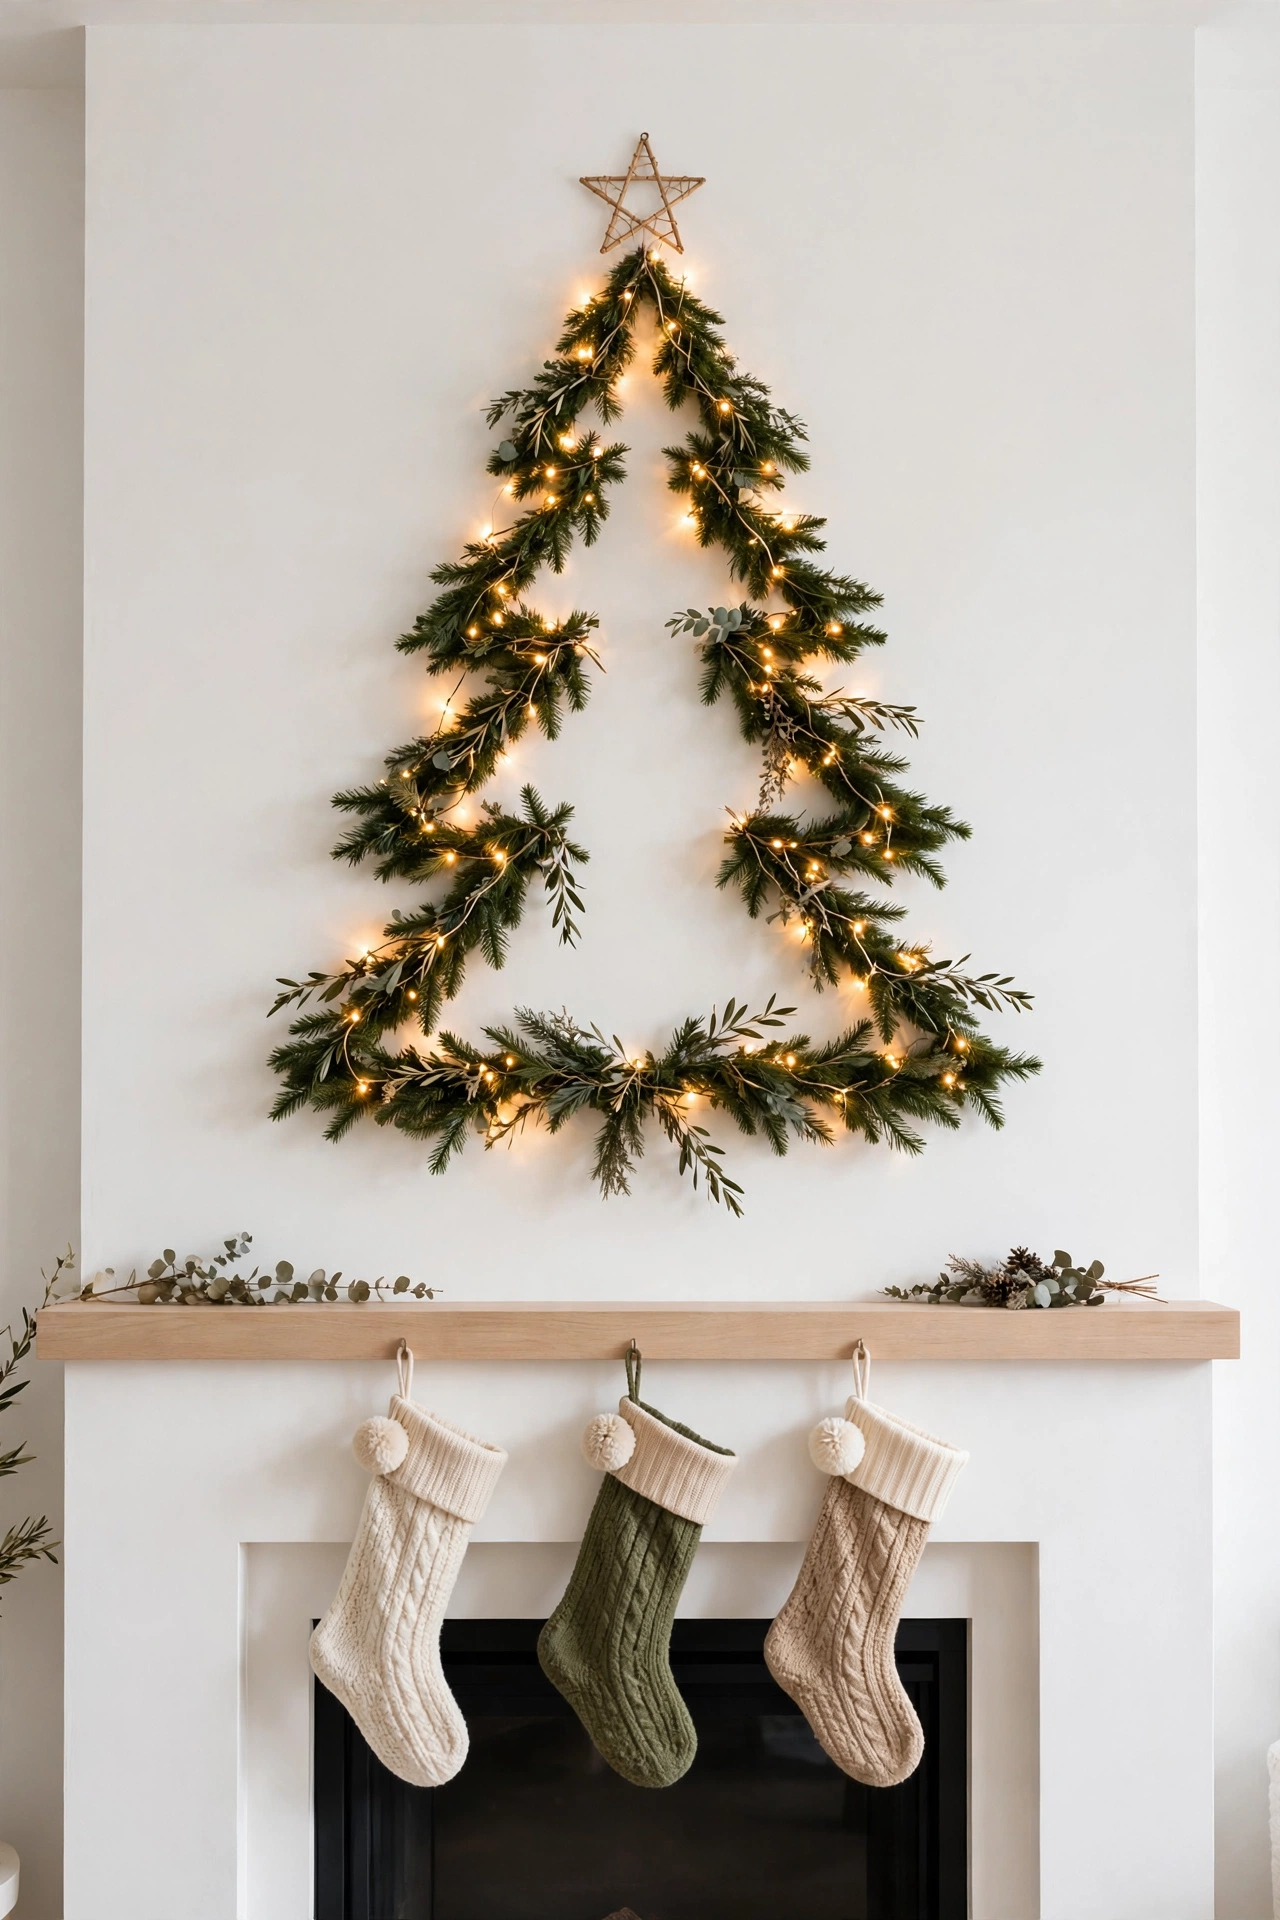
Above-the-Mantel Wall Tree
Center a light-strand or garland wall tree on the wall above the mantel, sized to the mantel width. The mantel becomes the tree’s “floor”: stockings below, lights above, and the whole fireplace becomes one installation. Size the tree to about two-thirds of the mantel width.
Try it: Keep the tree’s bottom edge 6 inches above the mantel. Tight to the mantel it looks connected; higher up it floats apart.

31
Hallway and Stairwell Wall Tree
Hallways have long blank walls and zero floor to spare, which is exactly what wall trees are for. Run a slim light-outline tree along the stairwell wall, sized to the wall’s proportions. A narrow 3-foot-wide, 6-foot-tall tree suits most hallways.
Try it: Keep hallway trees 12 inches shallower than the walkway edge. A tree that forces you to duck or brush past it will be hated by Christmas Eve.

32
Office and Cubicle Wall Tree
Build a small battery-light wall tree on the cubicle wall or office door. A 2-foot fairy light outline with a dozen micro ornaments personalizes a desk without touching anyone else’s space. Everything battery, nothing plugged into the office outlet.
Try it: Keep it under 3 feet tall in shared offices. A big statement tree in a cubicle reads as a claim on shared visual space; a small one reads as cheerful.
Pro tip: Stand across the room and squint before you decorate. The silhouette should read as a tree with your eyes half closed; if it does not, adjust the template before you hang a single ornament. Shape first, sparkle second.
Three rules for wall Christmas trees
- Weight before beauty: Add up the weight of materials, lights, and ornaments, then buy mounting hardware rated for double that. Small adhesive hooks hold 1 to 4 pounds each; a full garland tree with ornaments runs 8 to 12 pounds. Hardware failure is the number one reason wall trees end up on the floor.
- Tape the template first: Mark the full triangle with painter’s tape and live with it for an hour. Check the proportions from the doorway, not just up close. Every crooked wall tree traces back to a skipped template step.
- One palette, one style: Wall trees show every color choice because they are flat and graphic. Pick two colors plus one metal and repeat them from top to bottom. Mixed palettes that work on a round tree look scattered on a wall tree.
After Christmas: the wall tree reset
- Photograph before takedown: Take a straight-on photo of the finished tree. Next year you will match the hook positions in half the time because the photo is your map.
- Store flat or coiled: Wood and pegboard pieces stack flat with felt between them; lights coil around cardboard; garland loops loosely in a bag so it does not crush. Flat pieces in a garment bag store under a bed.
- Bag the hardware: Put the exact hooks, strips, and spares in a labeled zip bag and tape it to the largest piece. Next December you will not rebuy what you already own.
More ideas you’ll love: small christmas tree ideas, slim christmas tree ideas, small living room christmas decor ideas, tabletop christmas tree ideas, and more in our Christmas Decor collection.
Questions readers ask
How do you make a Christmas tree on the wall?
Tape a triangle template on the wall first, then mount hardware rated for the material’s weight, then build the tree along the template. For garland, zigzag it across hooks every 12 inches. For lights, drape one strand in scallops from a row of clear hooks. Start from the top point and work down so each row widens evenly.
What can I use instead of a real Christmas tree in a small apartment?
A wall tree uses zero floor space and costs a fraction of a real tree. Garland zigzags and string light outlines give the fullest look, while washi tape or felt trees suit renters who need zero damage. Most wall trees go up in under an hour and come down with no holes to patch.
How do you hang a garland tree without damaging walls?
Use removable adhesive hooks rated for at least double the total weight, wipe the wall with rubbing alcohol first, press each strip for 30 seconds, and wait one hour before hanging. Avoid wallpaper, textured walls, and paint less than a week old. Remove by pulling the strip straight down the wall, never outward.
How tall should a wall Christmas tree be?
Between 4 and 6 feet for most living rooms, with the top point at or above eye level. In hallways or offices, 2 to 3 feet suits the smaller wall. Keep the proportions roughly two parts tall to one part wide for the classic tree triangle.
Are wall Christmas trees safe around kids and pets?
Flat wall trees are among the safest options because there is nothing to climb or knock over. Felt and paper trees are the safest for toddlers since everything is soft and light. Keep glass ornaments off low rows, and use battery lights with timers so no cords trail down the wall. For more seasonal advice, ESFI’s holiday safety tips are worth a read before you hang lights anywhere in the house.
How much does a wall Christmas tree cost?
A washi tape or paper tree costs $5 to $15. A garland or light tree runs $20 to $45 in materials. Wood plank and floating shelf trees cost $40 to $90 depending on lumber. Kits with pre-lit panels run $40 to $80. Almost every option costs less than a quality artificial tree.
Can a wall tree hold real ornaments?
Yes, as long as the mounts can carry them. Keep glass ornaments to 2 ounces or less each and total tree weight under the hooks’ combined rating. Wood, shelf, pegboard, and half trees handle heavier ornaments best; garland and tape trees should stick to shatterproof and paper ornaments.
How do I store a wall Christmas tree?
Coil lights around cardboard so they do not tangle, stack flat pieces like wood slats and pegboards with felt between them, and keep garland loose in bags. Put all the hooks and strips in a labeled bag taped to the largest piece. A garment bag under the bed holds most flat wall trees.
People Also Ask
What is a half Christmas tree?
A half tree is a real or artificial tree built flat on one side so it sits flush against a wall. It looks like a full tree from the front but needs roughly half the floor depth. A 7.5-foot half tree takes about 3 feet of width and only 20 inches of depth.
Can you put a Christmas tree in a dorm room?
Yes, and a wall tree is the best format for it. Stick to adhesive-only mounting and battery lights, since most dorms ban nails and unattended plug-in lights. Keep it under 4 feet tall and check the housing rules on open decor and light wattage before you buy.
How long does it take to put up a wall Christmas tree?
A washi tape or fairy light outline takes 15 to 30 minutes. A garland zigzag takes 45 to 90 minutes including the template. A wood plank or floating shelf tree takes 1 to 2 hours. Kits go up in about 20 minutes. In every case the template step saves time on fixes later.
loved these ideas? ✿
Save this guide for later
Pin it to your board so it’s there when you’re ready to recreate it.

Curated by
Hey! I'm Sanaullah — visual curator and content creator. I search, curate, and test the best aesthetic ideas across Pinterest so you can easily transform your living space, style daily outfits, and try simple creative DIYs without the overwhelm.