
Paper gets a bad reputation as a kids’ craft supply, but in grown-up hands it turns into gallery-worthy wall art, jewelry people assume came from a boutique, and gifts that look professionally made. These 22 paper crafts for adults use nothing fancier than paper, glue, and scissors, and every single one is finished enough to display, wear, or gift without a disclaimer.
Quick Idea Summary
- The key takeaway: With the right paper and finish (a coat of Mod Podge, a real frame, or quality cardstock), paper crafts look like studio art instead of a school project.
- The detail most people miss: Paper weight decides the result more than skill does. Heavy cardstock, crepe paper, and quilling strips are what separate the elegant pieces from the flimsy ones.
- What it costs or how long it takes: Most projects run $5 to $20 in supplies and take one to three hours, so a weekend afternoon covers two or three pieces easily.
At a glance
| Zone | Ideas | Budget |
|---|---|---|
| Wall art | 01–06 | $10–$25 |
| Home decor | 07–12 | $8–$20 |
| Gifts and stationery | 13–17 | $5–$15 |
| Wearables and finishing touches | 18–22 | $5–$18 |
The paper crafts for adults ideas
01
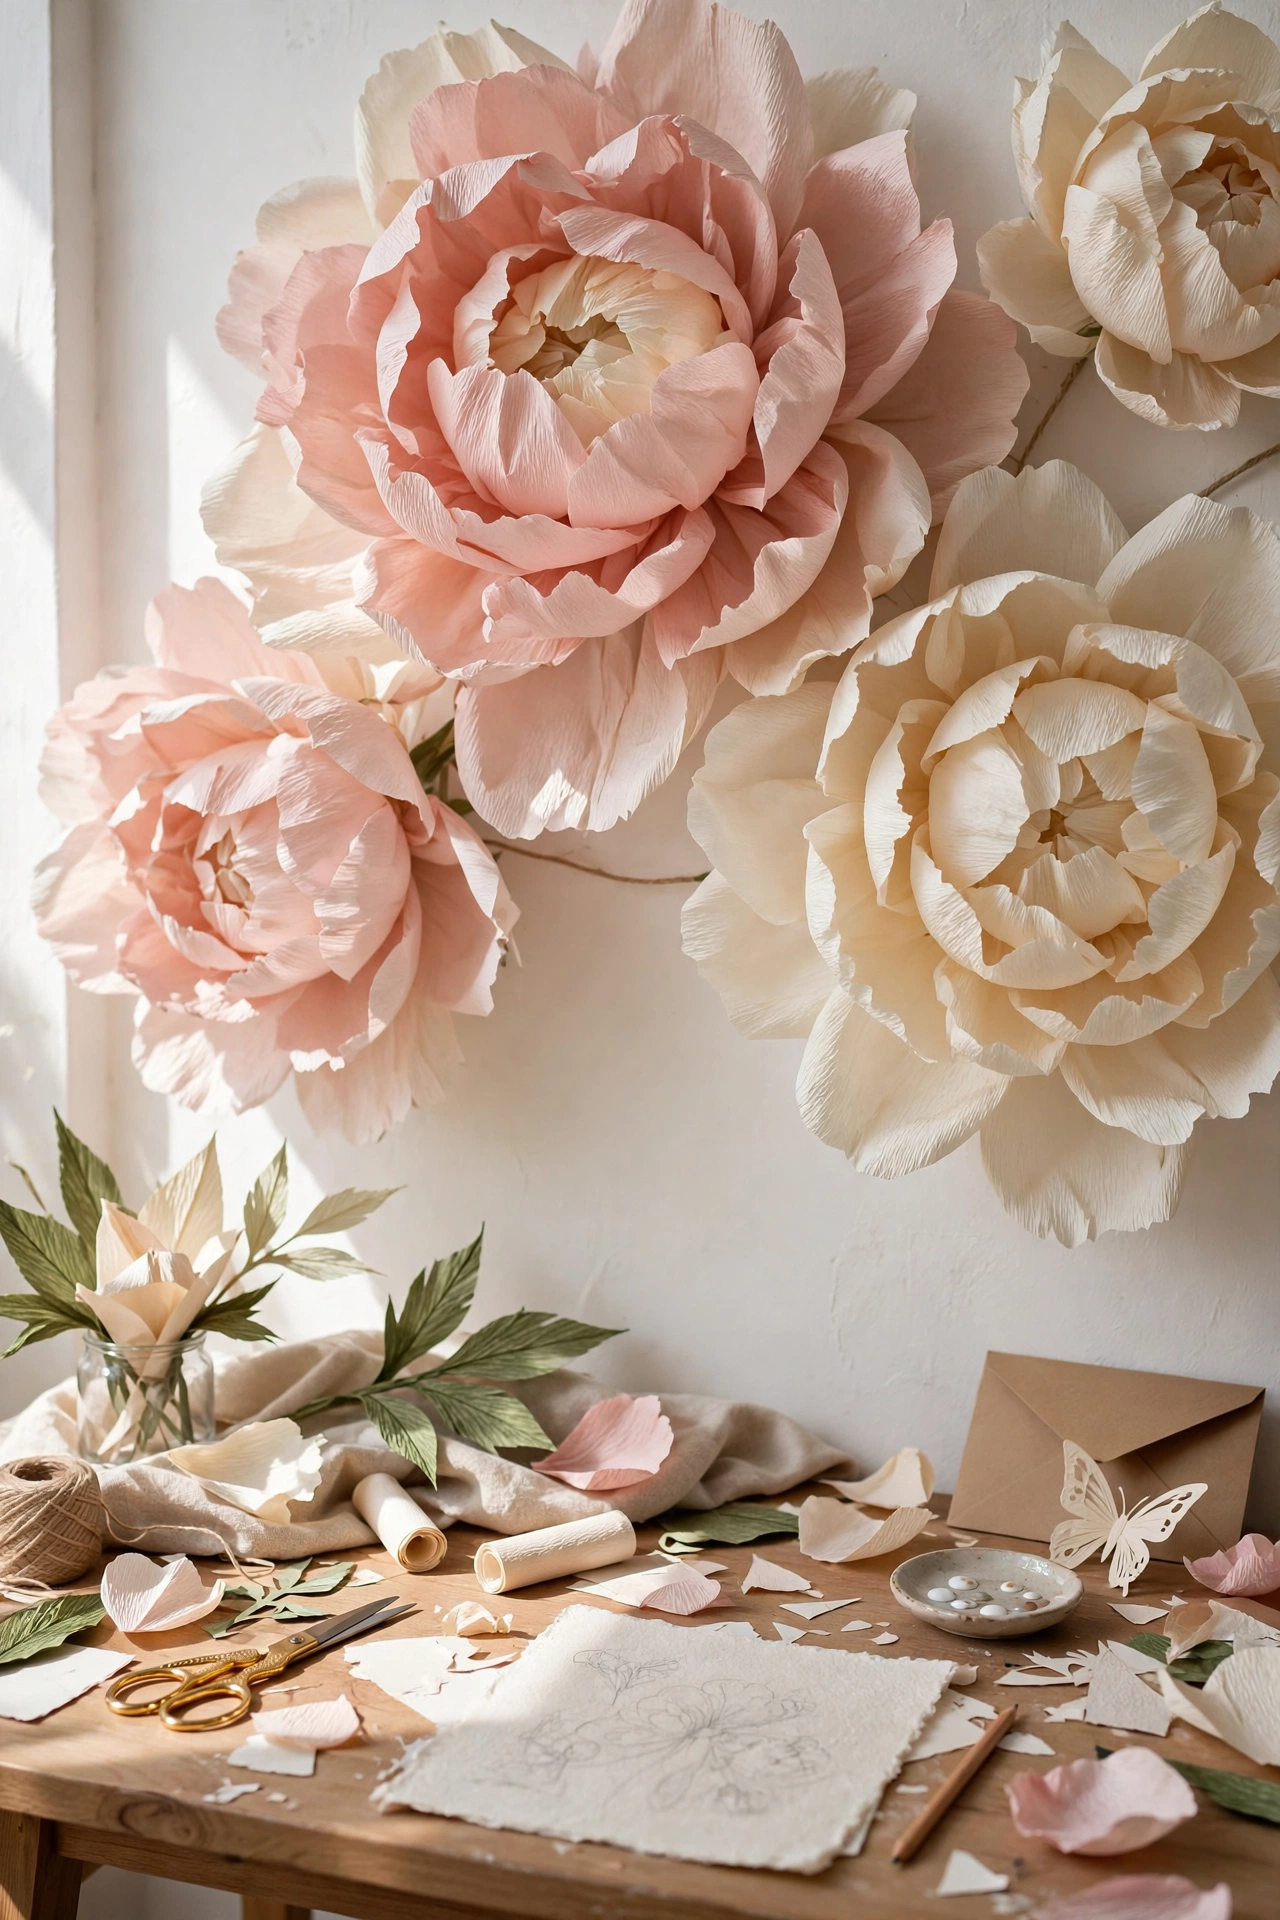
01. Crepe-Paper Peony Wall Arrangement
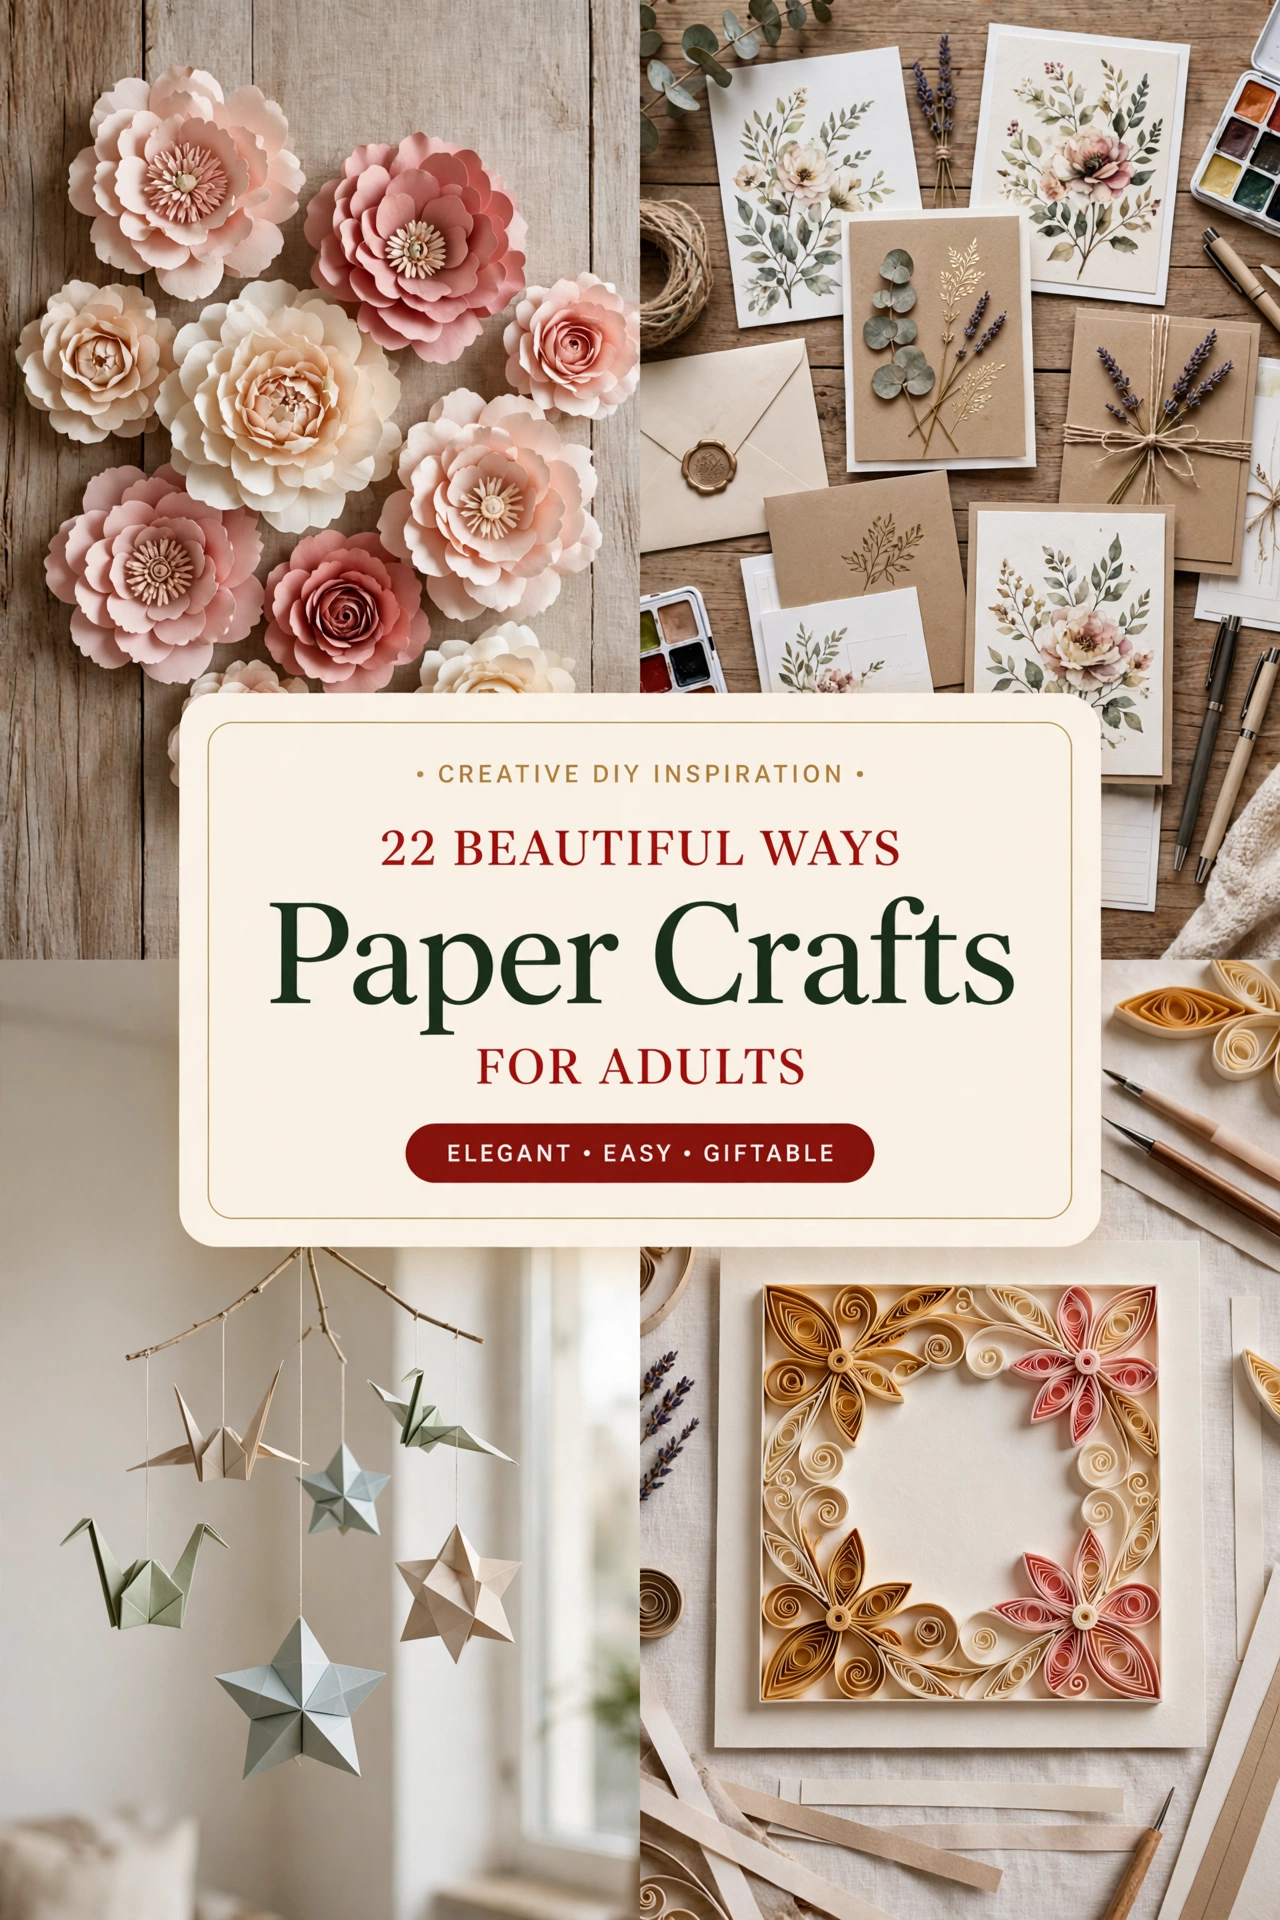
Oversized crepe-paper peonies look like a designer installation and cost a fraction of real flowers that would wilt in a week. You need Italian crepe paper in two or three tones, floral wire, and a hot glue gun; a single bloom takes about 45 minutes once you learn the petal shape. The problem with most paper flowers is thin paper that tears and looks flat, so this works because heavyweight crepe holds sculpted curves and reads as lush from across the room.
Try it: Cut your petals about 20 percent larger than you think you need, since oversized blooms are what make the arrangement look expensive.
02
02. Quilled Botanical Frame
Quilling, rolling thin paper strips into shapes, produces fern fronds and blossoms with a delicacy that photographs beautifully. A quilling tool, strip pack, and a basic frame are all you need, and a 8×10 botanical design takes around two hours. People assume quilling is tedious, but the solution is simple: use pre-cut strips in a limited palette of three greens and one accent color so the design stays cohesive and calm.
Try it: Glue your finished coils to dark navy or charcoal mat board, the contrast makes the paper look like fine ink work.

03
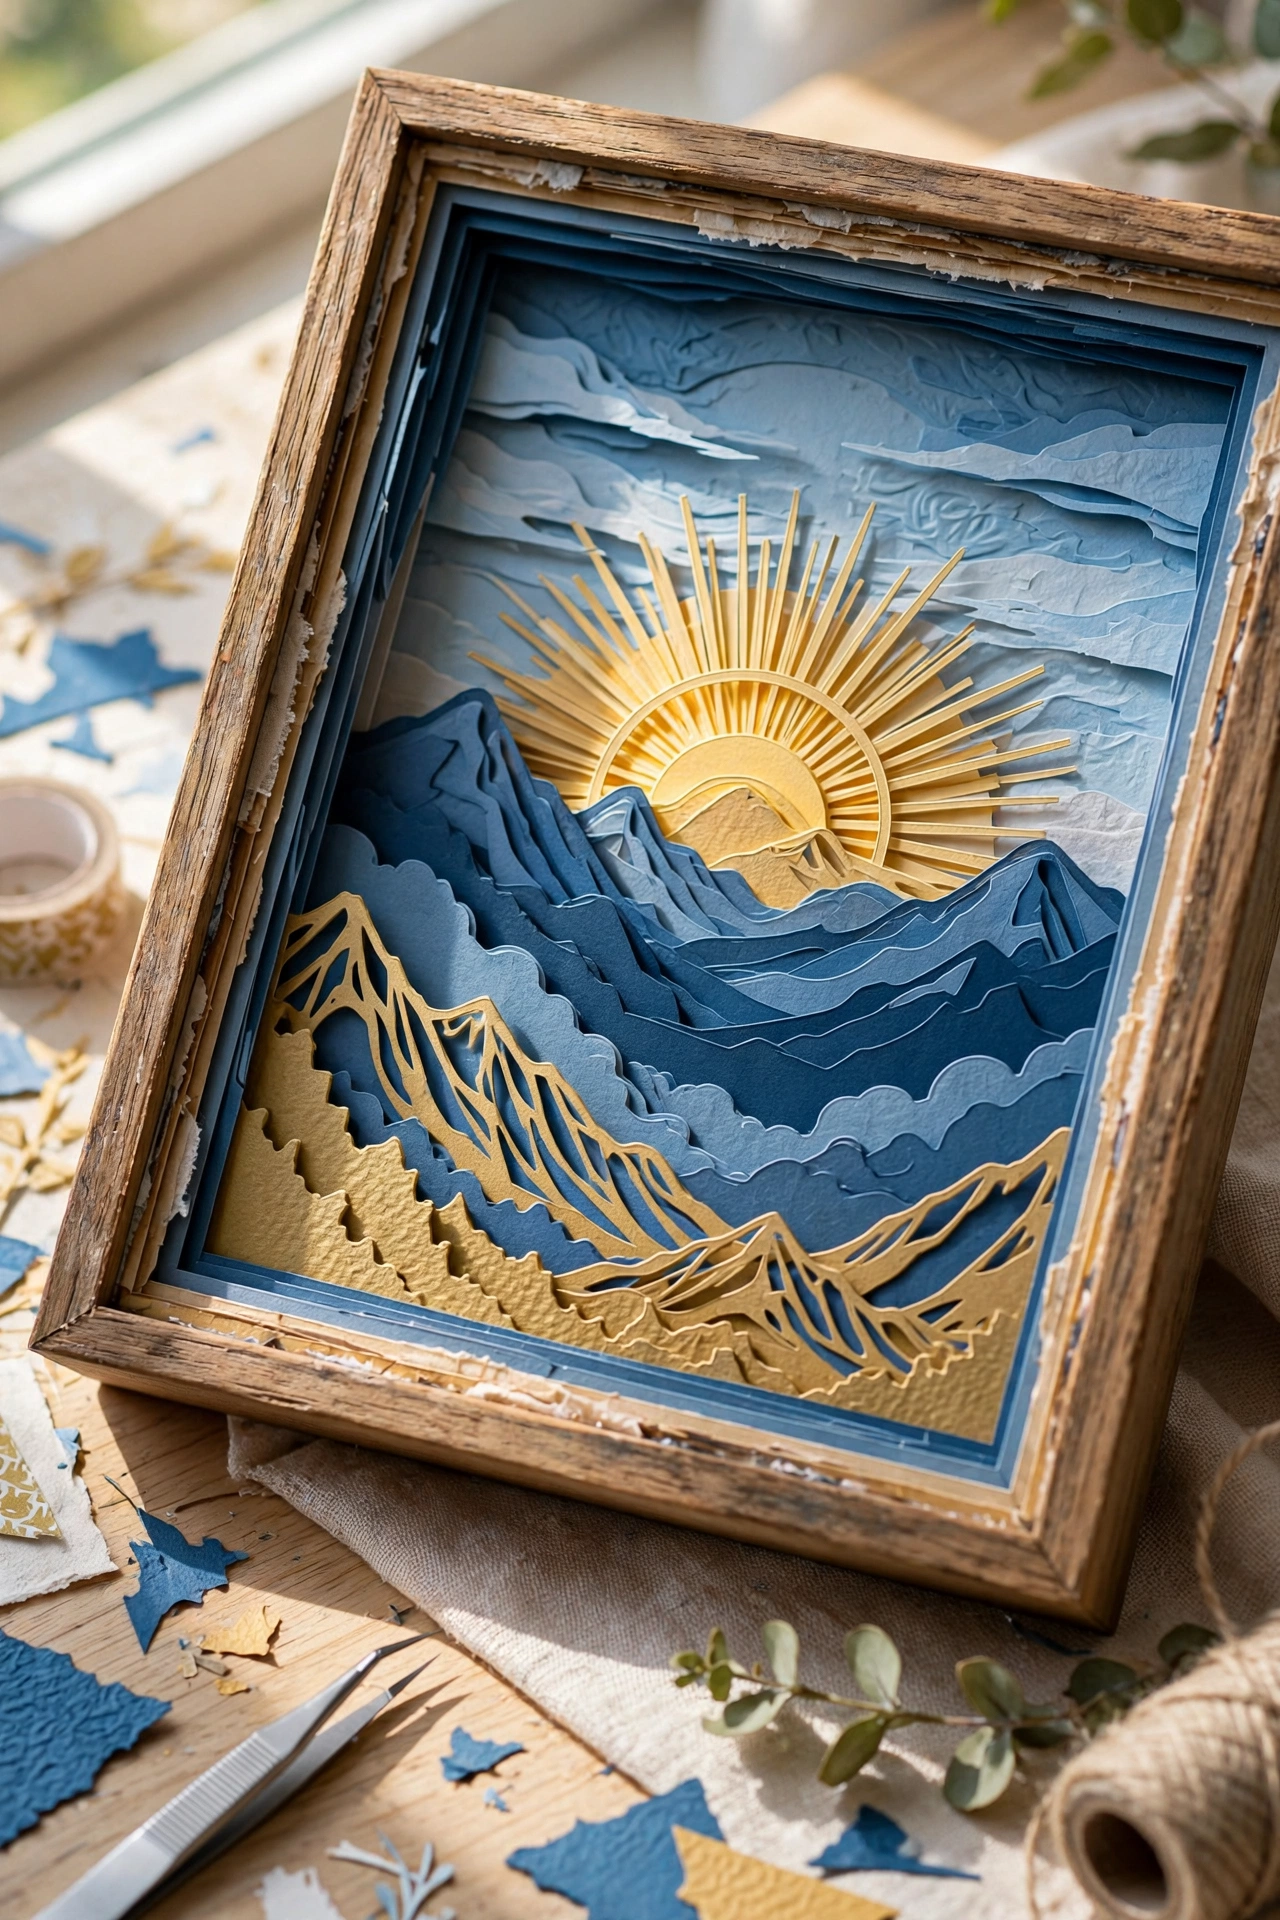
03. Layered Paper Shadow Box
Stacking cut paper layers inside a deep frame creates a dimensional landscape, mountains, a sunrise, a forest, that has genuine depth. Cardstock in five or six graduating tones, foam spacers, and a shadow box frame take about two hours to assemble. The trick that keeps it from looking flat is spacing: quarter-inch foam risers between each layer cast real shadows, which is exactly what store-bought versions charge $60 for.
Try it: Work from dark in front to light in back, since depth reads correctly when the foreground is the deepest tone.
04
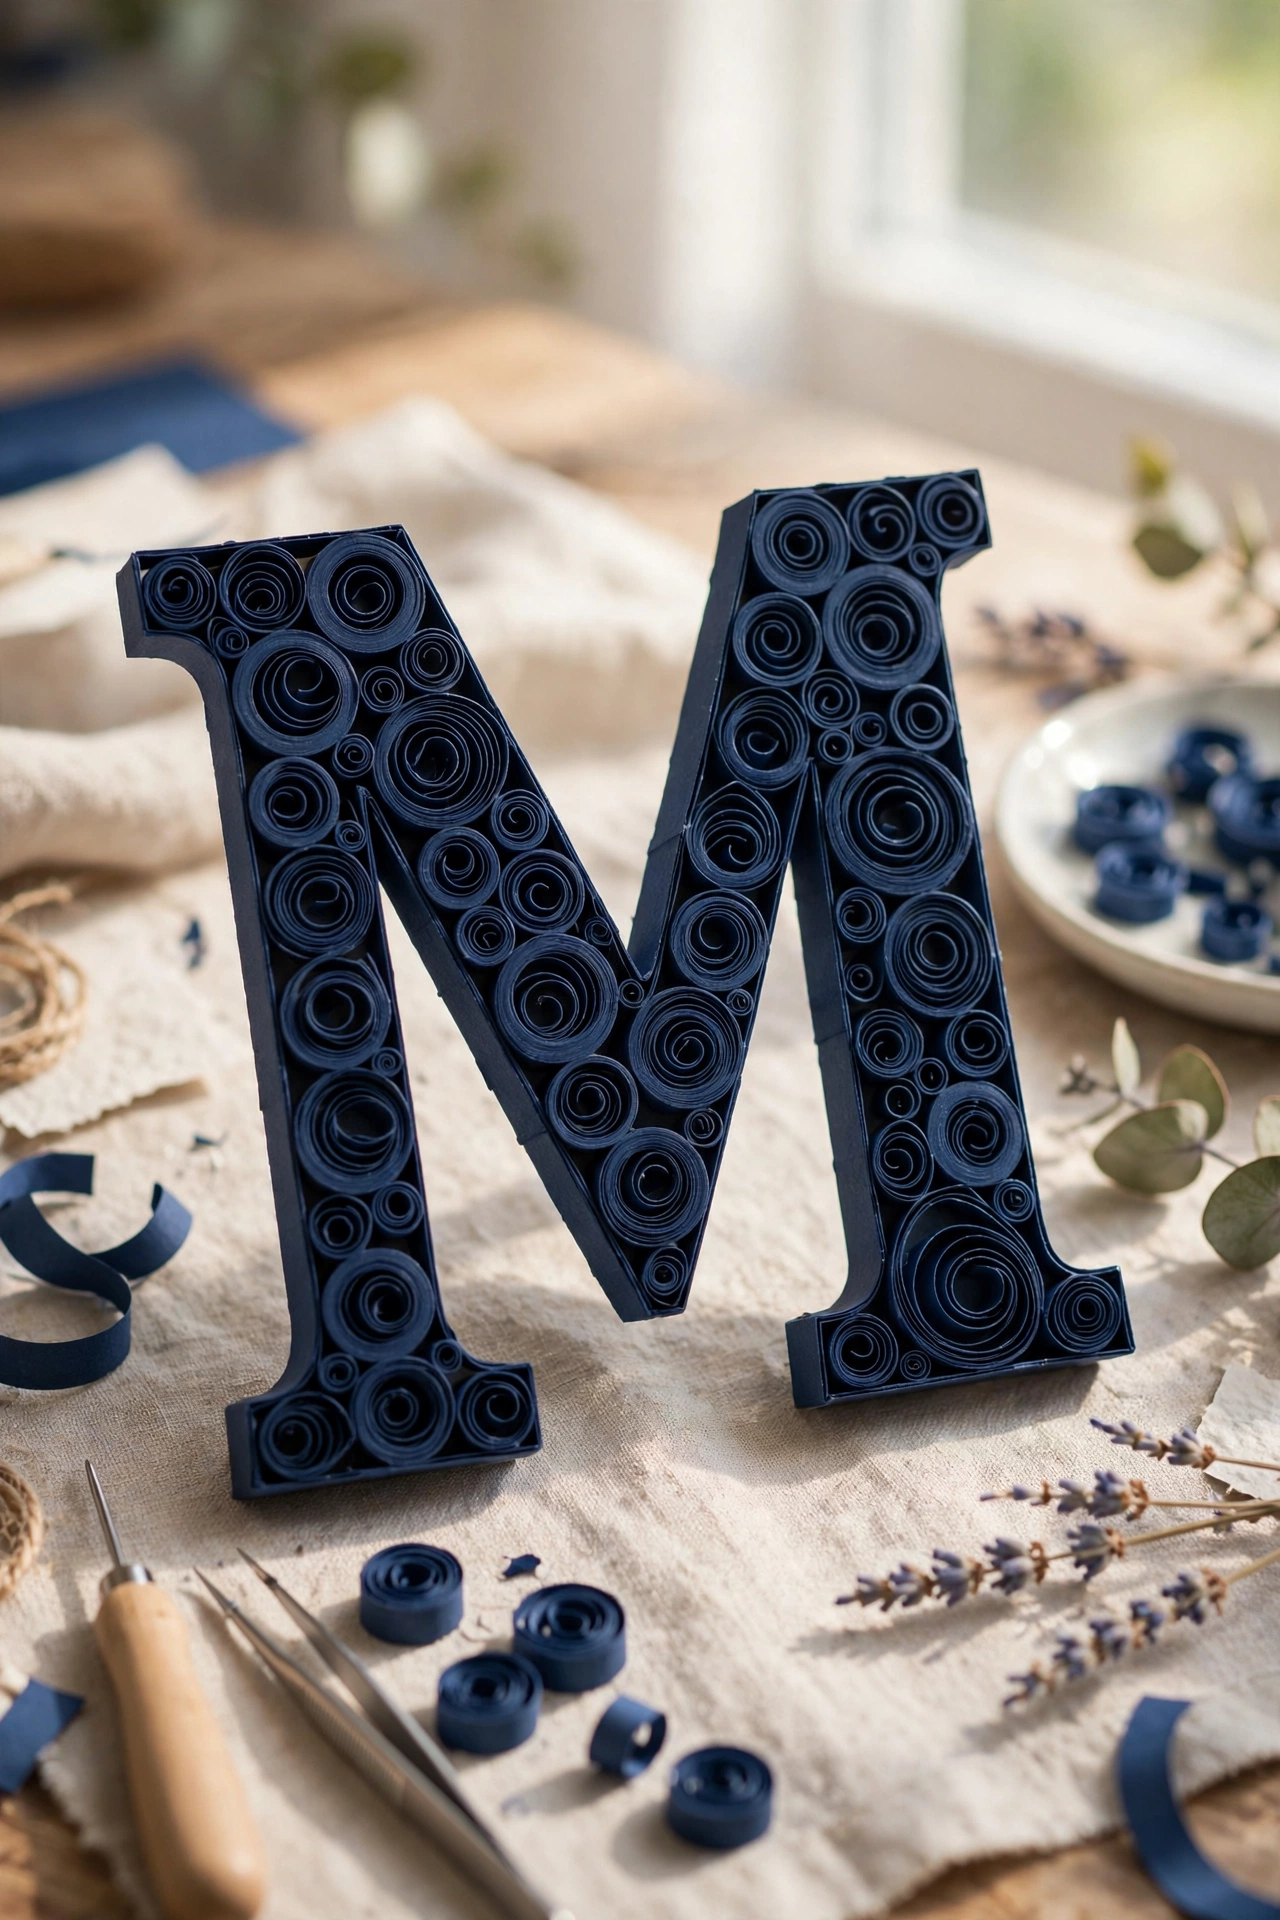
04. Quilled Monogram Art
A single large initial built from tight quilled coils becomes personalized art that looks custom-commissioned. You need quilling strips, glue, and a pre-cut chipboard letter, and expect about two hours of rolling. The risk is a lumpy, uneven letter, so solve it by mixing tight coils and teardrop shapes rather than one uniform shape, which hides variation and adds texture.
Try it: Keep the letter in one color family, like all warm whites or all deep blues, for the most expensive look.
05
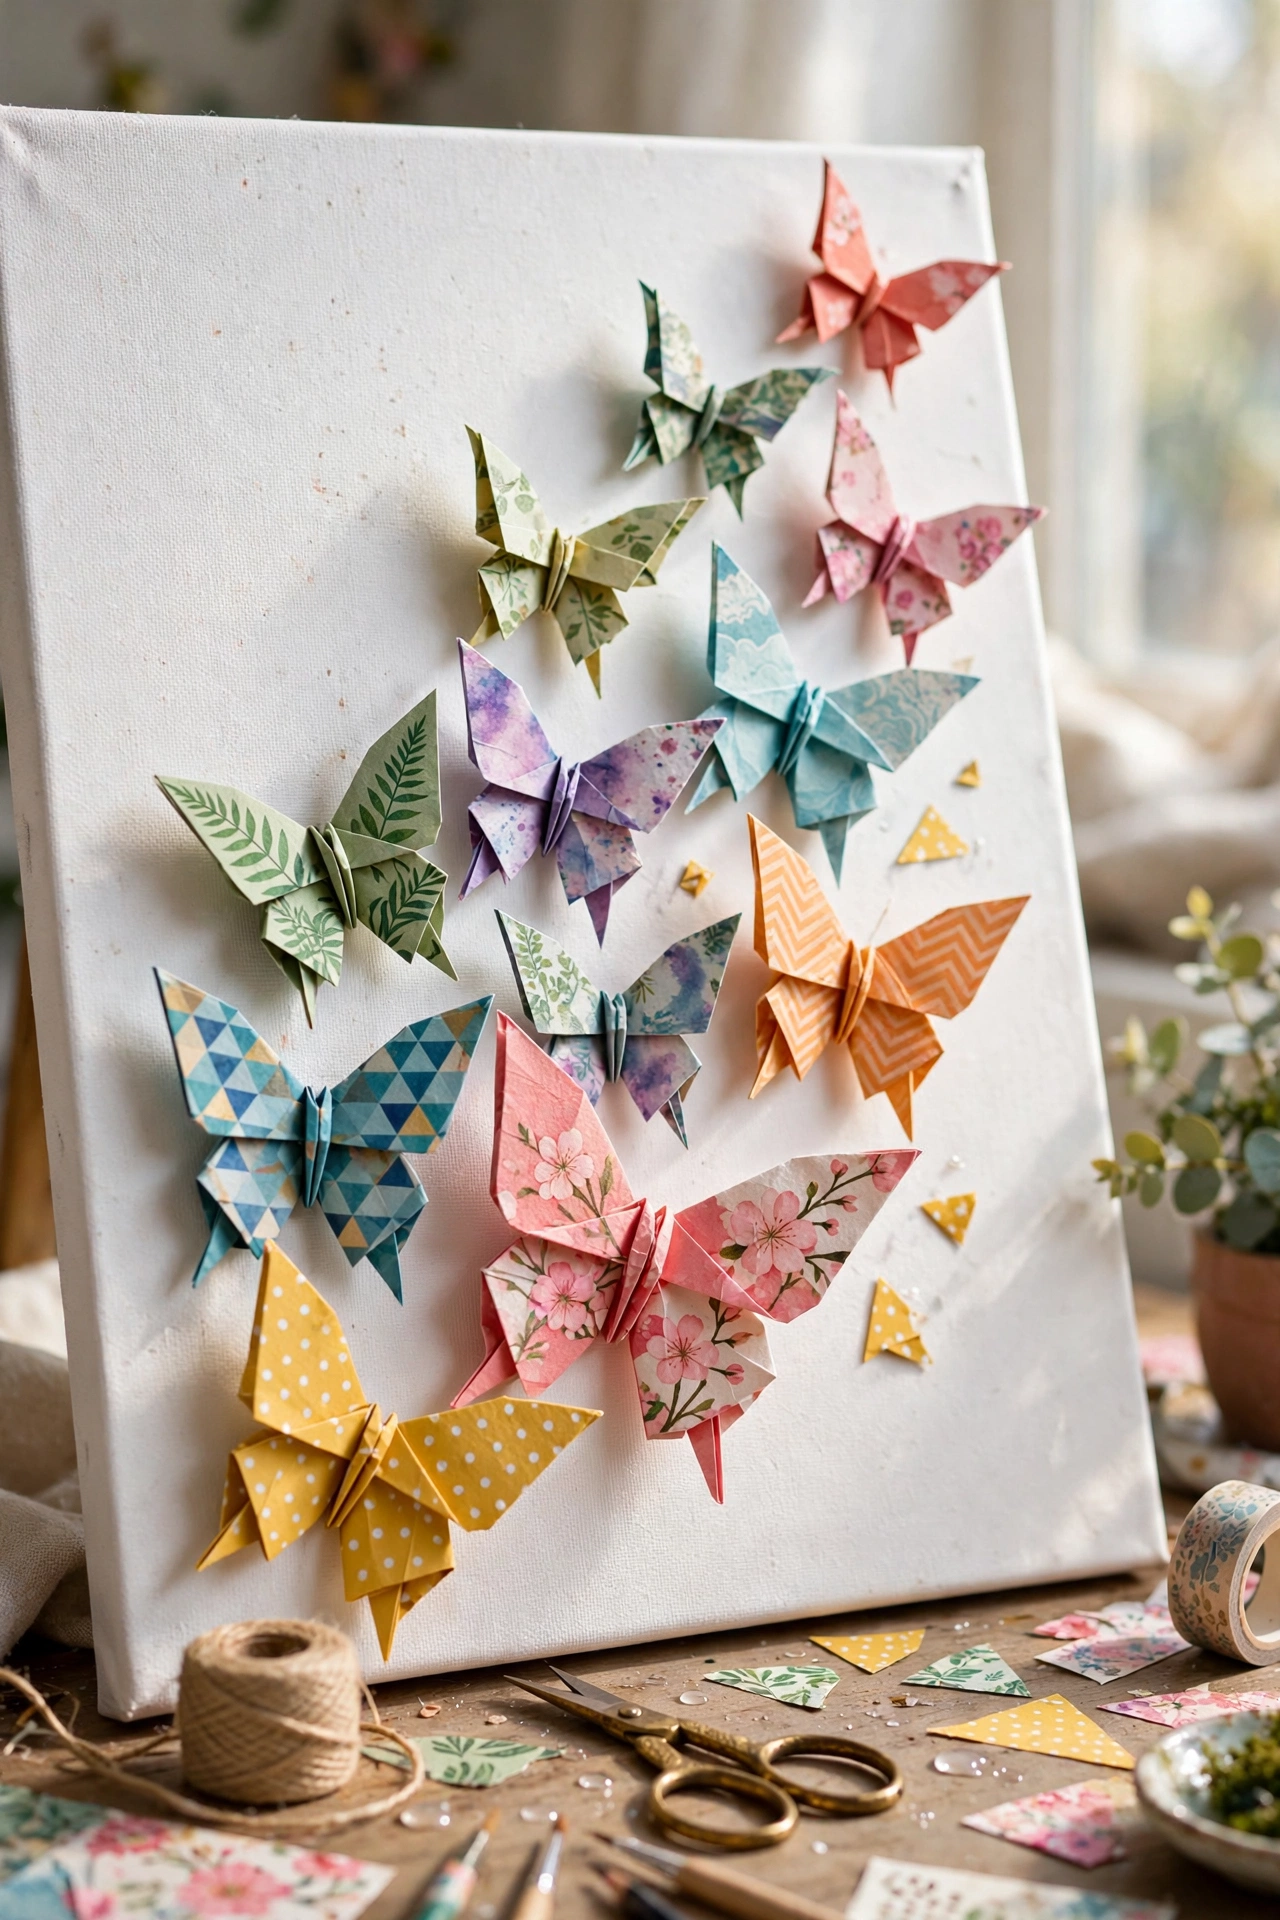
05. Origami Butterfly Gallery
A dozen folded butterflies arranged in a flight pattern across a canvas or directly on the wall reads as intentional gallery art. Double-sided origami paper and removable adhesive dots are the whole supply list, and folding plus arranging takes about an hour. Flat, one-color butterflies look crafty, so the fix is using patterned or gradient paper and sizing them from small to large along the flight path.
Try it: Hang them with tiny foam dots so each butterfly casts a small shadow and looks like it is about to lift off.
06
06. Kirie Silhouette Window Art
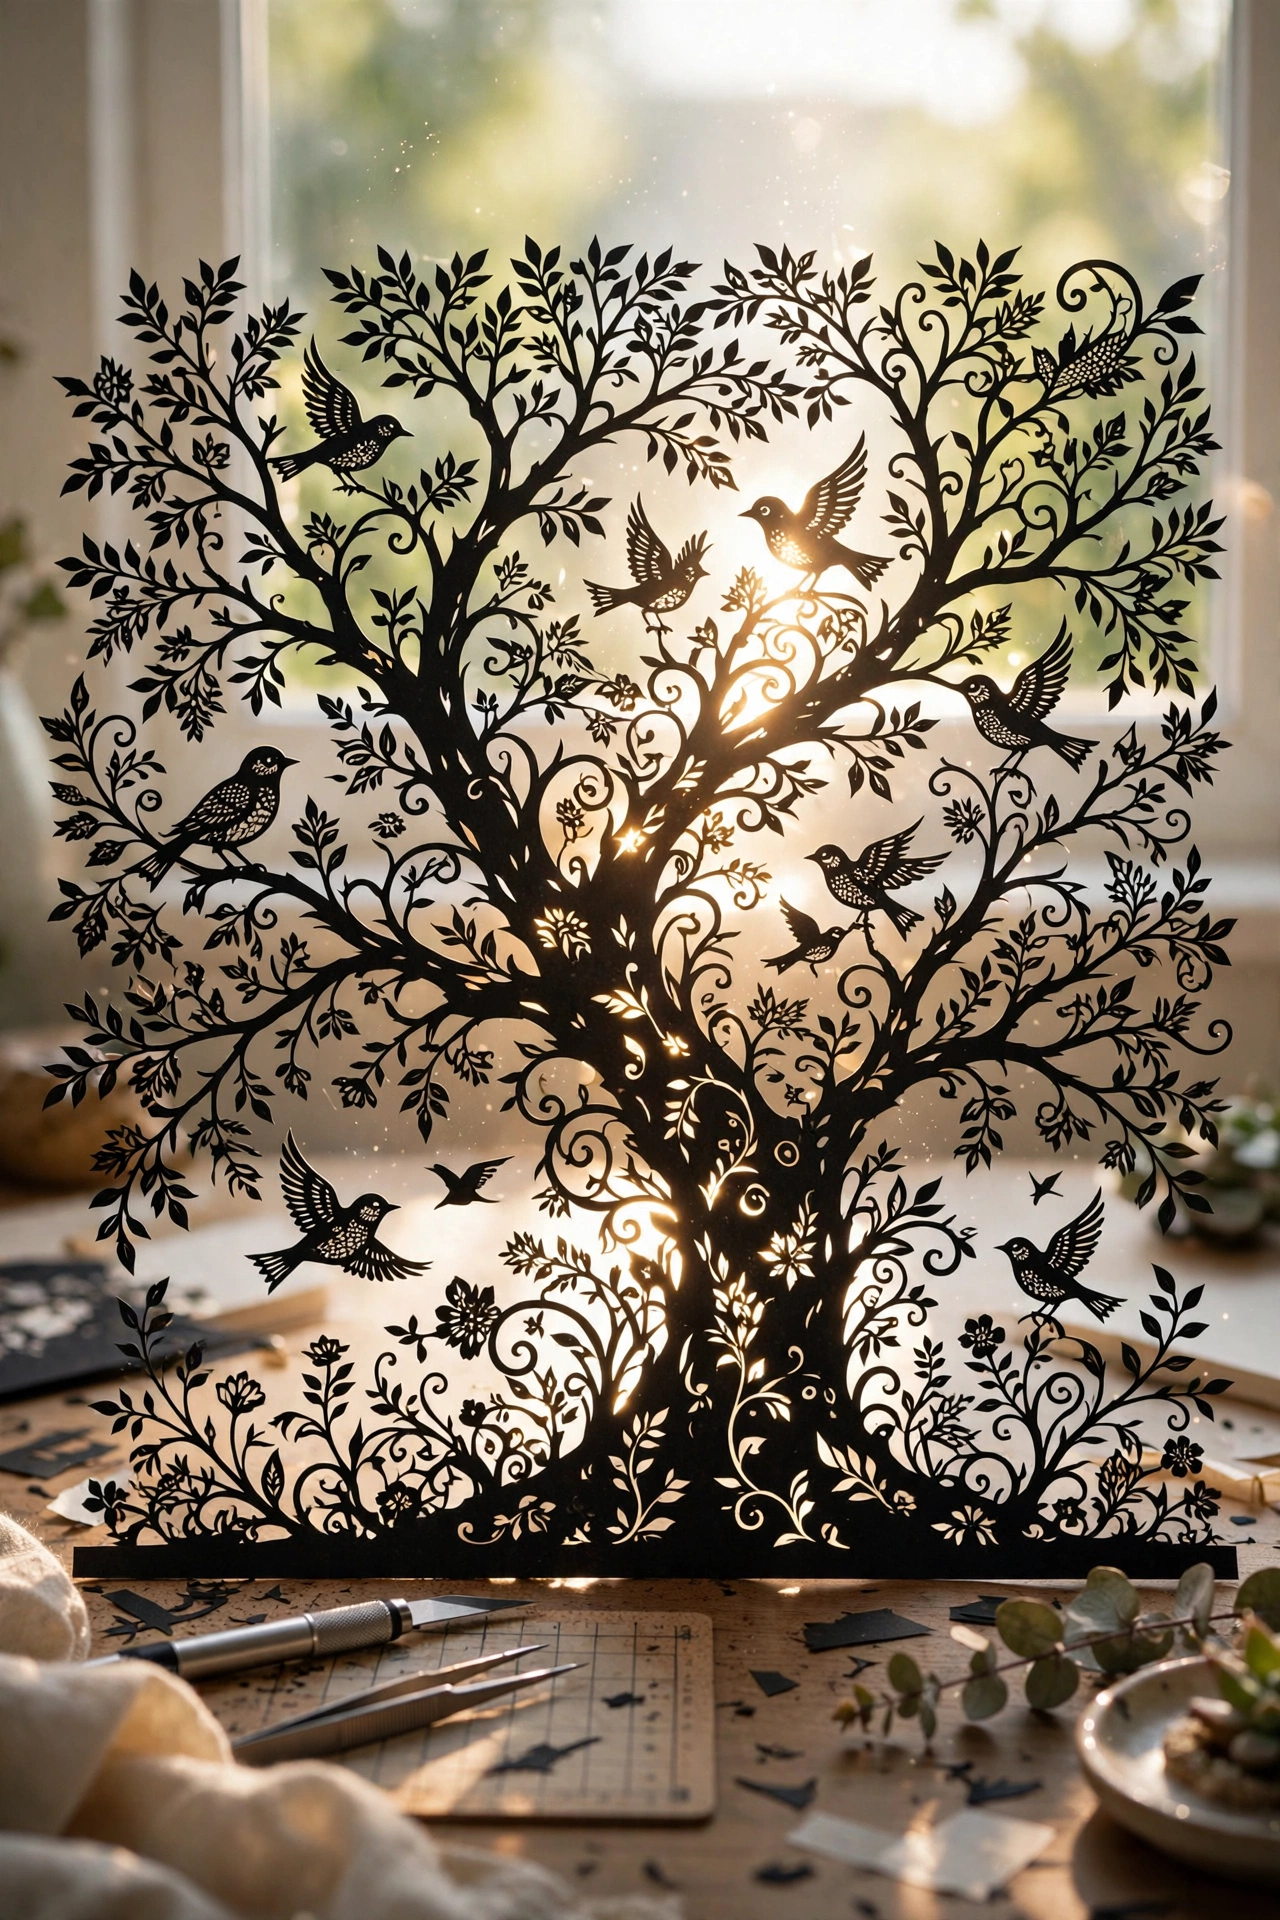
Kirie, the Japanese art of cutting a single sheet into intricate silhouettes, turns one sheet of black paper into window art that glows when backlit. You need black art paper, a craft knife, a cutting mat, and a printed template; a detailed piece takes one to two hours. The intimidation factor is real, but starting with a symmetrical design like a tree or bird means every cut teaches the next one, and the finished silhouette hides every wobble.
Try it: Tape the template to the back of the black paper and cut both at once so your lines stay clean and guided.
07
07. Paper Mache Sculptural Bowl
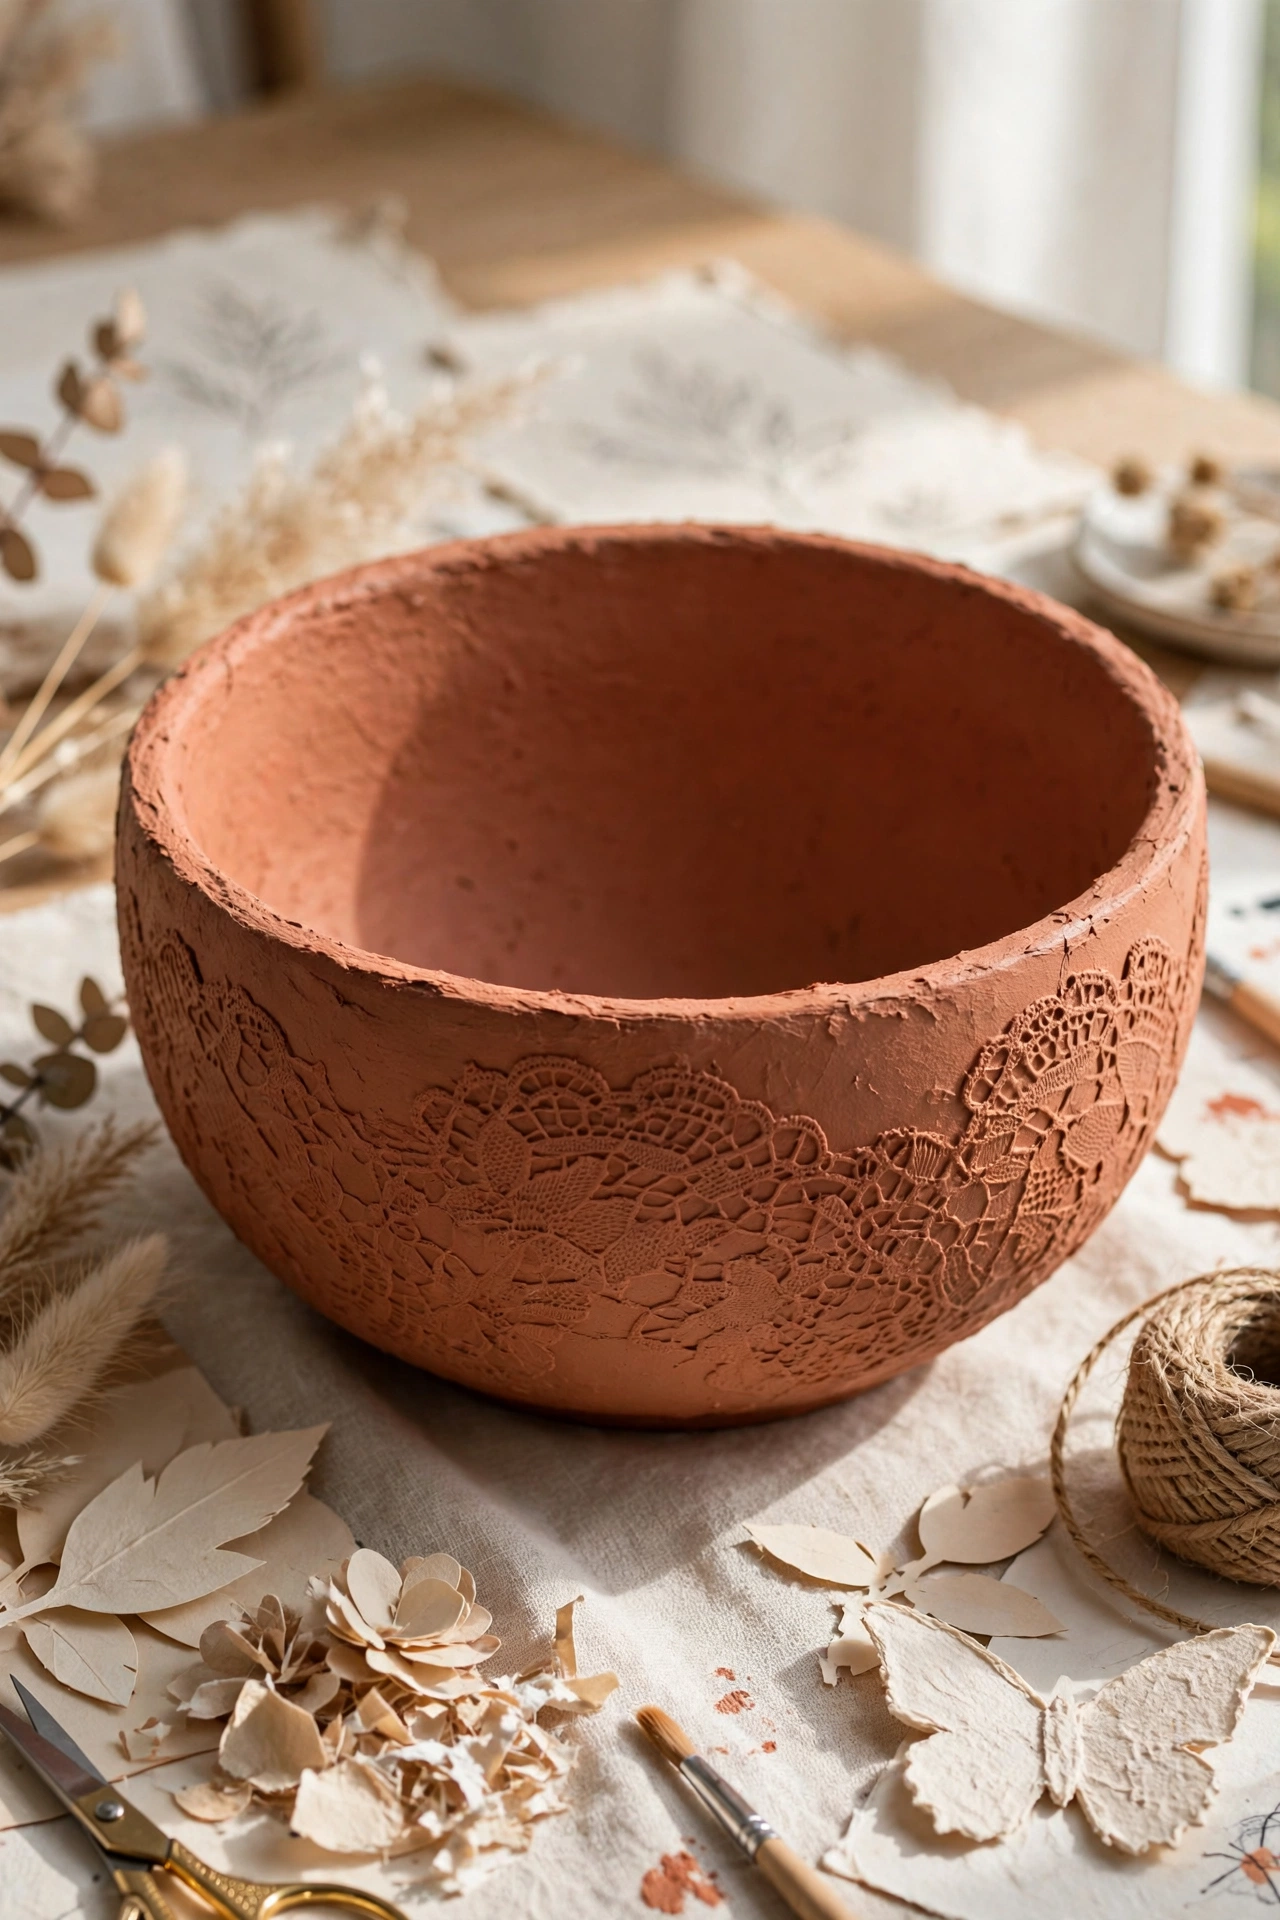
Paper mache bowls made from newspaper strips over a balloon, then painted in matte tones, look like artisan ceramics from across the room. Newspaper, flour paste or glue mix, and acrylic paint are the supplies, and the project takes an afternoon plus overnight drying. The amateur giveaway is a lumpy surface, so sand lightly between coats and finish with two coats of matte sealer, and nobody will guess the base is newspaper.
Try it: Add texture by pressing a lace doily into the final wet layer for an embossed pattern before it dries.
08
08. Decoupaged Keepsake Vase
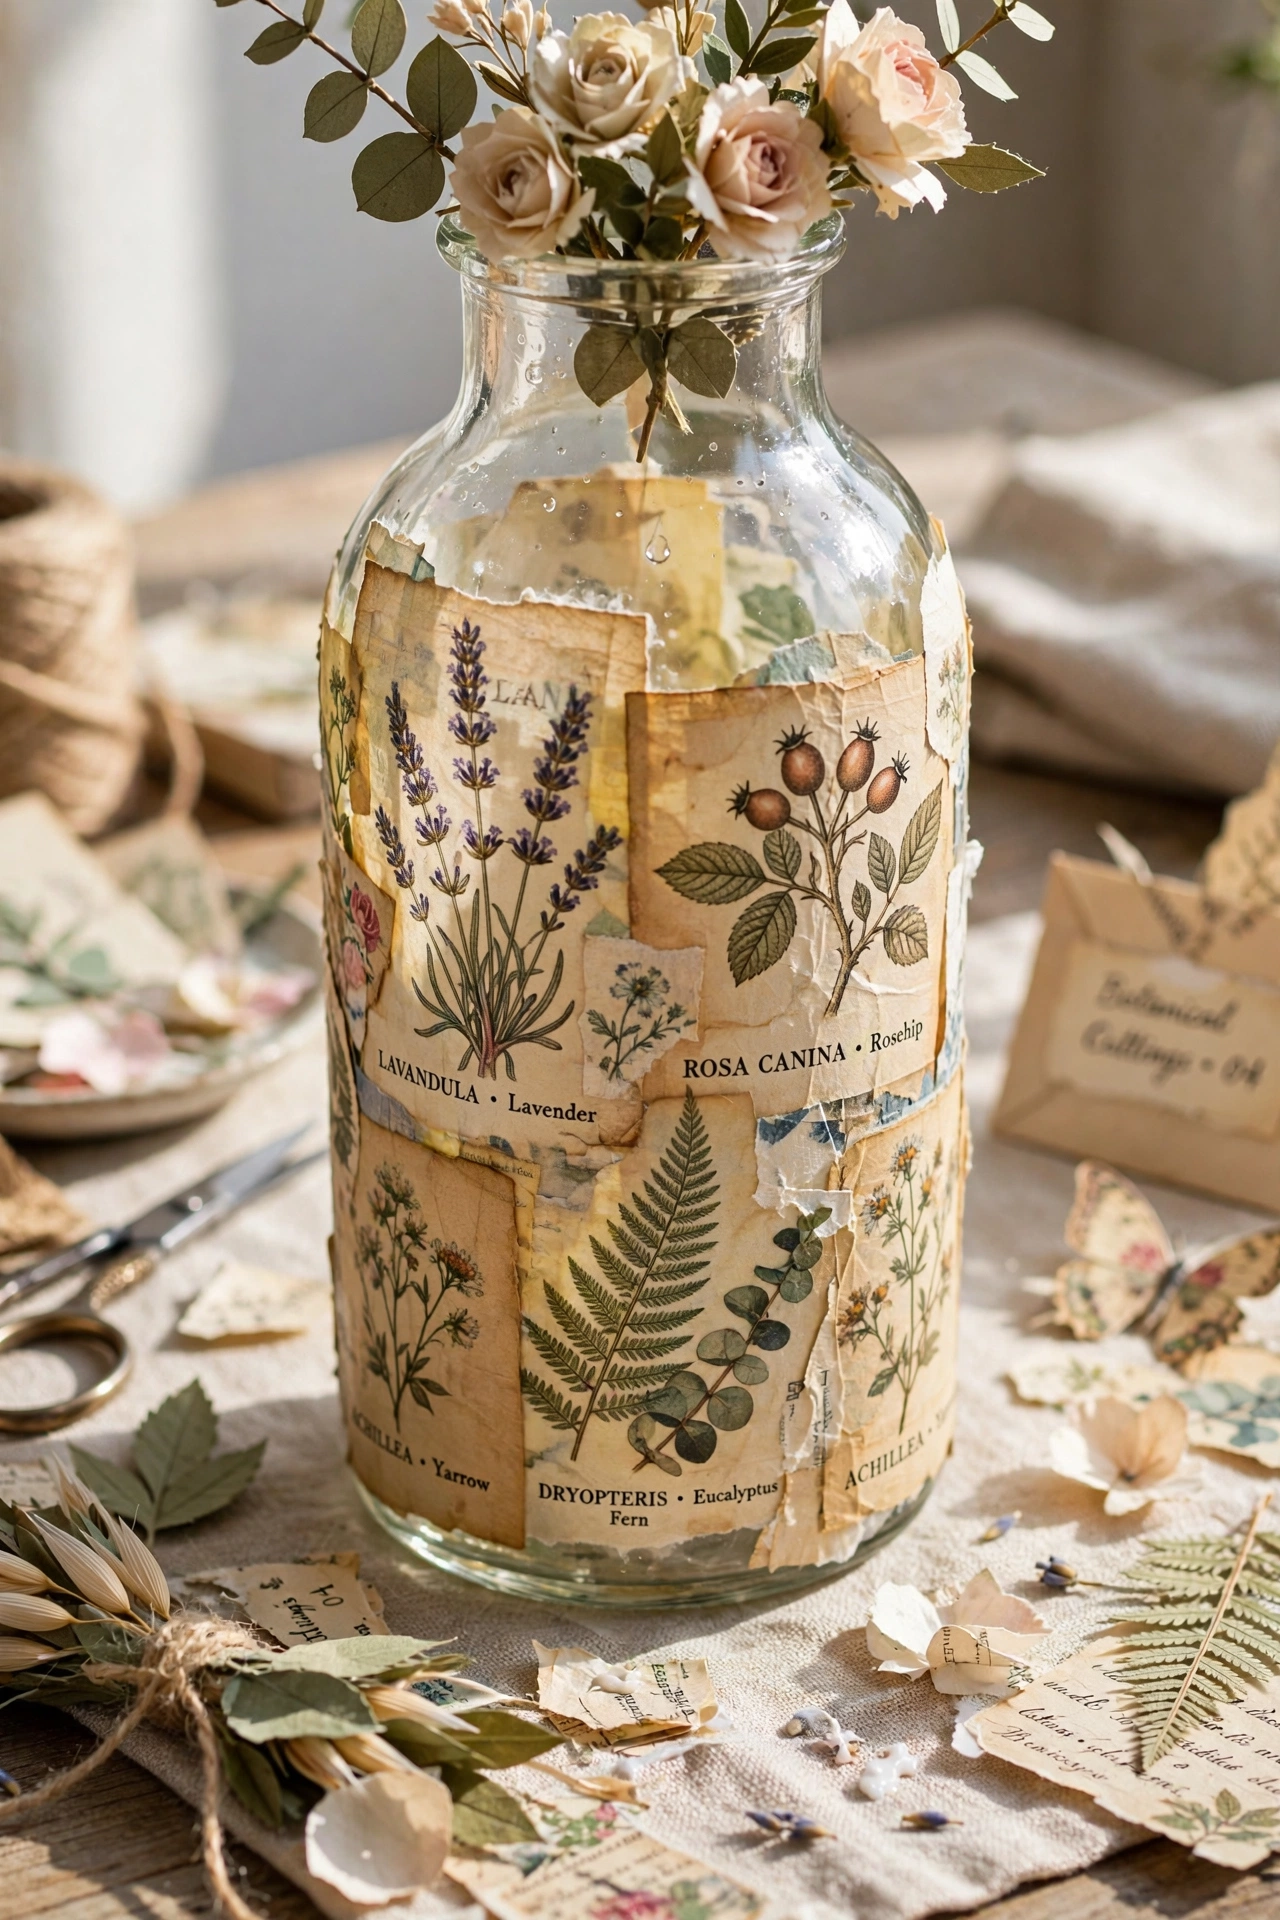
Wrapping a plain glass vase in cut paper botanicals or vintage map pages, sealed with decoupage medium, produces a one-of-a-kind piece that looks store-bought. You need a thrift-store vase, printed napkins or paper sheets, and matte Mod Podge; it takes about an hour plus drying time. The problem is wrinkling, so work in small sections, smooth with a damp brush, and use thin paper that conforms to curves.
Try it: Seal the outside with a final coat rated for light moisture so it survives being near water.

09
09. Paper Strip Lanterns
Woven paper strip lanterns in warm neutrals give off the same glow as expensive rice-paper fixtures for a few dollars. Cardstock strips, a glue stick, and an LED tea light are all it takes, about 30 minutes per lantern. The secret to the grown-up look is a restrained palette, all cream or all kraft, instead of rainbow strips, which instantly reads as party decor.
Try it: Use only battery LED candles inside, real flames and paper are never a combination worth trying.
10
10. Woven Paper Placemats
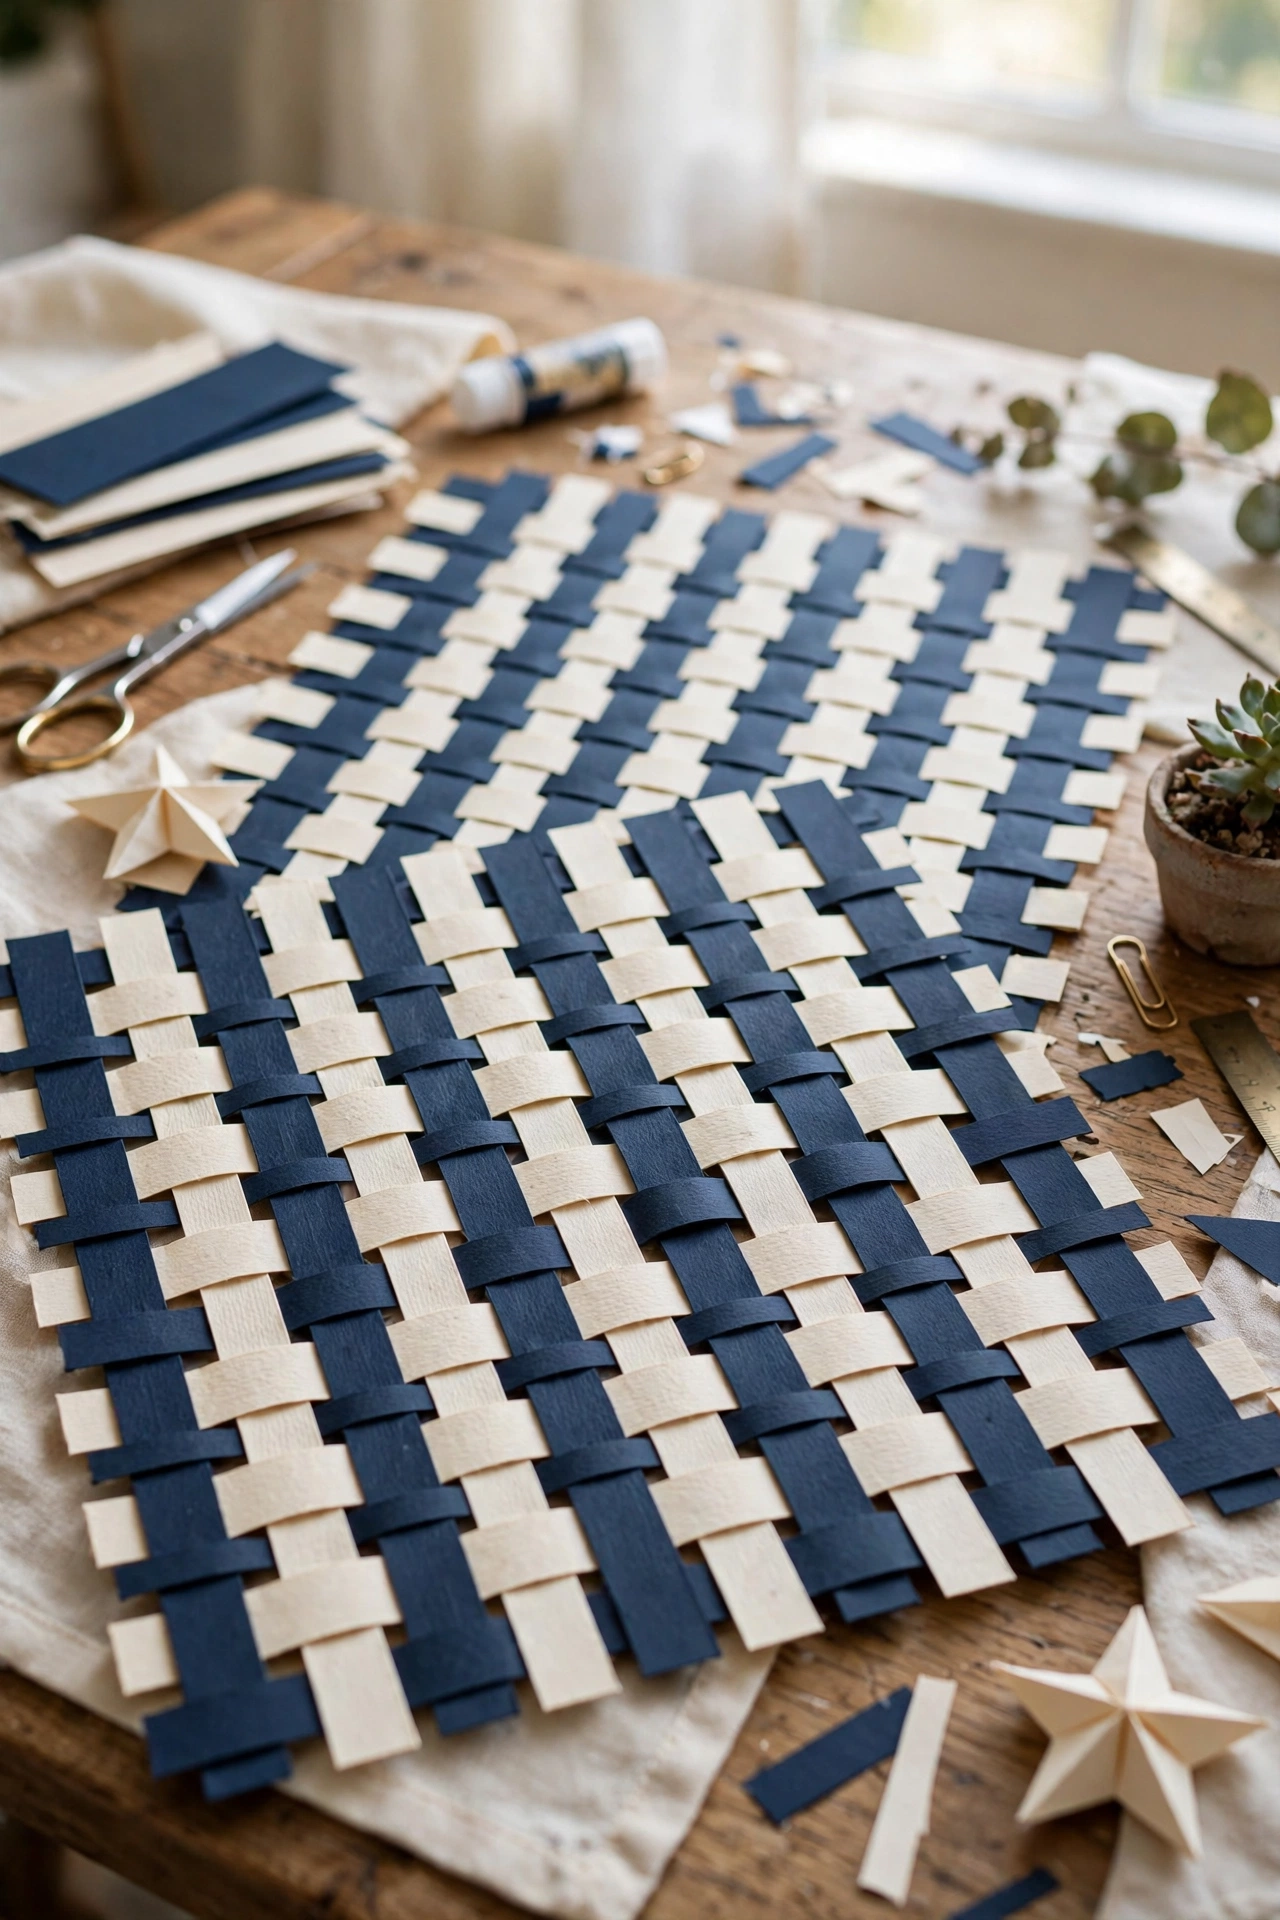
Weaving cardstock strips into placemats gives your table a handmade textile look without any sewing. You need two contrasting cardstock colors cut into strips, plus clear contact paper or laminate to seal them; a set of four takes about two hours. The weaving itself is simple over-under, and sealing them makes the set genuinely usable for daily meals instead of decoration-only.
Try it: Choose colors pulled from your dining room, since matching placemats look deliberate rather than improvised.
11
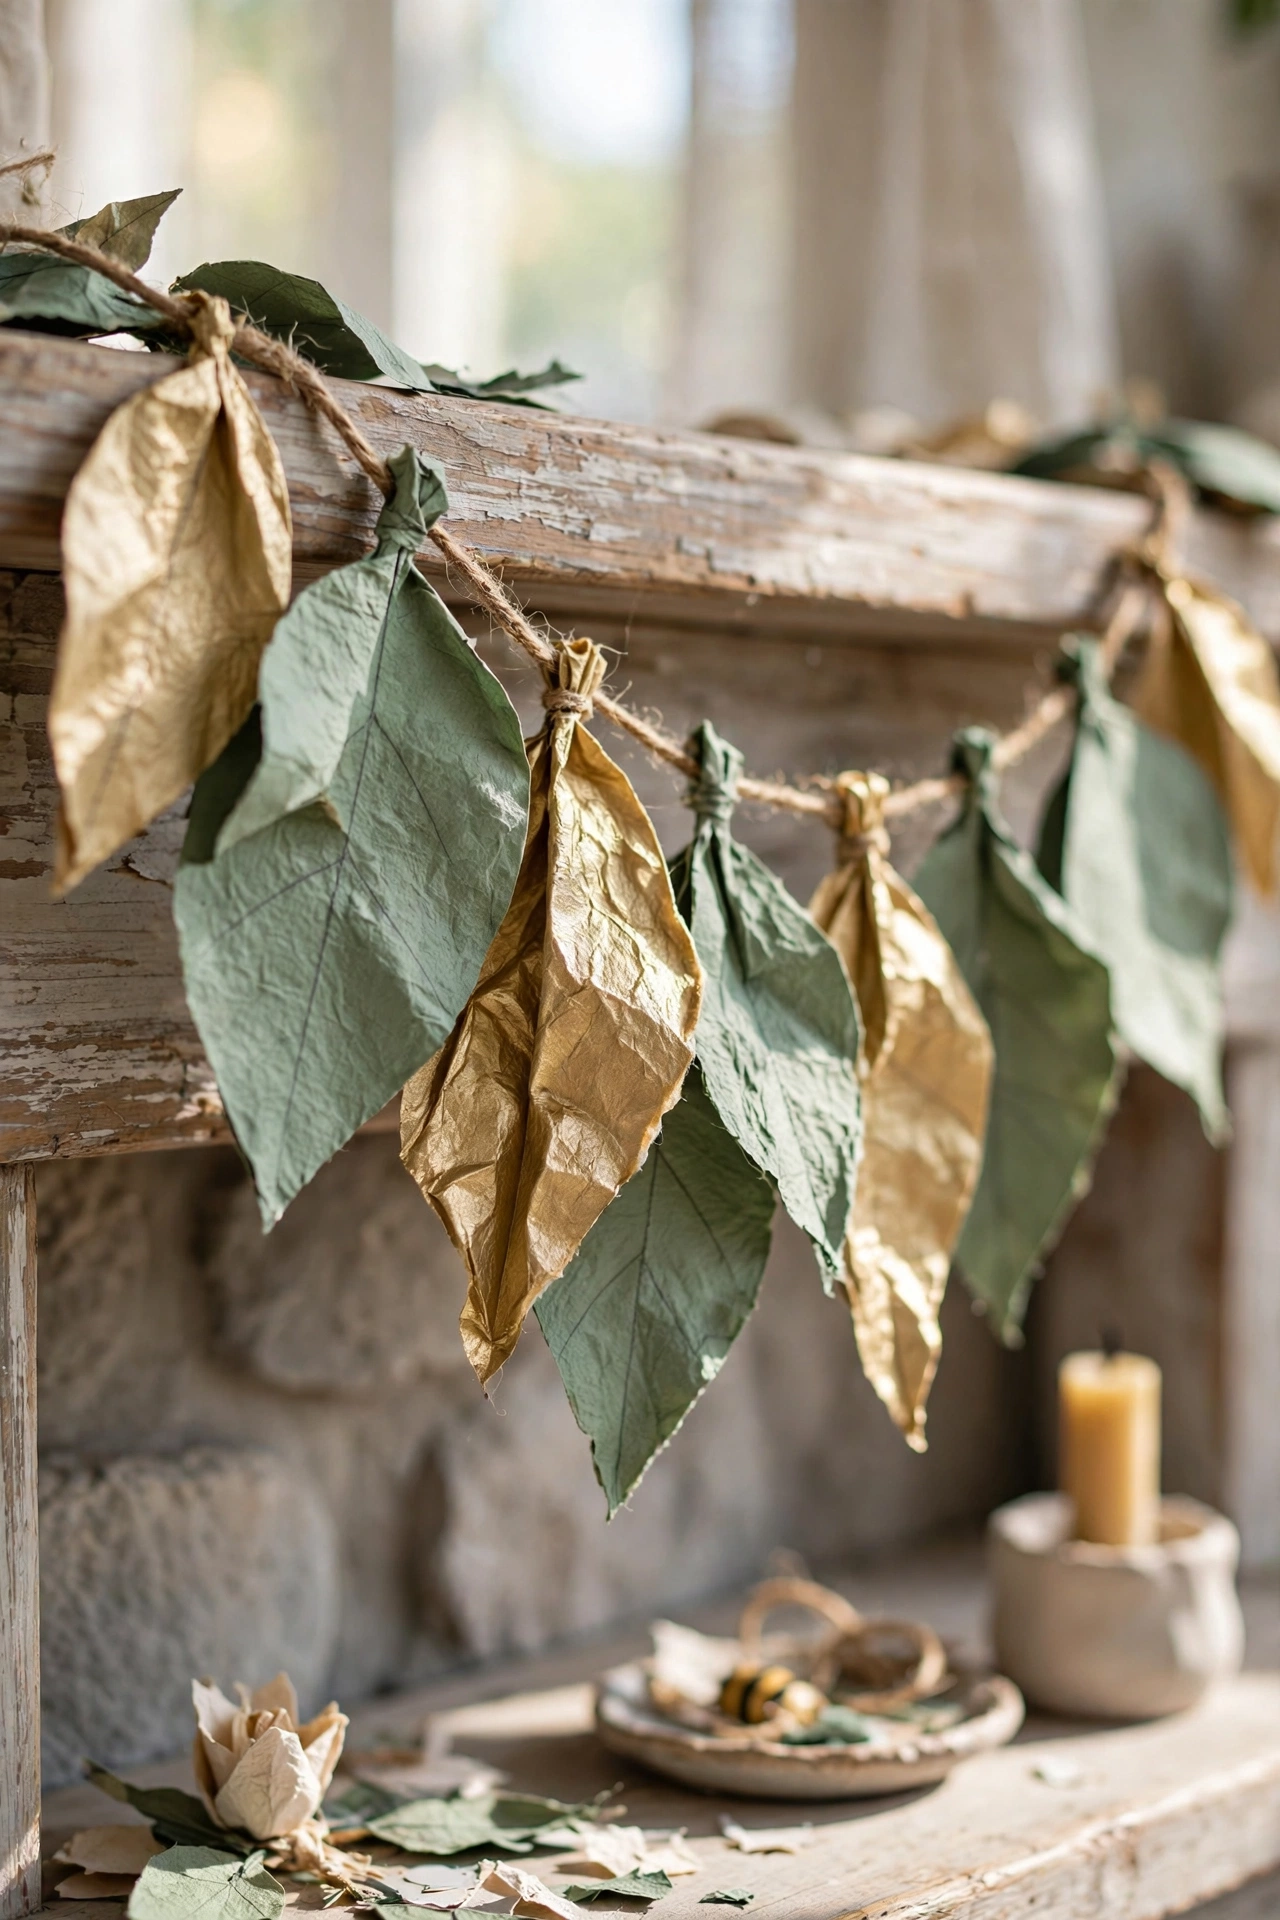
11. Paper Leaf Mantel Garland
Strung paper leaves in eucalyptus greens and soft golds make a mantel garland that rivals the faux versions sold for $40. Cardstock, a leaf template, and twine are the supplies, and cutting and stringing takes about 90 minutes. Realism comes from folding each leaf down the center for a vein crease, which is the single detail that separates convincing garlands from flat cutouts.
Try it: Mix three shades of green instead of one flat color, since real foliage is never uniform.
12
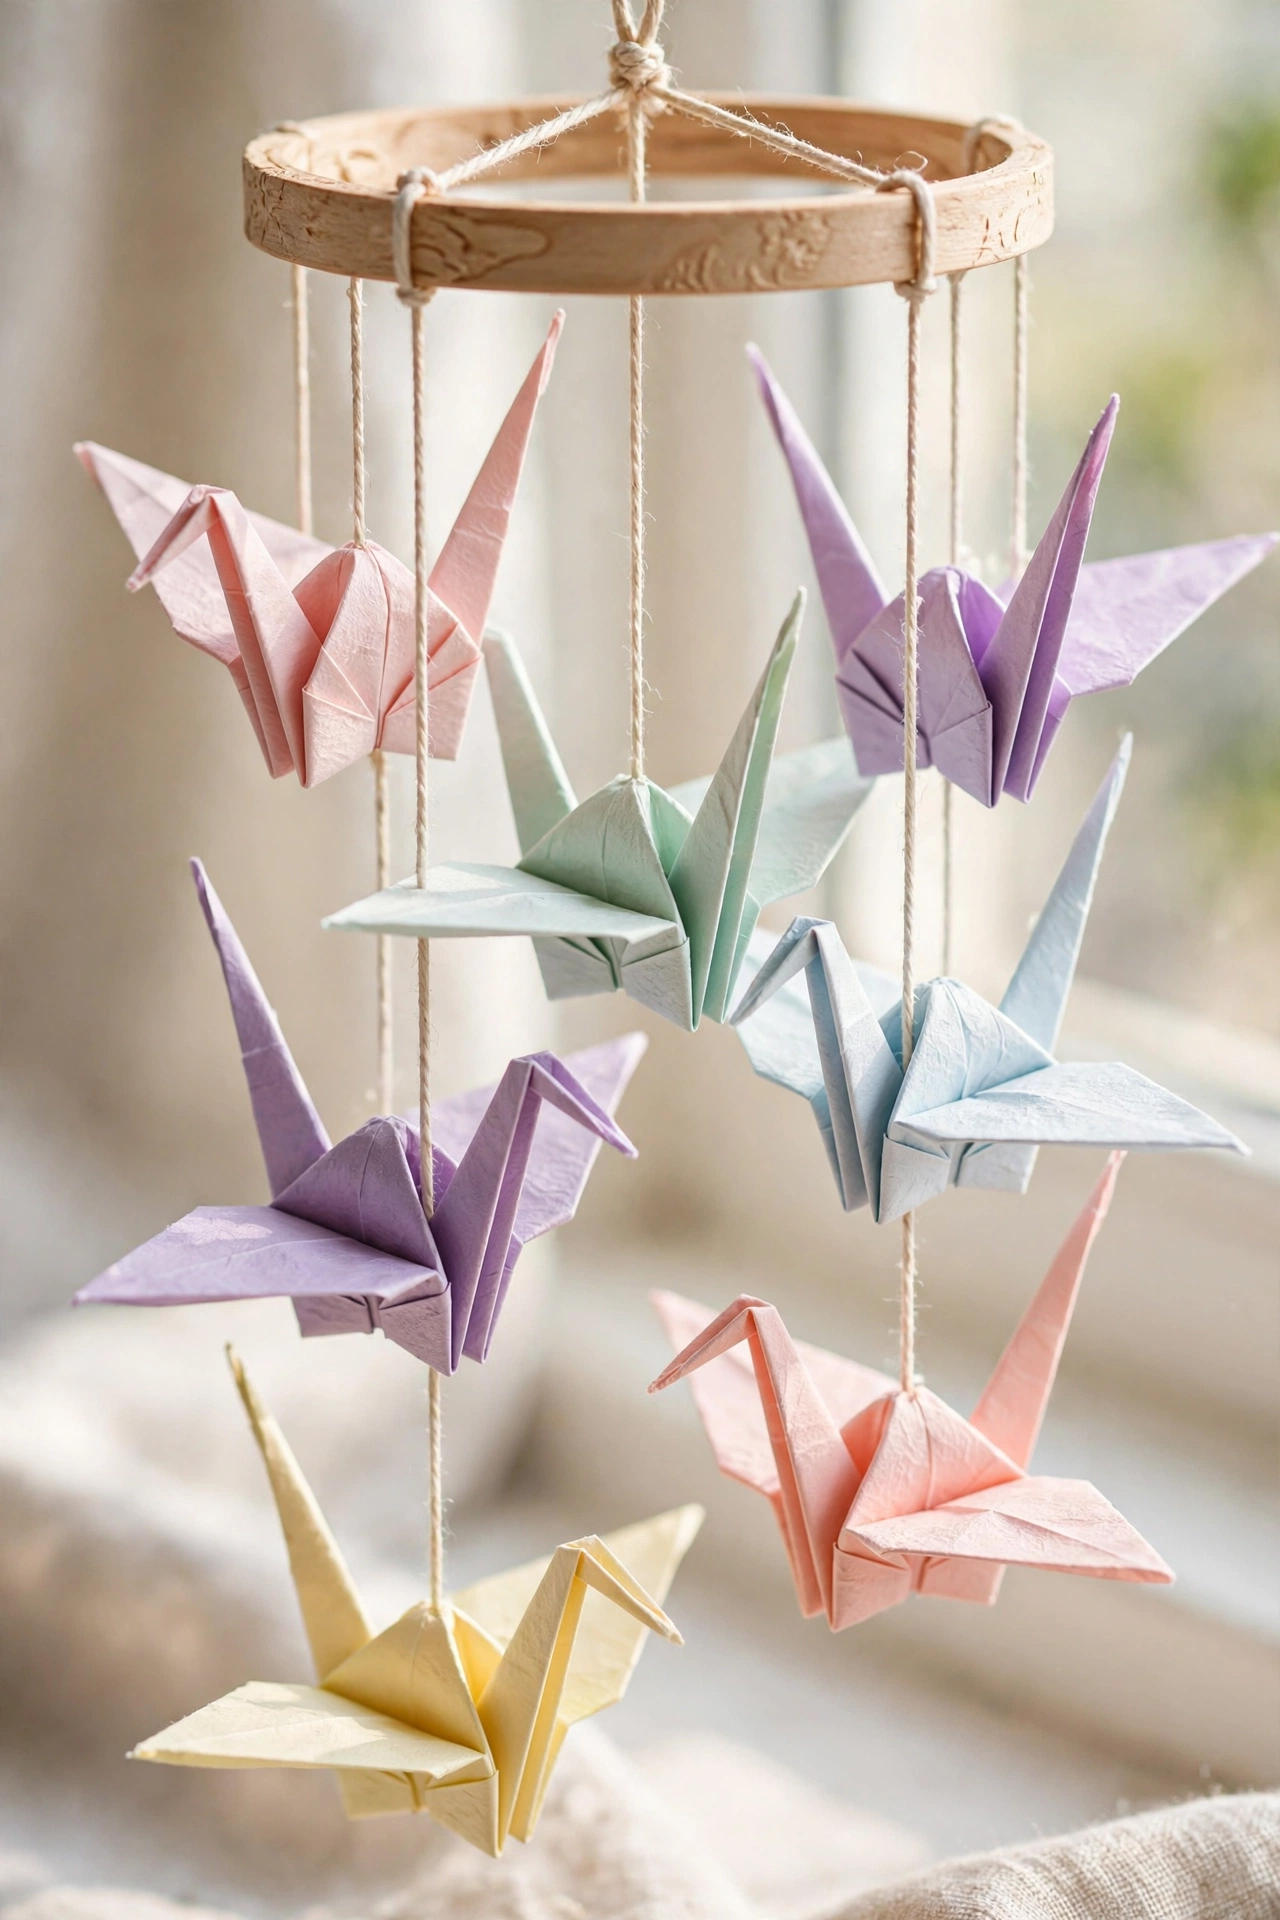
12. Origami Crane Mobile
A hundred folded cranes hung from a wooden hoop on fishing line becomes a sculptural mobile that moves gently in the air. Origami paper, clear thread, and an embroidery hoop are the supplies; plan an evening, since each crane takes about three minutes. Cranes strung at varied heights catch light differently, which is what makes the finished mobile feel dynamic rather than static.
Try it: Use gradient paper that shifts from one color to another across the set for an ombre effect.
13
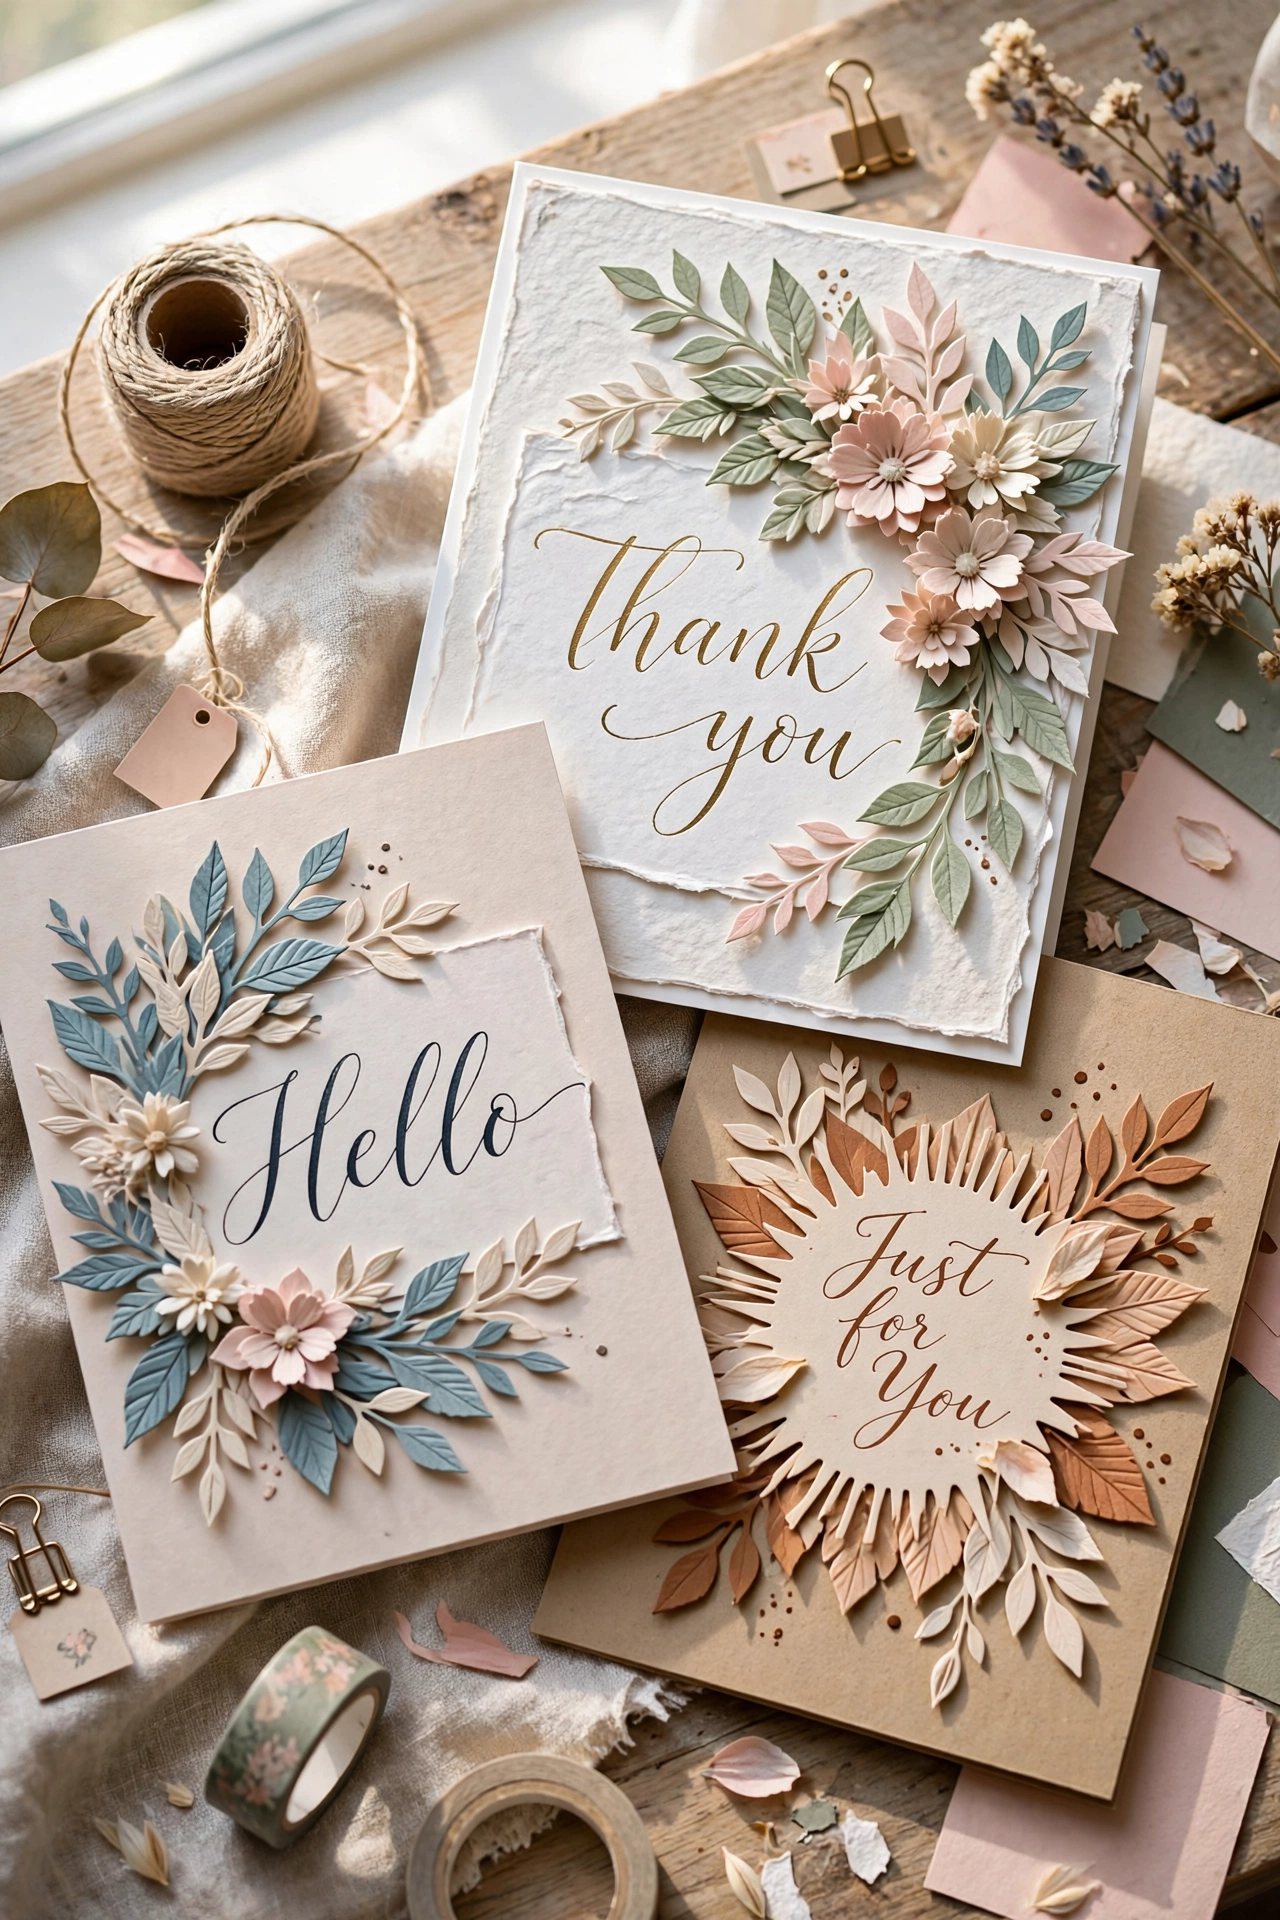
13. Hand-Lettered Card Set
A set of six matching greeting cards with hand-lettered sentiments and simple paper layers costs less than one boutique card. Heavyweight card blanks, a brush pen, and a few paper scraps take about two hours for the full set. The reason store cards cost $6 is presentation, so mount each design on a contrasting mat layer before gluing it to the blank and the whole card looks finished.
Try it: Write the sentiment first in pencil, trace in pen, then erase, so the lettering stays confident.
14
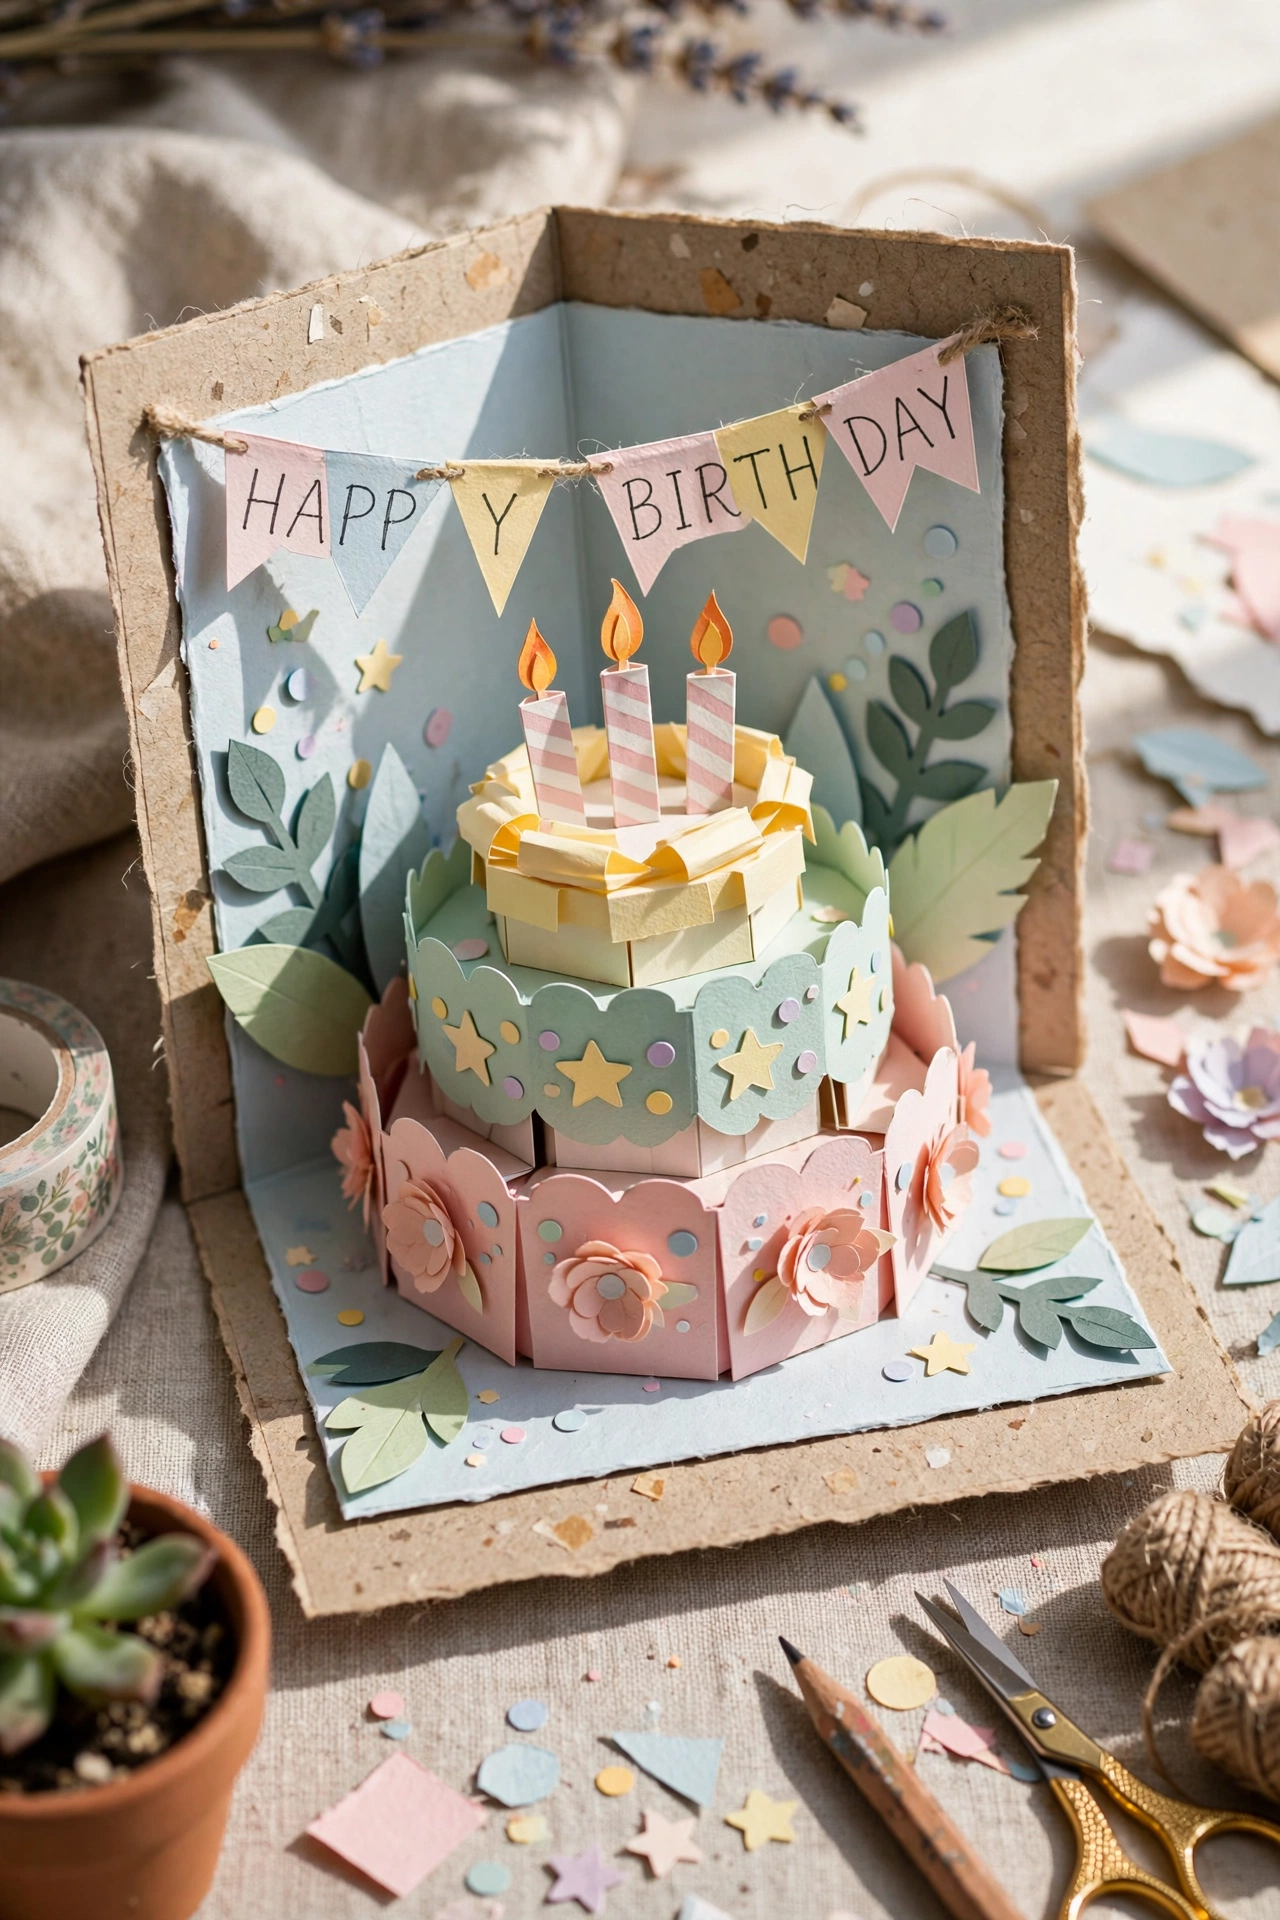
14. Pop-Up Birthday Cards
A pop-up mechanism inside a handmade card, a cake that springs up or balloons that rise, turns a $1 card into a keepsake people actually keep. Cardstock, a ruler, and a craft knife are the supplies, and the first card takes about an hour while later ones go faster. The mechanism is just two folds and a slit, so the magic comes free once you understand the basic box fold.
Try it: Keep the pop-up element to one simple shape, since one crisp pop beats a cluttered scene.
15
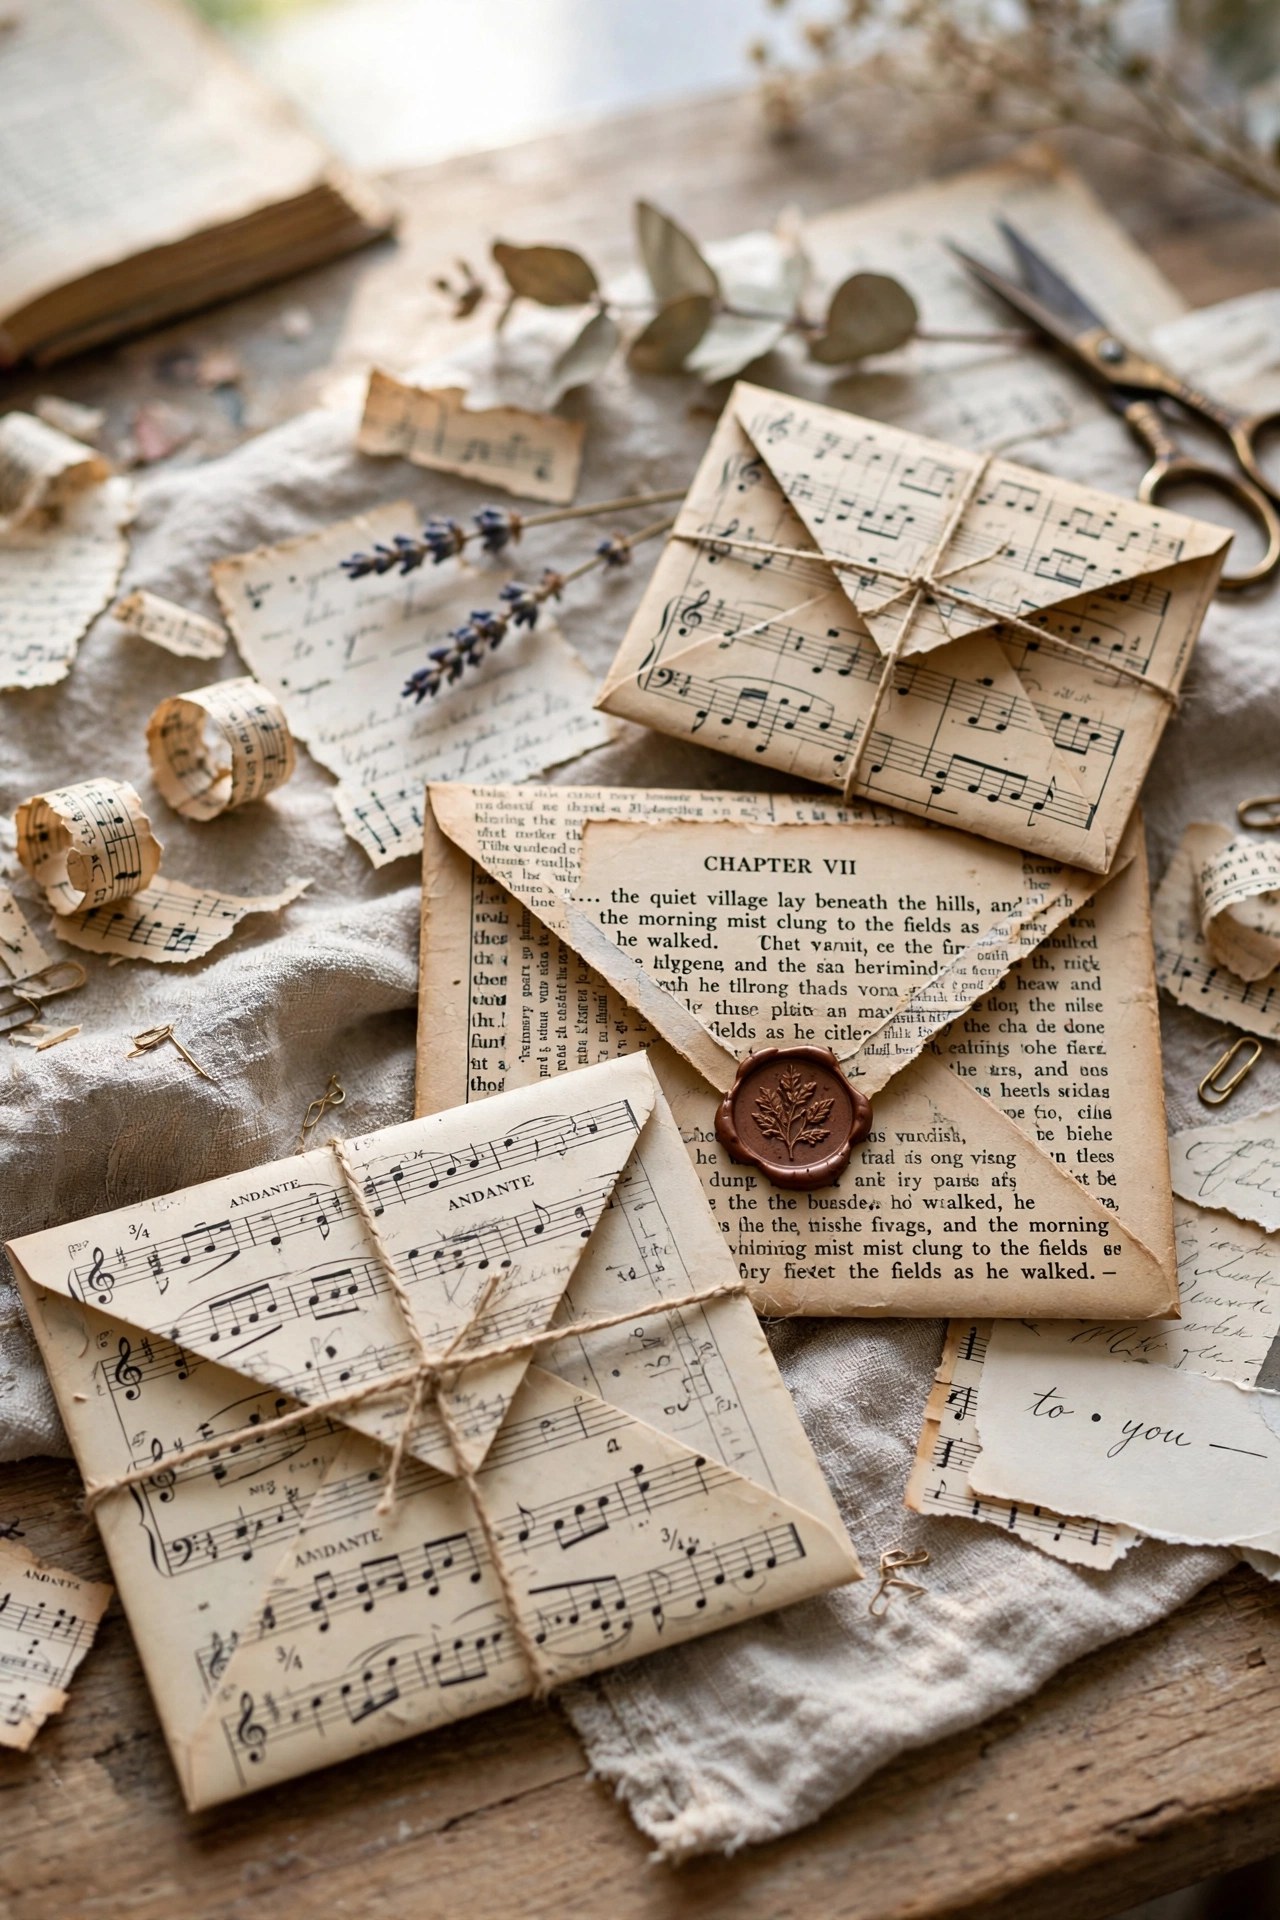
15. Vintage-Page Envelopes
Envelopes folded from old book pages, sheet music, or maps make every letter feel like an event before it is even opened. A paper trimmer, glue stick, and an envelope template are all you need, and each envelope takes under five minutes. The solution to flimsy book paper is lining the inside with a plain sheet, which adds body and keeps the writing private.
Try it: Check the size against your card before folding, since book pages vary and one template does not fit all.
16
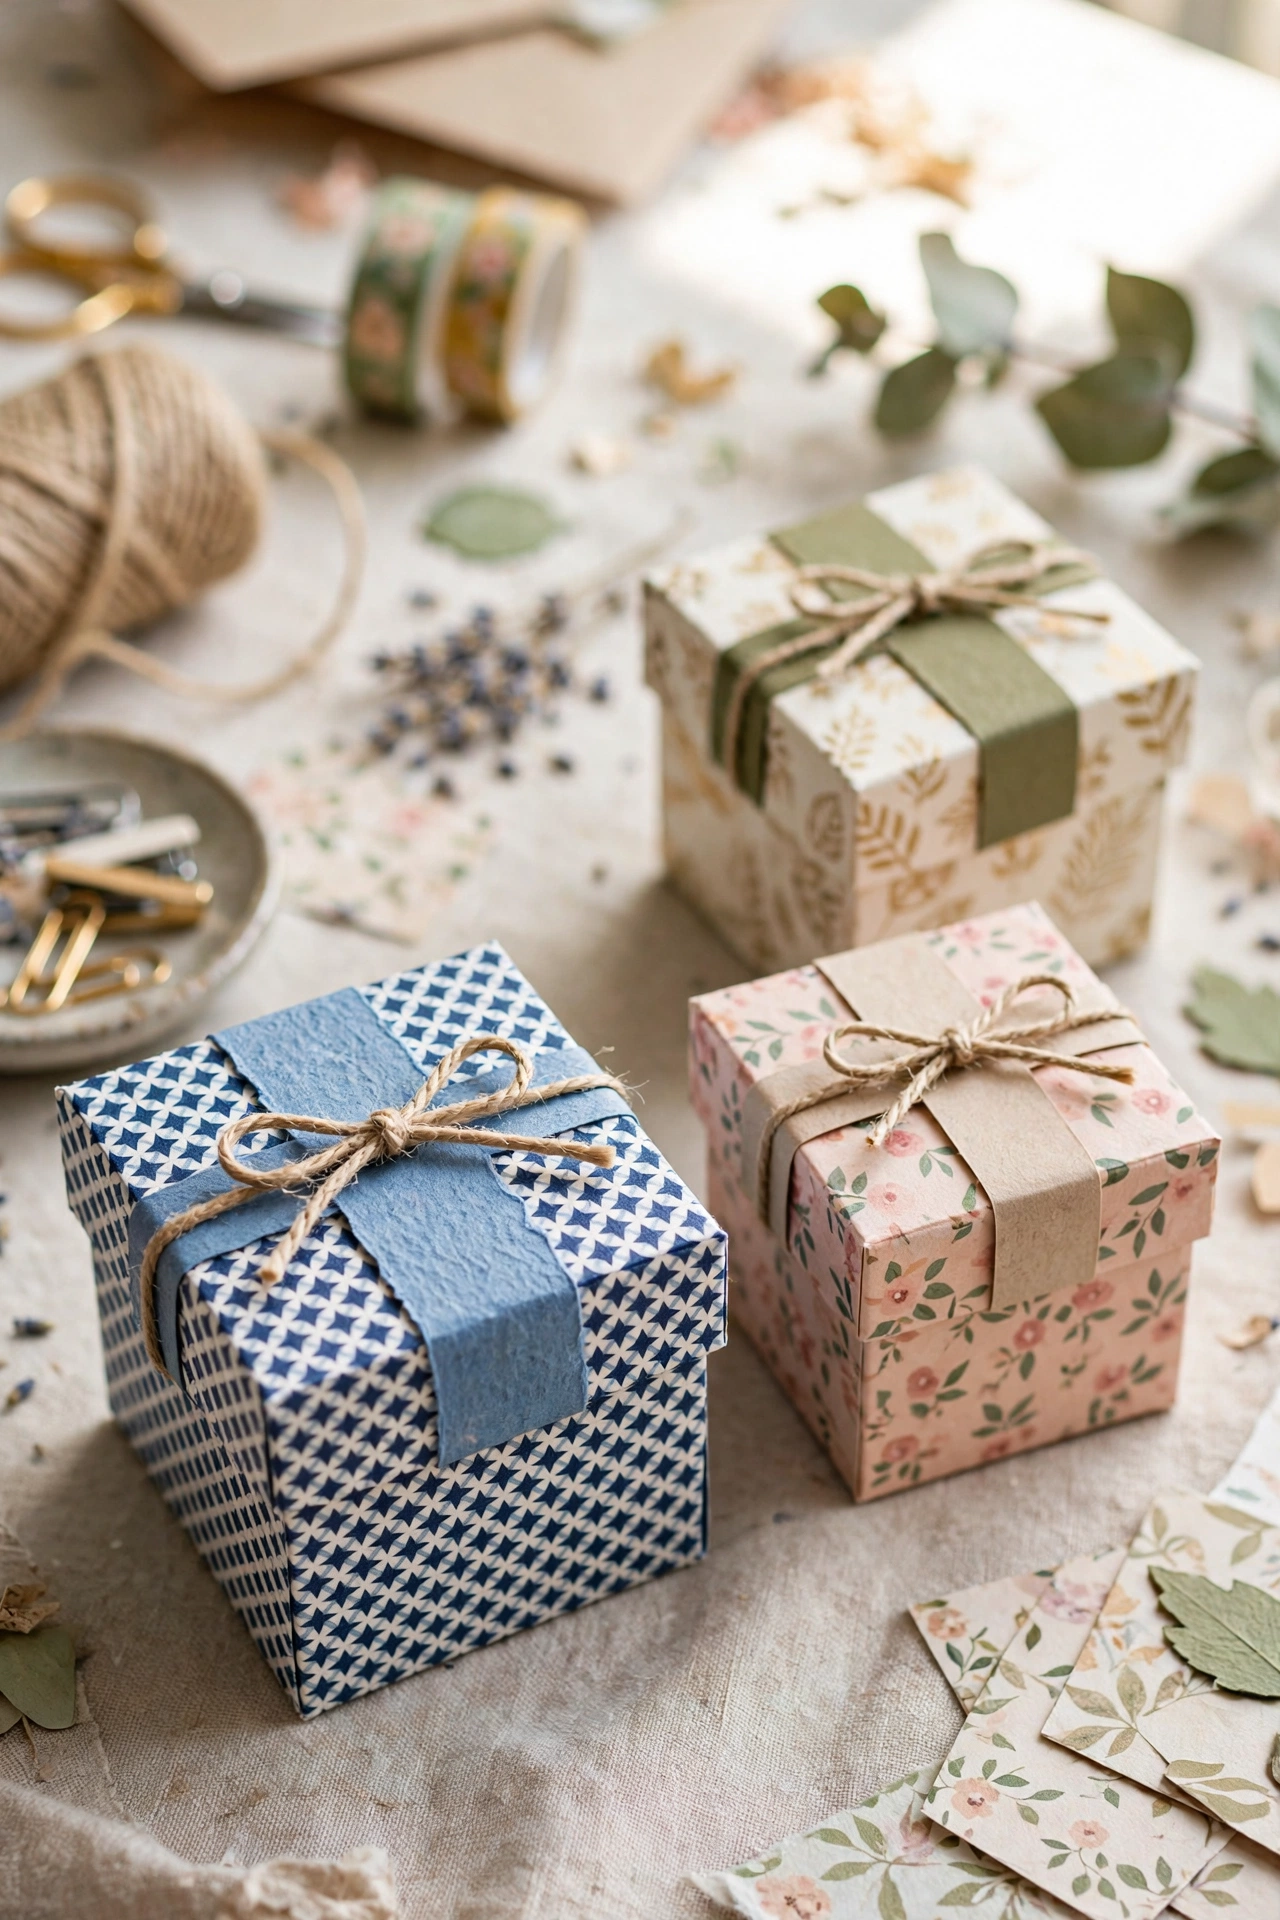
16. Custom Gift Boxes
Small lidded gift boxes from patterned cardstock look like packaging from an expensive shop and take minutes each. Cardstock, a scoring tool, and double-sided tape are the supplies, and one box takes about 15 minutes once you have the measurements. The difference between flimsy and premium is scoring: crisp scored folds give sharp edges that read as professionally made.
Try it: Add a paper band in a contrasting color around the lid for a finish that looks designed rather than folded.
17
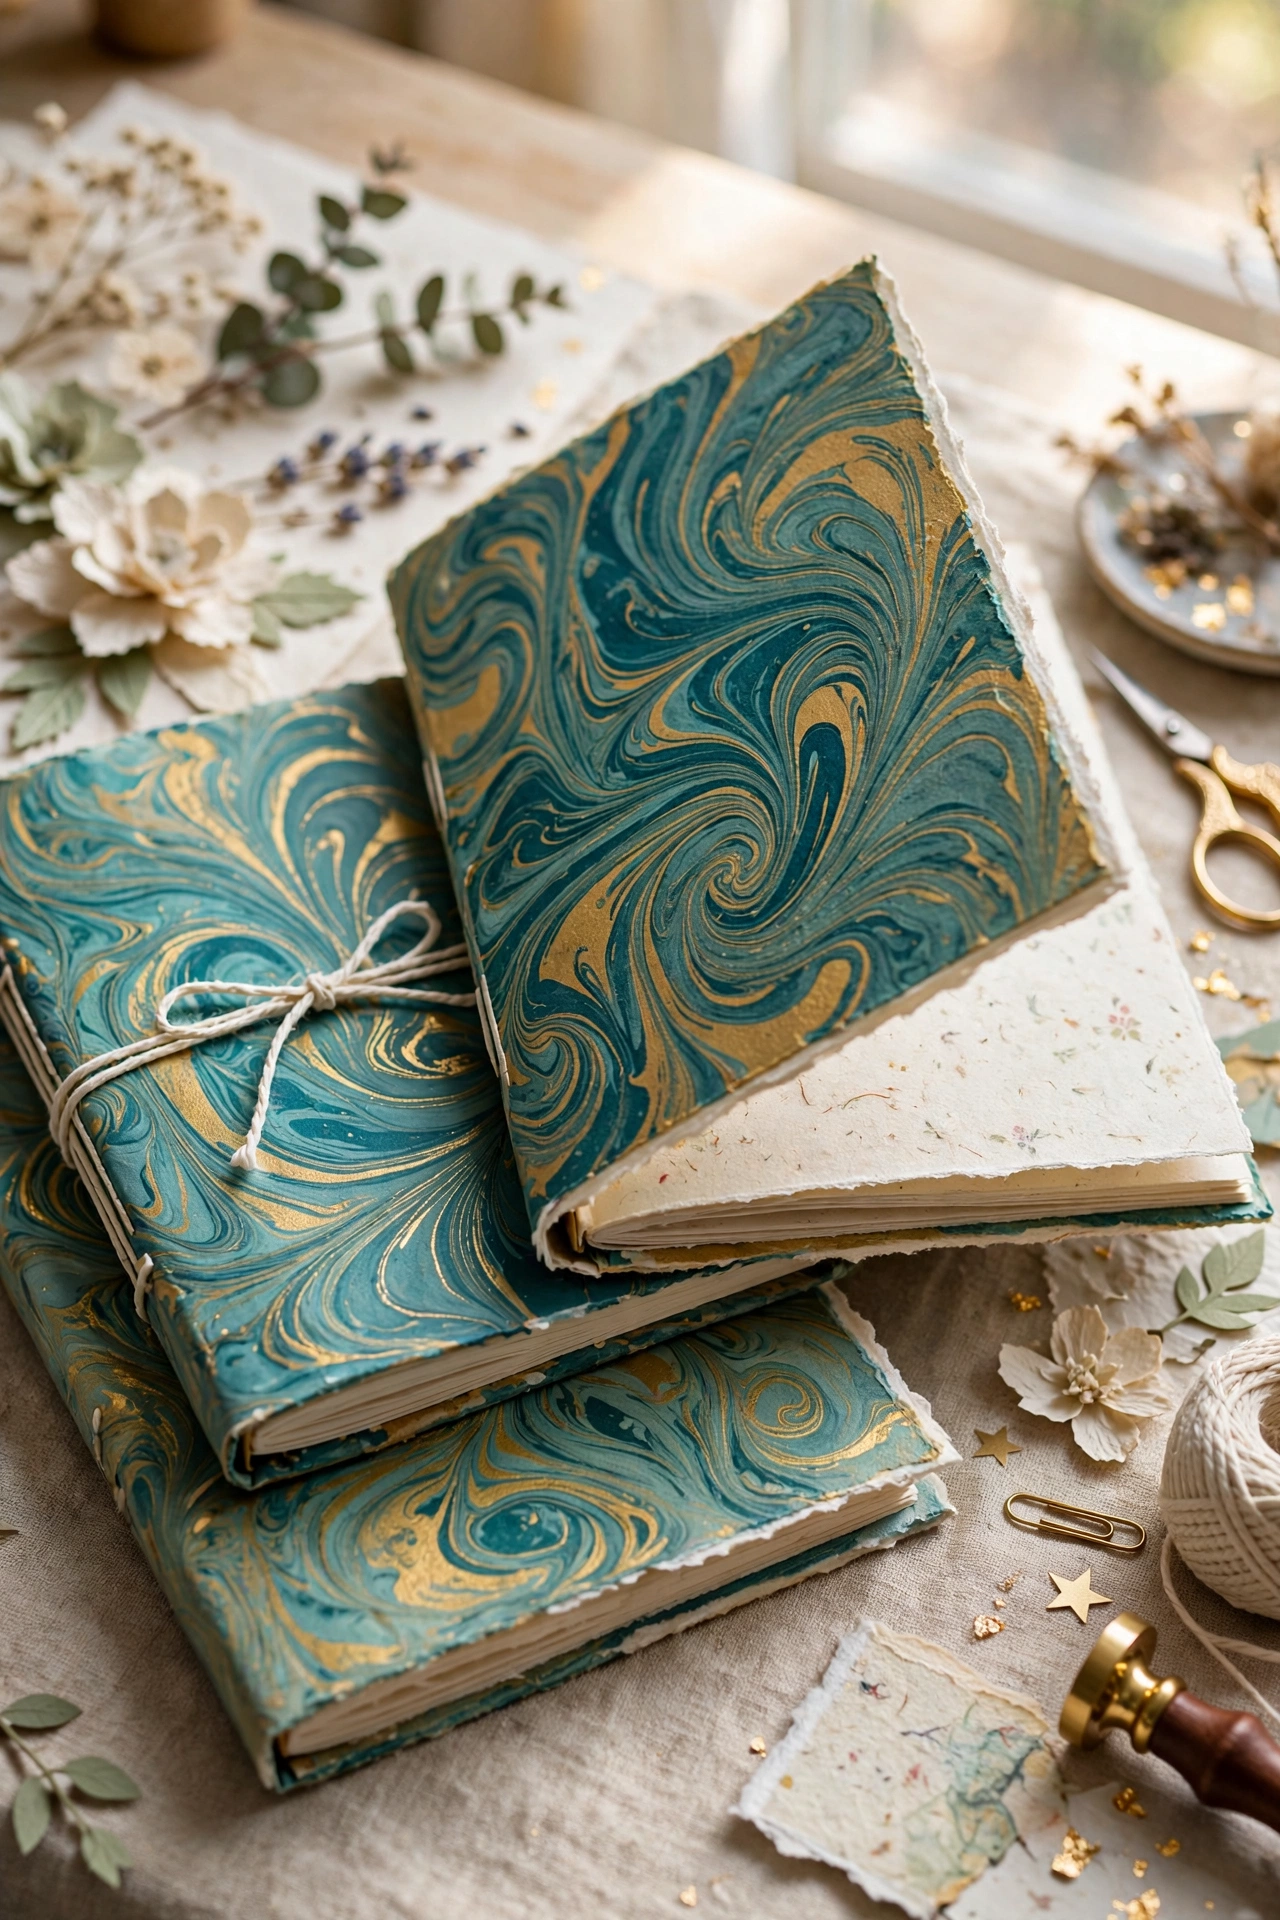
17. Marbled Paper Journal Covers
Marbled paper, swirled with shaving-cream and ink, wrapped around plain notebooks creates journals that look like leather-bound finds. Plain notebooks, shaving cream, food coloring or ink, and glue take about an hour for three covers. The marbling step feels unpredictable, but that is the point: no two covers match, which is exactly what makes them giftable.
Try it: Let the marbled sheets dry fully flat under a book before gluing so the cover does not warp.
18
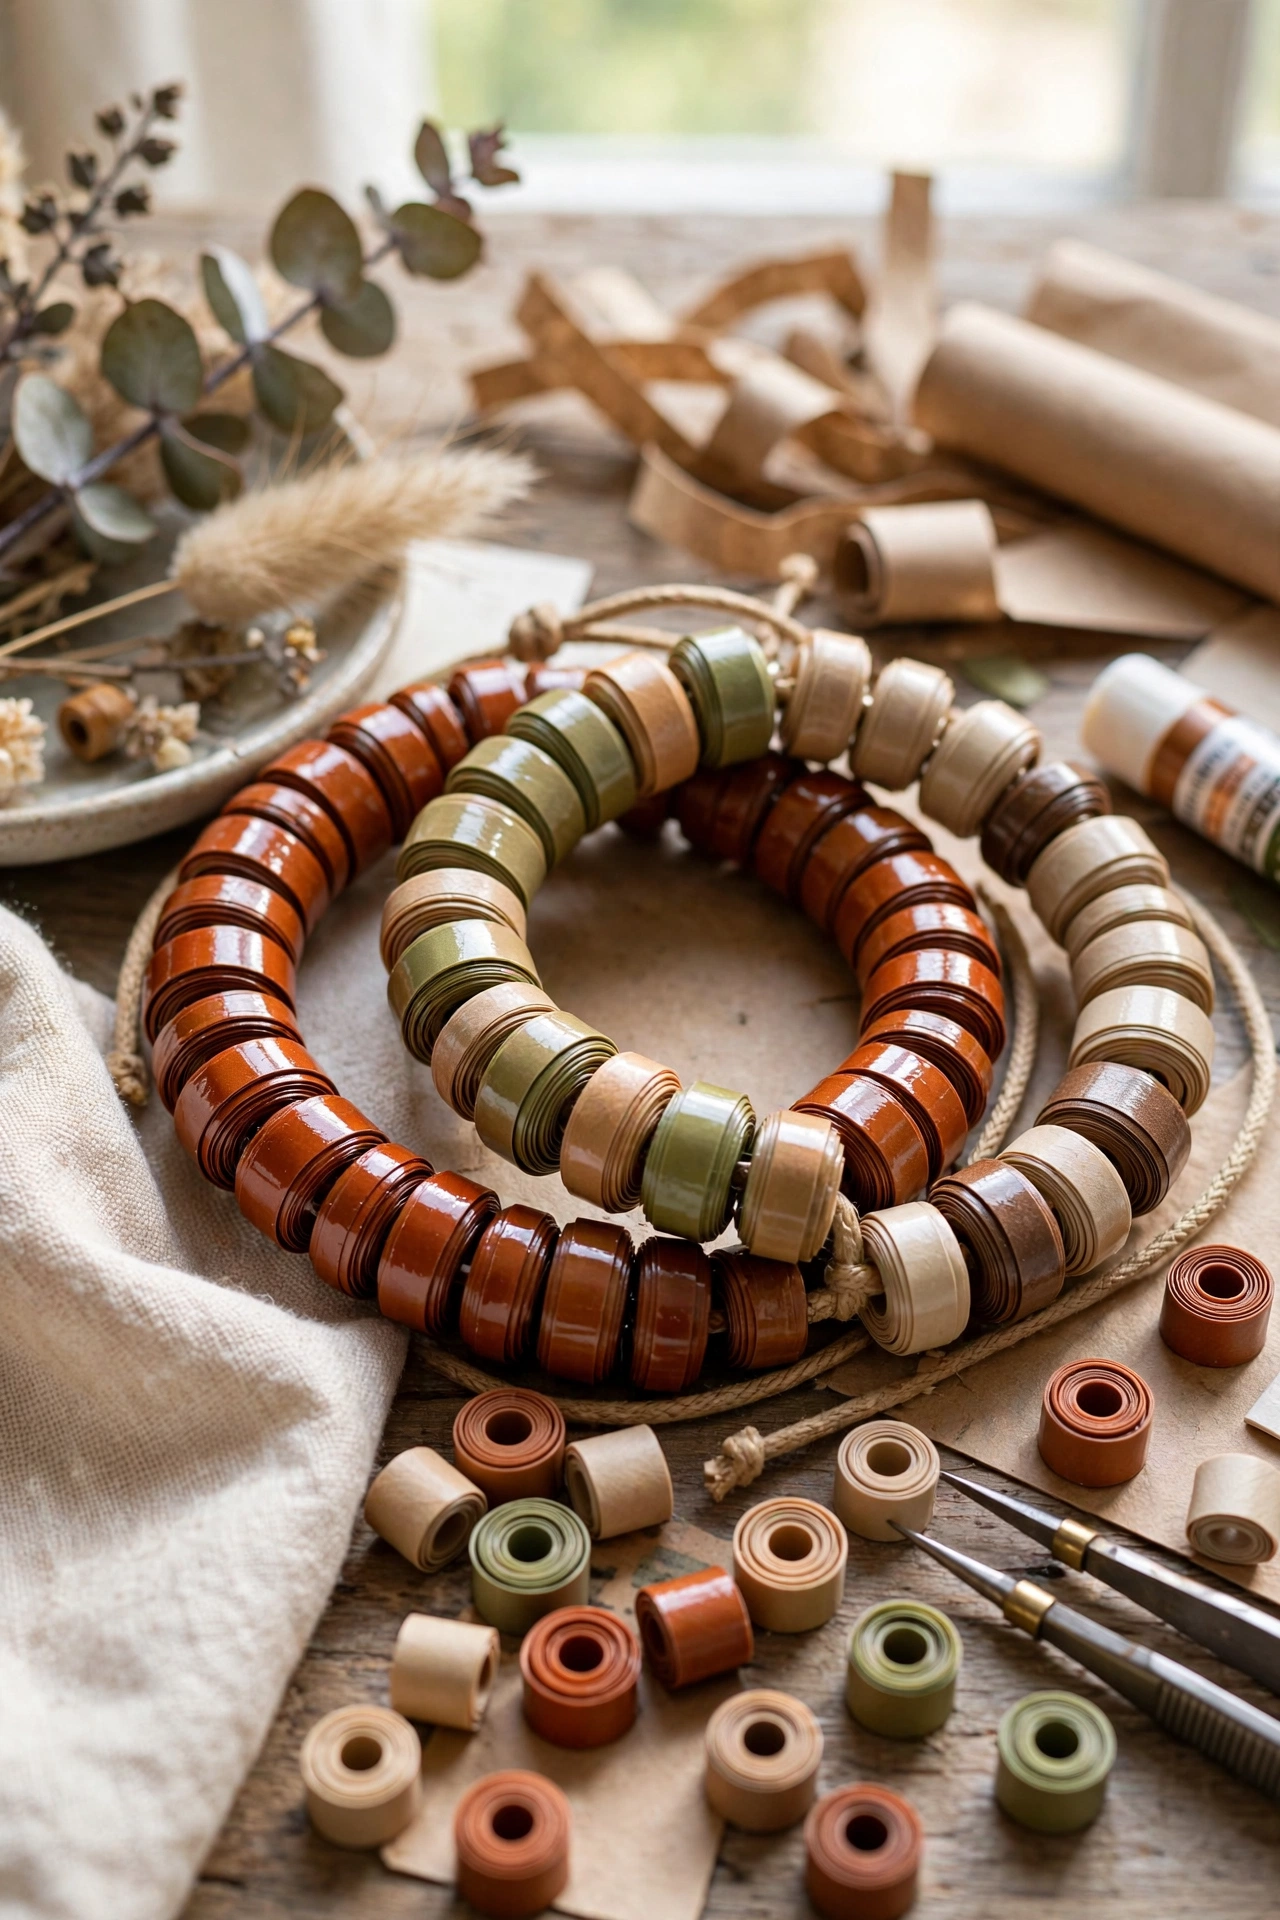
18. Paper Bead Bracelets
Rolled paper beads sealed with varnish look like glazed ceramic or wood beads, and the patterns come from the printed paper you choose. Magazine pages, a bead roller or skewer, and clear varnish are the supplies; a bracelet takes about an hour including drying. The secret is rolling tightly and sealing with three thin varnish coats, which makes the beads genuinely waterproof and durable.
Try it: Roll beads from one magazine spread so the bracelet has a coordinated color story.
19
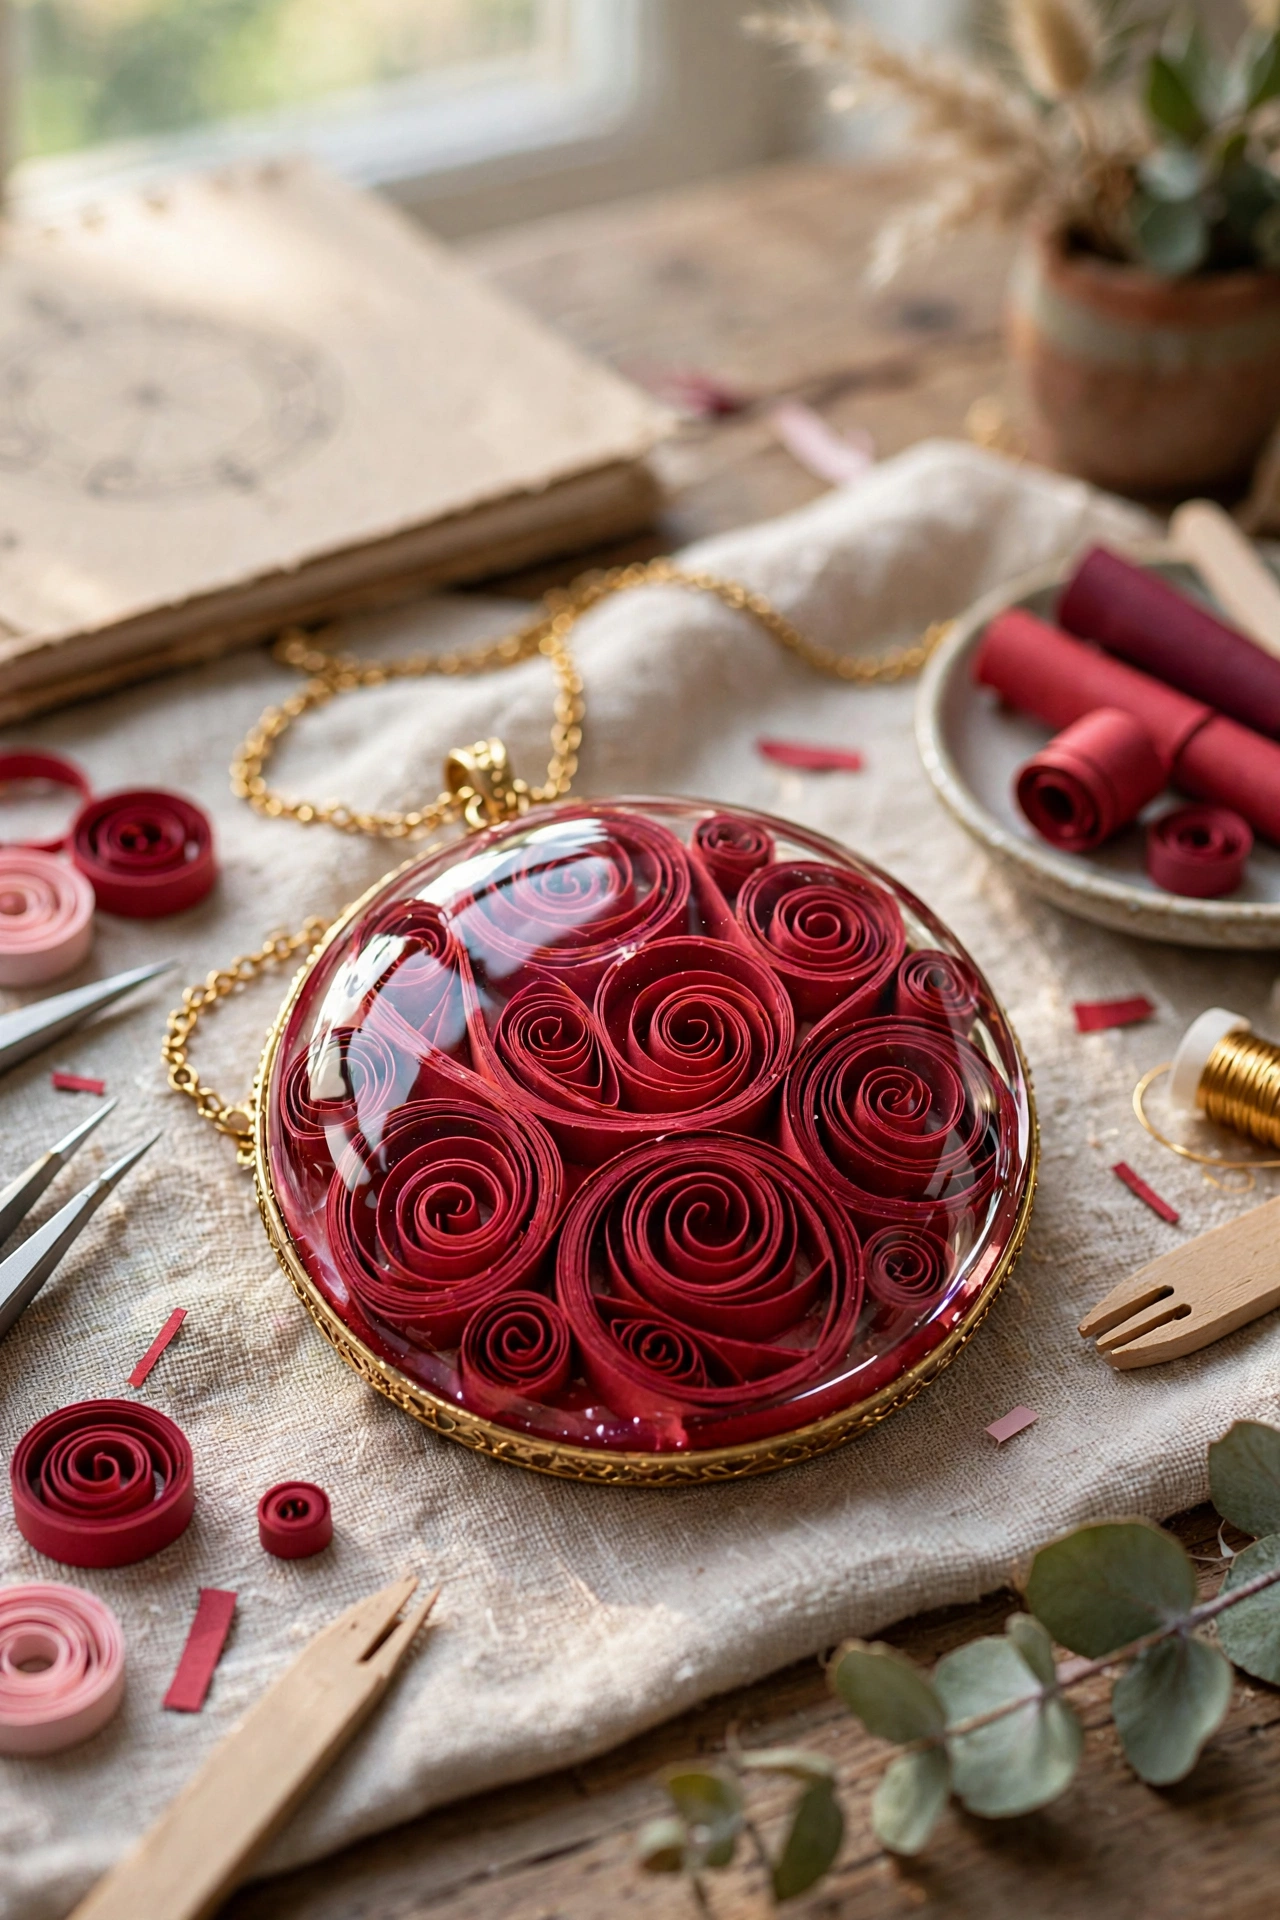
19. Quilled Pendant Necklaces
A tight quilled medallion, dome-sealed with resin or dimensional glaze, becomes a pendant that looks like enamel work. Quilling strips, a pendant tray or bezel, and glaze are the supplies, and each pendant takes about an hour. The glaze is what sells it: a domed clear coat turns matte paper coils into something that catches light like glass.
Try it: Work the quilling slightly smaller than the bezel, since the glaze spreads and needs a margin.
20
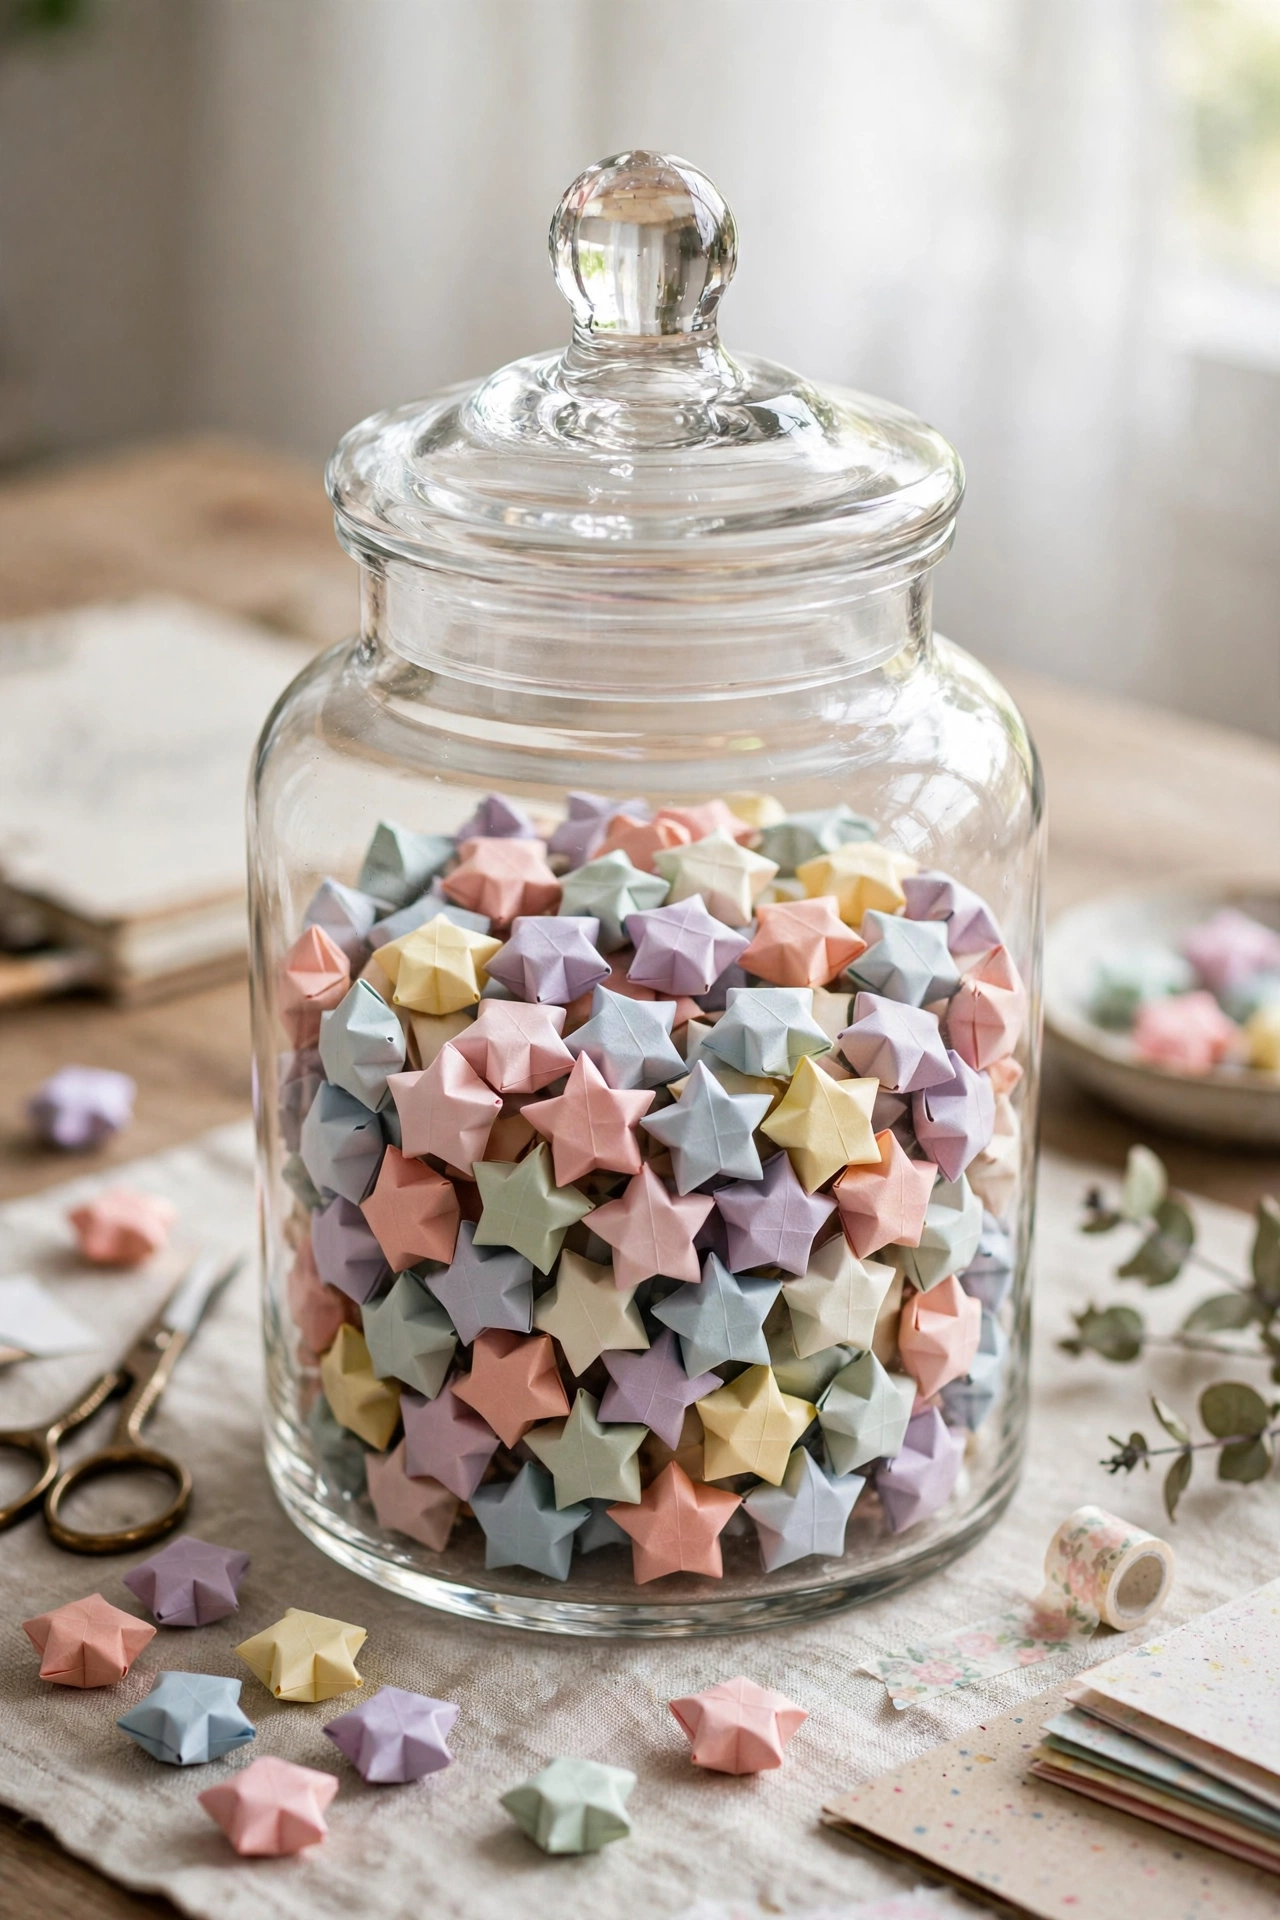
20. Lucky Star Apothecary Jar
Hundreds of tiny folded lucky stars filling a glass jar look like candy and work as decor, a gift, or a wish jar. Origami star strips and a glass jar with a lid are all you need, and folding is a perfect TV-time activity at about one star per minute. The project is pure repetition, which is exactly why it is relaxing, and the finished jar needs no further styling.
Try it: Mix metallic gold strips in with your main color so the jar sparkles when light hits it.
21
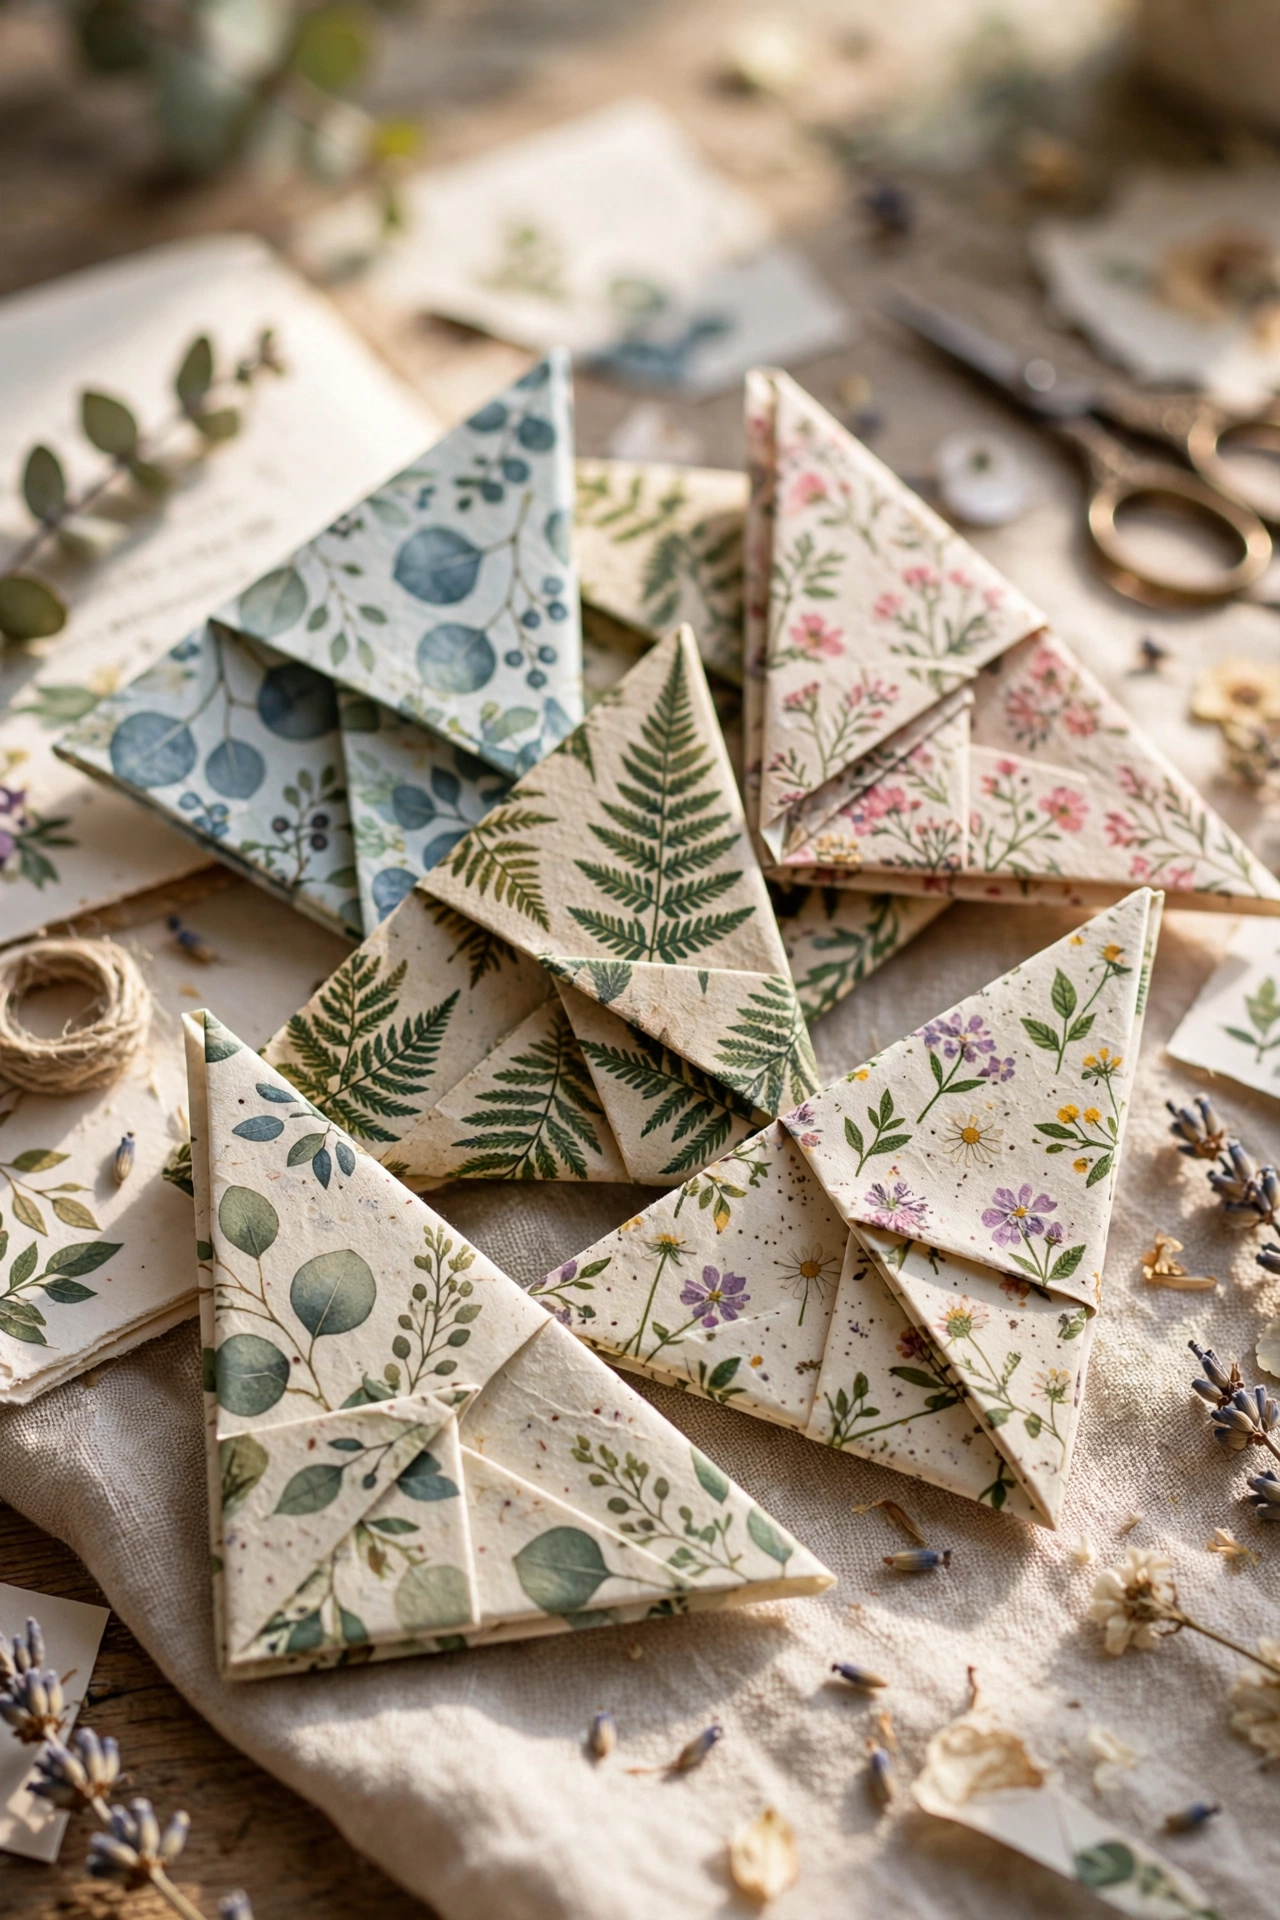
21. Origami Corner Bookmarks
Folded corner bookmarks, plain or decorated with tiny faces and patterns, make genuinely useful gifts that cost almost nothing. Origami paper and a pen for details are the supplies, and each bookmark takes about five minutes. The grown-up version uses sophisticated patterns like marbled or botanical paper instead of cartoon prints, so the set looks like a boutique stationery gift.
Try it: Bundle four bookmarks with a ribbon and a hand-written tag for a gift that looks complete.
22
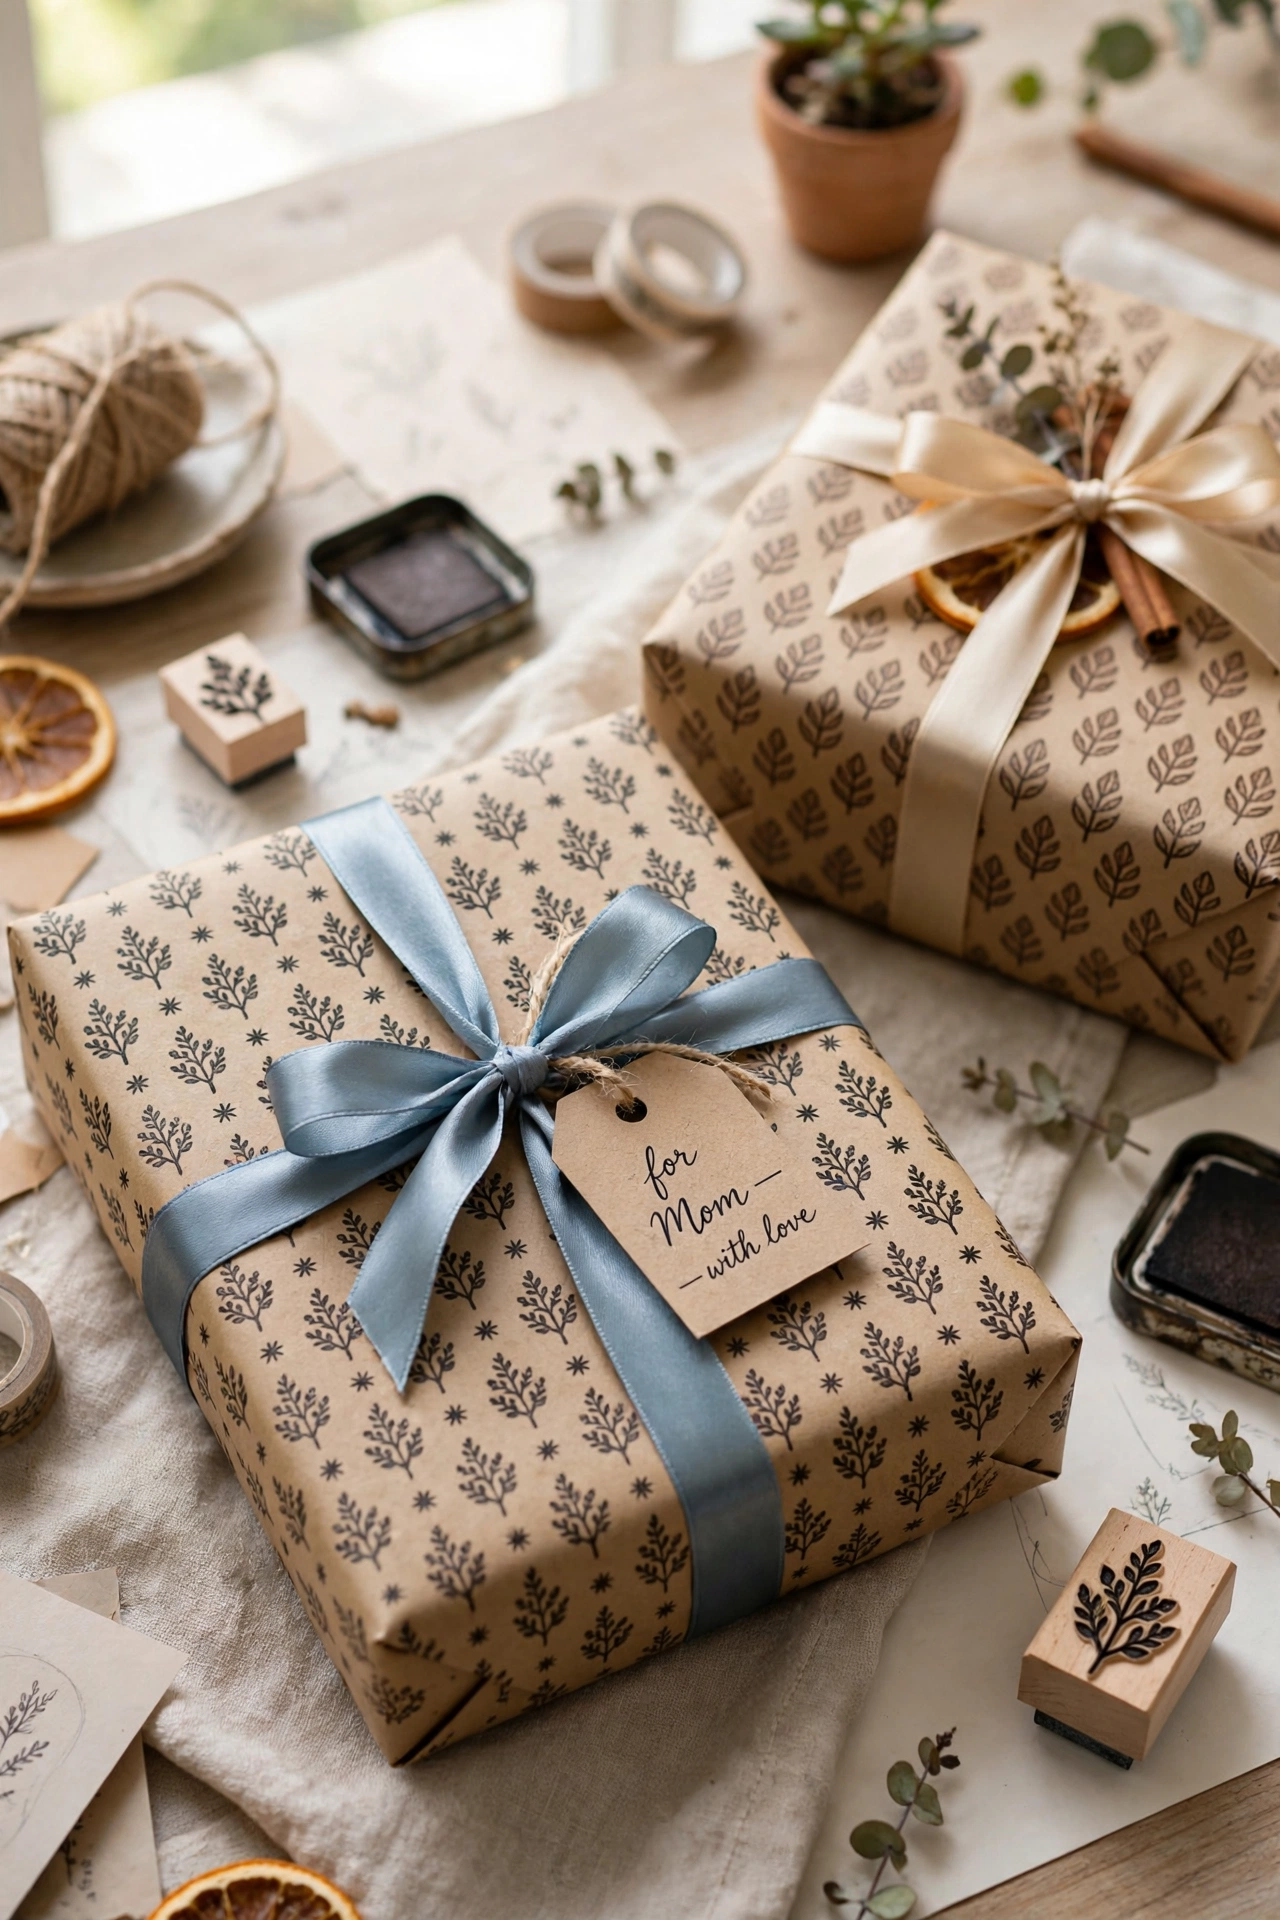
22. Personalized Gift Wrap
Stamping or hand-drawing on kraft paper rolls creates custom wrapping that costs pennies per gift and looks like artisan packaging. A kraft roll, a carved stamp or simple repeat pattern, and an ink pad are the supplies, and wrapping paper for a season of gifts takes one afternoon. The professional trick is a consistent repeat: one simple motif stamped in a grid always looks better than scattered doodles.
Try it: Match the ribbon to one color in your stamped pattern so the whole package looks coordinated.
Pro tip: Finish every piece like it is going in a shop window, trim the loose threads, wipe the glue fingerprints, and photograph it in good light, since the last five minutes of finishing decide whether it looks handmade or hand-crafted.
Three rules for grown-up paper crafts
Paper crafts look sophisticated when you treat the material with the same respect as fabric or wood. These three rules, grounded in proven paper craft techniques, are the difference between projects you display and projects you hide.
- Choose paper like it matters, because it does: Cardstock, crepe paper, and cotton paper behave completely differently from printer paper. Spending a few dollars on the right weight and texture is the single biggest upgrade you can make to any project.
- Finish the edges: A coat of matte sealer, a clean scored fold, or a mounted mat layer signals intention. Most DIY-looking results come from unfinished edges, not from lack of talent.
- Limit the palette: Three colors or fewer per project, pulled from one family or one room. Restraint reads as design, while every-color crafts read as classroom.
Storing supplies and finished pieces
Paper supplies multiply fast when you are juggling several new DIY craft ideas, and finished pieces are more fragile than they look. A little organization keeps both in good shape.
- Store paper flat and dry: Keep cardstock and specialty paper in a flat file or under a heavy book, away from humidity. Curled or warped paper is the most common reason a project goes sideways before it starts.
- Keep finished pieces out of direct sun: Paper fades faster than almost any other craft material. Display wall art and garlands where sunlight does not hit them directly, or accept that colors will soften within a year.
- Box dimensional pieces separately: Shadow boxes, mobiles, and quilled art crush easily in a drawer. Store them upright in their own boxes with tissue paper so the dimension you worked to create survives.
More ideas you’ll love:
Christmas decor ideas
vintage Christmas decor ideas
DIY & Crafts
Questions readers ask
What is the easiest paper craft for adults to start with?
Lucky star jars and woven placemats are the easiest starting points. Both need almost no tools, teach you how paper behaves, and still produce something you would actually display.
What kind of paper should I buy for paper crafts?
Start with three staples: 65 lb cardstock for structure, Italian crepe paper for flowers, and a quilling strip pack for detail work. These three cover the majority of adult-level projects without a big investment.
How do I make paper crafts look less cheap?
Three things: use heavier paper, seal or finish every surface, and stick to a limited color palette. These finishing steps cost almost nothing and remove the flimsy, classroom look completely.
Are paper crafts durable enough to gift?
Yes, when they are sealed. Paper bead jewelry with three coats of varnish and decoupaged pieces with matte sealer hold up to daily use. Unsealed paper is decoration-only, so match the project to the purpose.
How long do paper crafts typically take?
Most take one to three hours. Simple projects like bookmarks and gift boxes take under 30 minutes, while quilled art and mobiles can take an evening. Almost nothing on this list needs more than a weekend afternoon.
What tools do I actually need to get started?
A craft knife, a metal ruler, a cutting mat, a hot glue gun, and good scissors cover nearly every project here. Add a quilling tool and a scoring board only when you move into quilling or box-making.
Can I sell paper crafts I make?
Yes, and personalized pieces like quilled monograms, marbled journals, and custom gift wrap sell well at craft fairs and online. Price for your time: materials are cheap, but two hours of rolling quilling coils is skilled work.
How do I store leftover paper so it stays usable?
Store it flat, dry, and out of sunlight, sorted by type. Rolled or curled paper can be flattened under heavy books overnight, but paper that has yellowed or gotten damp should be recycled rather than used for display pieces.
People Also Ask
What paper crafts are trending for adults right now?
Quilling botanical art, oversized crepe-paper flowers, and layered paper shadow boxes are the current favorites. They photograph well, use affordable materials, and the finished pieces genuinely look like boutique decor.
Is paper crafting expensive as a hobby?
No, it is one of the cheapest creative hobbies. A starter kit of cardstock, glue, a craft knife, and basic tools costs under $30, and most projects after that use only a few dollars of paper per piece.
What is the difference between quilling and origami?
Origami is folding a single sheet of paper into shapes without cutting or glue, while quilling is rolling thin paper strips and gluing them into designs. Origami tends to be faster and more sculptural; quilling is more detailed and better suited to framed art.
loved these ideas? ✿
Save this guide for later
Pin it to your board so it’s there when you’re ready to recreate it.

Curated by
Hey! I'm Sanaullah — visual curator and content creator. I search, curate, and test the best aesthetic ideas across Pinterest so you can easily transform your living space, style daily outfits, and try simple creative DIYs without the overwhelm.