
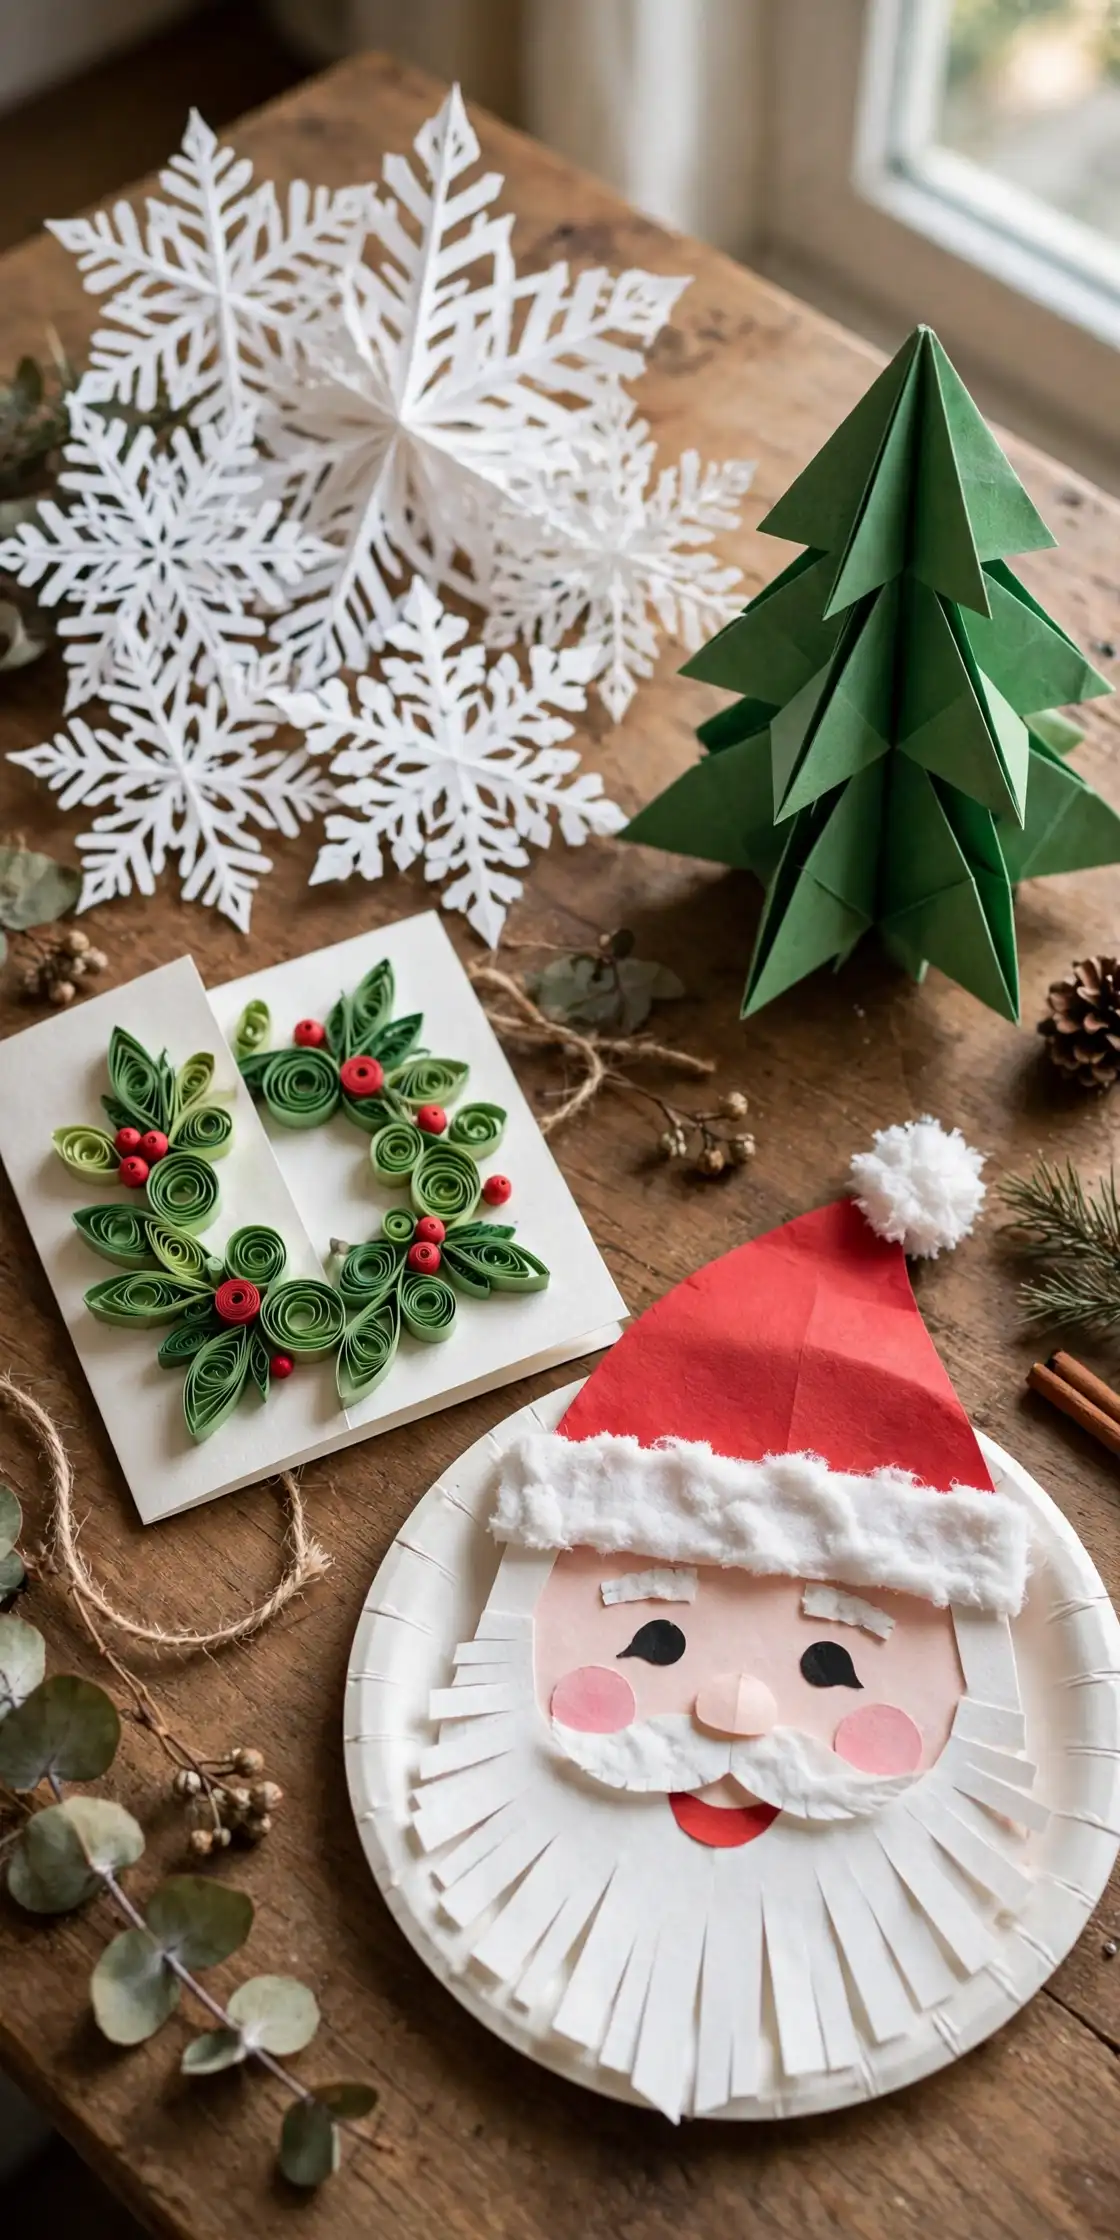
A house dressed only with shop-bought decorations can feel like a showroom, because every piece looks the same as every other house on the street. A house dressed with paper crafts feels personal, because every snowflake, star, and tree carries a fold or a cut you made yourself. Most paper christmas crafts fail in the same way: people start with a vague idea, fold one tricky origami model, give up, and end up with a pile of torn paper and nothing on the tree. This list works the other way around. These 24 paper christmas crafts are grouped by technique, paper cutting, origami, quilling, papier-mache, honeycomb and 3D paper, and paper plate crafts, and every make comes with real steps, so you can pick one technique, finish it, and move on. If you want the fullest version of this list, start with the easiest group and work toward the fiddliest, and your whole house will look handmade by Christmas Eve, not half finished.
- The key takeaway: One technique per session beats a mixed pile. A table full of finished snowflakes or a finished set of quilled cards looks like a plan, while five half-folded models in different techniques look like a mess.
- The detail most people miss: The paper matters more than the pattern. Crisp printer paper folds cleanly for origami, thick card holds quilling coils, and thin tissue makes honeycomb decorations glow, while the wrong paper for the technique fights you at every step.
- What it costs or how long it takes: Most of these 24 ideas cost $2 to $15 in supplies, and each takes 10 minutes to 2 hours to make. Paper christmas crafts are often the cheapest decorations in the house, because paper, scissors, and glue are already in a drawer.
| Group | Ideas | Materials | Best for |
|---|---|---|---|
| Paper Cutting | 01-04 | Scissors, printer paper, card | Windows, garlands, and cards |
| Origami | 05-08 | Origami paper, squares | Trees, stars, and ornaments |
| Quilling and Rolled Paper | 09-12 | Quilling strips, glue, card | Cards, wreaths, and ornaments |
| Papier-Mache | 13-16 | Newspaper, paste, balloons | Ornaments, reindeer, and trees |
| Honeycomb and 3D Paper | 17-20 | Tissue paper, card | Table centrepieces and trees |
| Paper Plates and Kid Crafts | 21-24 | Paper plates, paint, glue | Kids, classrooms, and family trees |
Jump to an idea ↓
- 01 Classic Paper Snowflakes
- 02 Paper Chain Garland
- 03 Kirigami Christmas Cards
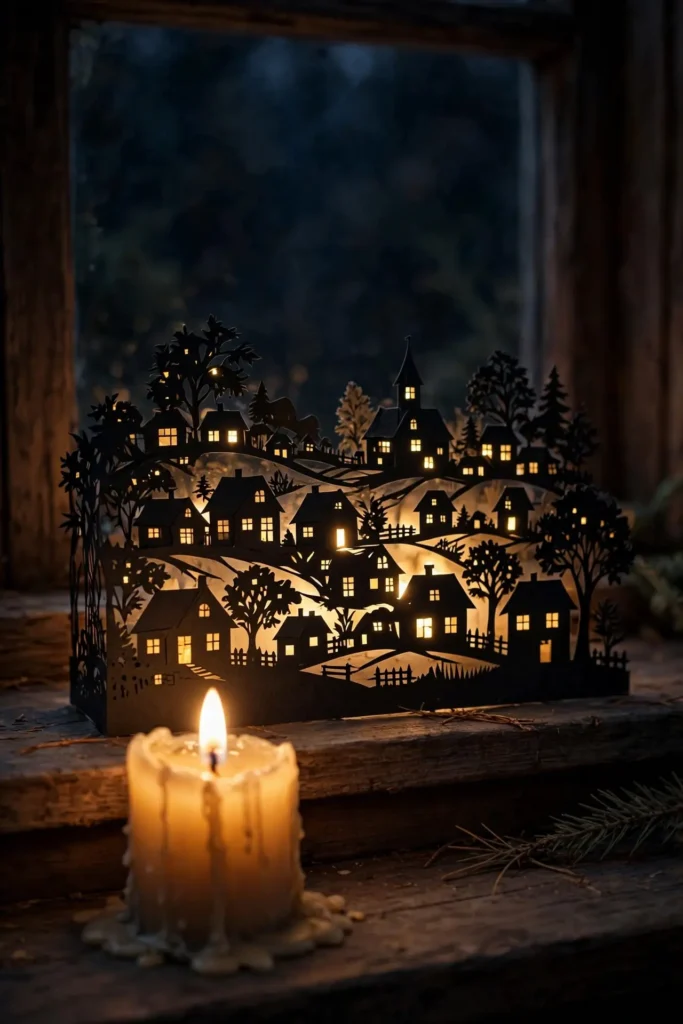
- 04 Paper Cut Village Silhouette
- 05 Origami Christmas Tree
- 06 Origami Paper Stars
- 07 Origami Christmas Baubles
- 08 Origami Reindeer
- 09 Quilled Christmas Cards
- 10 Quilled Snowflake Ornaments
- 11 Quilled Angel Ornaments
- 12 Quilled Poinsettia Wreath
- 13 Paper Mache Ornaments
- 14 Paper Mache Reindeer
- 15 Paper Mache Christmas Tree
- 16 Paper Mache Baubles
- 17 Honeycomb Paper Christmas Tree
- 18 Honeycomb Paper Ornaments
- 19 Honeycomb Paper Balls
- 20 Paper Lanterns
- 21 Paper Plate Christmas Tree
- 22 Paper Plate Snowman
- 23 Paper Plate Santa
- 24 Paper Plate Gingerbread Man
Paper Cutting
01
Classic Paper Snowflakes
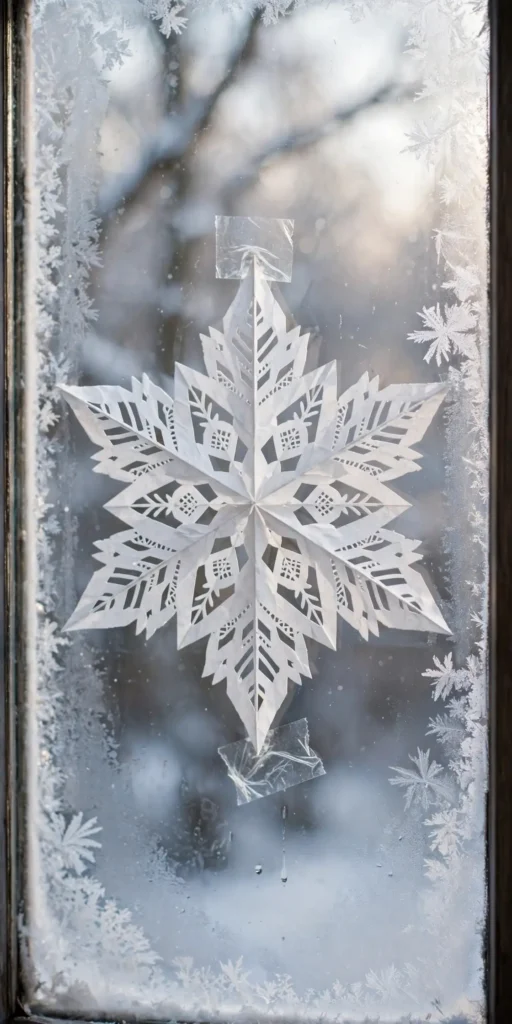
A window with no decoration can look bare in December, because the glass shows only the dark outside. Classic paper snowflakes solve this in minutes, because a folded square cut with simple triangles opens into a six-pointed flake that catches the light. Steps: 1. Fold a square of white paper into a triangle, then into a smaller triangle, then once more. 2. Cut small triangles and curves out of the folded edges, keeping at least one edge uncut so the flake holds together. 3. Unfold slowly, press flat under a book, and tape the flake to the window or hang it with thread.
Try it: Cut less than you think you should on the first flake. A flake with too many cuts falls apart when you unfold it, while a flake with a few bold cuts looks crisp and strong.
02
Paper Chain Garland
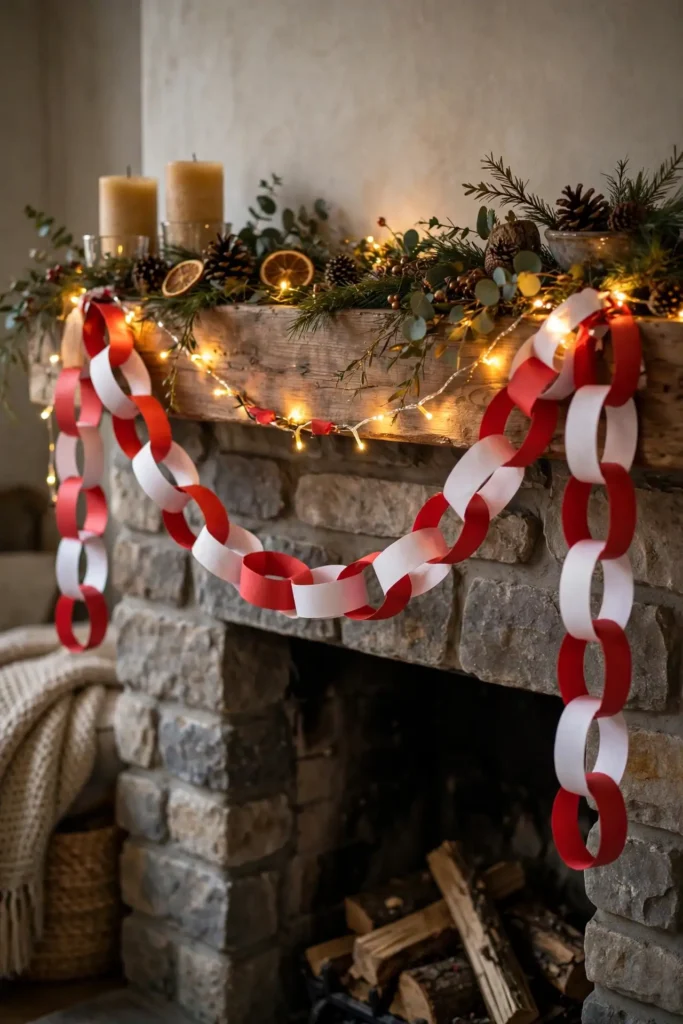
A mantel with only a garland of greenery can look like every other mantel, because green on green has no colour pop. A christmas paper chain, loops of coloured paper linked together, adds stripes of red, green, gold, and white that no shop garland gives, because you choose the colours yourself. Steps: 1. Cut strips of coloured paper about 3 cm wide and 20 cm long. 2. Loop the first strip into a ring and glue or staple the ends together. 3. Thread the next strip through the ring before closing it, and keep going until the chain is as long as you need.
Try it: Alternate two colours only, red and white or green and gold. A chain in every colour looks like a classroom project, while a chain in two colours reads as a design.
03
Kirigami Christmas Cards
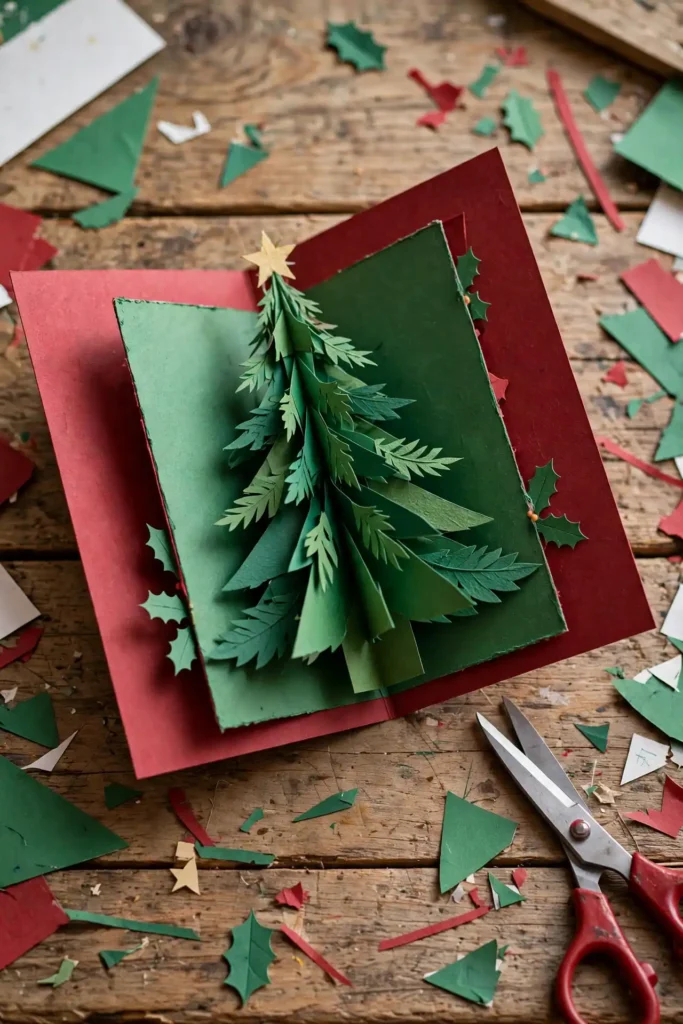
A shop-bought Christmas card can feel impersonal, because the same printed tree arrives in thousands of letterboxes. Kirigami christmas cards, cards with a tree or star that pops up when opened, feel personal before they are even read, because the pop-up was cut and folded by hand. Steps: 1. Fold a piece of card in half and draw half a tree on the fold. 2. Cut along the tree outline, stopping at the fold, and make two small horizontal cuts where the tree meets the fold. 3. Push the tree shape inward so it pops up when the card opens, then glue the folded card onto a second card as a backing.
Try it: Practise the cuts on scrap card first. A kirigami cut in the wrong place cannot be undone, while one practice run turns a shaky first card into a confident one.
04
Paper Cut Village Silhouette
A windowsill with only candles can look plain, because candles alone give light but no shape. A paper cut village silhouette, a row of tiny houses with lit windows cut from black card, gives the sill a skyline, because the candlelight behind the card makes every window glow. Steps: 1. Draw a row of simple houses with pitched roofs on black card, with small square windows in each house. 2. Cut out the windows with a craft knife, keeping the house outlines joined at the base. 3. Stand the silhouette in front of a battery candle, and the windows will glow like a real village at night.
Try it: Keep the houses joined in one long strip, not separate pieces. A single strip stands on its own, while separate houses fall over one by one.
Origami
05
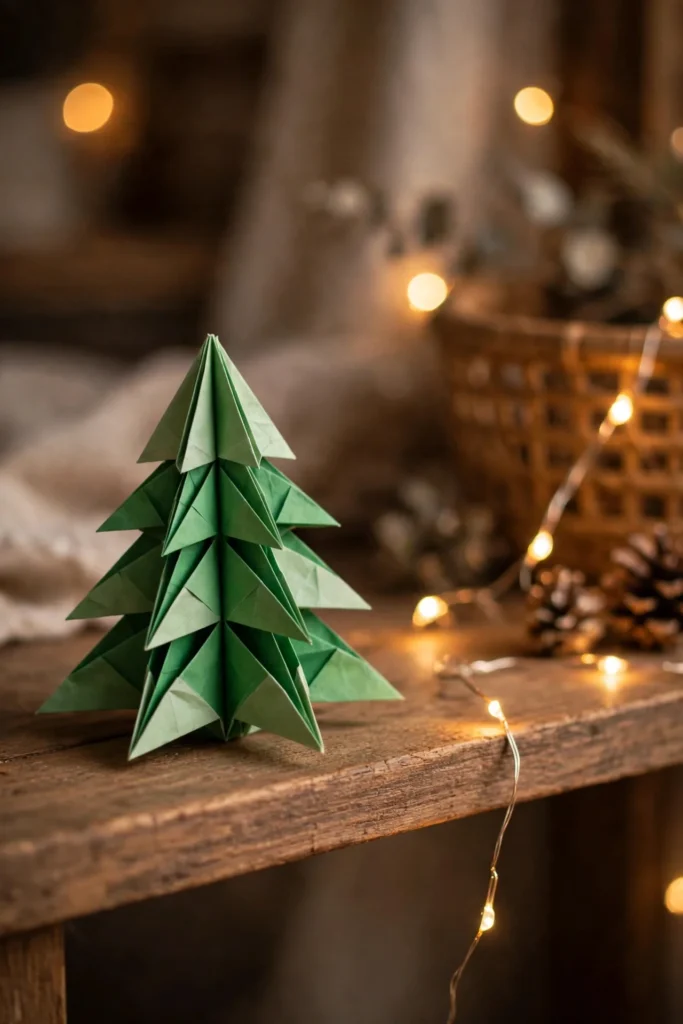
Origami Christmas Tree
A small flat with no room for a real tree can feel left out of Christmas, because a full tree needs floor space you do not have. An origami christmas tree, folded from one square of green paper, gives you a tree that fits on a shelf, because the folds themselves make the branches. Steps: 1. Fold a square of green paper in half diagonally, then unfold, and fold the two side corners into the centre crease to make a kite shape. 2. Fold the bottom point up, then fold the whole shape in half lengthwise. 3. Make three small horizontal cuts on the folded edge and fold each cut section outward to make layered branches, then stand the tree upright.
Try it: Use paper that is green on one side and white on the other. The white edges read as snow on the branches, while paper that is green on both sides can look flat.

06
Origami Paper Stars
A tree dressed only in round baubles can look flat, because every ornament is the same shape. Origami paper stars, five-pointed stars folded from strips or squares, give the tree points and angles, because the folds catch light differently from every side. Steps: 1. Fold a strip of paper into a pentagon knot, then wrap the long end around the pentagon again and again until the strip runs out. 2. Tuck the end under a fold, then pinch each flat side of the pentagon inward to puff it into a star. 3. Thread a loop of string through one point and hang the star on the tree.
Try it: Make the stars in one colour family, all golds or all reds. Stars in mixed colours look like confetti, while stars in one family read as a set.
07
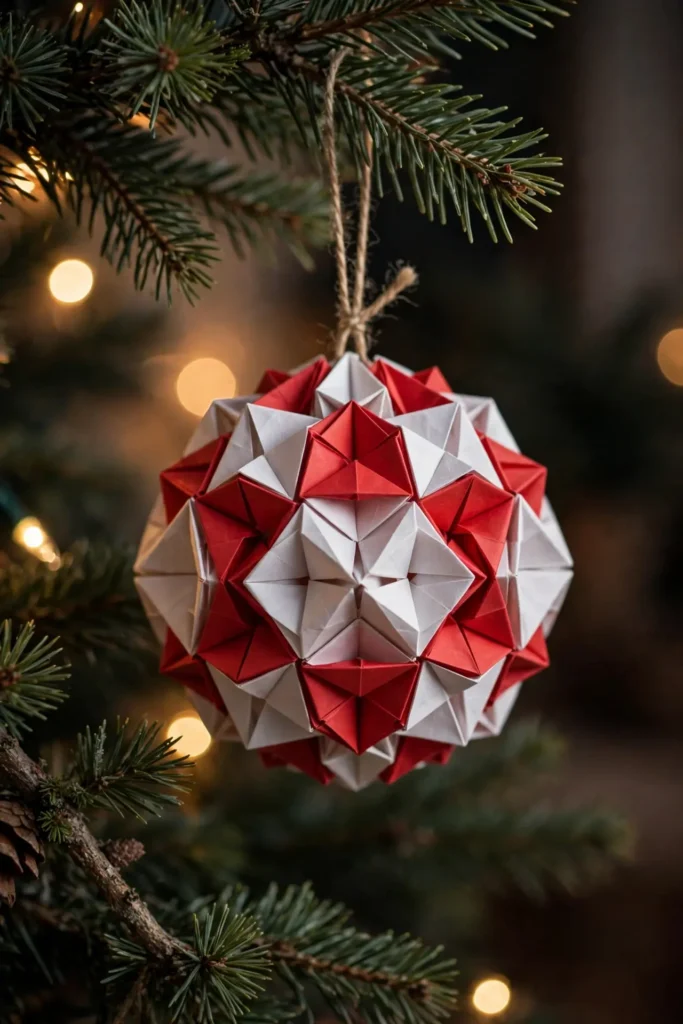
Origami Christmas Baubles
A tree covered in shop baubles can look like a catalogue page, because identical baubles repeat with no variation. Origami christmas baubles, round balls folded from twelve identical paper units slotted together, give the tree ornaments nobody else owns, because the folded units make a geometric ball that no factory copies. Steps: 1. Fold twelve identical square units, each with pockets and points. 2. Slot the points of one unit into the pockets of the next, building the ball in rings. 3. Add a string loop to the last unit before closing the ball, so it can hang.
Try it: Fold all twelve units before you start assembling. A ball assembled unit by unit as you fold takes twice as long, while a pile of ready units slots together in minutes.
08
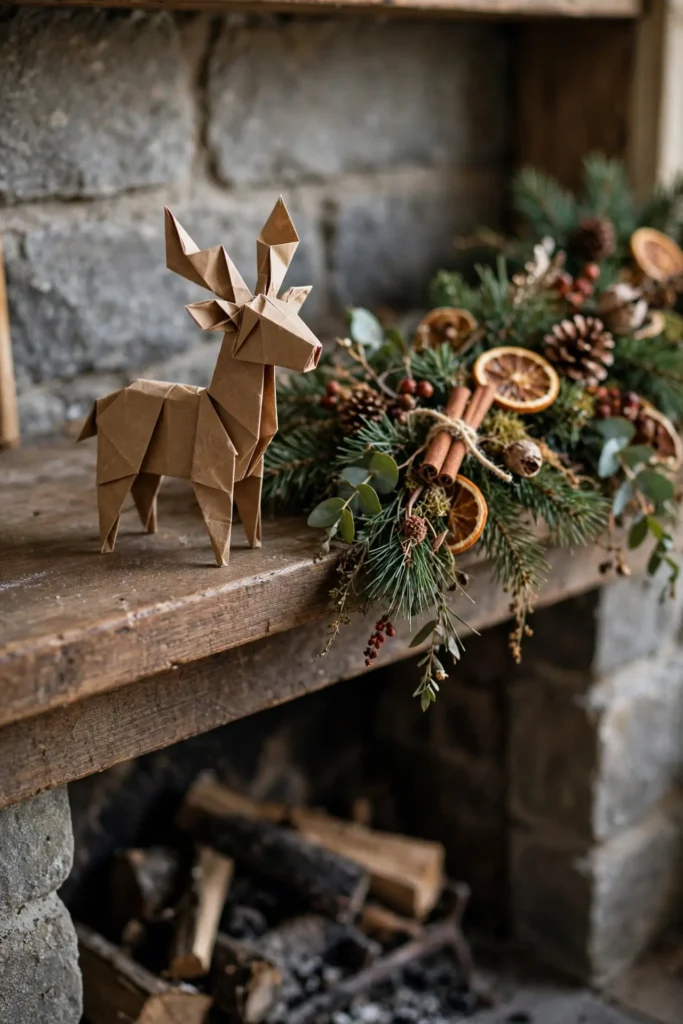
Origami Reindeer
A mantel with only candles and garland can look soft, because nothing on it stands upright with a shape. An origami reindeer, folded from one square of brown paper, gives the mantel a small figure with antlers, because the folds make the head, body, and legs from a single sheet. Steps: 1. Fold a square in half diagonally and fold the two bottom corners up to make a kite shape. 2. Fold the top point down for the head and fold two small points outward for antlers. 3. Fold the bottom point under to make legs, and stand the reindeer on a flat surface.
Try it: Use stiff origami paper, not thin tissue paper. A reindeer folded from thin paper flops, while a reindeer folded from stiff paper stands all season.
Quilling and Rolled Paper
09
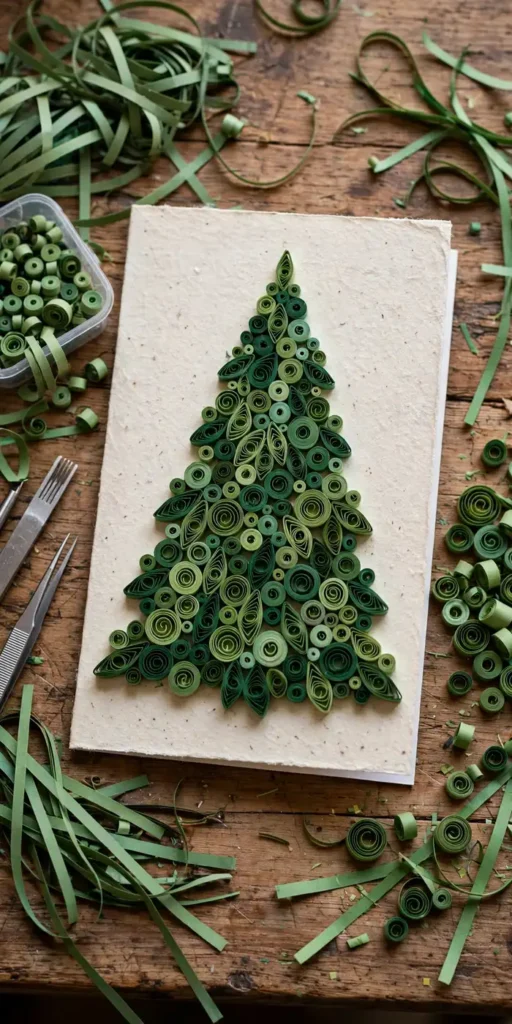
Quilled Christmas Cards
A Christmas card with a printed picture can feel like it came from a shop shelf, because it did. Quilling christmas cards, cards decorated with tiny coils of rolled paper shaped into trees, wreaths, and snowflakes, feel handmade the moment they are touched, because the coils stand proud of the card. Steps: 1. Roll a quilling strip tightly around a quilling needle or a cocktail stick, then let it loosen slightly into a coil. 2. Pinch the coil into a teardrop, eye, or triangle shape. 3. Glue the shapes onto the card in a tree or wreath pattern, and let the glue dry fully before writing inside.
Try it: Glue the shapes to the card in rows, not one at a time at random. A quilled design planned in rows stays even, while shapes glued as you go drift out of line.
10
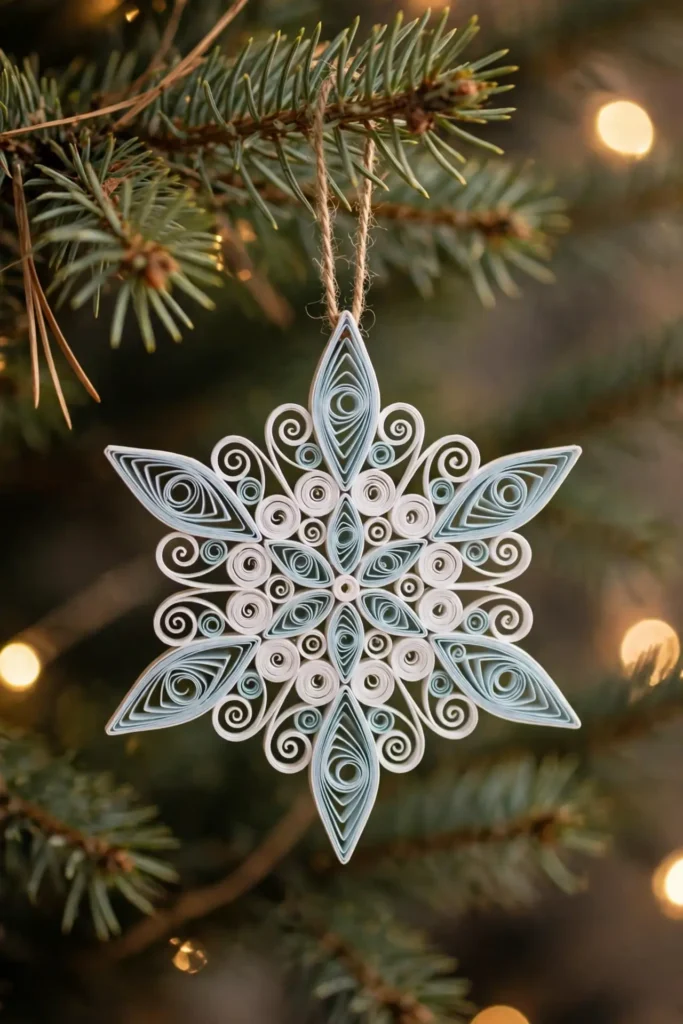
Quilled Snowflake Ornaments
A tree dressed only in flat paper snowflakes can look two-dimensional, because flat flakes have no depth. Quilled snowflake ornaments, six arms built from rolled paper coils, give the tree flakes with real depth, because the coils catch light and shadow. Steps: 1. Roll twelve tight coils and twelve loose coils from white and pale blue quilling strips. 2. Pinch six loose coils into teardrops for the arms and glue them around a tight centre coil. 3. Glue a tight coil to the end of each arm, add a string loop, and hang the flake where light hits it.
Try it: Use two shades, white and pale blue, not white alone. A single-colour quilled flake can look flat, while two shades give it the depth of real ice.
11
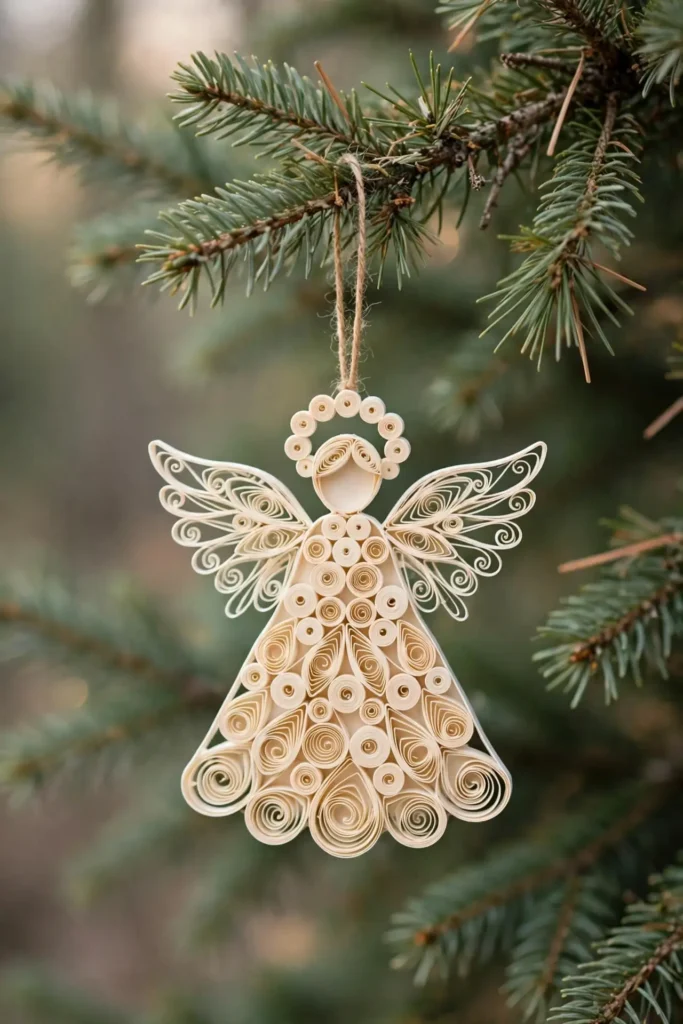
Quilled Angel Ornaments
A tree topped with a star and covered in baubles can feel like it forgot the angels, because angels are the figure children look for after Santa. A quilled angel, a dress of rolled coils, a round head coil, and two wing shapes, hangs as a small guardian, because the coils read as soft and the wings read as light. Steps: 1. Roll a large loose coil and pinch it into a teardrop for the dress. 2. Roll a small tight coil in cream for the head and glue it to the top of the dress. 3. Pinch two coils into wing shapes, glue them to the back, and add a string loop at the top.
Try it: Hang quilled angels on front branches, not hidden inside. A quilled angel tucked inside the tree disappears, while an angel on the front reads as a guardian of the whole tree.
12
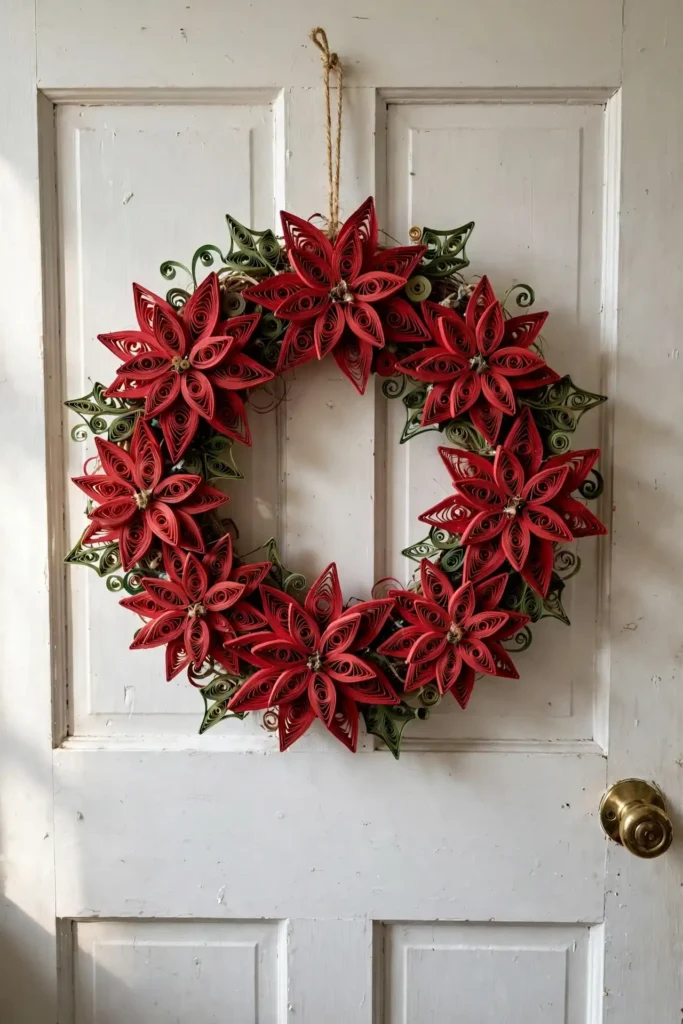
Quilled Poinsettia Wreath
A front door dressed with only a greenery wreath can look like every other door, because greenery repeats everywhere. A quilled poinsettia wreath, a ring covered in red and green quilled petals, gives the door a wreath that no shop sells, because every petal is a rolled coil shaped by hand. Steps: 1. Roll and pinch twenty red teardrop coils for petals and ten green ones for leaves. 2. Glue the petals into five poinsettia flowers, five petals each, with a yellow tight coil as the centre. 3. Glue the flowers and leaves around a cardboard ring, and hang the wreath on an interior door where it will not get wet.
Try it: Hang a quilled wreath indoors only. Quilling paper softens in rain and damp, while an interior door keeps the coils crisp all season.
Papier-Mache

13
Paper Mache Ornaments
A tree dressed only in shop ornaments can feel impersonal, because nothing on it was made by anyone in the house. Paper mache ornaments, shapes built from newspaper strips and paste, then painted, give the tree ornaments with a story, because every layer was laid by hand. Steps: 1. Tear newspaper into strips about 2 cm wide and mix flour and water into a thick paste. 2. Dip each strip in paste, lay it over a balloon or a crumpled foil shape, and add three layers, letting each layer dry. 3. Pop or remove the mould, paint the shape, and add a string loop.
Try it: Let each layer dry fully before adding the next. Wet layers on wet layers slide and sag, while dry layers build a shell that holds its shape.

14
Paper Mache Reindeer
A yard or mantel with only lights can look like an outline, because lights alone give glow but no shape. A paper mache reindeer, built over a wire or cardboard frame, gives the display a figure, because the reindeer shape reads from across the room. Steps: 1. Build a simple reindeer frame from cardboard tubes for the body and legs, and wire for the antlers. 2. Cover the frame with three layers of pasted newspaper strips, letting each layer dry. 3. Paint the body brown, the nose red, and the antlers dark, and stand the reindeer where it will be seen.
Try it: Make the legs short and thick, not long and thin. Long thin paper mache legs buckle under the body, while short thick legs hold the reindeer upright.
15
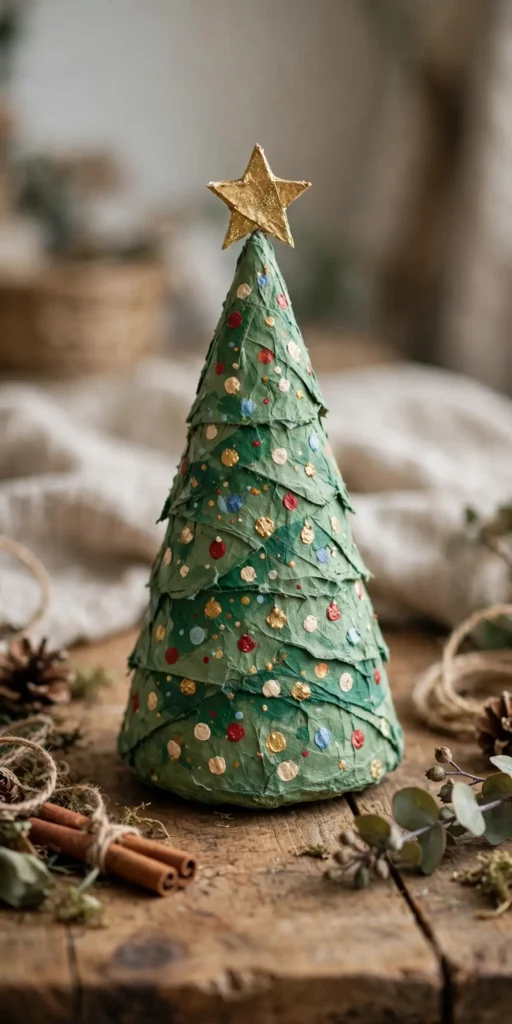
Paper Mache Christmas Tree
A table with only a candle can look bare, because a candle alone gives light but no Christmas shape. A paper mache christmas tree, a cone built from newspaper and paste and painted green, gives the table a tree that lasts for years, because the hardened shell keeps its shape. Steps: 1. Roll a cone from stiff card and tape the seam. 2. Cover the cone with three layers of pasted newspaper strips, letting each layer dry. 3. Paint the cone green, add dots of paint as baubles, and top it with a small star.
Try it: Paint the tree after the final layer is bone dry, not just dry to the touch. Paint on damp paper mache bubbles and peels, while paint on dry paper mache stays smooth.
16
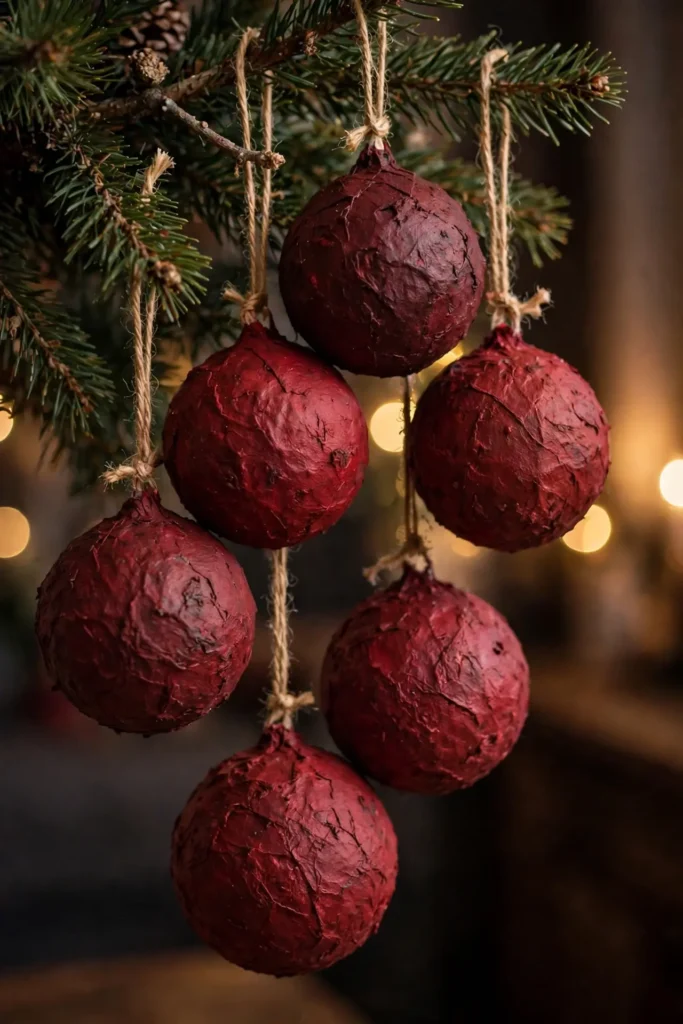
Paper Mache Baubles
A tree covered in identical shop baubles can look like a catalogue page, because identical baubles repeat with no variation. Paper mache baubles, round balls built over balloons and painted in one colour family, give the tree baubles with handmade texture, because the paper surface is slightly uneven in a way factory baubles never are. Steps: 1. Blow up small balloons to bauble size and cover each with three layers of pasted newspaper strips. 2. Once dry, pop the balloon and trim the hole. 3. Paint each bauble in one colour, add a ribbon loop through the hole, and hang them at mixed depths on the tree.
Try it: Paint the baubles in one colour family, all reds or all golds. Baubles in mixed colours look like a paint experiment, while one family reads as a set.
Honeycomb and 3D Paper
17
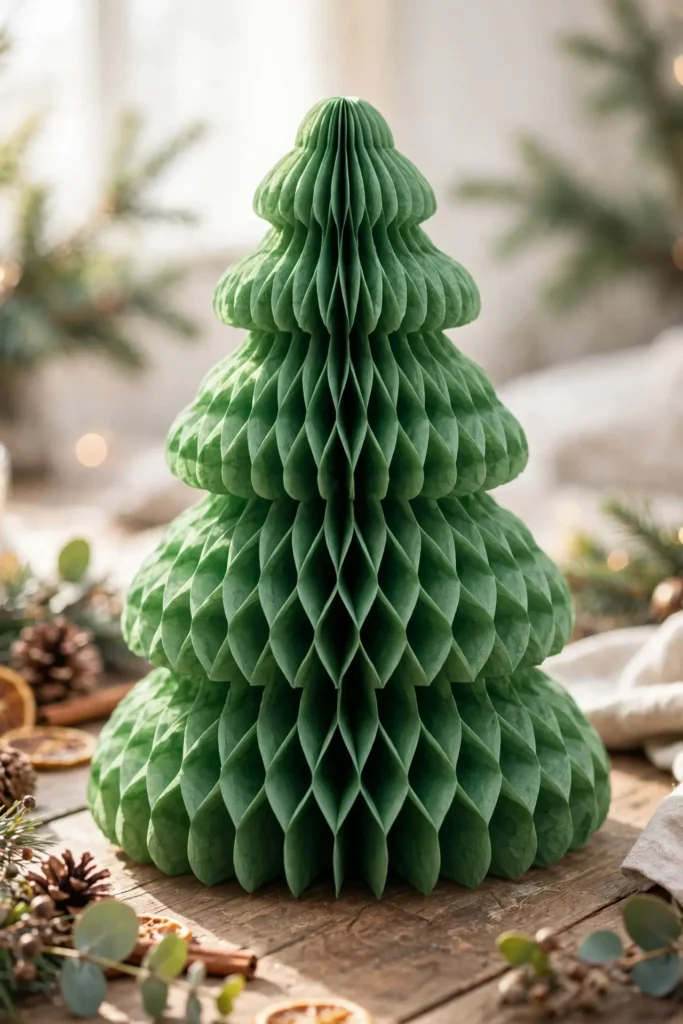
Honeycomb Paper Christmas Tree
A table centrepiece made only from candles can look plain, because candles alone give light but no shape. A honeycomb paper christmas tree, a tree that folds flat for storage and opens into a full 3D shape, gives the table a centrepiece with a trick, because guests watch it open. Steps: 1. Cut twenty identical tree shapes from green tissue paper, folded in half. 2. Glue the shapes together along the folded edge, one after another, until they form a stack. 3. Glue the first and last shapes together to close the circle, and the tree will stand open on the table.
Try it: Use tissue paper, not printer paper, for honeycomb trees. Printer paper is too stiff to fold into a honeycomb, while tissue opens softly into a full tree.

18
Honeycomb Paper Ornaments
A tree dressed only in flat ornaments can feel two-dimensional, because flat shapes have no depth. Honeycomb paper ornaments, balls and stars that open from flat discs into 3D shapes, give the tree depth, because the honeycomb layers catch light from every angle. Steps: 1. Cut twelve identical circles from tissue paper in one colour. 2. Glue the circles together in a stack, gluing along alternating lines so the stack opens into a ball. 3. Open the ball, glue the two outer circles together, and add a string loop.
Try it: Open the honeycomb gently, a little at a time. A honeycomb yanked open tears along the glue lines, while a honeycomb opened slowly holds its shape all season.
19
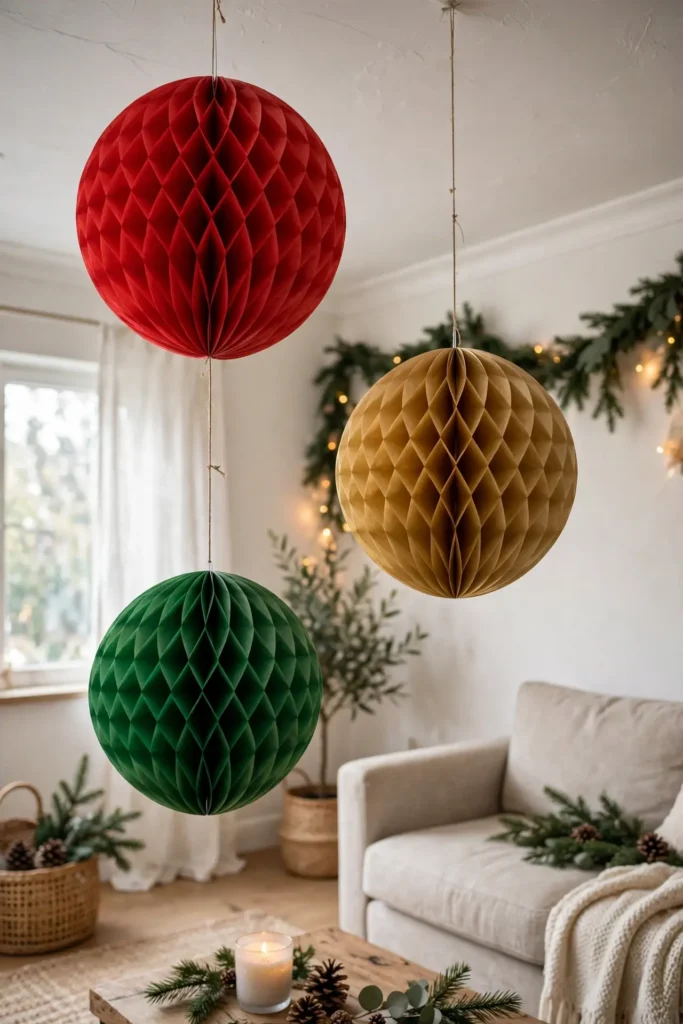
Honeycomb Paper Balls
A room dressed only with a tree can look like the tree got all the decoration, because the ceiling and corners stay bare. Honeycomb paper balls, hung from the ceiling in red, green, and gold, fill the upper half of the room, because the balls draw the eye upward. Steps: 1. Make a honeycomb ball as in the ornament idea, but larger, about 30 cm across. 2. Tie a long thread to the top of the ball. 3. Hang the balls at different heights from the ceiling, three or five of them, so they read as a group.
Try it: Hang honeycomb balls in odd numbers, three or five. Odd numbers read as a design, while even numbers can look like a row of lanterns.
20
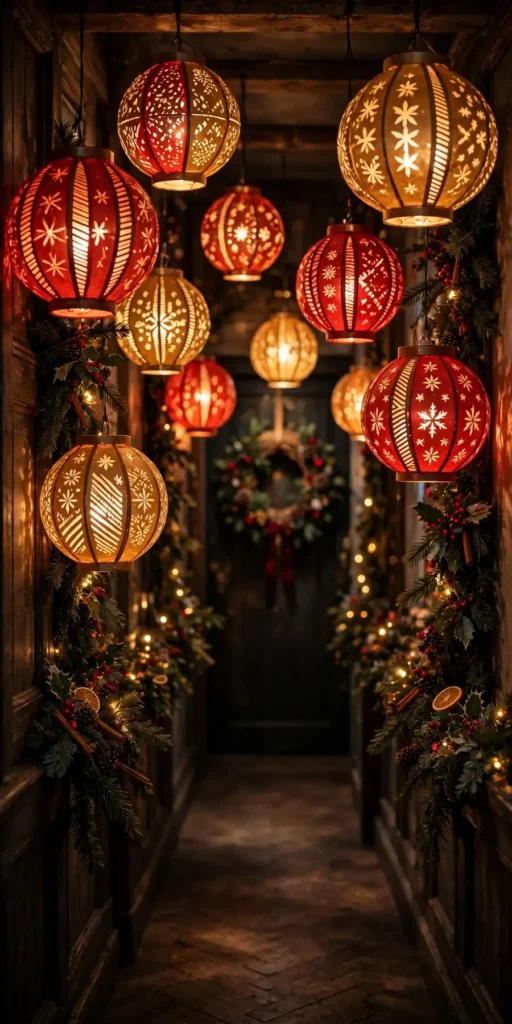
Paper Lanterns
A hallway with only overhead lights can feel flat, because ceiling light gives no warmth at the edges. Paper lanterns, cylinders of coloured paper with a battery candle inside, give the hallway warm pools of light, because the paper glows from within. Steps: 1. Fold a sheet of coloured paper in half lengthwise and cut slits from the fold toward the open edge, stopping 2 cm short. 2. Unfold the paper, roll it into a cylinder, and tape the seam. 3. Push the top and bottom edges gently together so the slits open, and place a battery candle inside.
Try it: Use battery candles, never real flames, in paper lanterns. Real flames and paper are a fire risk, while battery candles glow safely all evening.
Paper Plates and Kid Crafts
21
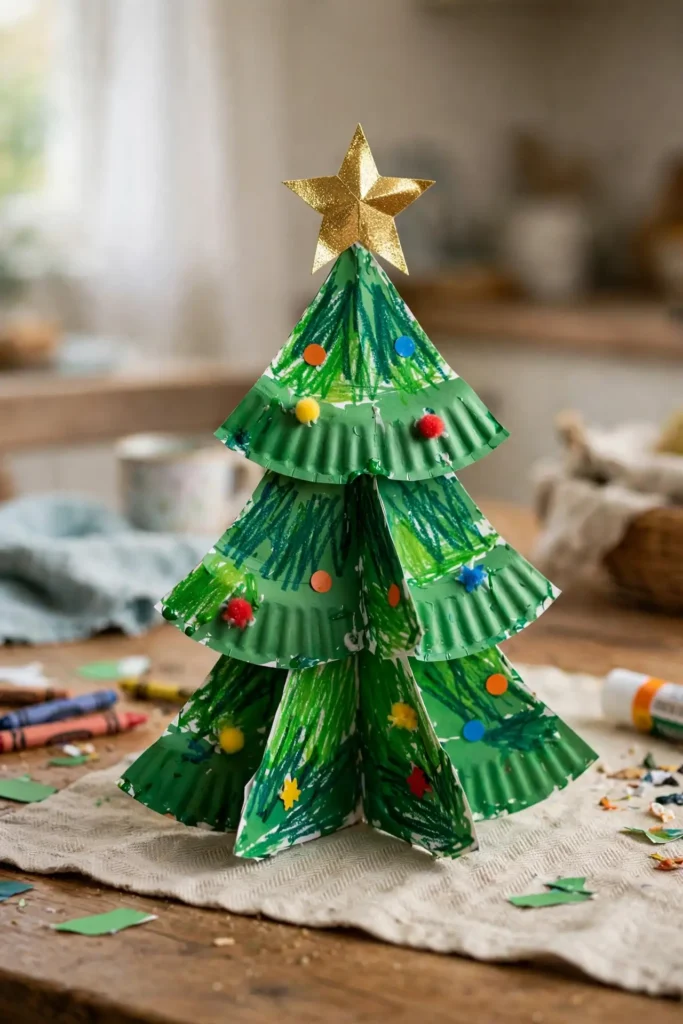
Paper Plate Christmas Tree
A classroom or kitchen table with no tree can feel left out of Christmas, because a full tree needs floor space and money. A christmas paper plates tree, a plate cut into a spiral and pulled into a cone, gives children a tree they made themselves, because the spiral cut is the whole trick. Steps: 1. Paint a paper plate green on both sides and let it dry. 2. Cut the plate in a spiral from the edge to the centre, stopping just short of the middle. 3. Pull the centre upward to form a cone, tape the base flat, and add a star on top.
Try it: Paint the plate before cutting, not after. Paint on a cut spiral smudges across the cuts, while paint on a flat plate stays even.
22
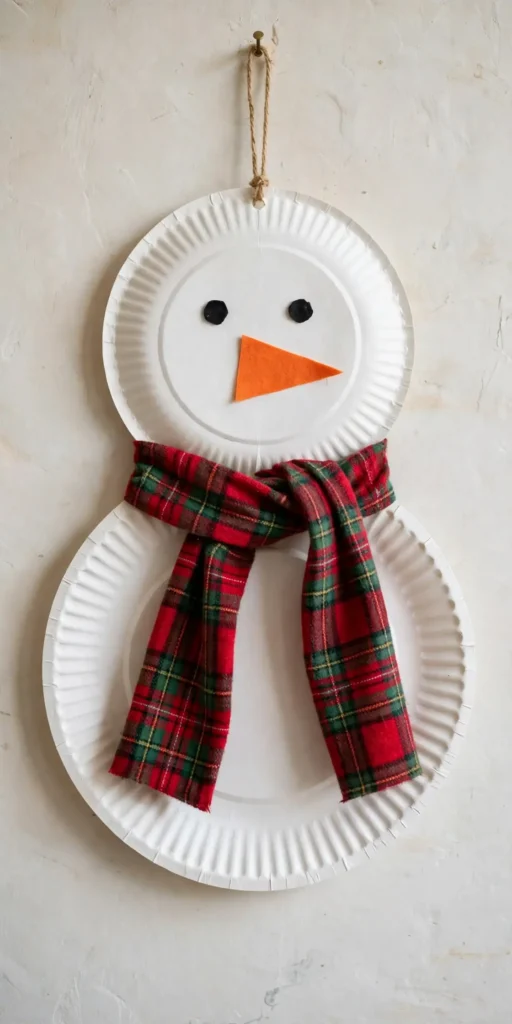
Paper Plate Snowman
A wall with no decoration can look bare in a child’s room, because the walls stay plain while the tree gets everything. A snowman paper plates craft, two plates painted white and joined as a snowman face and body, gives the wall a friendly face, because the plates read as snowballs. Steps: 1. Paint two paper plates white, one large and one small, and let them dry. 2. Glue the small plate above the large plate, overlapping slightly, to make the head and body. 3. Glue on black paper dots for eyes and buttons, an orange triangle for a nose, and a strip of fabric as a scarf.
Try it: Use the uncoated side of the plates for gluing. Glue on the shiny coated side peels off, while glue on the plain side holds all season.
23
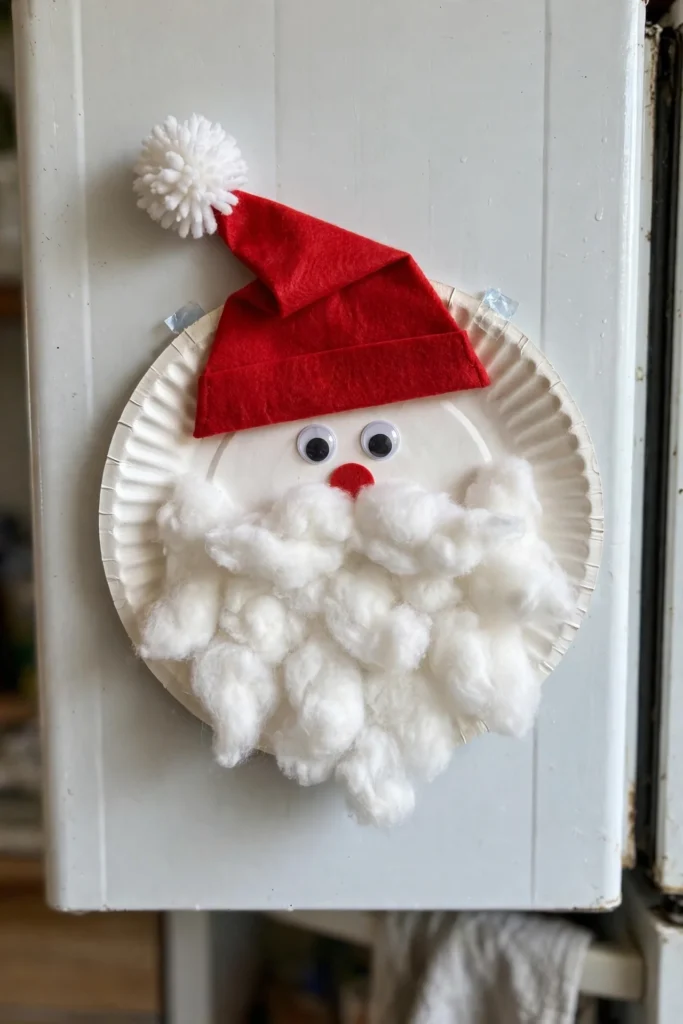
Paper Plate Santa
A fridge door with only magnets can look like it forgot Christmas, because the fridge is the gallery every family actually looks at. A paper plate Santa, a plate with a cotton wool beard and a red hat, gives the fridge a face children love, because the beard is soft and the hat is bright. Steps: 1. Paint the top third of a paper plate red for the hat, and leave the rest white. 2. Glue cotton wool balls around the bottom two thirds of the plate as a beard. 3. Glue on two dot eyes, a pink nose, and a white pom-pom on the hat, and stick the Santa to the fridge with a magnet.
Try it: Glue the cotton wool in rows, not in one big clump. Rows of cotton wool read as a beard, while one clump reads as a cloud.
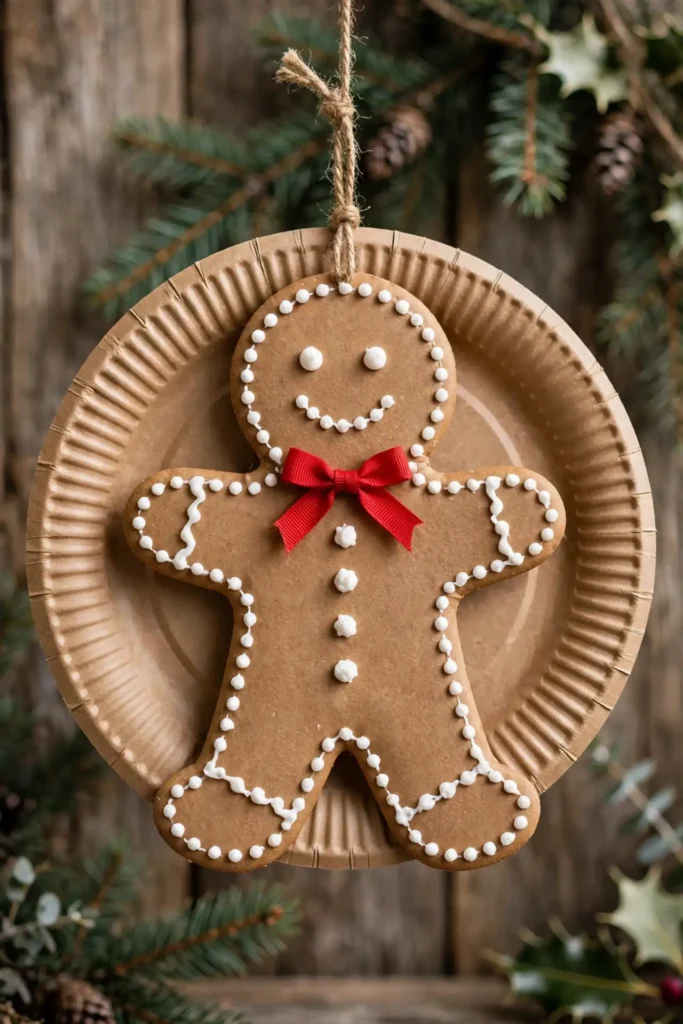
24
Paper Plate Gingerbread Man
A tree dressed with real gingerbread ornaments can look wonderful for a week and stale after it, because biscuits dry out and crumble. A gingerbread paper plates craft lasts for years, because the plate holds the shape and the paint holds the icing look. Steps: 1. Paint a paper plate brown on both sides and let it dry. 2. Cut two small circles from brown card for arms and legs, or simply paint arms and legs onto the plate. 3. Add white paint dots for buttons and a smile, two dot eyes, and a red bow at the neck, then hang the gingerbread man with a string loop.
Try it: Paint the icing details after the brown coat is fully dry. Icing painted onto wet brown smears, while icing on dry brown stays crisp like real piping.
Pro tip: Finish one technique completely before starting the next. A table full of finished snowflakes, a finished set of quilled cards, and a finished paper chain make the house feel done, while five half-folded models in different techniques make it feel chaotic, even if you spent the same hours.
Three rules for paper crafts that look intentional, not homemade
Most paper Christmas crafts look unfinished for the same three reasons, and all three are fixable.
- First, limit the palette. One or two colours per project, repeated consistently, look intentional, while a project in unrelated colours looks like leftovers.
- Second, finish every edge. Clean folds, glued seams, and trimmed edges are what separate a paper craft from a pile of scrap, because the finish is what the eye reads first.
- Third, match the scale to the space. A huge honeycomb ball on a small table dominates it, and a tiny quilled card on a large mantel disappears, so choose crafts sized to the space you actually have, not the space you wish you had.
Storing and reusing your paper Christmas crafts
Paper Christmas crafts last for years if you store them properly, and the storage step is part of the making, not an afterthought.
- First, store flat crafts flat. Snowflakes, cards, and silhouettes crease permanently when folded, so keep them flat between sheets of card in a folder.
- Second, store 3D crafts in their own boxes. Honeycomb decorations, papier-mache shapes, and quilled ornaments crush against each other, so tissue paper and a box per shape are worth the minute they take.
- Third, keep paper dry and away from damp. Paper warps, spots, and grows mould in a damp attic, so store paper crafts in a dry cupboard, and keep them away from direct sunlight, which fades colour over time.
Questions readers ask
What are the easiest paper christmas crafts for beginners?
The easiest paper christmas crafts for beginners are paper snowflakes, paper chains, and paper plate crafts, because all three need only paper, scissors, and glue, and mistakes hide easily under more cuts or more paint. Start with snowflakes, since one folded square makes a finished decoration in under ten minutes.
How do I make paper christmas decorations?
You make paper christmas decorations by choosing one technique, cutting, origami, quilling, papier-mache, or honeycomb, and following its steps with the right paper for the job. A paper christmas decorations how to make project starts with crisp paper for folding, thick card for quilling, and tissue paper for honeycomb, since the wrong paper fights you at every step.
What paper is best for Christmas crafts?
Printer paper is best for snowflakes and cutting, origami paper is best for folding, thick card is best for quilling and cards, and tissue paper is best for honeycomb decorations, because each technique needs a different weight and stiffness. Using the right paper for the technique is the single biggest difference between a craft that works and one that tears.
Can kids make paper Christmas crafts?
Yes, kids can make paper Christmas crafts, and the best projects are paper plate trees, snowmen, Santas, and gingerbread men, plus paper chains and snowflakes, because all of them are safe, forgiving, and genuinely useful as decorations. Keep craft knives and hot glue for adults, and let children choose colours and placements.
How do I make a paper Christmas tree?
You make a paper christmas tree by folding one square of green paper into an origami tree, cutting a paper plate into a spiral cone, or gluing honeycomb tissue shapes into a standing tree. A paper christmas tree how to make project takes ten minutes for a plate tree and about half an hour for an origami one, and both fit on a shelf or a table.
How long do paper Christmas crafts last?
Paper Christmas crafts last for many seasons when stored properly, with card, quilled, and papier-mache pieces lasting the longest, and tissue honeycomb pieces lasting a few seasons if kept dry. Store flat crafts flat between card, keep 3D pieces in their own boxes, and keep everything away from damp and sunlight.
What is quilling?
Quilling is a paper craft where narrow strips of paper are rolled into tight or loose coils, then pinched into shapes like teardrops, eyes, and triangles, and glued into pictures, cards, and ornaments. Quilling christmas cards are the most popular quilling project, because the coils stand proud of the card and catch the light.
How do I store paper Christmas crafts so they last?
You store paper Christmas crafts so they last by keeping flat pieces flat between sheets of card, storing 3D pieces separately in tissue-lined boxes, and keeping everything in a dry cupboard away from damp and sunlight. Stored this way, snowflakes, quilled cards, and papier-mache ornaments will last for many seasons.
People Also Ask
What is the 70/30 rule for paper Christmas crafts?
The 70/30 rule for paper Christmas crafts means roughly 70 percent of the display stays as it is, and 30 percent carries paper decoration. The rule is a guide, not a law, but a room that follows it will read as festive rather than cluttered.
How do I make my paper crafts look shop bought, not homemade?
You make your paper crafts look shop bought, not homemade, by folding crisply, gluing seams neatly, trimming every edge, and keeping one palette across each project. A craft with sharp folds, hidden glue, and a clear palette reads as designed, while soft folds and visible glue read as a school project.
What paper Christmas crafts should beginners avoid?
Beginners should avoid kirigami cards and modular origami baubles on a first attempt, because each of those needs precise cuts or twelve identical units to work well. Start with snowflakes, chains, and paper plate crafts, and save kirigami and modular origami for a second session.
loved these ideas? ✿
Save this guide for later
Pin it to your board so it’s there when you’re ready to recreate it.

Curated by
Hey! I'm Sanaullah — visual curator and content creator. I search, curate, and test the best aesthetic ideas across Pinterest so you can easily transform your living space, style daily outfits, and try simple creative DIYs without the overwhelm.