
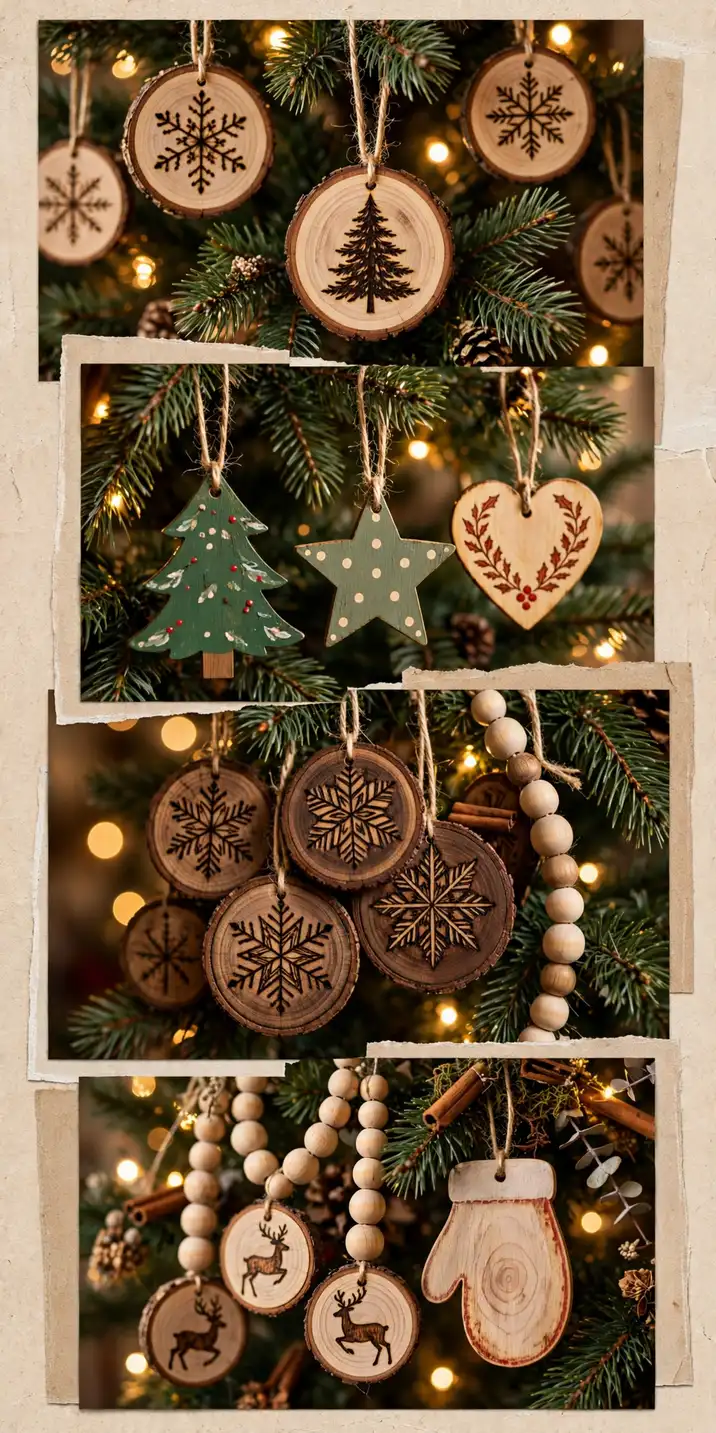
A tree dressed only in glass and plastic can feel cold, because shiny surfaces reflect light but give nothing back to the hand. A tree dressed in wood feels warm the moment you touch it, because every ornament carries grain, weight, and a shape you can feel. Most wooden christmas ornament ideas fail in the same way: people buy a mixed bag of wooden shapes, hang them at random, and wonder why the tree looks like a craft box rather than a collection. This list works the other way around. These 24 wooden christmas ornament ideas are grouped by wood form, slices, cutouts, painted wood, pyrography, beads and turned wood, and personalized pieces, so you can pick one form and carry it across the whole tree. If you want the fuller versions first, our Christmas Ornament Ideas covers 28 ornaments for every tree and budget. Pick one group here, make or buy only what fits it, and your tree will look like it grew that way, not like it was assembled in a hurry.
- The key takeaway: One wood form beats a mixed box. A tree dressed entirely in wood slices or entirely in painted cutouts reads as a collection, while a tree mixing every wood craft reads as clutter.
- The detail most people miss: The finish is the decoration. A slice sanded smooth, sealed, and hung with plain string looks finished, while the same slice left rough and unsealed looks like firewood.
- What it costs or how long it takes: Most of these 24 ideas cost $5 to $30 in total, and each takes 20 minutes to 2 hours to make. A wooden ornament tree is often the cheapest tree you will ever dress, because wood offcuts, branches, and beads cost almost nothing.
At a glance
| Group | Ideas | Materials | Best for |
|---|---|---|---|
| Wood Slices | 01-04 | Branch slices, bark, string | Rustic and farmhouse trees |
| Cutouts and Shapes | 05-08 | Plywood, laser-cut shapes | Clean, modern rustic trees |
| Painted Wood | 09-12 | Paint, cutouts, baubles | Colourful family trees |
| Pyrography and Burned Wood | 13-16 | Wood burner, slices, discs | Heirloom and gift ornaments |
| Beads and Turned Wood | 17-20 | Wooden beads, turned baubles | Soft, Scandi-style trees |
| Personalized and Photo | 21-24 | Names, photos, unfinished blanks | Gifts and first Christmases |
Jump to an idea ↓
- 01 Bark-Edged Slice Discs with a Burned Star
- 02 Wood Slice Snowman
- 03 Wood Slice Reindeer
- 04 Wood Slice Angel
- 05 Laser-Cut Wooden Snowflakes
- 06 Wooden Star Ornaments
- 07 Wooden Tree Cutouts
- 08 Wooden Bell Cutouts
- 09 Hand-Painted Wooden Baubles
- 10 Painted Wooden Santas
- 11 Painted Wooden Gingerbread Men
- 12 Wooden Baubles in One Colour
- 13 Wood-Burned Snowflake Disc
- 14 Pyrography Family Name Ornament
- 15 Burned Pinecone Pattern Disc
- 16 Burned Winter Scene Disc
- 17 Wooden Bead Garland Ornaments
- 18 Turned Wooden Baubles
- 19 Wooden Bead Snowman
- 20 Wooden Bead Angel
- 21 Personalized Wooden Name Ornaments
- 22 Wooden Photo Ornaments
- 23 Custom Wood Ornament for a First Christmas
- 24 Unfinished Wood Ornaments to Paint
Wood Slices
01
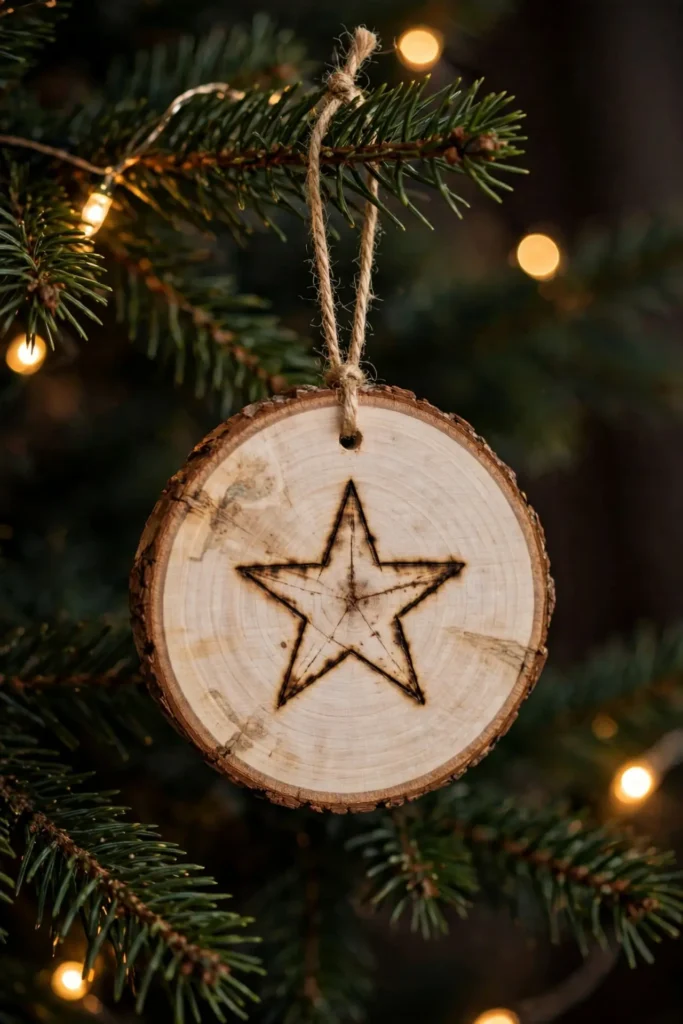
Bark-Edged Slice Discs with a Burned Star
A tree dressed in painted wooden ornaments can look busy, because painted shapes in many colours read as a toy box. Bark-edged slice discs with a single burned star read as calm and natural, because the wood grain and the bark edge are the only pattern, and the burned star is the only mark. Steps: 1. Cut branch slices about 1 cm thick and sand the cut faces smooth, leaving the bark edge rough. 2. Burn a simple star into the centre with a wood-burning pen, working slowly so the lines stay even. 3. Drill a small hole near the top, thread plain string, and seal the face with one thin coat of clear varnish.
Try it: Burn the star freehand, not from a stencil. A slightly uneven hand-burned star looks made by a person, while a perfect stencil star looks machine cut.
02
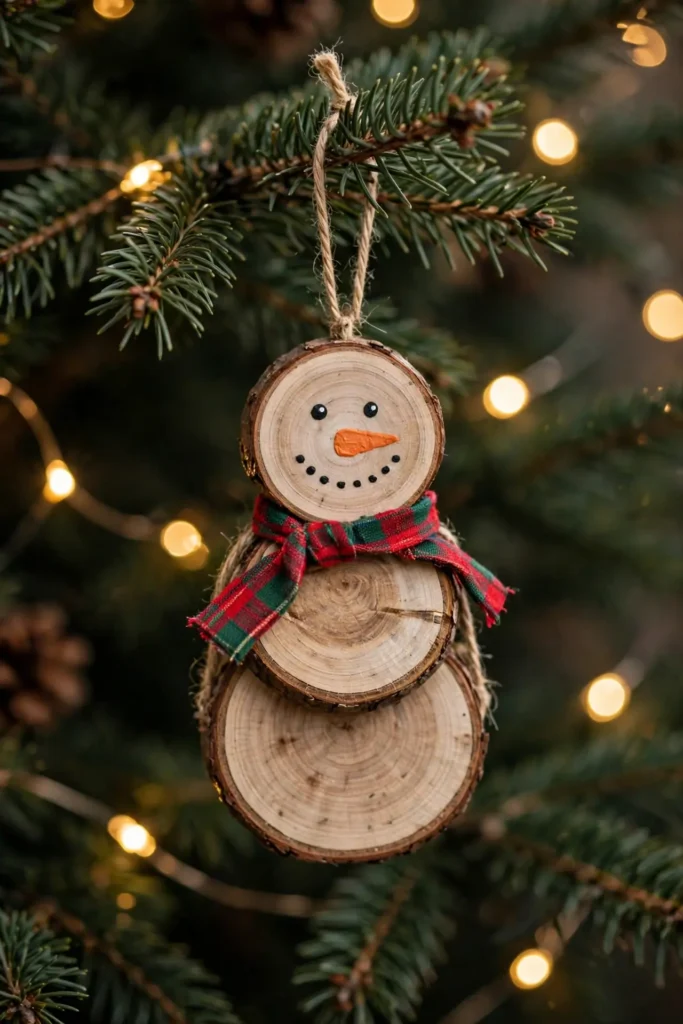
Wood Slice Snowman
A tree dressed only in round baubles can look flat, because every ornament is the same shape. A wood slice snowman, three small slices stacked vertically with a painted face and a twig scarf, gives the tree a figure with a face, because the slices read as snowballs and the painted details read as a character. Steps: 1. Glue three slices in decreasing sizes to a backing stick or a felt strip. 2. Paint two dot eyes, a carrot nose, and a smile on the top slice. 3. Tie a scrap of fabric around the middle slice as a scarf and add a string loop at the top.
Try it: Keep the painted face tiny, dots and a line, not a full portrait. A tiny face reads as charming, while a detailed face turns the snowman into a doll.
03
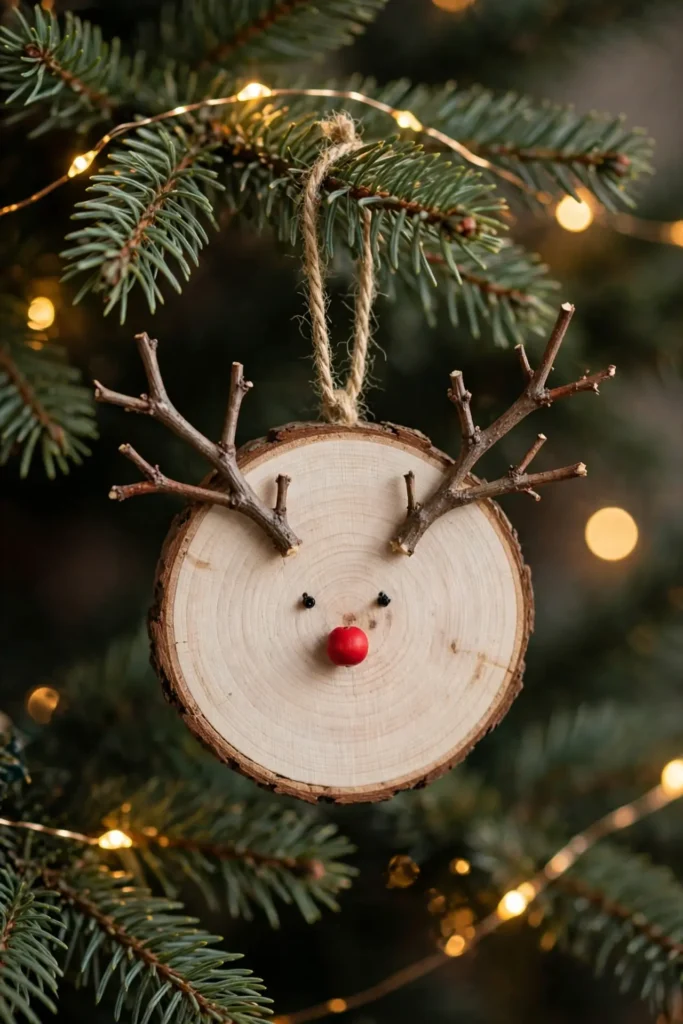
Wood Slice Reindeer
A tree dressed in shop-bought reindeer ornaments can look identical to every other tree, because the same plastic reindeer sits everywhere. A wood slice reindeer, one round slice for the face with two small twig antlers glued on top, is unmistakably handmade, because no two slices have the same grain. Steps: 1. Choose a round slice with a clear grain pattern and sand it smooth. 2. Glue two forked twigs to the top as antlers and a small red bead or painted dot as a nose. 3. Paint two dot eyes, drill a hole, and hang with plain string.
Try it: Use real twigs for the antlers, not cutout antlers. Real twigs give the reindeer its woodland character, while flat cutout antlers look like a cartoon.
04
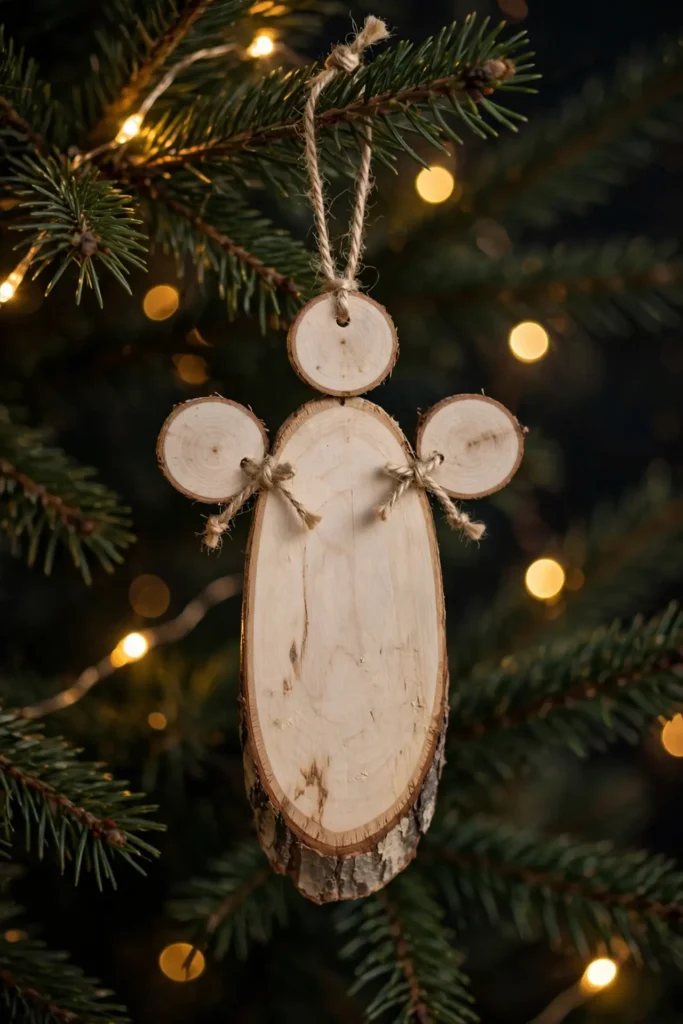
Wood Slice Angel
A tree topped with a star and covered in baubles can feel like it forgot the angels, because angels are the figure children look for after Santa. A wood slice angel, one teardrop-shaped slice for the body with two smaller slices as wings, hangs on a branch like a small guardian, because the pale wood reads as soft and the wings read as light. Steps: 1. Cut one tall slice for the body and two small round slices for wings. 2. Glue the wings to the back of the body slice, angled outward. 3. Paint a simple halo ring on the top of the body, add a string loop, and hang it near the top of the tree.
Try it: Hang the angel on a front branch, not hidden inside. An angel tucked inside the tree disappears, while an angel on the front reads as a guardian of the whole tree.
Cutouts and Shapes
05
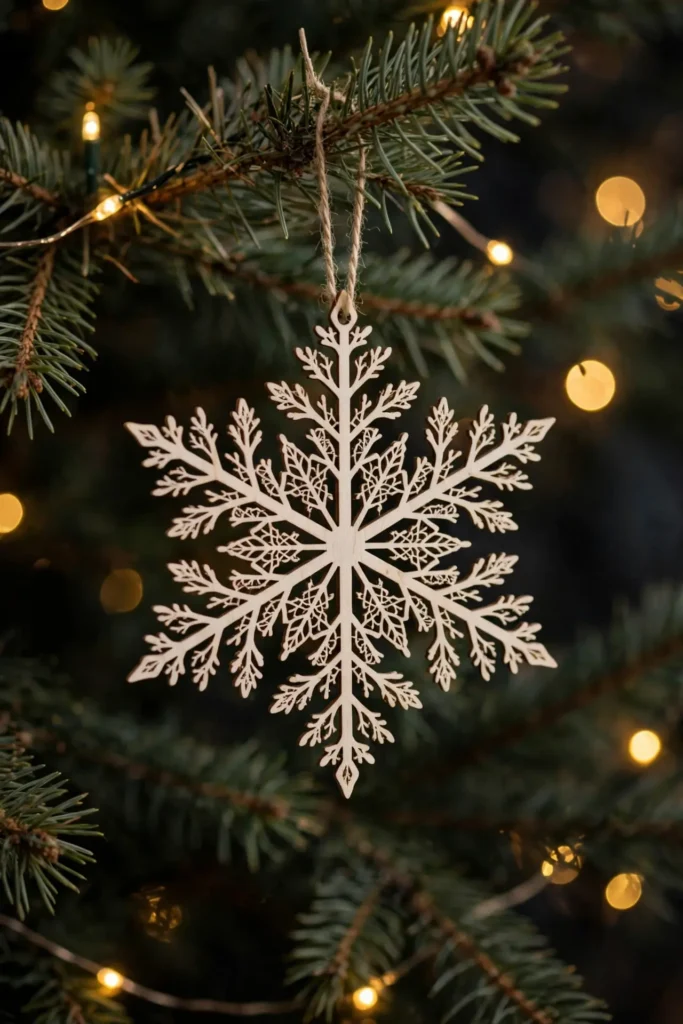
Laser-Cut Wooden Snowflakes
A tree dressed in plastic snowflakes can look cheap, because thin plastic bends and shines in the wrong way. Laser-cut wooden snowflakes, thin plywood cut into fine branching patterns, look precise and warm at the same time, because the laser lines are crisp and the wood grain shows through every branch. These are the most popular wooden christmas tree decorations for modern trees, and they suit a white or pale green tree best, where the pale wood stands out.
Try it: Hang laser-cut snowflakes at different depths, some on outer tips, some tucked inside. Snowflakes at one depth look pasted on, while snowflakes at mixed depths look like falling snow.
06
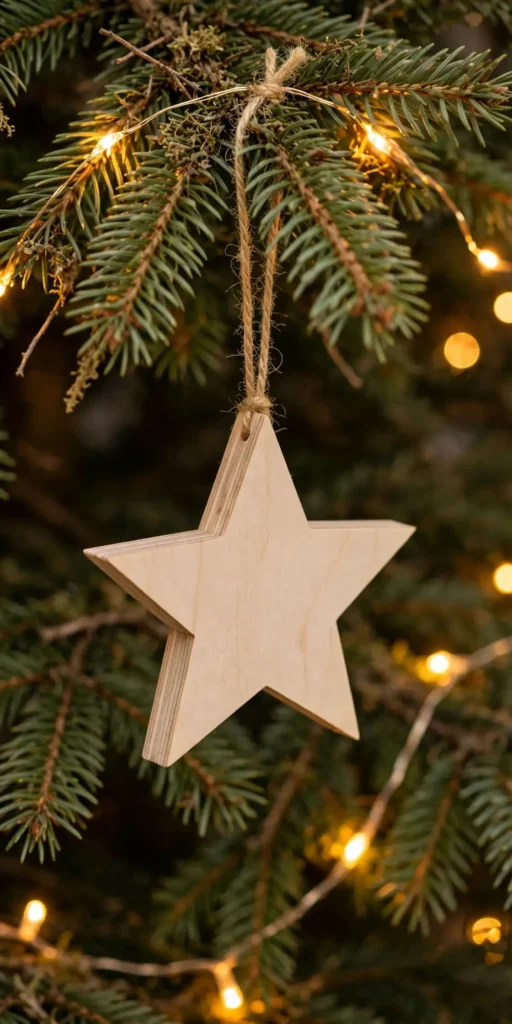
Wooden Star Ornaments
A tree dressed in star ornaments of many materials can look scattered, because glass, plastic, and metal stars reflect light differently. Wooden star ornaments in one wood and one finish unify the tree, because every star has the same warm tone and the same matte surface. Cut stars from thin plywood or buy unfinished wooden stars, sand the edges smooth, and hang them with plain string in a single size.
Try it: Use one size only, about 10 cm across. Mixed star sizes look like a box emptied onto the tree, while one size reads as a deliberate set.
07
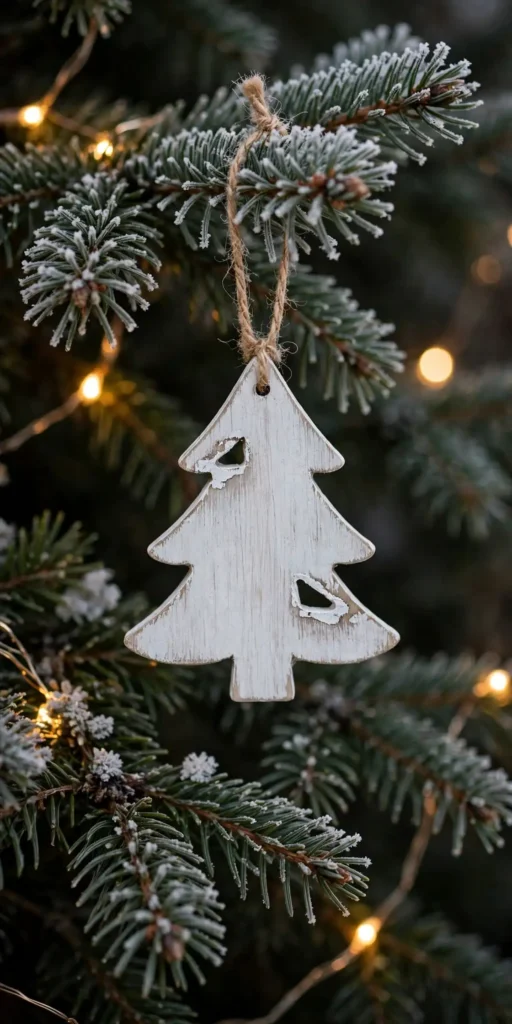
Wooden Tree Cutouts
A tree dressed only in round ornaments can feel like it has no trees of its own, because every shape is a ball. Wooden tree cutouts, small fir shapes cut from plywood and hung among the branches, echo the big tree in miniature, because the same silhouette repeats at two scales. Paint them green, leave them natural, or whitewash them, but keep one finish across the set.
Try it: Whitewash the tree cutouts instead of painting them green. A whitewashed tree cutout reads as frosted and vintage, while a green cutout can disappear against green branches.
08
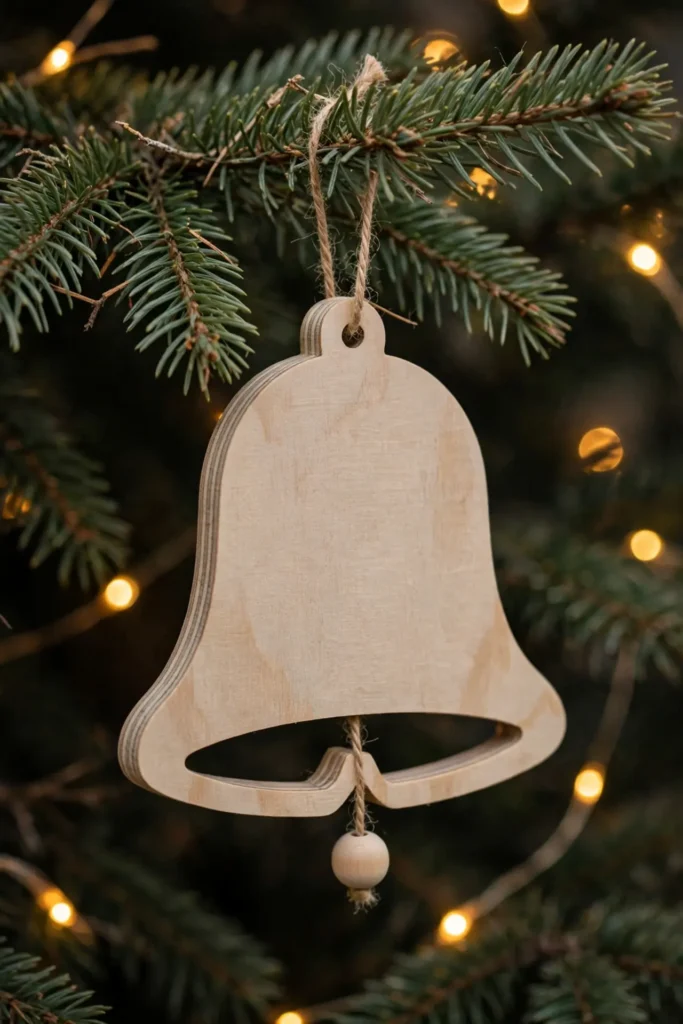
Wooden Bell Cutouts
A tree dressed with a silent set of ornaments can feel like it is missing something, because bells are the sound of Christmas. Wooden bell cutouts, flat bell shapes with a small bead glued inside as a clapper, give the tree the shape of a bell without the weight of metal, because plywood is light enough for the thinnest branches. Hang them near the front of the tree where guests can see the bell shape.
Try it: Glue a tiny wooden bead inside each bell as a clapper. A bell without a clapper looks unfinished, while a bead clapper completes the shape at a glance.
Painted Wood
09
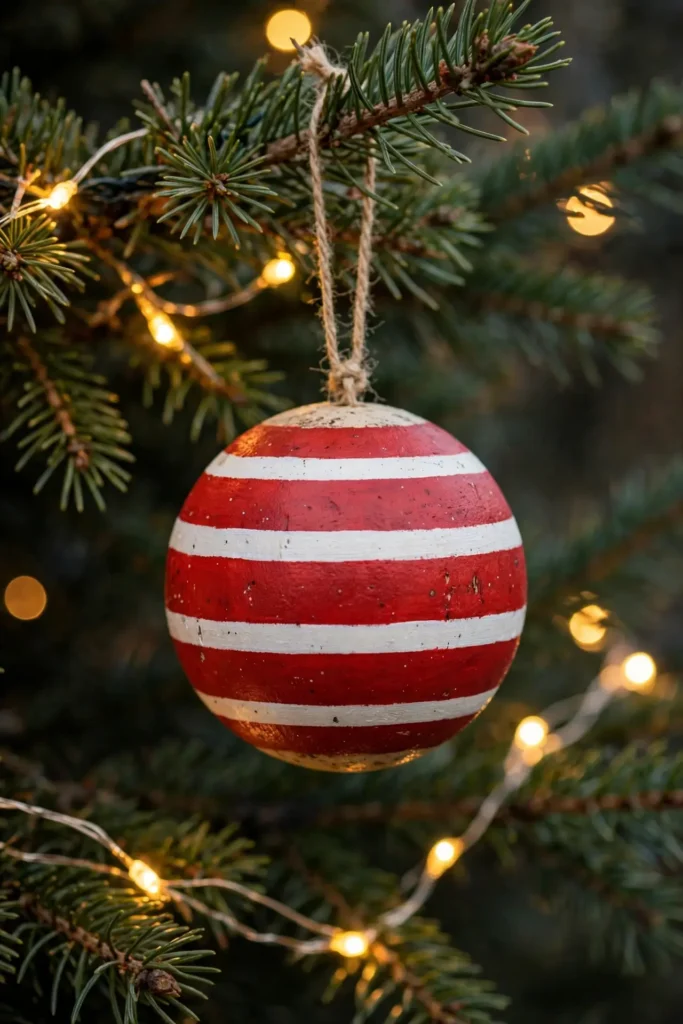
Hand-Painted Wooden Baubles
A tree dressed in plain wooden baubles can look unfinished, because bare wood on bare wood has no variation. Hand-painted wooden baubles, round wooden balls painted with simple patterns, stripes, dots, or a single snowflake, give the tree colour without losing the warmth of wood, because the paint sits on a wooden base that still shows at the edges. Steps: 1. Sand round wooden baubles smooth and wipe off the dust. 2. Paint one simple pattern per bauble in two colours maximum. 3. Seal with clear varnish once dry and hang with ribbon or string.
Try it: Paint one pattern per bauble and repeat it across the set. A set of matching painted baubles reads as a collection, while a set of different patterns reads as a paint experiment.
10
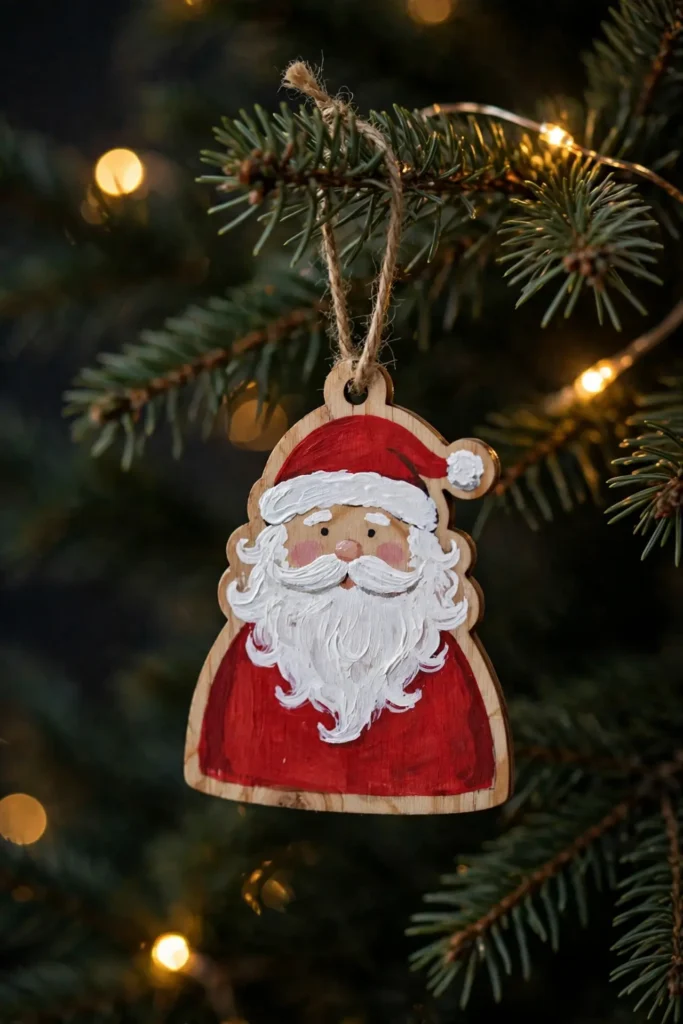
Painted Wooden Santas
A tree dressed with only abstract shapes can feel like it forgot the characters, because children look for faces first. Painted wooden Santas, small flat Santa shapes cut from plywood and painted red, white, and black, give the tree a figure children love, because the painted face is friendly and the flat shape hangs safely on any branch. Paint the coat red, the beard white, and the boots black, and keep the face to dots and a smile.
Try it: Paint the beard with a dry brush, not a loaded one. A dry-brushed beard looks fluffy and textured, while a thickly painted beard looks like a white blob.
11
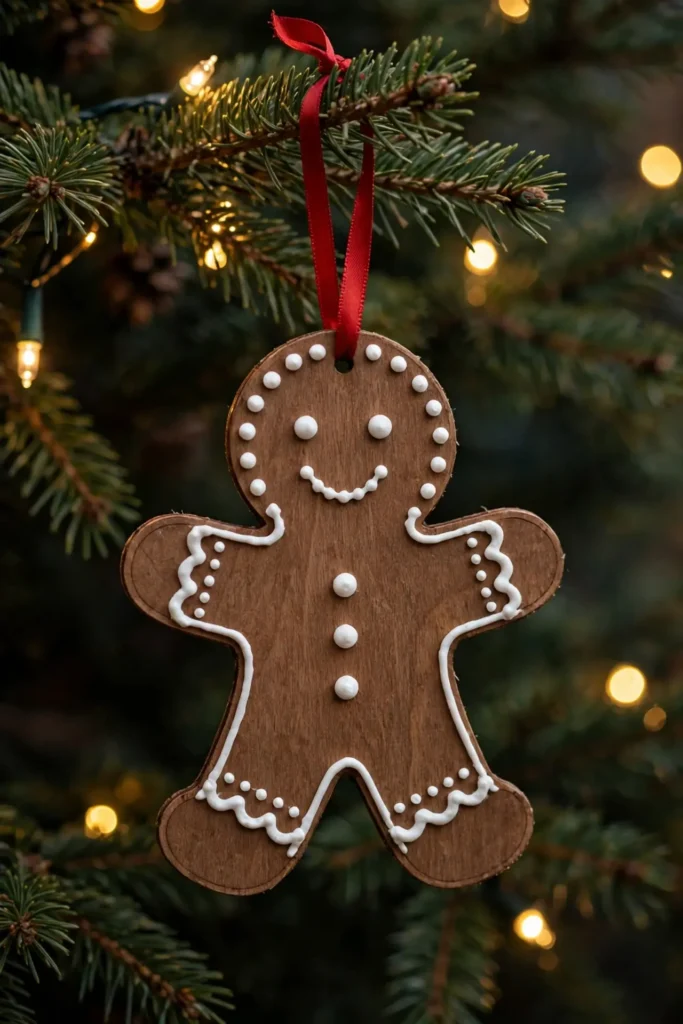
Painted Wooden Gingerbread Men
A tree dressed in gingerbread ornaments made from real biscuits can look wonderful for a week and stale after it, because biscuits dry out and crumble. Painted wooden gingerbread men last for years, because the wood holds the shape and the paint holds the icing look. Cut gingerbread man shapes from thin plywood, paint them brown, add white icing dots for buttons and a smile, and hang them with red ribbon.
Try it: Paint the icing details after the brown coat is fully dry. Icing painted onto wet brown smears, while icing on dry brown stays crisp like real piping.
12
Wooden Baubles in One Colour
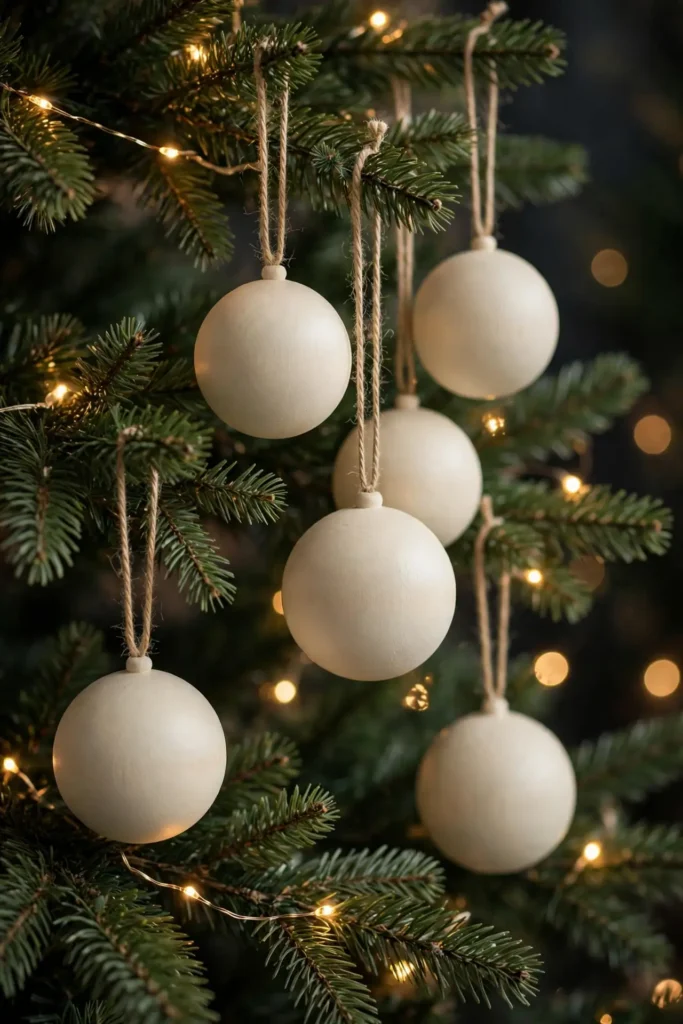
A tree dressed in wooden baubles of many colours can look like a toy shop, because every colour competes. Wooden baubles in one colour, all red, all cream, or all sage green, give the tree the calm of a single palette with the warmth of wood underneath, because the paint is thin enough that grain still shows through. This is the easiest of all wooden christmas decorations to buy ready-made, since one-colour sets are sold everywhere.
Try it: Choose a matte paint, not gloss. Matte paint lets the wood grain show through, while gloss paint turns a wooden bauble into a plastic-looking one.
Pyrography and Burned Wood
13
Wood-Burned Snowflake Disc
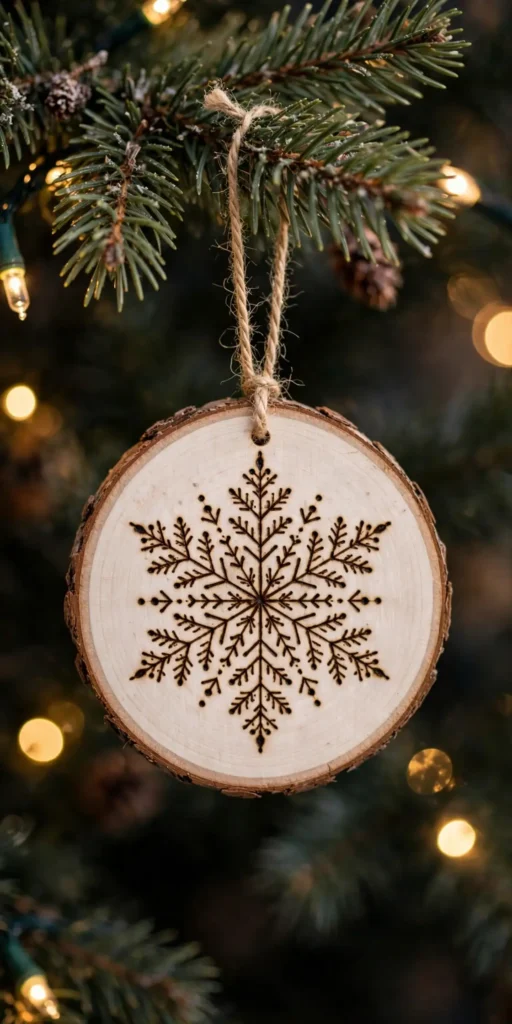
A tree dressed in printed snowflake ornaments can look flat, because print has no texture. A wood-burned snowflake disc, a round slice with a snowflake burned into the face, has texture you can feel, because the burned lines sit slightly below the surface. Steps: 1. Sand a round slice smooth and draw a simple six-armed snowflake in pencil. 2. Burn along the pencil lines with a fine wood-burning tip, working slowly and evenly. 3. Seal with clear varnish and hang with plain string.
Try it: Practise the snowflake on a scrap slice first. A burned line cannot be erased, so one practice run turns a shaky first attempt into a confident final disc.
14
Pyrography Family Name Ornament
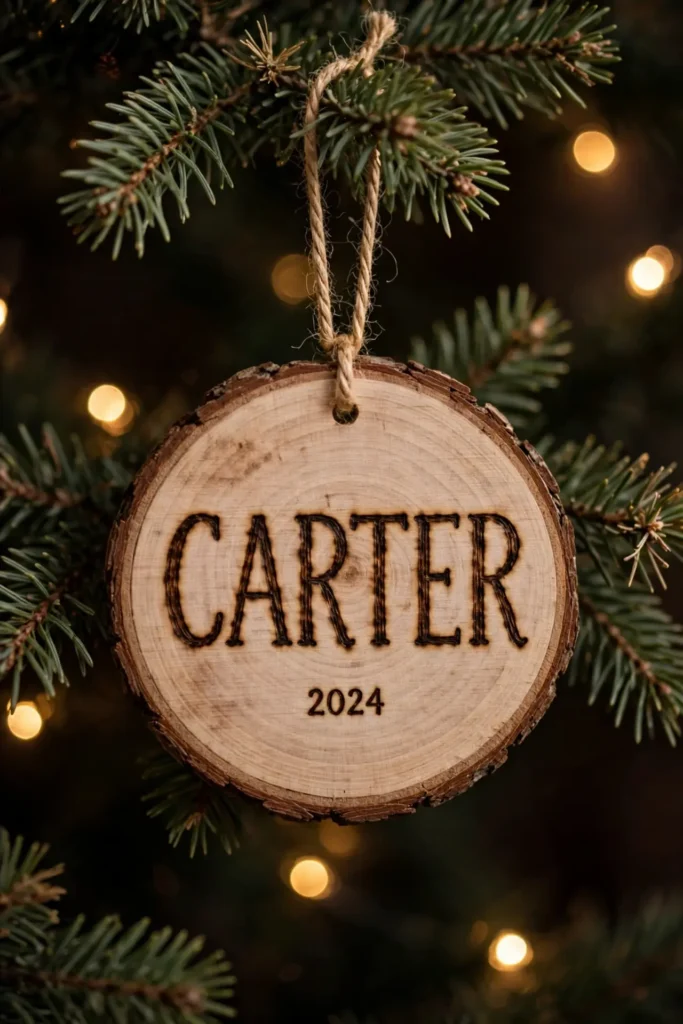
A tree dressed with generic ornaments can feel like a display, because nothing on it belongs to your family. A pyrography family name ornament, a slice or a disc with your surname and the year burned into it, turns the tree into a family record, because the burned name will not fade or peel like paint. This is one of the best personalized wooden ornaments for a gift, since it carries a name and a date in the wood itself.
Try it: Burn the surname large and the year small underneath. A large name with a small year reads as a family crest, while equal sizes read as a label.
15
Burned Pinecone Pattern Disc
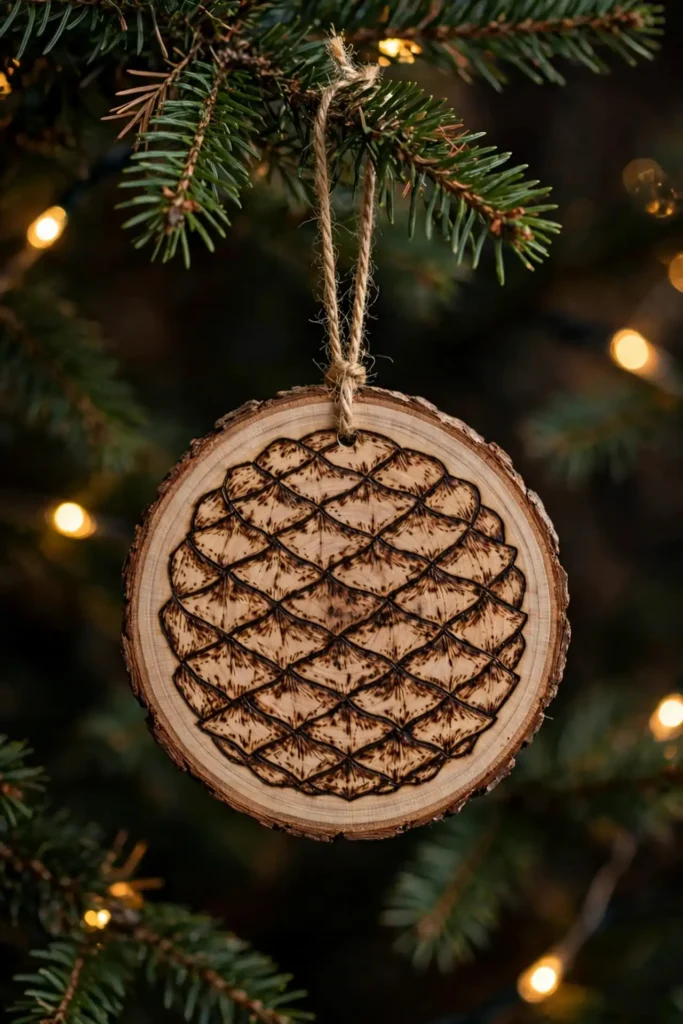
A tree dressed with real pinecones can shed needles and scales onto the floor, because real cones dry out and drop pieces. A burned pinecone pattern disc gives you the pinecone shape without the mess, because the pattern is burned into a slice that never sheds. Draw overlapping scale shapes in pencil, burn each scale outline, and shade the lower half of each scale lightly for depth.
Try it: Shade lightly and build up in passes. One heavy burn pass scorches the wood, while three light passes give the scales depth without burning through.
16
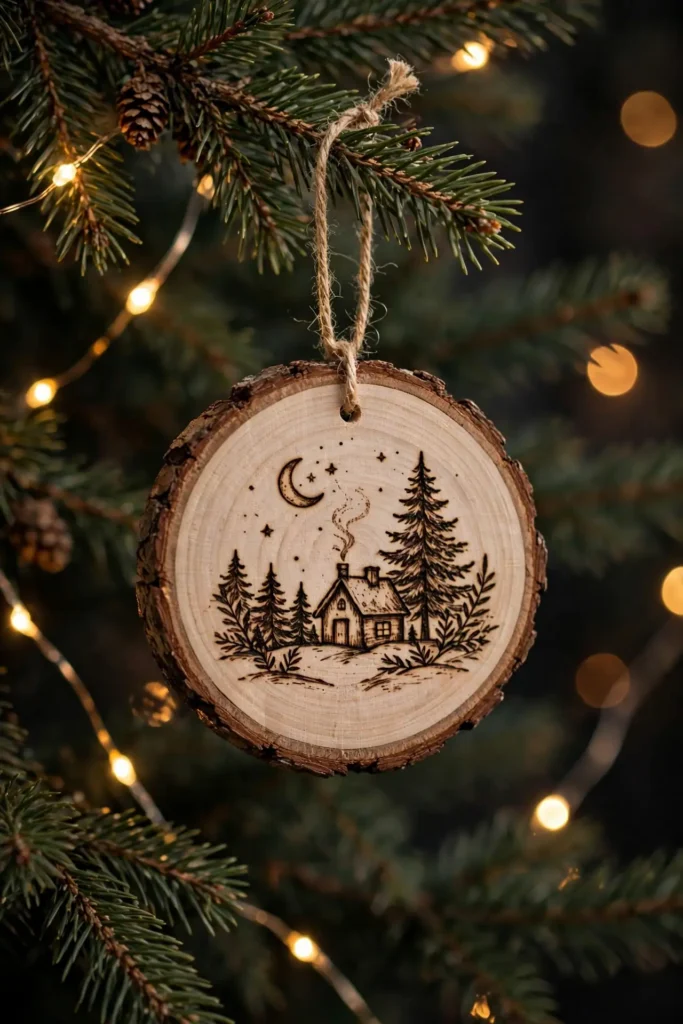
Burned Winter Scene Disc
A tree dressed only in single-shape ornaments can feel repetitive, because every ornament is one idea. A burned winter scene disc, a slice carrying a tiny burned scene, a house, a tree, and a moon, tells a whole story on one ornament, because the scene reads as a picture, not a shape. Sketch the scene in pencil first, burn the outlines, then add light shading for snow and sky.
Try it: Keep the scene to three elements maximum, a house, a tree, and a moon. A scene with five elements looks crowded on a small disc, while three elements read as a complete picture.
Beads and Turned Wood
17
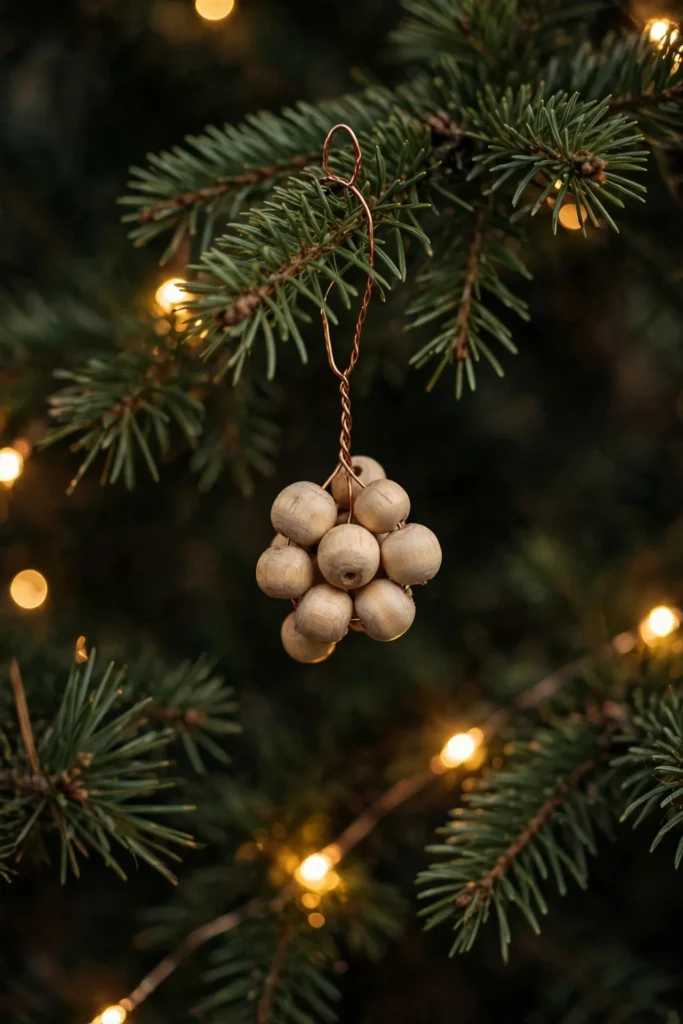
Wooden Bead Garland Ornaments
A tree dressed with tinsel can look frantic, because tinsel reflects light from every strand at once. Wooden bead garland ornaments, small clusters of beads strung on wire and hung as single ornaments, give you the movement of a garland without any shine, because the beads are matte and the gaps between them let the branches show. String five to seven beads on wire, twist the ends into a loop, and hang one cluster per branch.
Try it: Mix bead sizes in one cluster, large, medium, and small. Beads of one size look like a necklace, while mixed sizes look like a natural cluster.
18
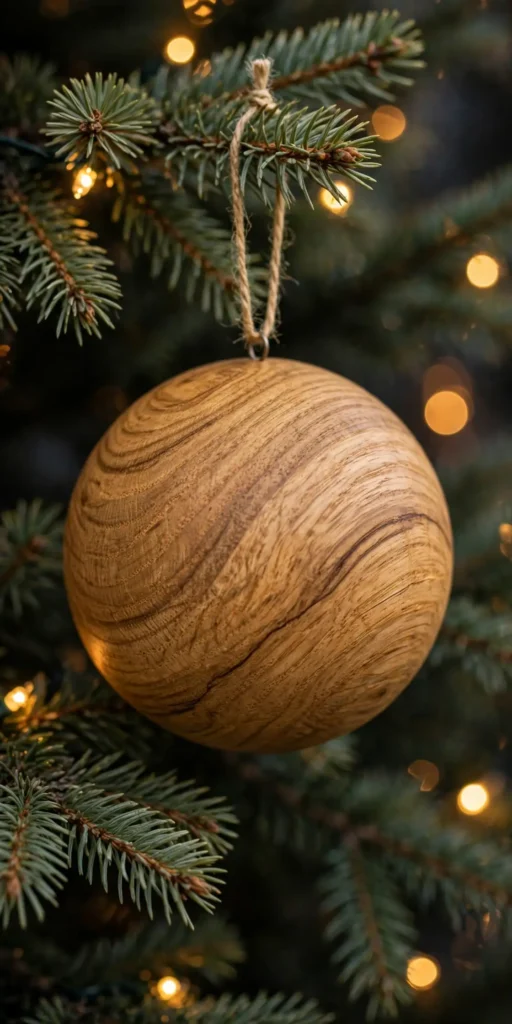
Turned Wooden Baubles
A tree dressed in flat wooden ornaments can feel two-dimensional, because flat shapes have no depth. Turned wooden baubles, round baubles shaped on a lathe from a single piece of wood, give the tree real depth, because the curved surface catches light and shows the grain wrapping around the ball. These are the finest wooden ornaments to buy, since turning is a skilled craft, and they suit a tree that is otherwise flat and simple.
Try it: Buy turned baubles in one wood, oak or walnut, not mixed woods. One wood reads as a set, while mixed woods read as offcuts.
19
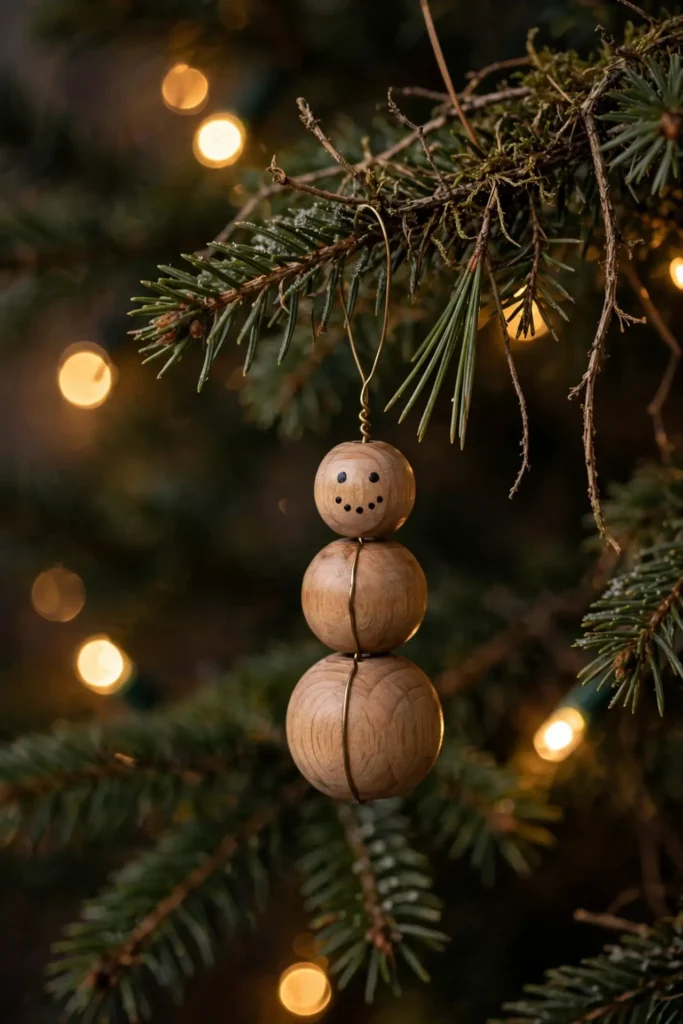
Wooden Bead Snowman
A tree dressed with bead ornaments in many shapes can look like a jewellery box, because beads in every form compete. A wooden bead snowman, three beads stacked on a wire with a tiny painted face on the top bead, gives the tree one bead figure with a face, because the stacked beads read as snowballs and the face reads as a character. Thread a large, medium, and small bead onto wire, twist a loop at the top, and paint dot eyes and a smile on the small bead.
Try it: Use natural, unpainted beads for the body and paint only the face. An all-painted bead snowman looks like plastic, while natural beads with a painted face read as wood.
20
Wooden Bead Angel
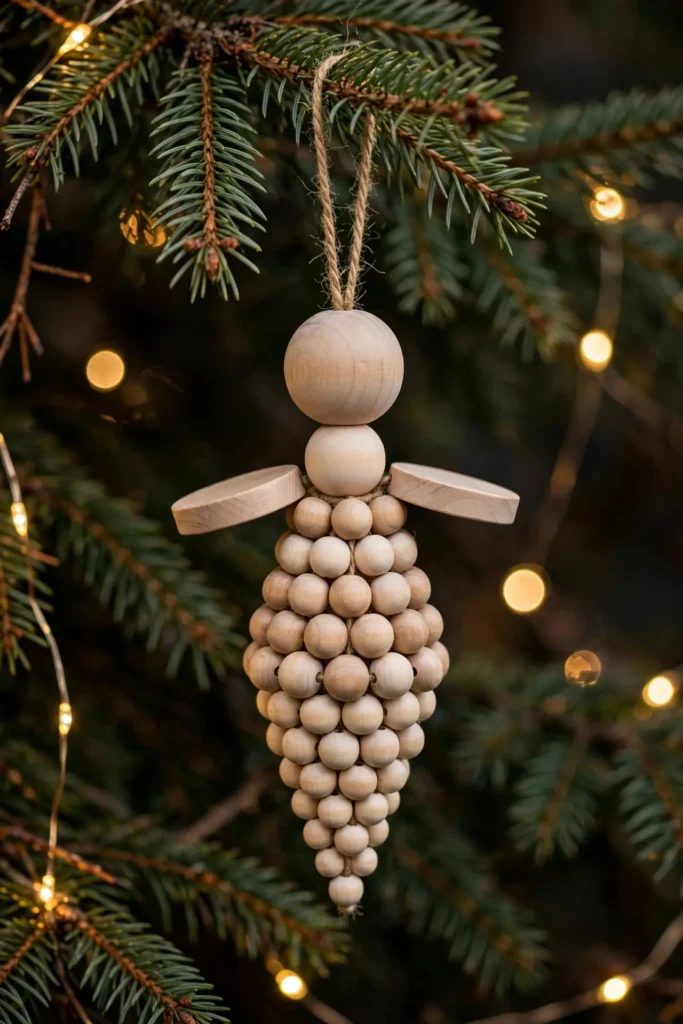
A tree dressed with bead garlands can feel like it forgot the angels, because garlands are decoration, not figures. A wooden bead angel, one large bead for the head, a cone of beads for the body, and two flat beads as wings, hangs as a small guardian, because the bead body catches light softly and the wings read as light. String the beads on wire in the angel shape, add a halo loop at the top, and hang it near the top of the tree.
Try it: Use a single bead colour for the body and a lighter bead for the head. A body and head in the same bead look like a blob, while a lighter head reads as a face.
Personalized and Photo

21
Personalized Wooden Name Ornaments
A tree dressed with ornaments for no one in particular can feel impersonal, because every ornament could belong to anyone. Personalized wooden name ornaments, a name cut from plywood or burned onto a disc, give every family member their own ornament, because the name makes it theirs. Hang one per person, and children will look for their own name first every year.
Try it: Cut or burn names in the same font and size for everyone. Matching name ornaments read as a family set, while mixed fonts read as a jumble.
22
Wooden Photo Ornaments
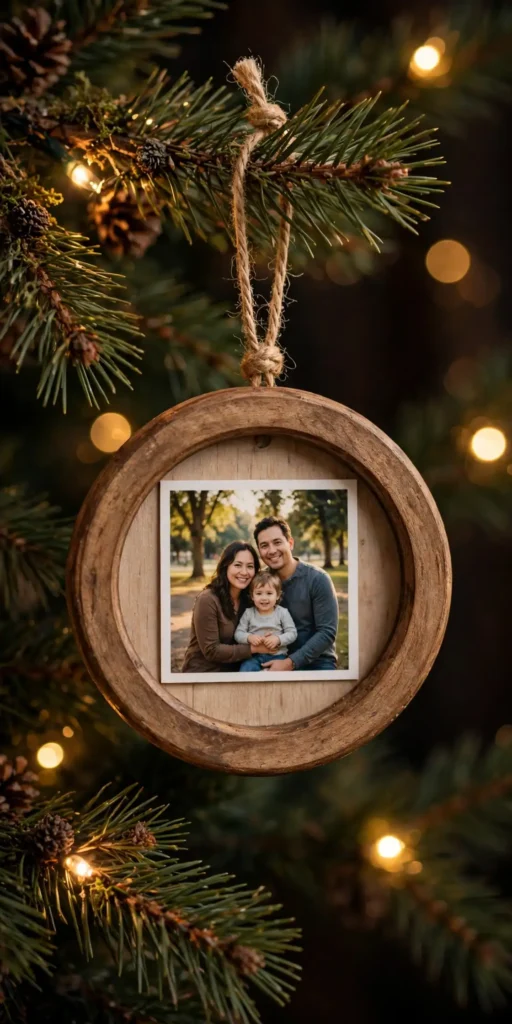
A tree with no personal ornaments can feel like a display, because nothing on it belongs to your family. Wooden photo ornaments, small photos transferred onto wood slices or set into wooden frames, turn the tree into a family album, because the wood frame warms the photo in a way a metal frame never does. Steps: 1. Print small photos, about 5 cm across, on ordinary paper. 2. Transfer the photo onto a sanded slice with photo transfer medium, or glue the photo onto the slice and seal it. 3. Add a string loop and hang the photo ornaments at eye level, where guests will actually see the faces.
Try it: Choose one photo per ornament and hang them at eye level. Photos hidden inside the branches disappear, while photos at eye level get noticed and talked about.

23
Custom Wood Ornament for a First Christmas
A first Christmas can pass without a keepsake, because the baby will not remember it and the adults are too busy to make one. A custom wood ornament for a first Christmas, a disc engraved or burned with the baby’s name and the year, becomes the keepsake the family keeps forever, because wood lasts and the date never fades. Order or make it early in December, so it hangs on the tree for the whole season, not just Christmas morning.
Try it: Add the year as well as the name. A name without a year could be any year, while a name and a year together mark the first Christmas forever.
24
Unfinished Wood Ornaments to Paint
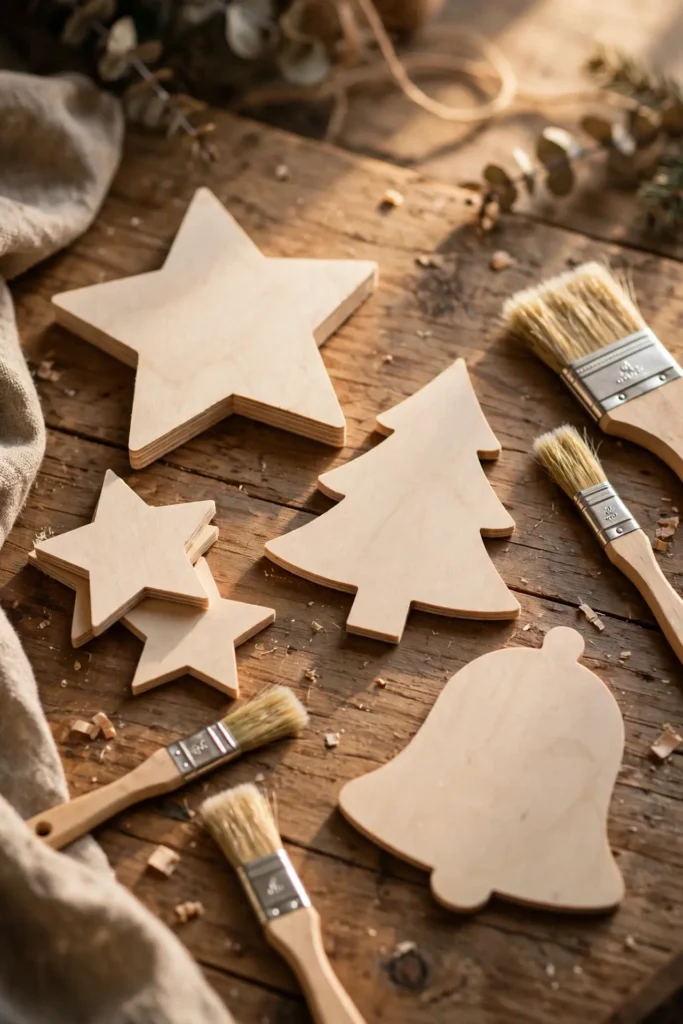
A tree dressed only in finished ornaments can feel like it left children out, because children cannot make a finished ornament. Unfinished wood ornaments to paint, plain plywood shapes sold in bags, let children paint their own ornaments, because the shapes are simple and the wood takes paint well. Buy a bag of mixed shapes, set out paints and brushes on Christmas Eve, and hang the painted ornaments while the paint is still slightly tacky, so they dry on the tree.
Try it: Seal the painted ornaments with clear varnish the next day. Unsealed paint chips and smudges, while a sealed ornament survives years of hanging and handling.
Pro tip: Step back to the doorway and squint at your tree. If you can still pick out each wooden ornament as a separate shape with its own grain, the tree is wooden. If the shapes blur into one brown mass, remove ornaments until each one stands alone again.
Three rules for wooden ornaments that look collected, not cluttered
Most wooden ornament trees look unfinished for the same three reasons, and all three are fixable.
- First, limit the wood form. One form per tree, slices or beads or painted cutouts, repeated consistently, looks collected, while ornaments from every wood craft look like leftovers.
- Second, finish every piece. Sanded edges, sealed faces, and neat string loops are what separate a wooden ornament from a piece of firewood, because the finish is what the eye reads first.
- Third, match the scale to the tree. Small beads on a tall tree disappear, and large slices on a small tree dominate it, so choose ornaments sized to the tree you actually have, not the tree you wish you had.
Storing and reusing your wooden ornaments
Wooden ornaments last for years if you store them properly, and the storage step is part of the making, not an afterthought.
- First, wrap each piece separately. Painted faces, burned designs, and bead clusters chip and scratch against each other, so tissue paper between pieces is worth the minute it takes.
- Second, label every box by form and year. A box labelled “2025 wood slices” is easy to find next December, while a box labelled “Christmas stuff” means unpacking everything to find one ornament.
- Third, keep wood dry and away from damp. Wood swells, warps, and grows mould in a damp attic, so store wooden ornaments in a dry cupboard, and keep painted pieces away from direct sunlight, which fades paint over time.
Questions readers ask
What is a wooden christmas ornament?
A wooden christmas ornament is a tree decoration made from wood, such as a slice, a cutout, a bead cluster, or a turned bauble, often left natural, painted, or burned with a design. The style favours warm grain, matte finishes, and one wood form across the whole tree.
How do I make wooden christmas ornaments at home?
You make wooden christmas ornaments at home by cutting branch slices or plywood shapes, sanding them smooth, then painting, burning, or decorating them, and finishing with a string loop and a coat of clear varnish. A diy wood ornaments project takes 20 minutes to 2 hours per ornament, depending on the design.
What wood is best for christmas ornaments?
Pine, birch, and basswood are best for christmas ornaments, because they are soft enough to cut and sand easily, pale enough to paint or burn clearly, and cheap enough to buy in bulk. Hardwoods like oak and walnut suit turned baubles best, since their grain shows beautifully on a curved surface.
Can I paint wooden ornaments?
Yes, you can paint wooden ornaments, and acrylic paint works best, because it dries fast, covers well, and seals cleanly under varnish. Sand the wood first, paint in thin coats, let each coat dry fully, and finish with clear varnish so the paint survives years of hanging.
How do I seal wooden ornaments so they last?
You seal wooden ornaments so they last by brushing on one or two thin coats of clear varnish or wood sealer, letting each coat dry fully, and sanding lightly between coats. Sealed wood resists moisture, dust, and handling, while unsealed wood stains and wears quickly.
Are wooden ornaments safe for children and pets?
Wooden ornaments are safe for children and pets when they are large, smooth, and hung out of reach of small hands and chewing pets, since small beads and sharp cut edges can be a hazard. Choose flat cutouts and large slices for low branches, and keep bead ornaments and small pieces higher up the tree.
How do I store wooden ornaments so they last?
You store wooden ornaments so they last by wrapping each piece separately in tissue paper, labelling the box by form and year, and keeping them in a dry cupboard away from damp and direct sunlight. Stored this way, wood slices, painted cutouts, and bead ornaments will last for many seasons.
Where can I buy wooden christmas ornaments?
You can buy wooden christmas ornaments in craft shops, thrift shops, and online marketplaces, where unfinished wood ornaments to paint, laser-cut snowflakes, and personalized wooden ornaments are sold in sets. Buying unfinished blanks and painting them yourself is the cheapest route, since a bag of blanks costs far less than finished ornaments.
People Also Ask
What is the 70/30 rule for a wooden ornament tree?
The 70/30 rule for a wooden ornament tree means roughly 70 percent of the tree carries wooden ornaments, and 30 percent carries lights and garland. The rule is a guide, not a law, but a tree that follows it will read as warm and wooden rather than bare or cluttered.
How do I make my wooden ornaments look shop bought, not homemade?
You make your wooden ornaments look shop bought, not homemade, by sanding every edge smooth, sealing every face, hiding every fixing, and keeping one wood form and one finish across the set. An ornament with smooth edges, a sealed face, and a neat string loop reads as designed, while rough edges and visible glue read as a craft project.
What wooden ornaments should beginners avoid?
Beginners should avoid turned baubles and fine pyrography scenes, because each of those needs specialist tools and practice to do well. Start with wood slices, painted cutouts, and bead ornaments, and save turning and detailed burning for a second year.
loved these ideas? ✿
Save this guide for later
Pin it to your board so it’s there when you’re ready to recreate it.

Curated by
Hey! I'm Sanaullah — visual curator and content creator. I search, curate, and test the best aesthetic ideas across Pinterest so you can easily transform your living space, style daily outfits, and try simple creative DIYs without the overwhelm.