
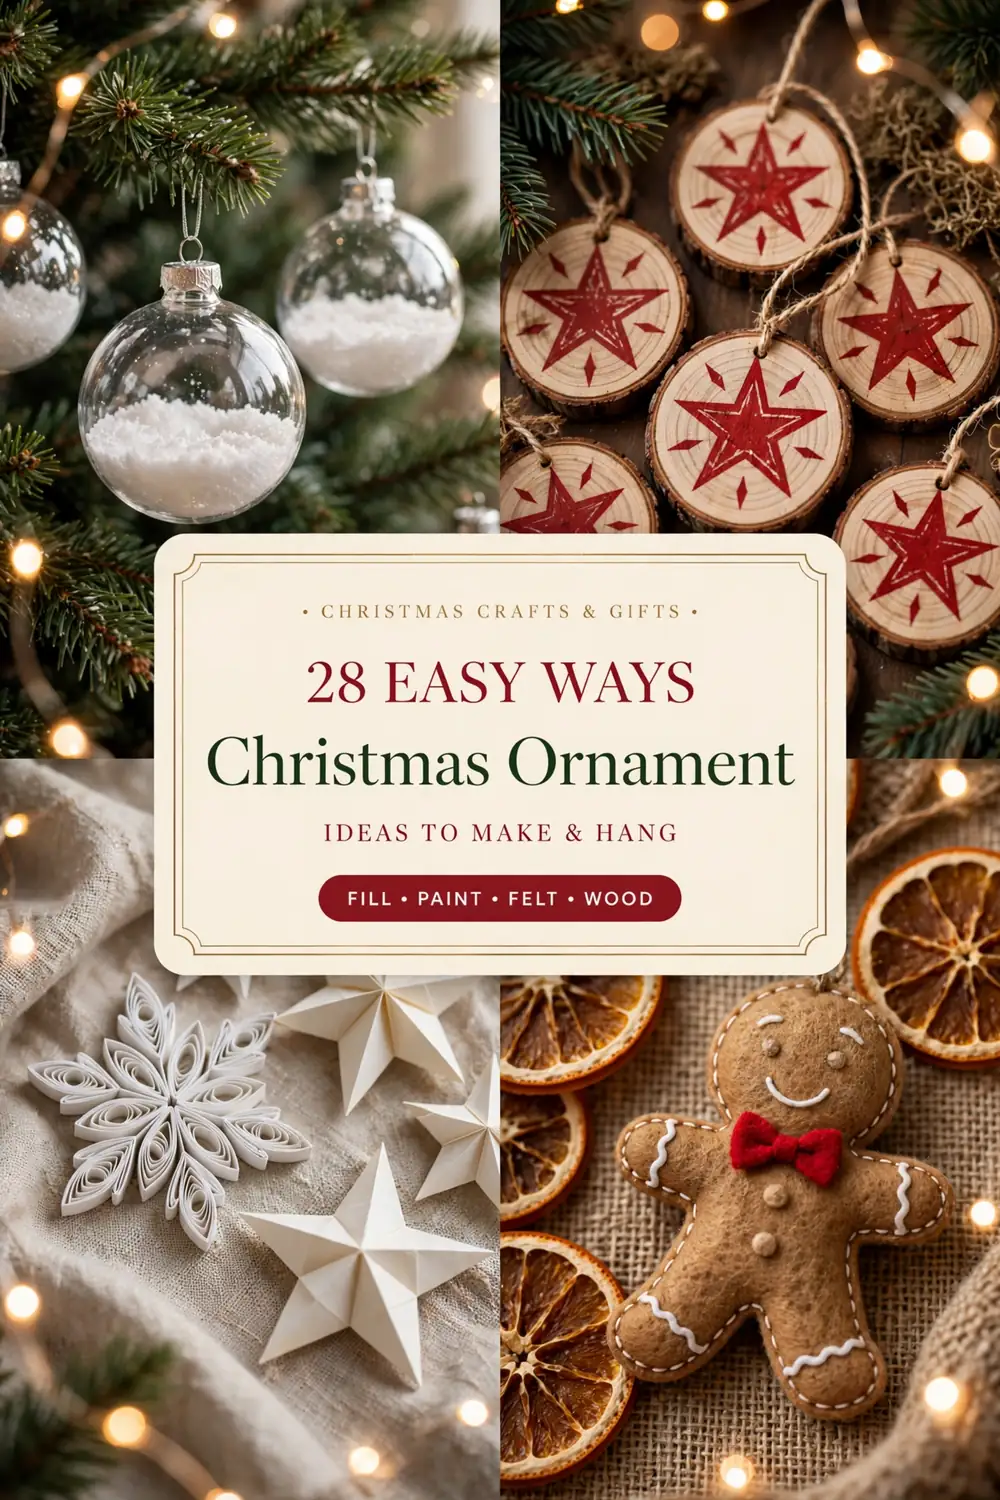
A tree dressed in handmade christmas ornaments has a warmth no store-bought set can copy, because every bauble on it carries a maker, a year, and a story. These 28 christmas ornament ideas are grouped by material (clear and fillable, wood, paper, fabric and felt, natural, painted glass, and food and keepsake) so you can shop your craft stash instead of a store, and most are easy christmas ornaments to make in under half an hour with supplies that cost under $2 per ornament. Whether you want diy christmas ornaments for your own branches, homemade ornaments for christmas gifts, or a neat batch to sell, pick one material group, make six to twelve in a single sitting, and your tree starts its heirloom years now.
QUICK IDEA SUMMARY
- The key takeaway: One material group is one craft setup. Choose a single group below, buy or gather that one set of supplies, and batch six to twelve matching ornaments in a sitting; two groups give a standard 6-foot tree a coordinated handmade core of 20 to 24 ornaments, finished off with plain filler baubles you already own.
- The detail most people miss: Drying time, not making time, is the real schedule. Paint-poured baubles need 24 to 48 hours to drain, salt dough needs 2 to 3 days to dry through, and dried orange slices need about 3 hours in a low oven, so start the slow ornaments first and the instant ones last.
- What it costs or how long it takes: Most of these cost $0.50 to $2 in materials each against $6 to $15 for a comparable bought ornament, and a batch of twelve takes 1 to 2 hours of hands-on time. A full tree’s worth of handmade ornaments is one weekend and one craft-store trip.
At a glance
| Material group | Ideas | Skill level | Time per ornament |
|---|---|---|---|
| Clear and fillable | 01-04 | Easy | 10 to 20 minutes |
| Wood | 05-08 | Easy to medium | 15 to 45 minutes |
| Paper | 09-12 | Easy to advanced | 10 to 40 minutes |
| Fabric and felt | 13-16 | Easy to medium | 10 to 30 minutes |
| Natural | 17-20 | Easy | 10 to 30 minutes, plus drying |
| Painted and glass | 21-24 | Easy to medium | 15 to 30 minutes, plus curing |
| Food and keepsake | 25-28 | Easy to medium | 10 to 45 minutes |
Clear and fillable ornaments
01
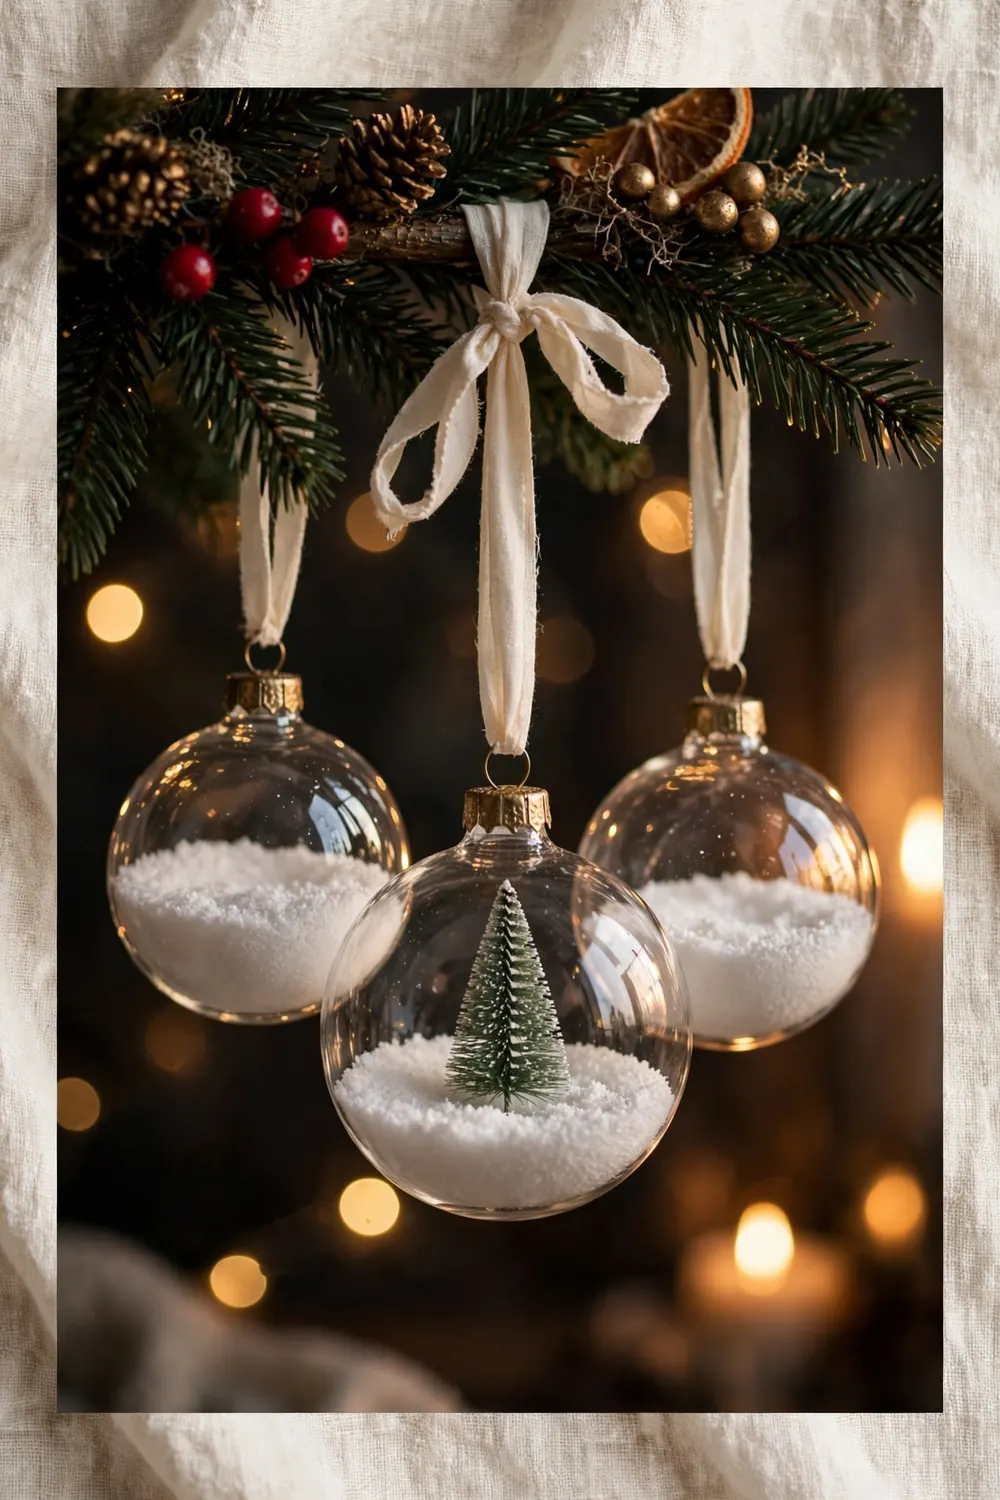
01. Snow-Filled Clear Baubles
Empty clear baubles look unfinished on a tree, but a spoonful of fake snow turns them into little snow globes that catch the lights from every angle. Pop the cap off a clear fillable bauble, funnel in faux snow or Epsom salt to fill the bottom third, add a tiny bottle-brush tree or a pinch of silver glitter if you like, then cap and hang.
You’ll need: clear fillable baubles · faux snow or Epsom salt · small funnel · ribbon · Time: 10 minutes · Skill: Easy
Try it: Fill with Epsom salt instead of plastic snow if the baubles will sit near warm lights. Salt has a finer, frostier sparkle and does not cling to the inside walls with static.
02
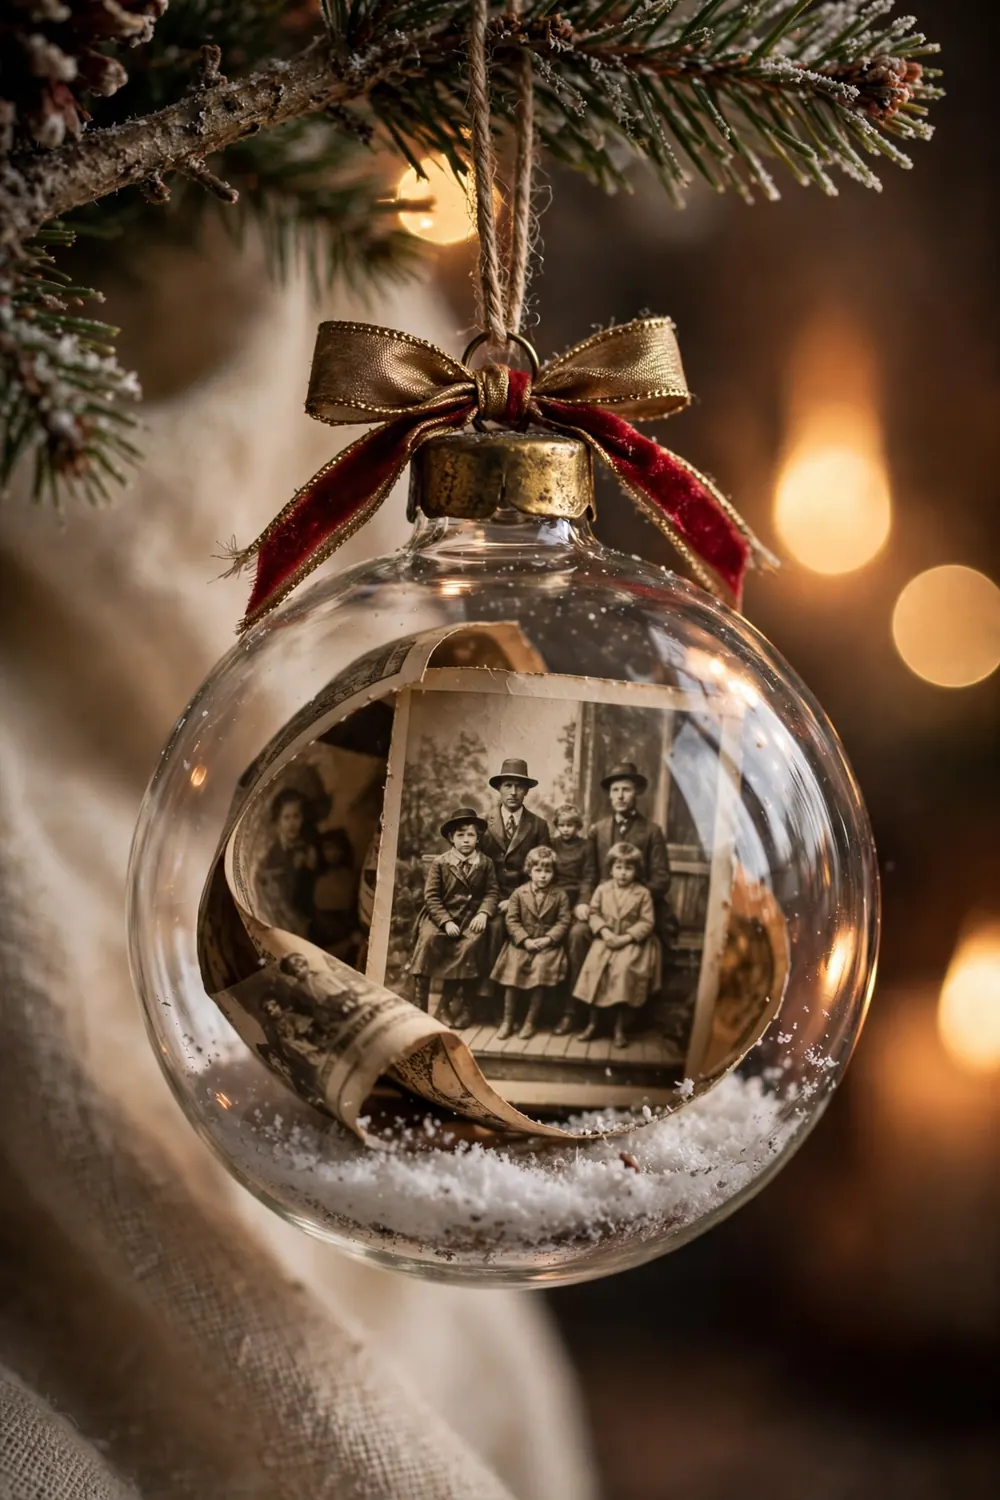
02. Photo Memory Clear Ornaments
A printed photo curled inside a clear bauble does the job of a framed picture and a decoration at once, and grandparents rate these above every other gift on the tree. Print a photo slightly taller than the bauble, trim it into a circle, roll it gently around a pencil so it springs open flat against the inside wall, then slide it in with tweezers and add a snow sprinkle at the base.
You’ll need: clear fillable baubles · printed photos · scissors · tweezers · faux snow · Time: 15 minutes · Skill: Easy
Try it: Print the year in small type at the bottom of each photo before trimming. A run of these, one per year, becomes a timeline of the family that guests actually stop and read.
03
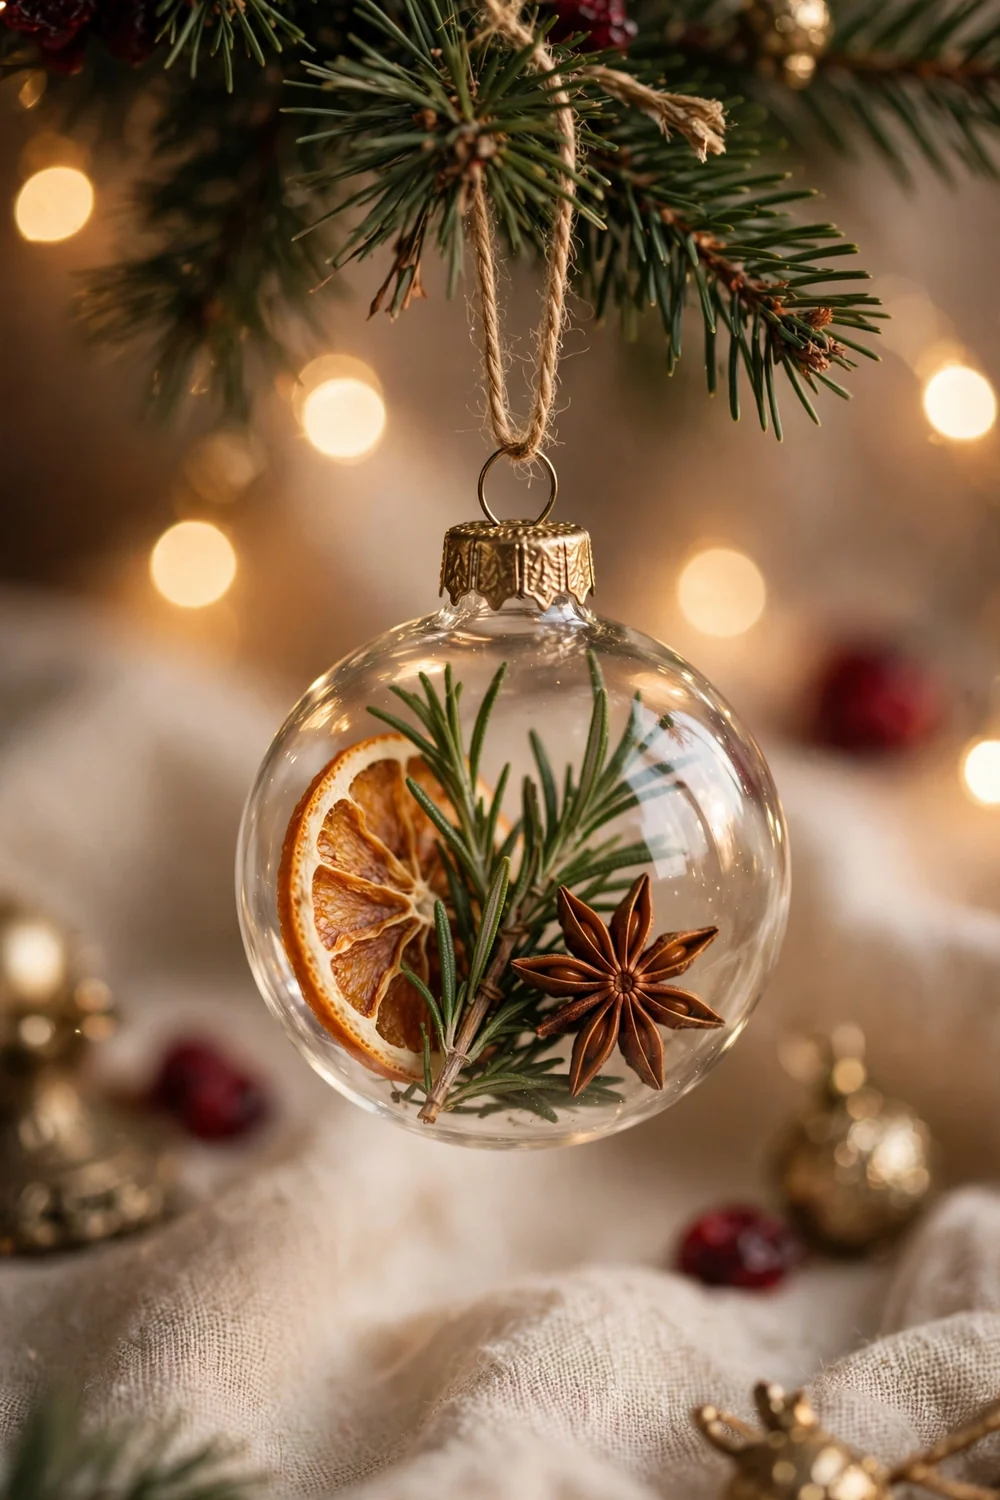
03. Dried Orange and Rosemary Filled Baubles
Clear baubles filled with dried botanicals solve the problem of natural ornaments looking dull by January, because everything inside the glass stays bright and dust-free. Push a small dried orange slice through the neck, tuck in a short rosemary sprig and one star anise, and the bauble reads like a tiny terrarium of the season.
You’ll need: clear fillable baubles · dried orange slices · rosemary sprigs · star anise · Time: 15 minutes · Skill: Easy
Try it: Use the two-piece baubles that split in half for anything wider than the neck. Forcing a dried orange slice through a narrow opening cracks it, and the cracked edge is all you will see.
04
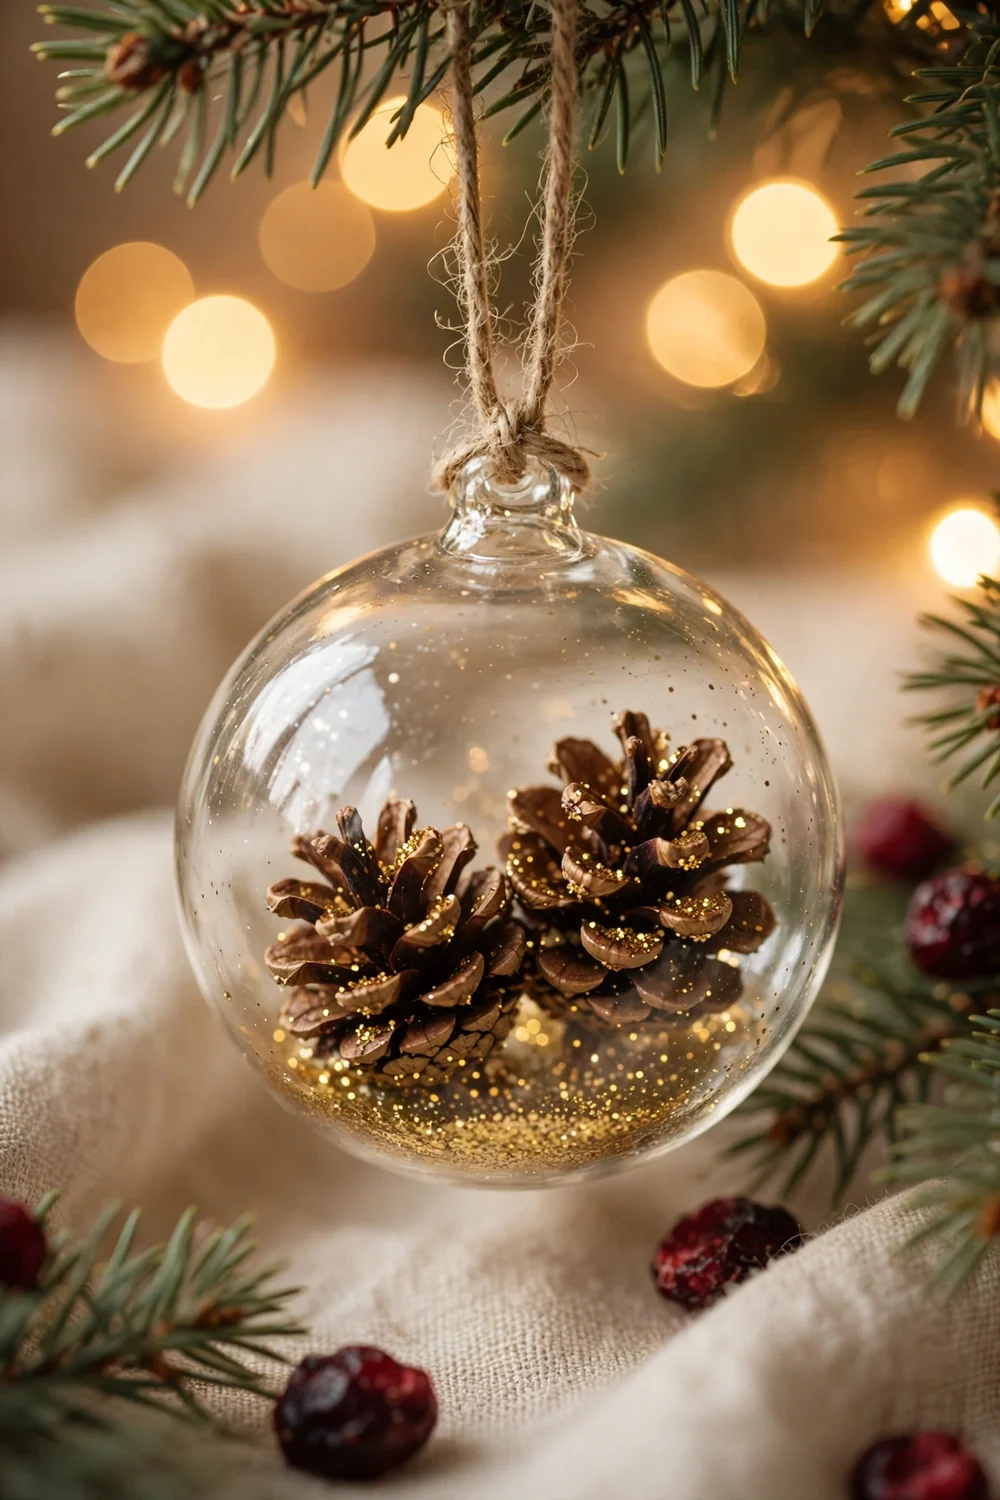
04. Mini Pinecone and Glitter Filled Baubles
A single mini pinecone inside a clear bauble looks like a specimen in a museum case, which is exactly the charm: rustic material, polished presentation. Drop two or three mini pinecones into the bauble with a half-teaspoon of coarse gold glitter, shake once so the glitter settles into the scales, and finish with a kraft or velvet hanging loop.
You’ll need: clear fillable baubles · mini pinecones · coarse glitter · ribbon or twine · Time: 10 minutes · Skill: Easy
Try it: Bake gathered pinecones at 200°F for 30 minutes before crafting. It opens the scales fully, dries out any sap, and makes sure nothing living comes in with them.
Wood ornaments
05
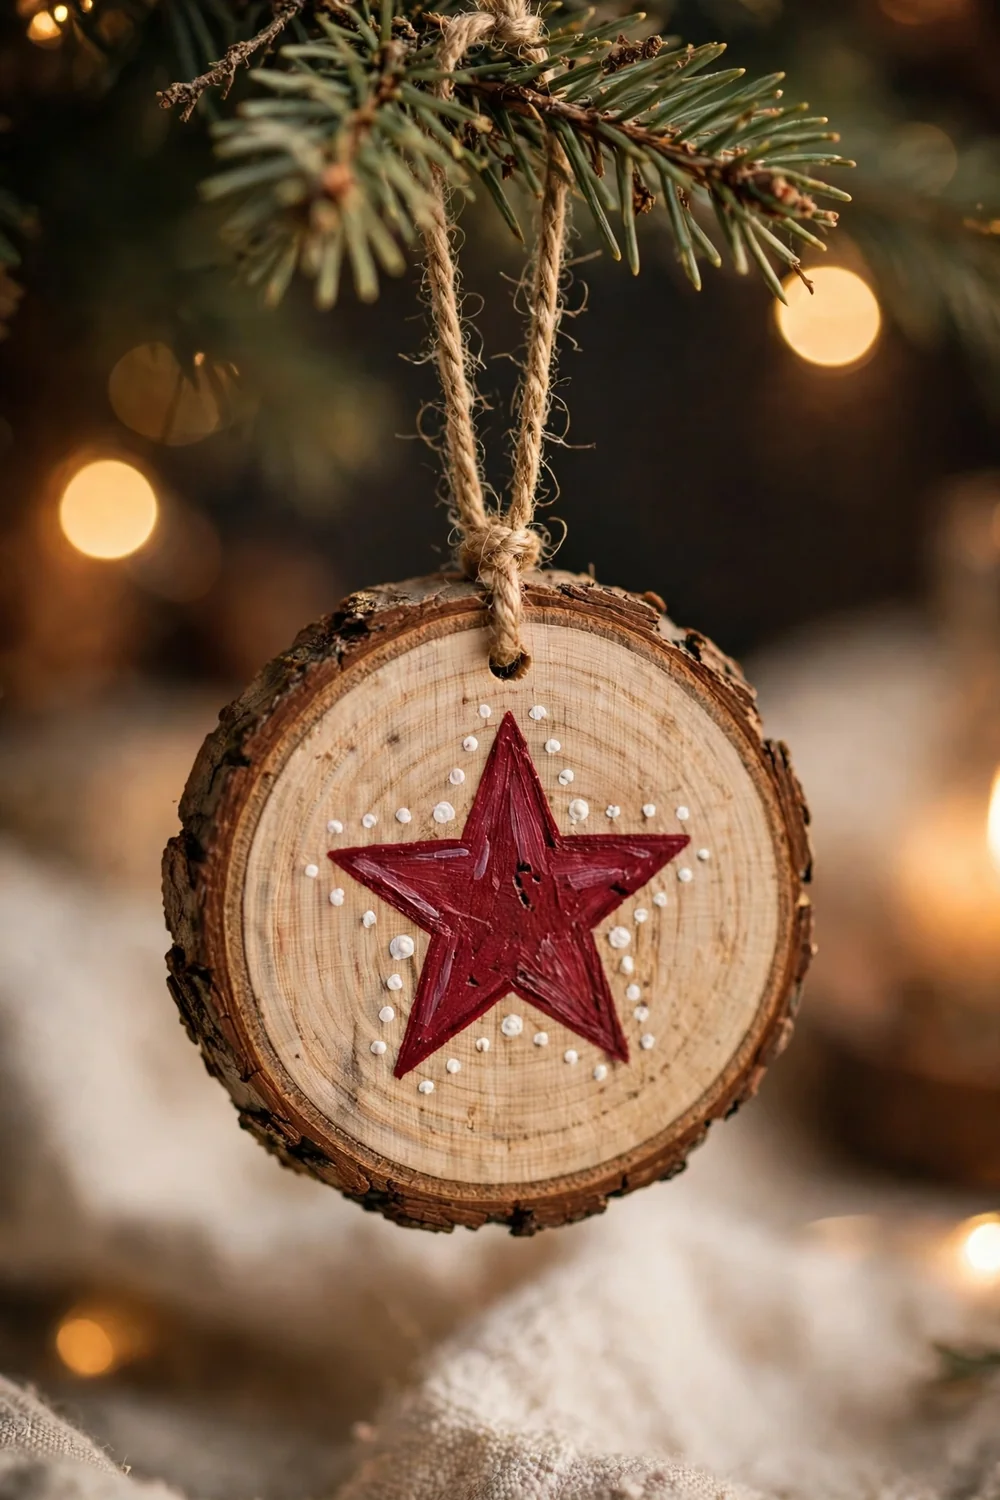
05. Painted Wood Slice Ornaments
Bare wood slices can look like coasters with string, but a confident painted design (a cranberry-red barn star, a simple tree, a checked border) makes them the ornaments people ask about. Sand the slice lightly, paint your design in acrylic with the bark edge left bare as a natural frame, seal with matte varnish, and hang from jute twine through the drilled hole.
You’ll need: wood slices, 3 to 4 inches · acrylic paint · fine brushes · matte sealer · twine · Time: 30 minutes, plus drying · Skill: Easy
Try it: Paint the design in one strong color plus white rather than full color. A red-and-white or green-and-white scheme looks deliberately folk-art and hides wobbly brushwork.
06
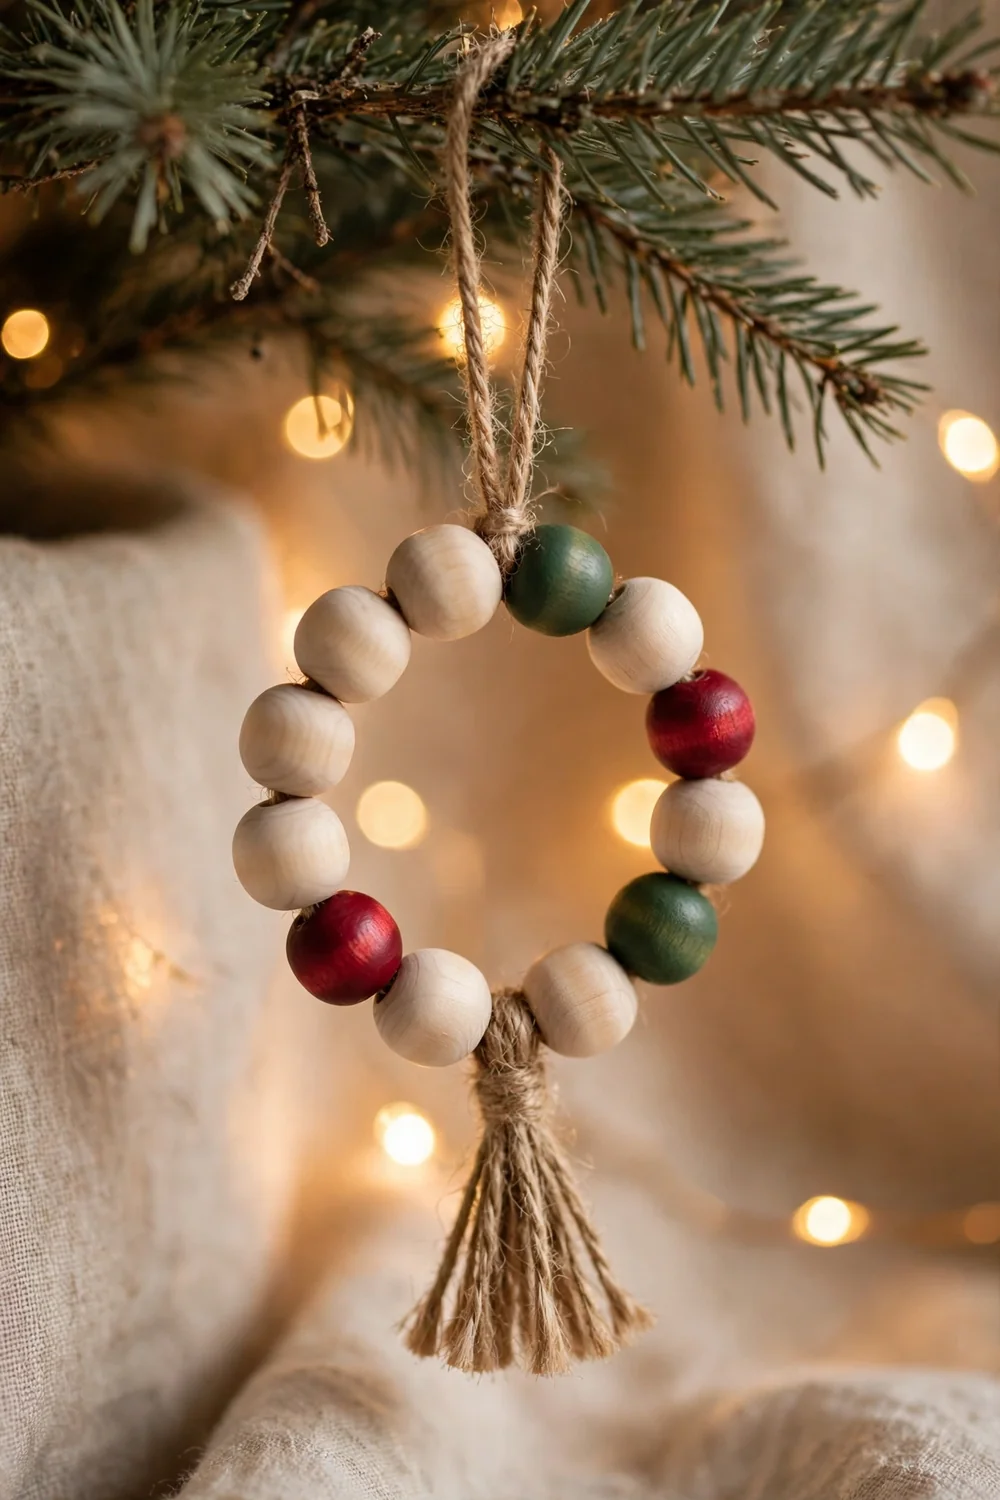
06. Wooden Bead Ornaments
Wooden bead ornaments fix the heaviness problem of an all-glass tree: they add shape and shadow without weight, shine, or breakage risk. Thread unfinished wooden beads onto jute or leather cord in a circle, a star, or a simple snowman stack, knot firmly, and leave a long loop for hanging.
You’ll need: unfinished wooden beads, mixed sizes · jute or leather cord · scissors · Time: 15 minutes · Skill: Easy
Try it: Dip just three or four beads from each ornament into cranberry or forest-green paint first. The mostly-natural palette with one color accent is what makes bead garlands and ornaments look Scandinavian rather than craft-fair.
07
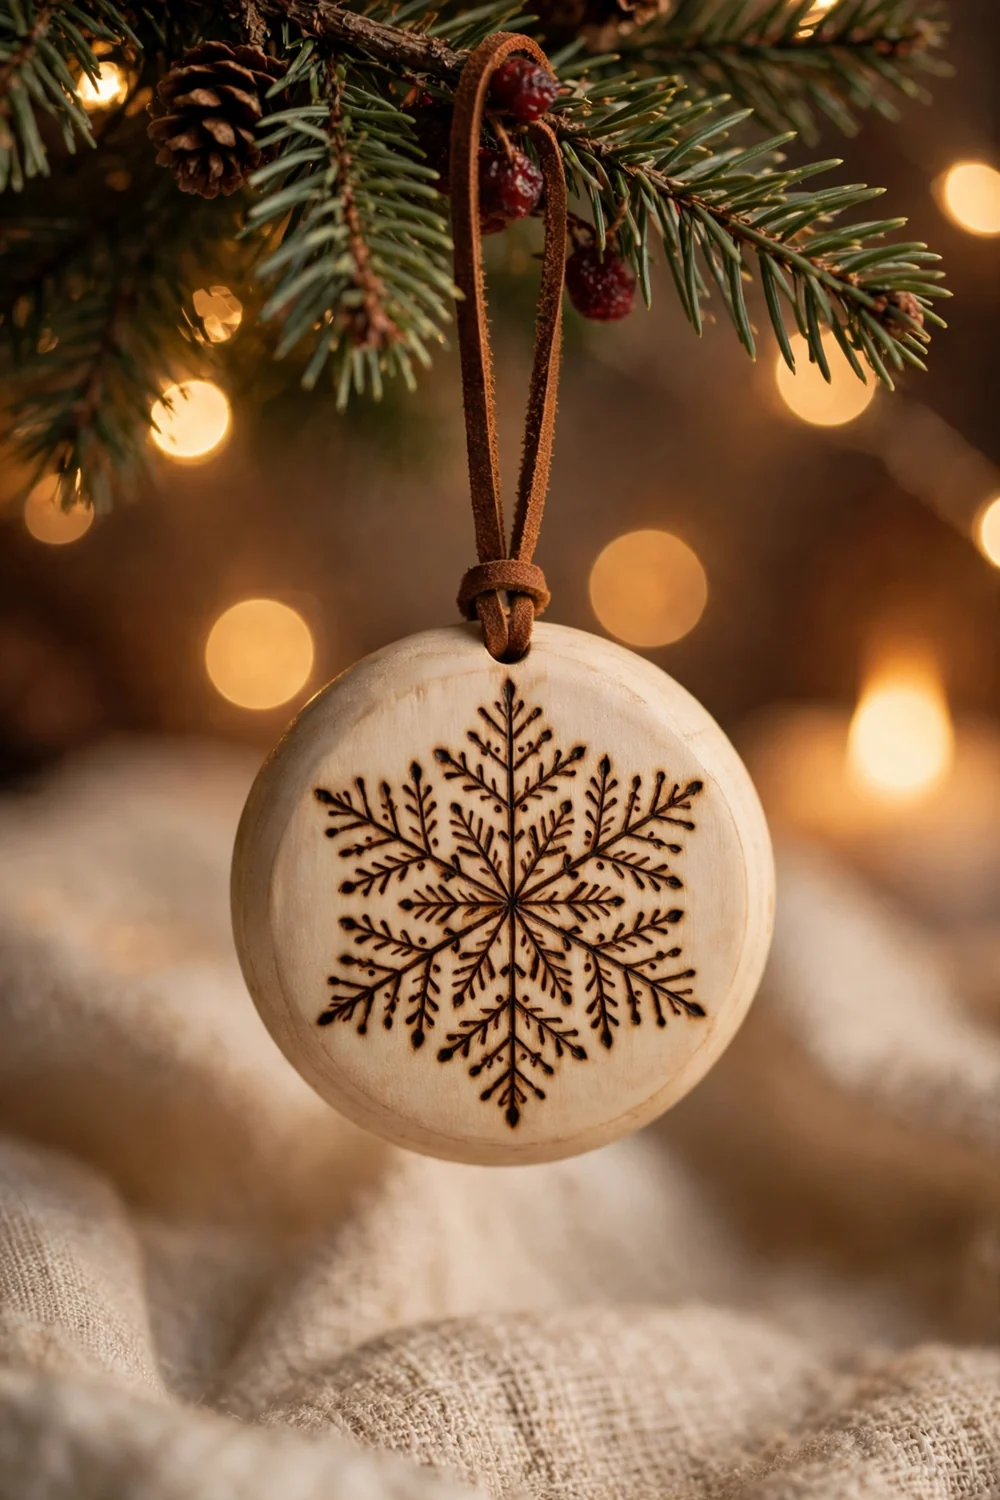
07. Wood-Burned Snowflake Rounds
Pyrography sounds like a specialist hobby, but a snowflake is six straight lines with branches, and the burned line gives wood an etched, heirloom depth that paint cannot match. Sketch the snowflake in pencil on a smooth wood round, trace it slowly with a wood-burning pen on medium heat, rub out the pencil marks, and finish with a light coat of oil or wax.
You’ll need: smooth wood rounds · wood-burning pen · pencil · mineral oil or wax finish · Time: 20 minutes · Skill: Medium
Try it: Practice for two minutes on the back of the first round. Every pen runs at a different heat, and one test patch tells you the speed that gives a dark line without a scorch halo.
08
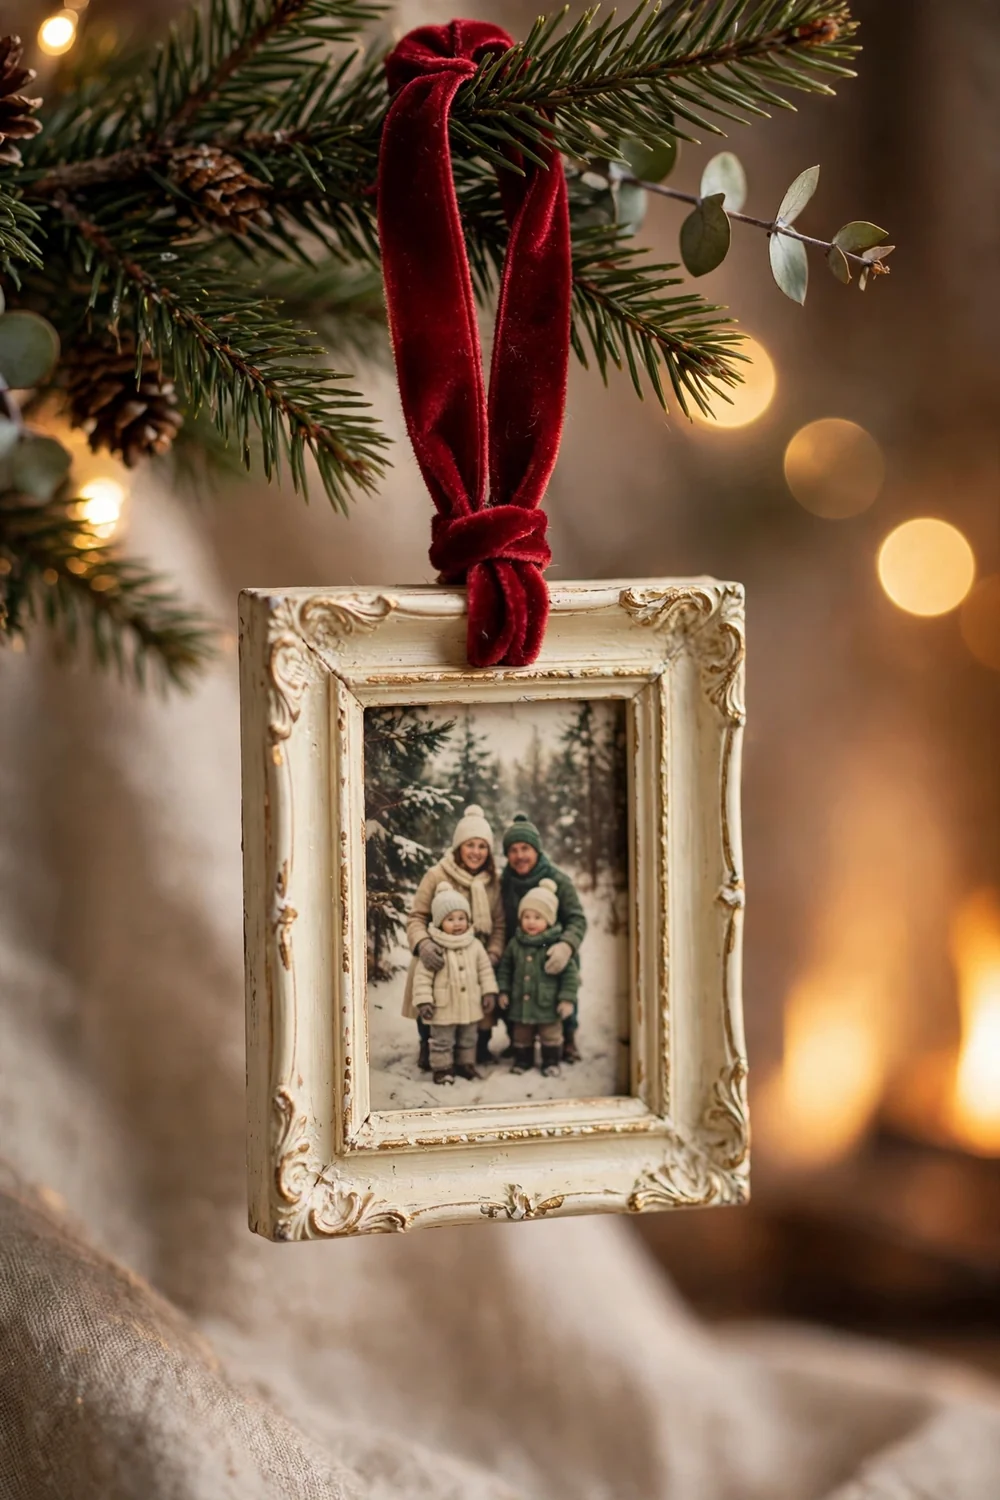
08. Mini Wood Frame Ornaments
Tiny wood frames turn the ornament into a gallery: school photos, a baby’s first picture, and the dog in a Santa hat all get their own branch. Paint or stain a mini craft frame, trim the photo to the opening, back it with card, glue a ribbon loop to the top, and write the year on the back in paint pen.
You’ll need: mini wood frames · photos · card · paint or stain · ribbon · glue · Time: 20 minutes · Skill: Easy
Try it: Keep one consistent frame color across every year, even as the photos change. A tree of matching mini frames in cream or walnut reads as a collection, not clutter.
Paper ornaments
09
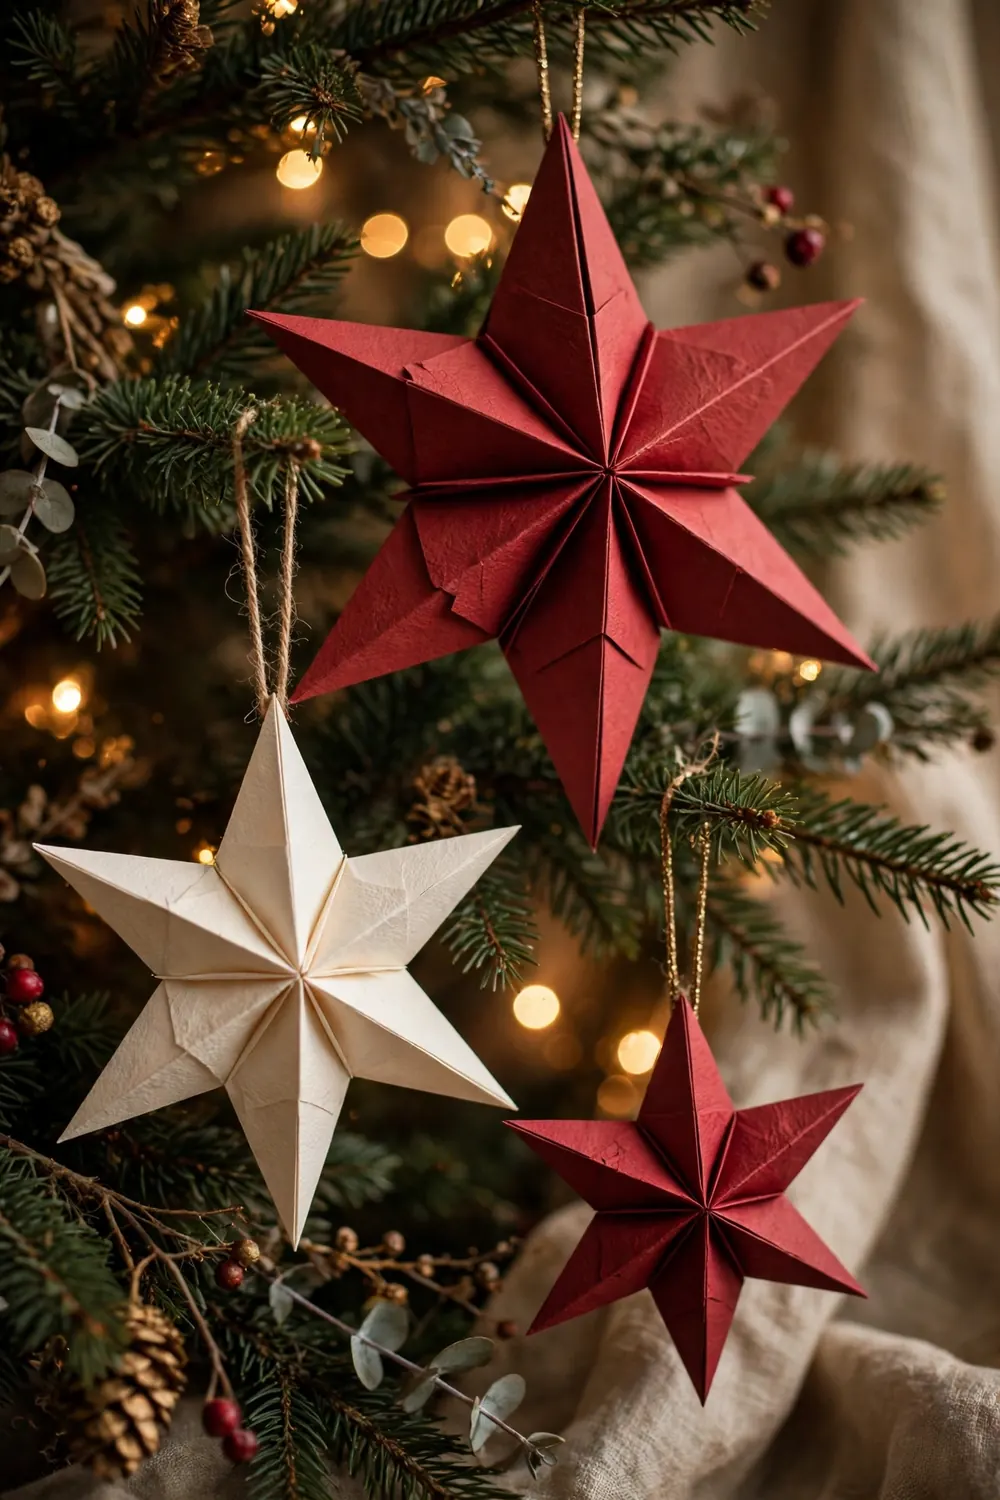
09. Folded Paper Star Ornaments
Paper stars are the cheapest large ornament you can make, and size is their superpower: a 10-inch star fills the bare gaps at the top of a tree that small baubles cannot. Fold five or six pointed pockets from cardstock or old book pages, glue them into a star, punch a hole in the top point, and hang on thin ribbon.
You’ll need: cardstock or book pages · glue · hole punch · ribbon · Time: 15 minutes · Skill: Easy
Try it: Make them in three sizes, about 6, 8, and 10 inches, and cluster one of each on the same branch area. A graded trio looks designed; a single star alone can look lost.

10
10. Sheet-Music Paper Baubles
Old hymn sheets and carol pages carry real Christmas text, so a bauble covered in sheet music reads as vintage rather than plain paper. Tear or cut the music into half-inch strips, brush each strip with decoupage glue, and wrap it smoothly around a foam or papier-mâché ball, overlapping until no base shows, then seal the whole ball with a second coat.
You’ll need: old sheet music or printed carol pages · foam or papier-mâché balls · decoupage glue · brush · Time: 25 minutes · Skill: Medium
Try it: Choose pages where a readable line of a famous carol lands on the front of the ball. Guests lean in to read them, which is the entire point of using music instead of plain paper.
11
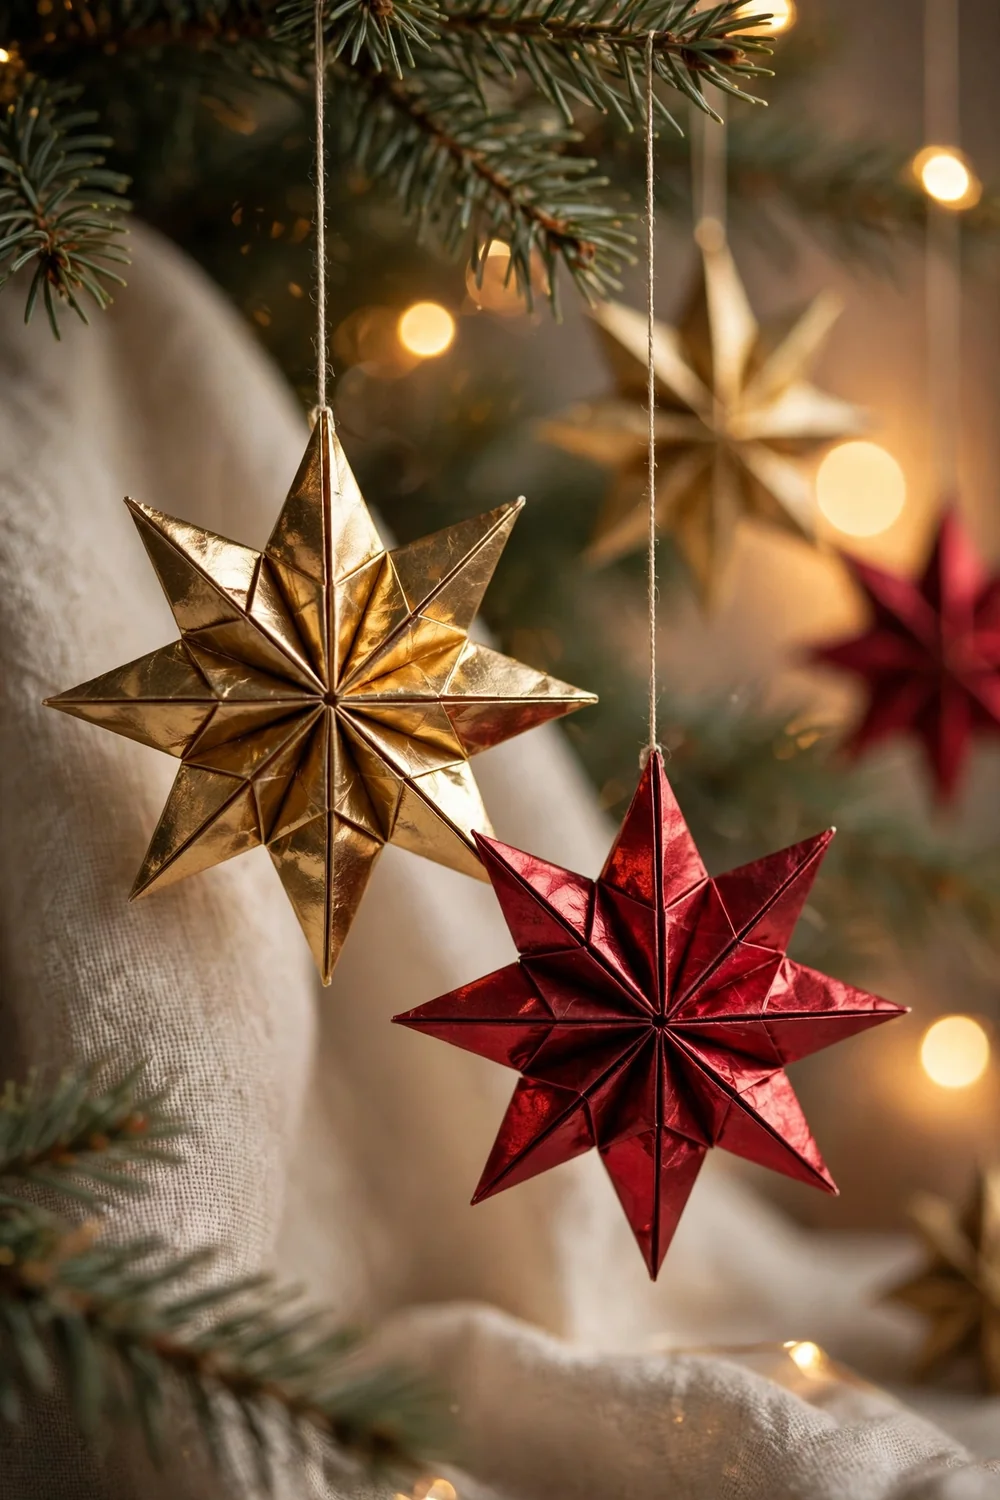
11. Origami Star Ornaments
Origami stars fold flat, post through the mail inside a Christmas card, and cost literally one sheet of paper, which makes them the best ornament to send to people far away. Fold a traditional eight-point star from a square of origami or wrapping paper, press the folds sharp with a fingernail, and thread a hanging loop through one point.
You’ll need: origami paper or thin wrapping paper · thread or fine cord · needle · Time: 10 minutes · Skill: Medium
Try it: Metallic and foil-backed papers fold into the crispest stars and catch tree lights like tin. Matte paper stars look soft and modern, foil ones look festive, so match the paper to your tree.
12
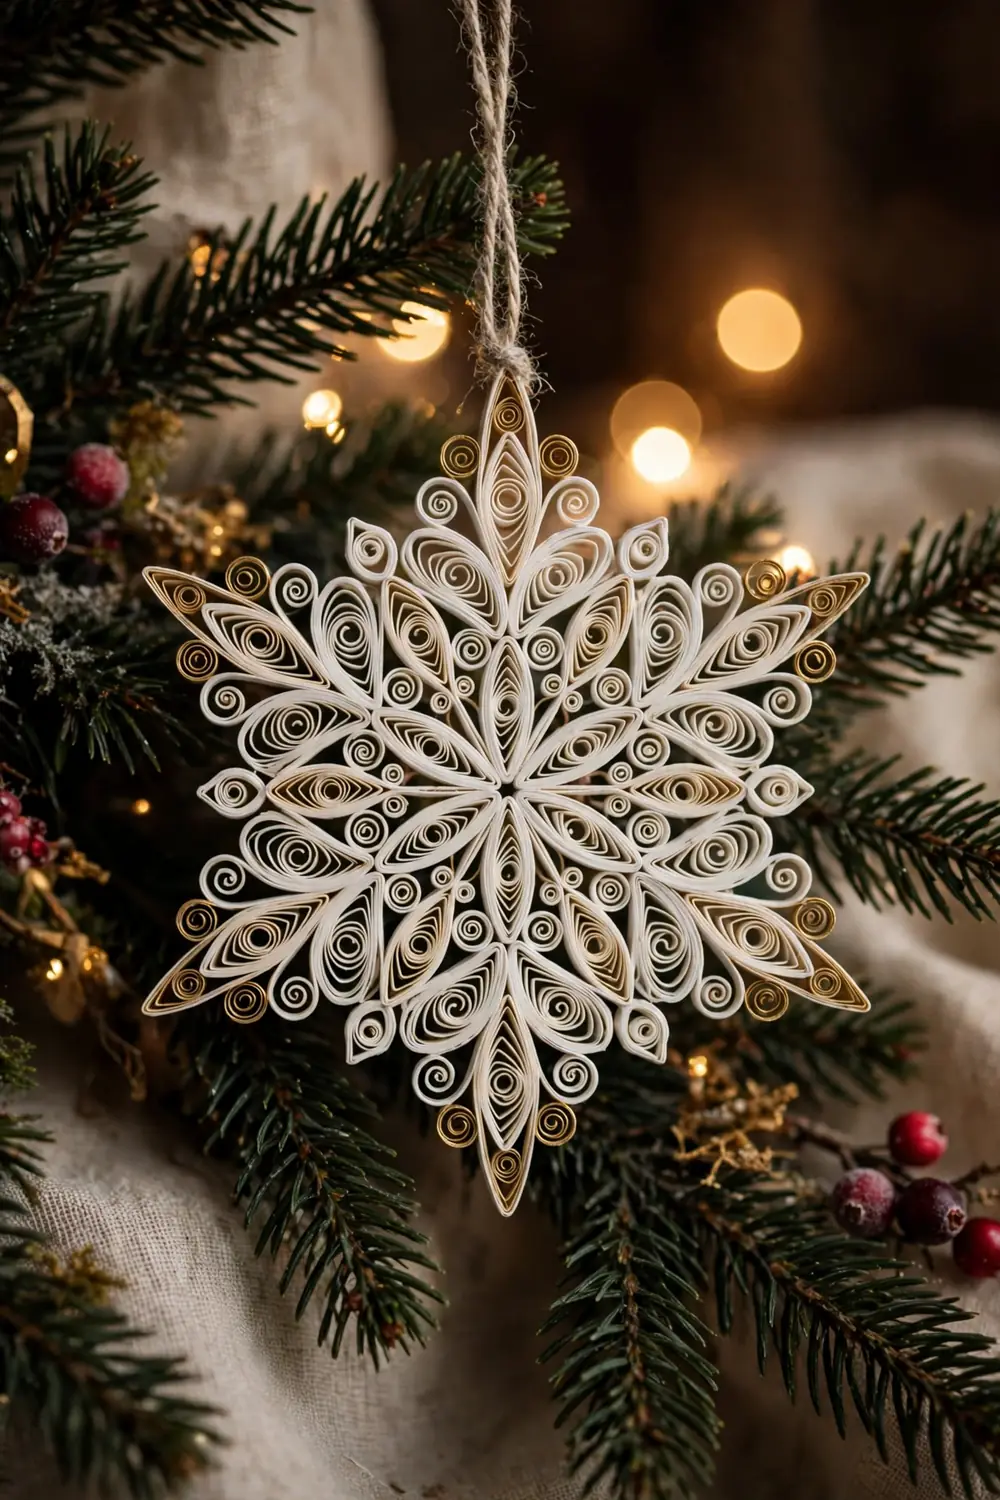
12. Quilled Paper Snowflakes
Quilling is the one paper technique that genuinely looks like lace, and a white quilled snowflake against dark green branches is as close to real frost as an ornament gets. Roll narrow paper strips into coils with a quilling tool, pinch them into teardrops and marquise shapes, glue six matching arms into a snowflake, and stiffen the finished flake with a brush of diluted glue.
You’ll need: quilling paper strips · quilling tool · craft glue · straight pins · Time: 40 minutes · Skill: Advanced
Try it: Build the six arms on a pin board over a printed snowflake template so every arm matches. Symmetry is the whole illusion with quilling, and freehand arms never quite match.
Fabric and felt ornaments

13
13. Felt Gingerbread Ornaments
A real gingerbread man crumbles by Boxing Day, but a felt one in ginger-brown with white blanket stitch “icing” lasts for decades of trees. Cut two gingerbread shapes from brown felt, stitch or glue white ricrac and button eyes onto the front, blanket-stitch the layers together with a little stuffing inside, and add a ribbon loop at the head.
You’ll need: brown and white felt · ricrac or white embroidery thread · stuffing · buttons · ribbon · Time: 30 minutes · Skill: Easy
Try it: Rub a dry cinnamon stick over the finished ornament and store it in a sealed box in the off-season. It picks up a faint real gingerbread smell that refreshes every year you open the box.
14
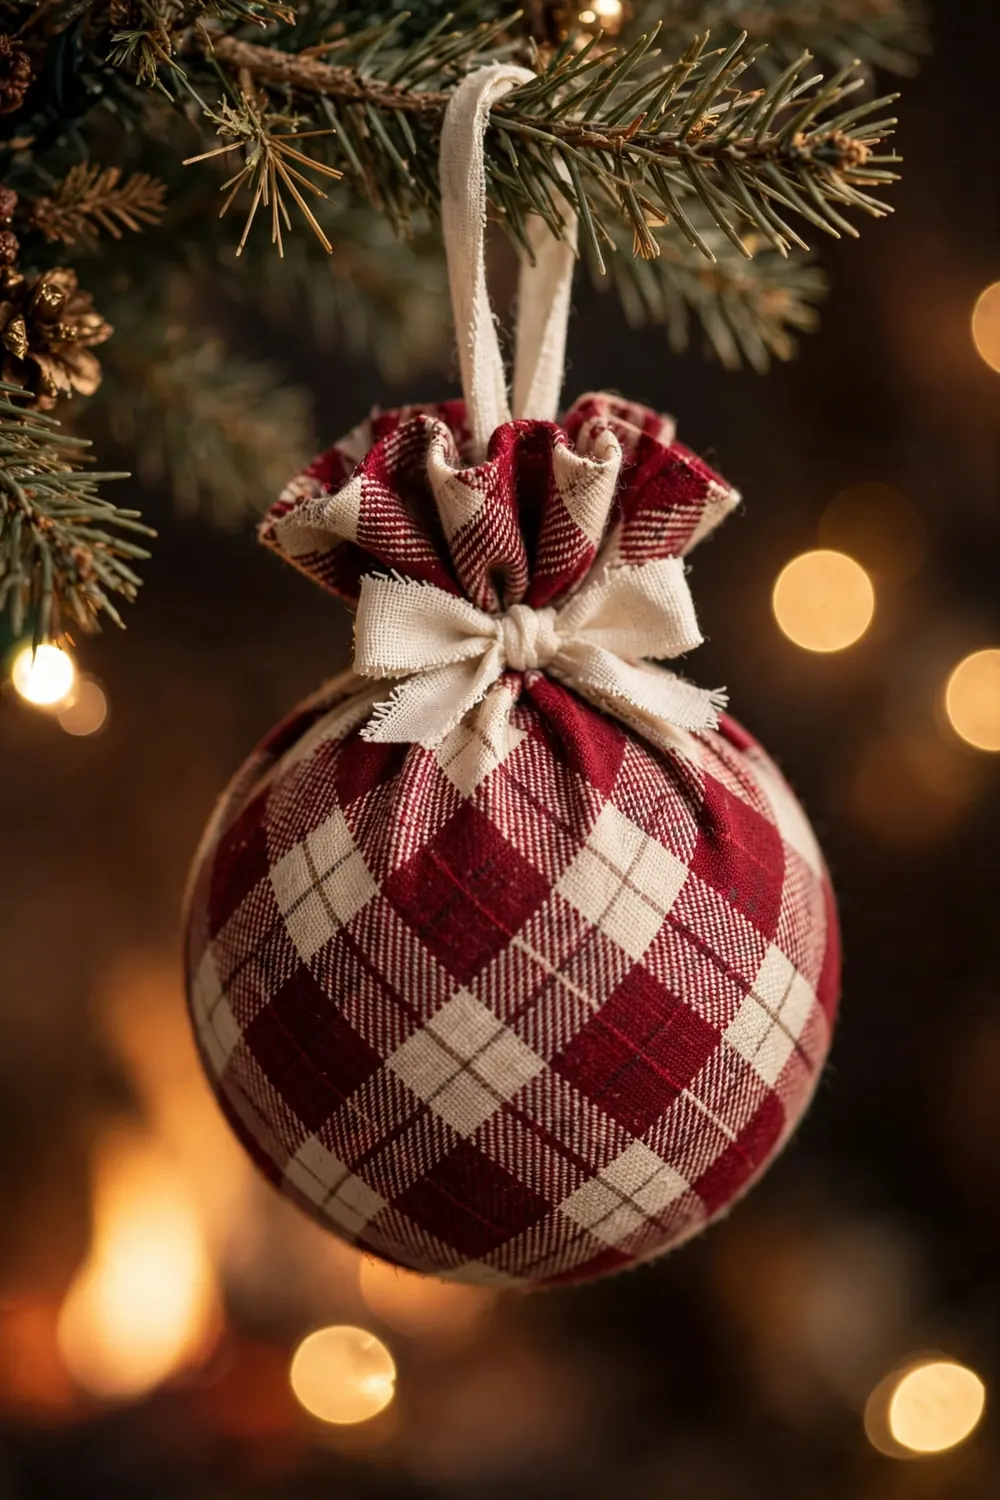
14. Plaid Fabric Baubles
Plaid fabric baubles borrow the cozy of a flannel shirt and solve the plain foam ball problem: full fabric coverage with no paint and no drying time. Cut a square of plaid cotton or flannel, wrap it around a foam ball, gather and pin the excess neatly at the top, then cover the gather with the bauble cap and a bow so the finish looks tailored.
You’ll need: plaid fabric or old flannel shirts · foam balls · pins or hot glue · ribbon · Time: 20 minutes · Skill: Easy
Try it: Cut the fabric on the diagonal so the plaid runs at an angle around the ball. A bias-cut plaid looks upholstered and expensive; a straight-cut one can look like a wrapped parcel.
15
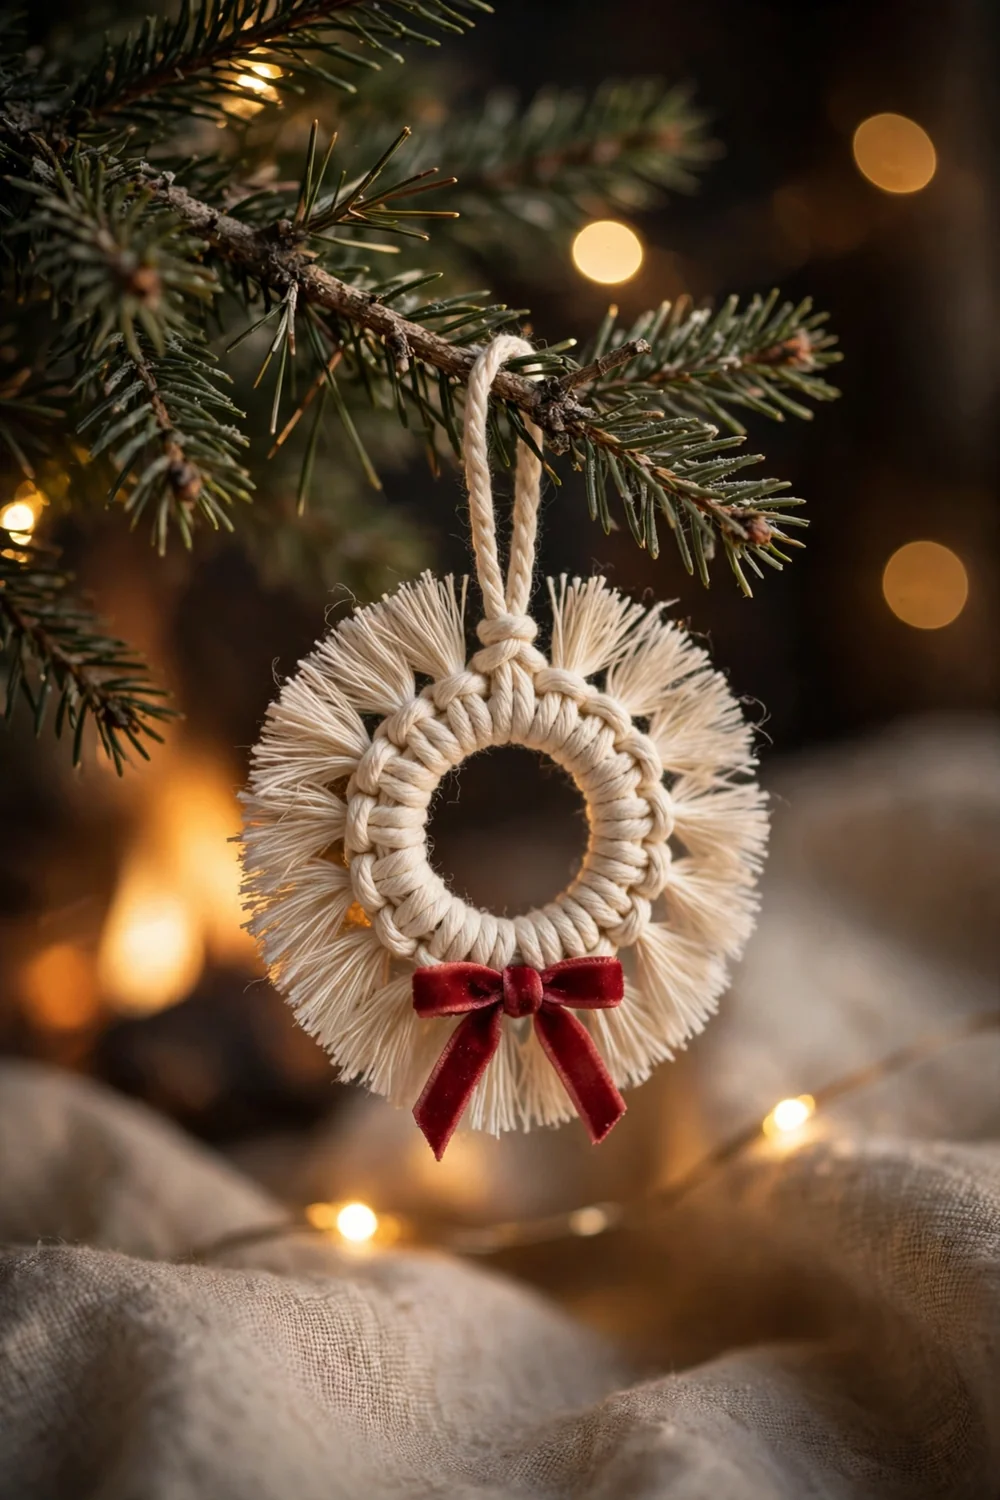
15. Mini Macrame Wreath Ornaments
A palm-sized macrame wreath gives a tree one soft, textural piece among the shine, and it is a satisfying first macrame project because the whole thing is one repeated knot. Lark’s-head a ring of cotton cord lengths onto a small metal or wooden ring, work square knots or a simple fringe all the way around, trim the ends into a neat halo, and finish with a tiny bow.
You’ll need: cotton macrame cord · small rings, about 2 inches · scissors · ribbon · Time: 30 minutes · Skill: Medium
Try it: Comb the trimmed fringe out with a fine pet comb and give it a light steam. The brushed halo is what separates a boutique-looking macrame wreath from a knotty ring.
16
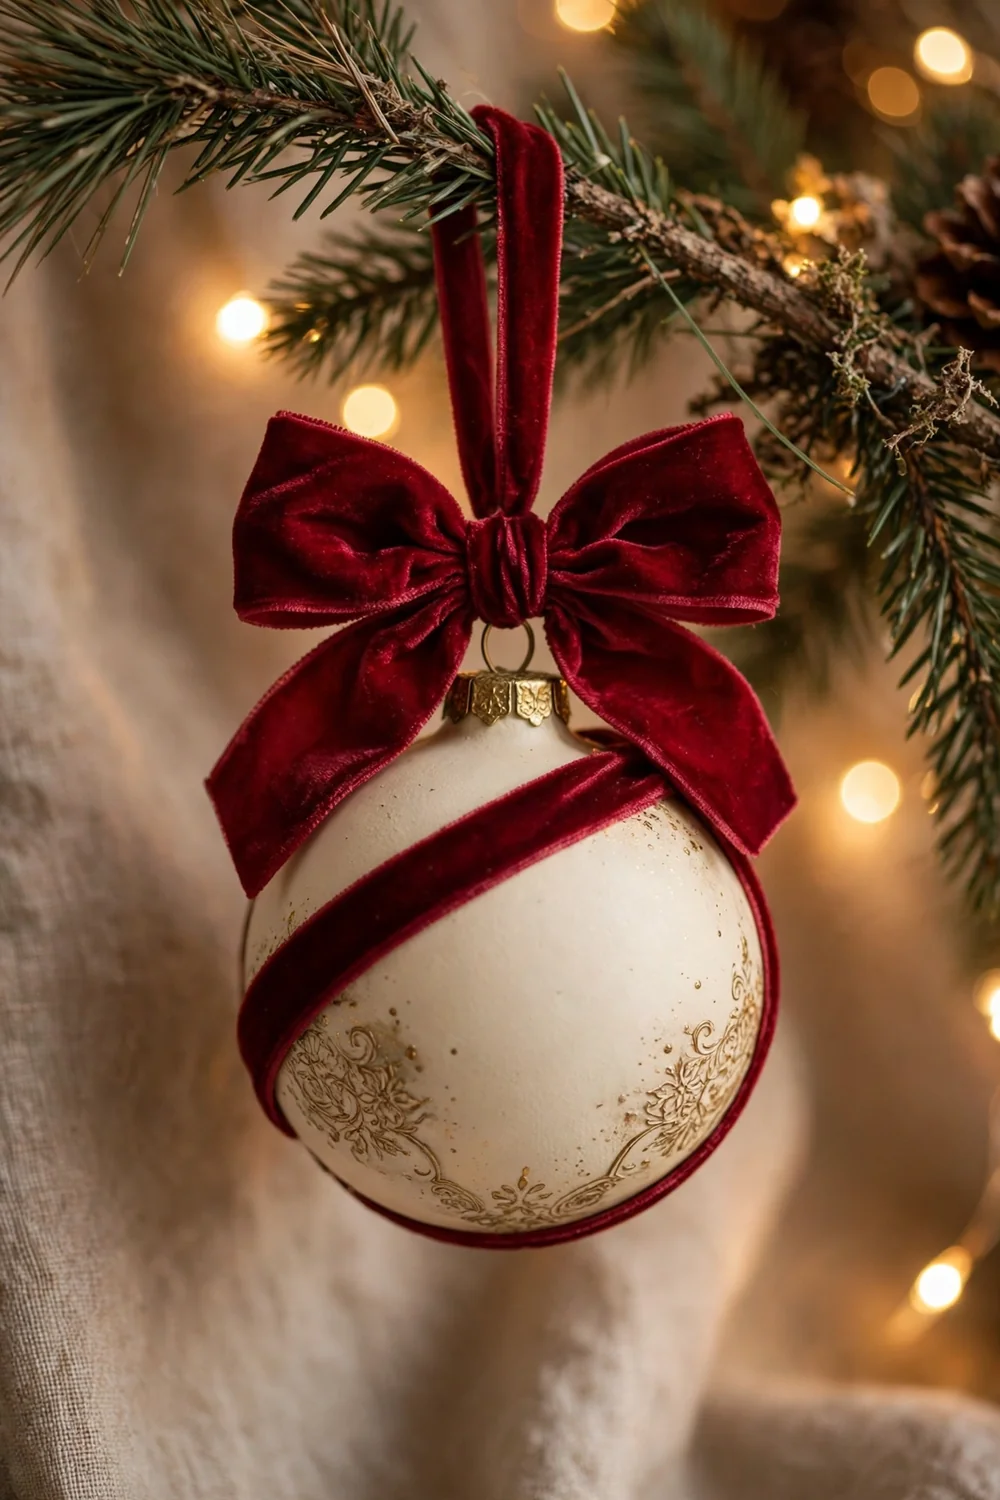
16. Velvet Ribbon Baubles
The fastest transformation on this page: a plain tired bauble plus a length of velvet ribbon reads as a designer ornament in about ten minutes. Wrap or cross the ribbon over the bauble, fix it under the cap or with two discreet glue dots, and tie a full velvet bow at the top in cranberry, forest, or cream.
You’ll need: plain baubles · velvet ribbon · scissors · glue dots or hot glue · Time: 10 minutes · Skill: Easy
Try it: Cover your oldest, scratched baubles first. Velvet hides every flaw, so the ornaments you were about to throw out become the most elegant ones on the tree.
Natural ornaments
17
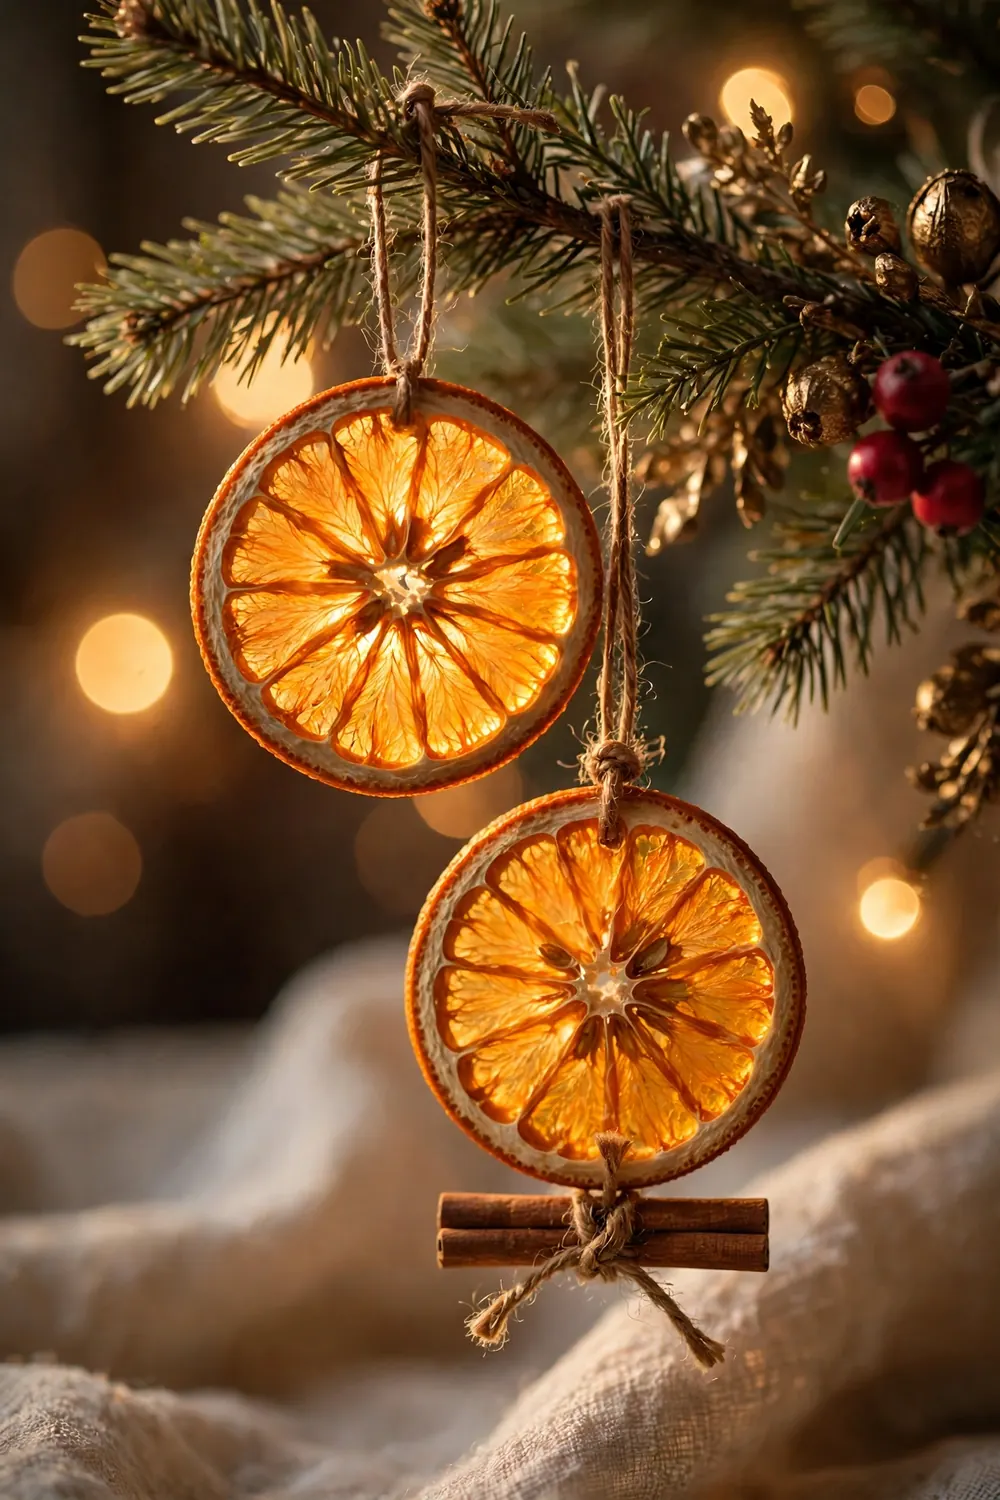
17. Dried Orange Slice Ornaments
A dried orange slice hung against tree lights glows like stained glass, and it is the rare ornament that is genuinely just food, dried. Slice oranges a quarter-inch thick, blot them dry, bake at 200°F for about 3 hours, flipping hourly, until the flesh is translucent and leathery, then thread twine through the top with a cinnamon stick or bay leaf tied on.
You’ll need: oranges · knife · baking rack · twine · optional cinnamon sticks · Time: 3 hours drying, 5 minutes assembly · Skill: Easy
Try it: A pinch of sugar on each slice before baking speeds the drying slightly and adds a frosted sparkle to the surface. Blood oranges dry to a deep ruby that looks stunning beside the standard orange.
18
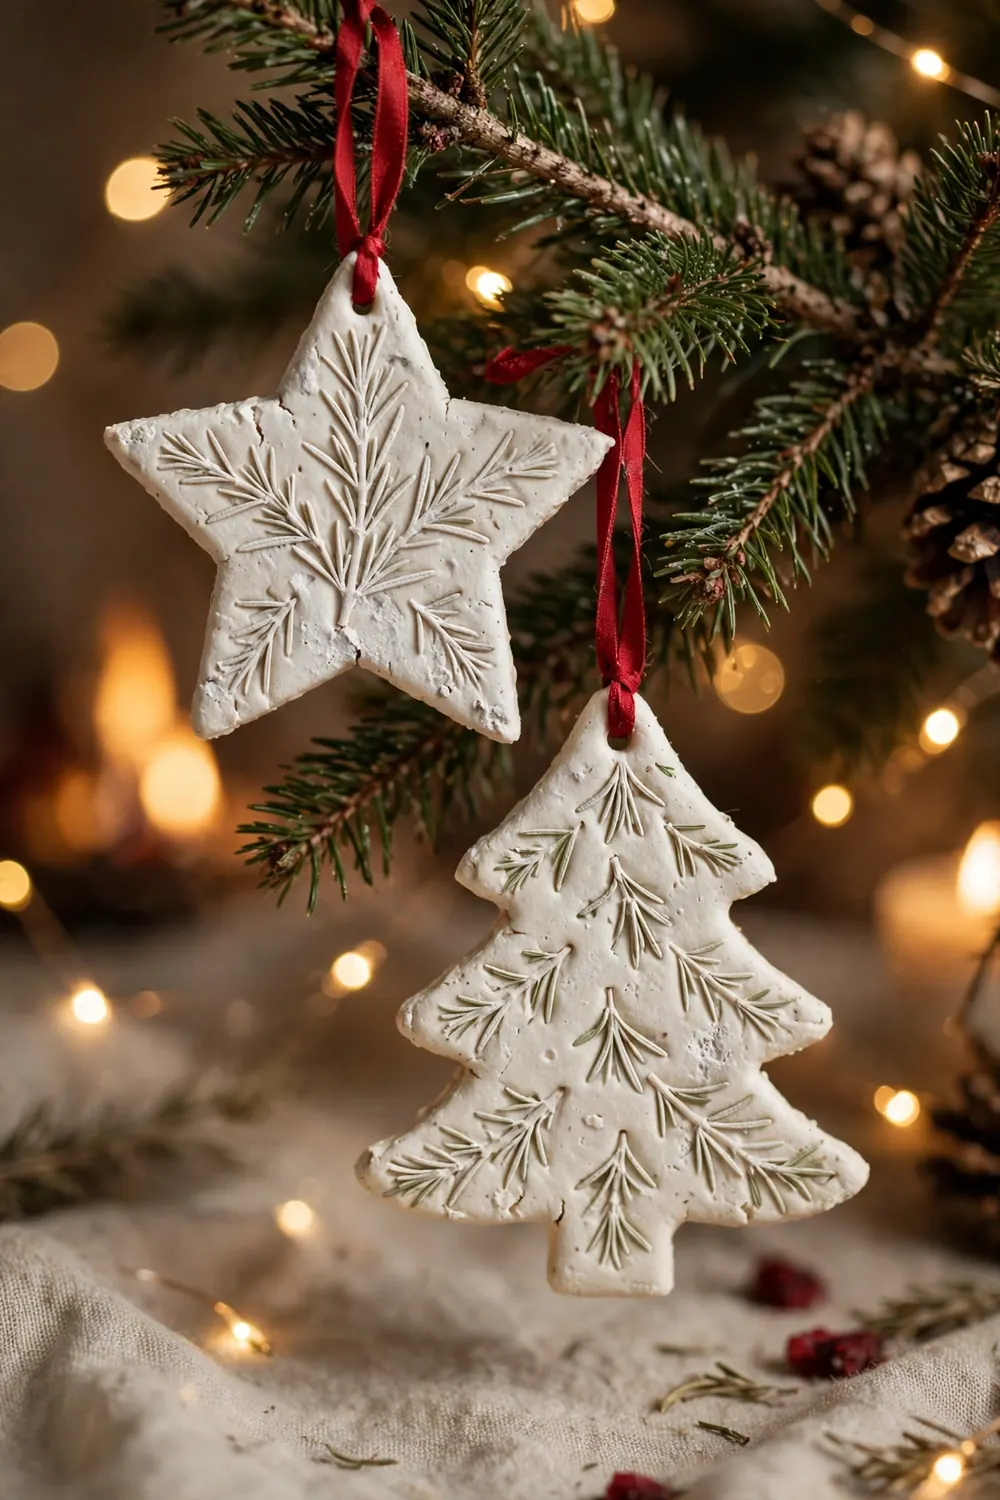
18. Salt Dough Ornaments
Salt dough is the classic first handmade ornament because the recipe is three pantry ingredients and a rolling pin, and the finished pieces keep for years. Mix 2 cups flour, 1 cup salt, and 1 cup warm water into a dough, roll it a quarter-inch thick, cut shapes with cookie cutters, poke a straw hole at the top, and dry flat for 2 to 3 days (or bake at 200°F for 2 to 3 hours) before painting and sealing.
You’ll need: flour · salt · water · cookie cutters · acrylic paint · clear sealer · ribbon · Time: 30 minutes making, 2 to 3 days drying · Skill: Easy
Try it: Press a sprig of rosemary, a doily, or a rubber stamp into the dough before drying. An impressed pattern makes even a plain white-painted round look like carved ceramic.
19
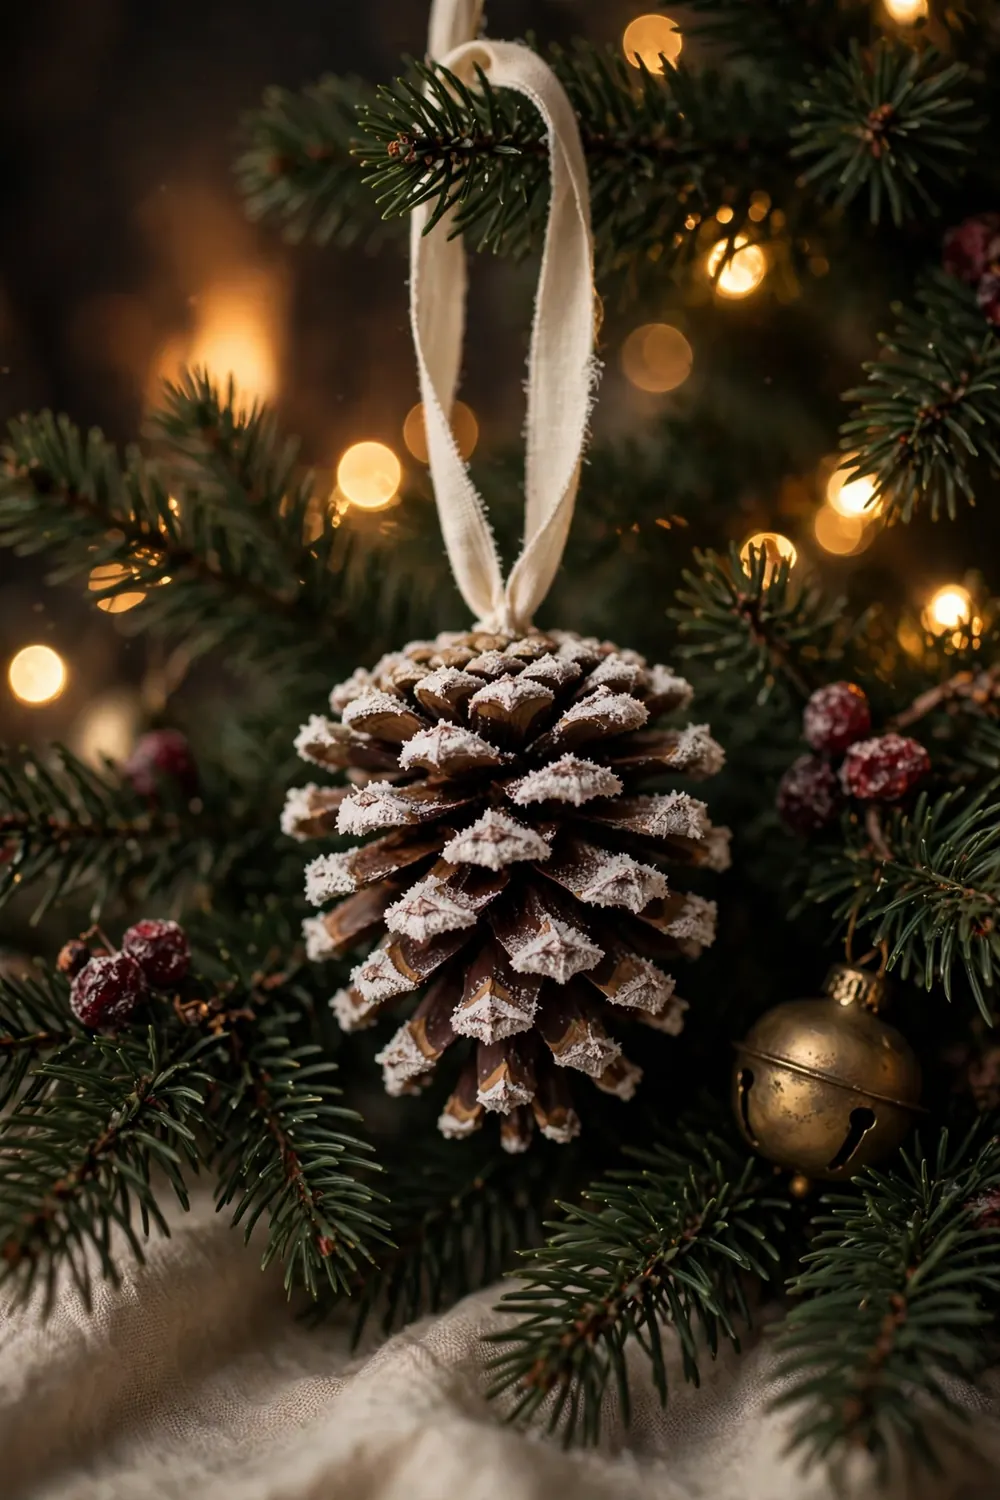
19. Pinecone Ornaments
A pinecone is already ornament-shaped; the craft is simply dressing it so it belongs indoors. Screw a small eye into the top (or hot-glue a ribbon loop into the scales), then frost the scale tips with white paint, a dusting of fake snow, or a roll through glitter, and hang it deep in the branches where its shadow adds depth.
You’ll need: pinecones · small screw eyes or ribbon · white paint or glitter · glue · Time: 20 minutes · Skill: Easy
Try it: Frost only the outer tips of the scales and leave the core natural brown. Full-glitter pinecones can look like disco balls; tipped ones look like they came in from real snowfall.
20
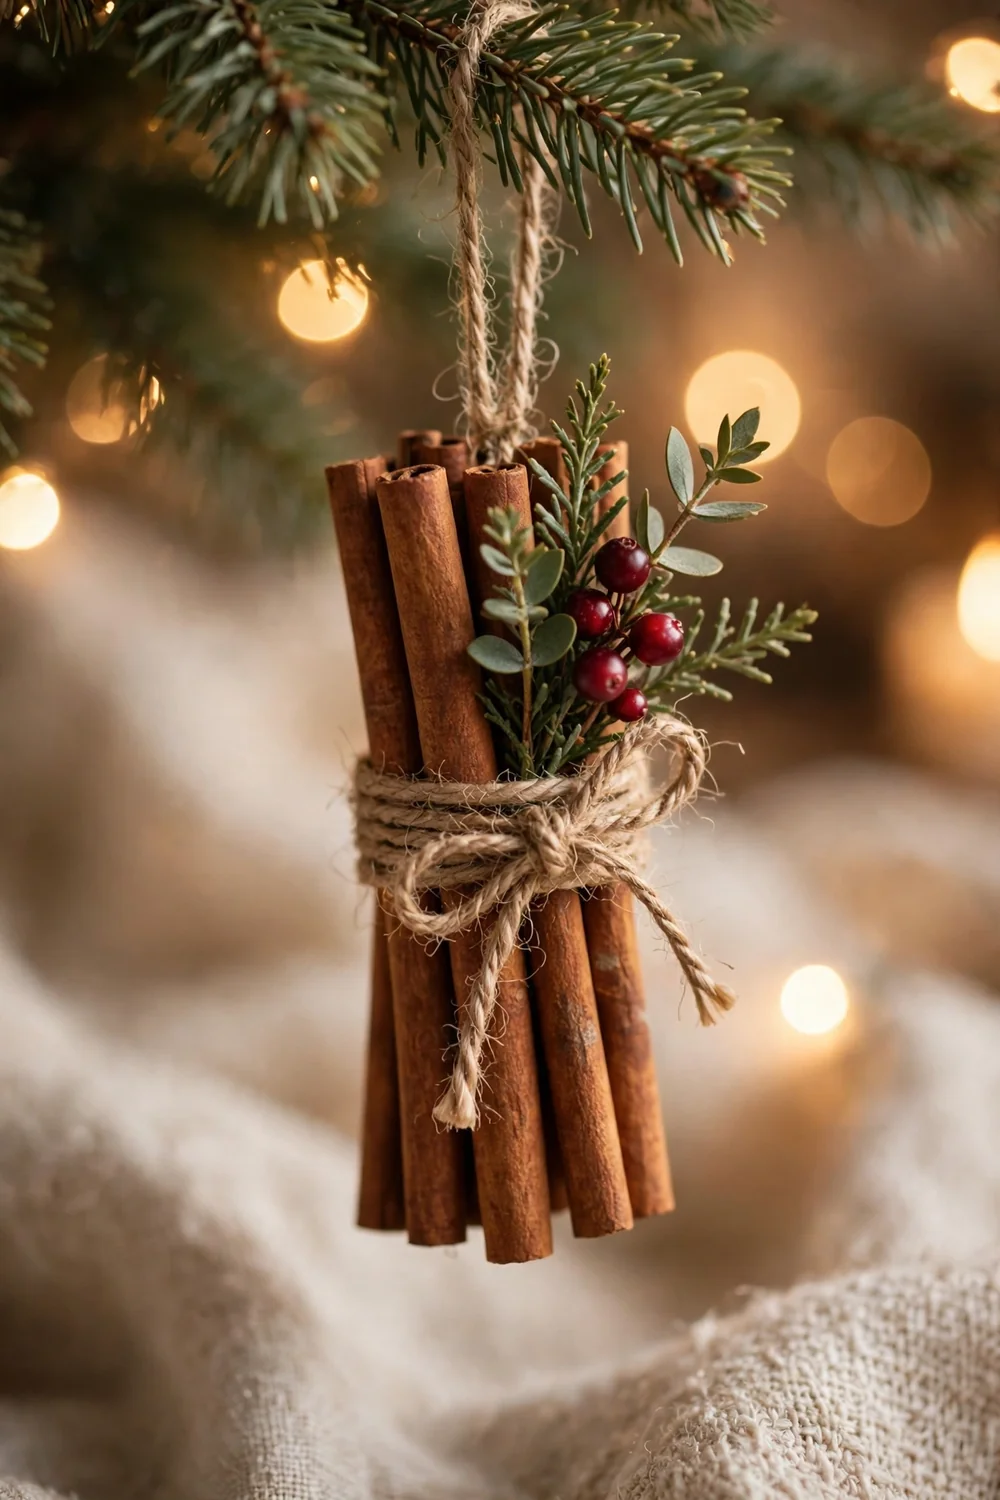
20. Cinnamon Stick Bundle Ornaments
Three cinnamon sticks and a bow make the best-smelling ornament on the tree, and they double as place-setting favors guests can take home. Bundle three to five cinnamon sticks, bind the middle tightly with twine or thin ribbon, tuck a small sprig of greenery or a dried orange mini-slice behind the knot, and hang from the binding loop.
You’ll need: cinnamon sticks · twine or thin ribbon · greenery sprigs · glue · Time: 10 minutes · Skill: Easy
Try it: Refresh the scent each year with one drop of cinnamon or orange essential oil on the back of the bundle. Ten seconds of work, and the whole tree smells baked again.
Painted and glass ornaments
21
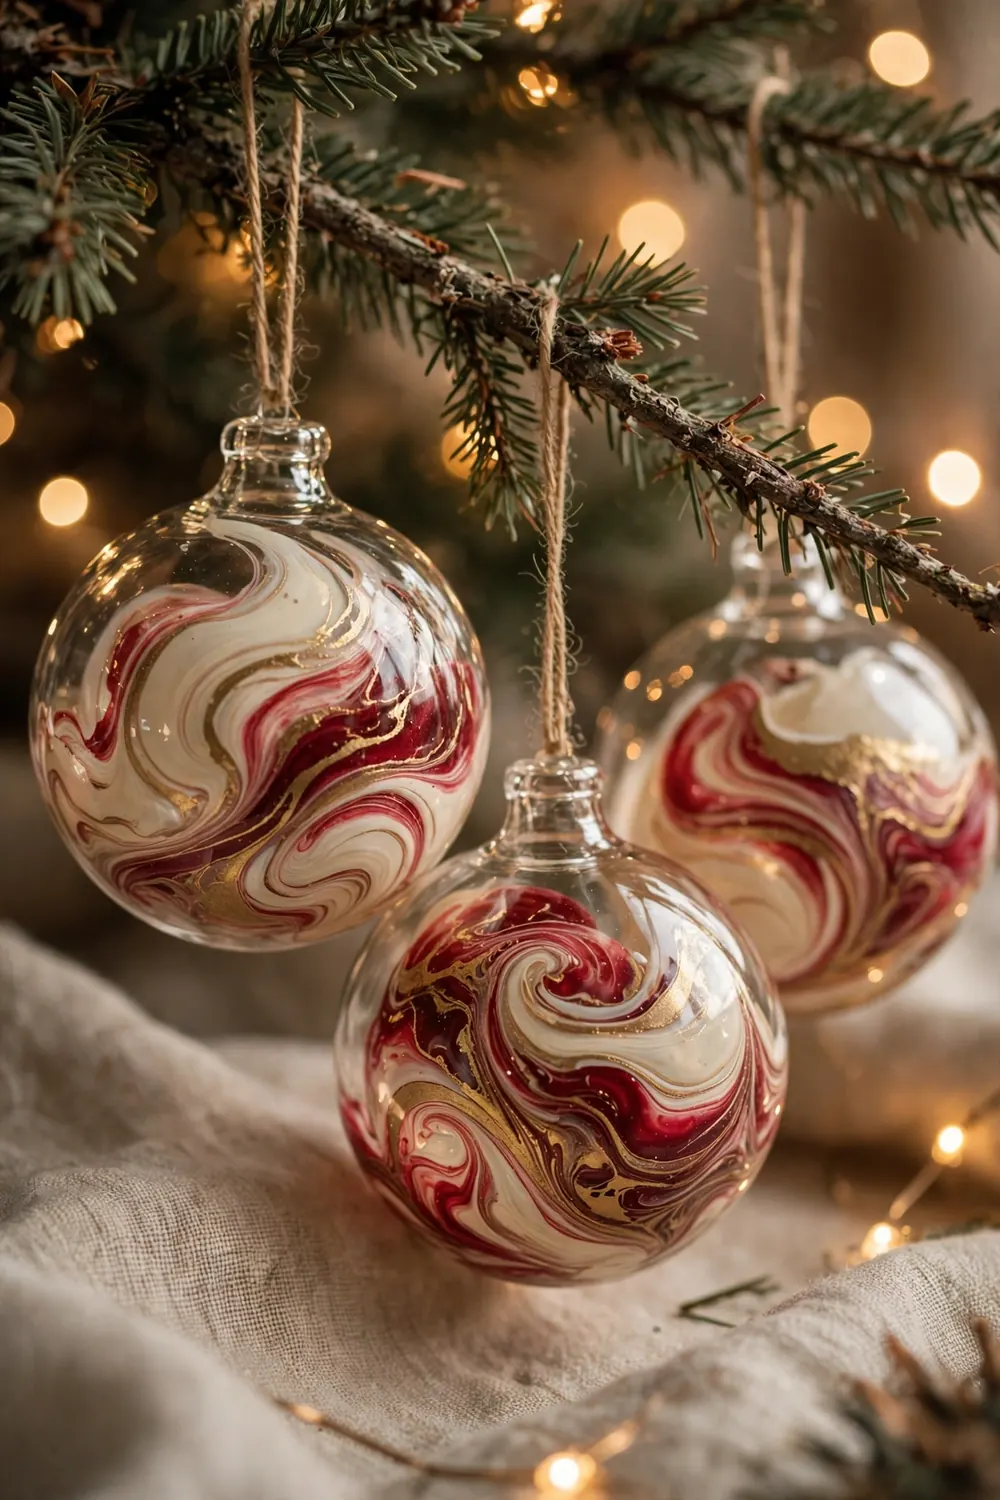
21. Marbled Paint-Pour Baubles
Paint swirled inside a clear glass bauble gives you a marble finish with no brush marks and no two alike, which is why these are the most gifted ornaments on the page. Remove the cap, drip two or three colors of acrylic paint inside, roll the bauble slowly until the inside is coated, then rest it upside down in a paper cup for 24 to 48 hours so the excess drains and the swirls set.
You’ll need: clear glass baubles · acrylic paint, 2 to 3 colors · paper cups · Time: 15 minutes, plus 24 to 48 hours draining · Skill: Easy
Try it: Use one metallic (antique gold or copper) in every mix. The metal pigment settles into veins as the paint drains, and that veining is what reads as real marble instead of tie-dye.
22
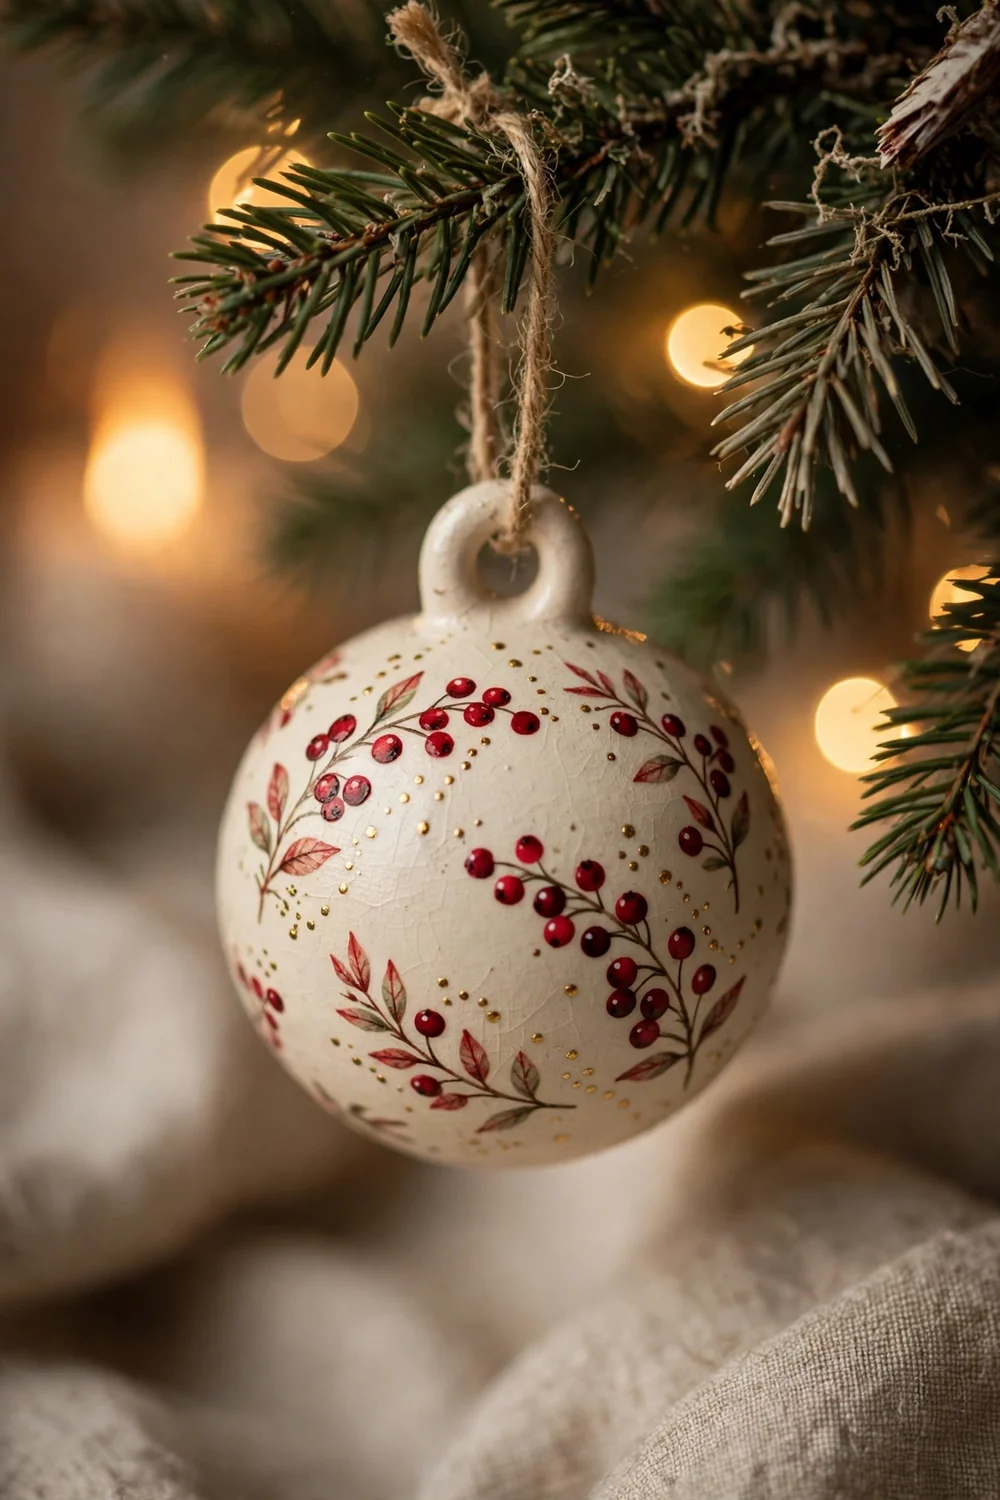
22. Hand-Painted Ceramic Baubles
Unglazed ceramic baubles take paint pens the way paper takes a marker, so even a non-artist can letter names, years, and tiny scenes with a steady, controlled line. Sketch your design lightly in pencil, go over it with acrylic paint pens in thin layers, let it cure for 24 hours, and finish with a clear gloss or matte spray to protect the surface.
You’ll need: unglazed ceramic baubles · acrylic paint pens · pencil · clear spray sealer · Time: 30 minutes, plus curing · Skill: Medium
Try it: Letter the name and year on one side and paint only dots, stars, or a sprig on the other. Half the design work, twice the polish, and the lettering stays the star.
23
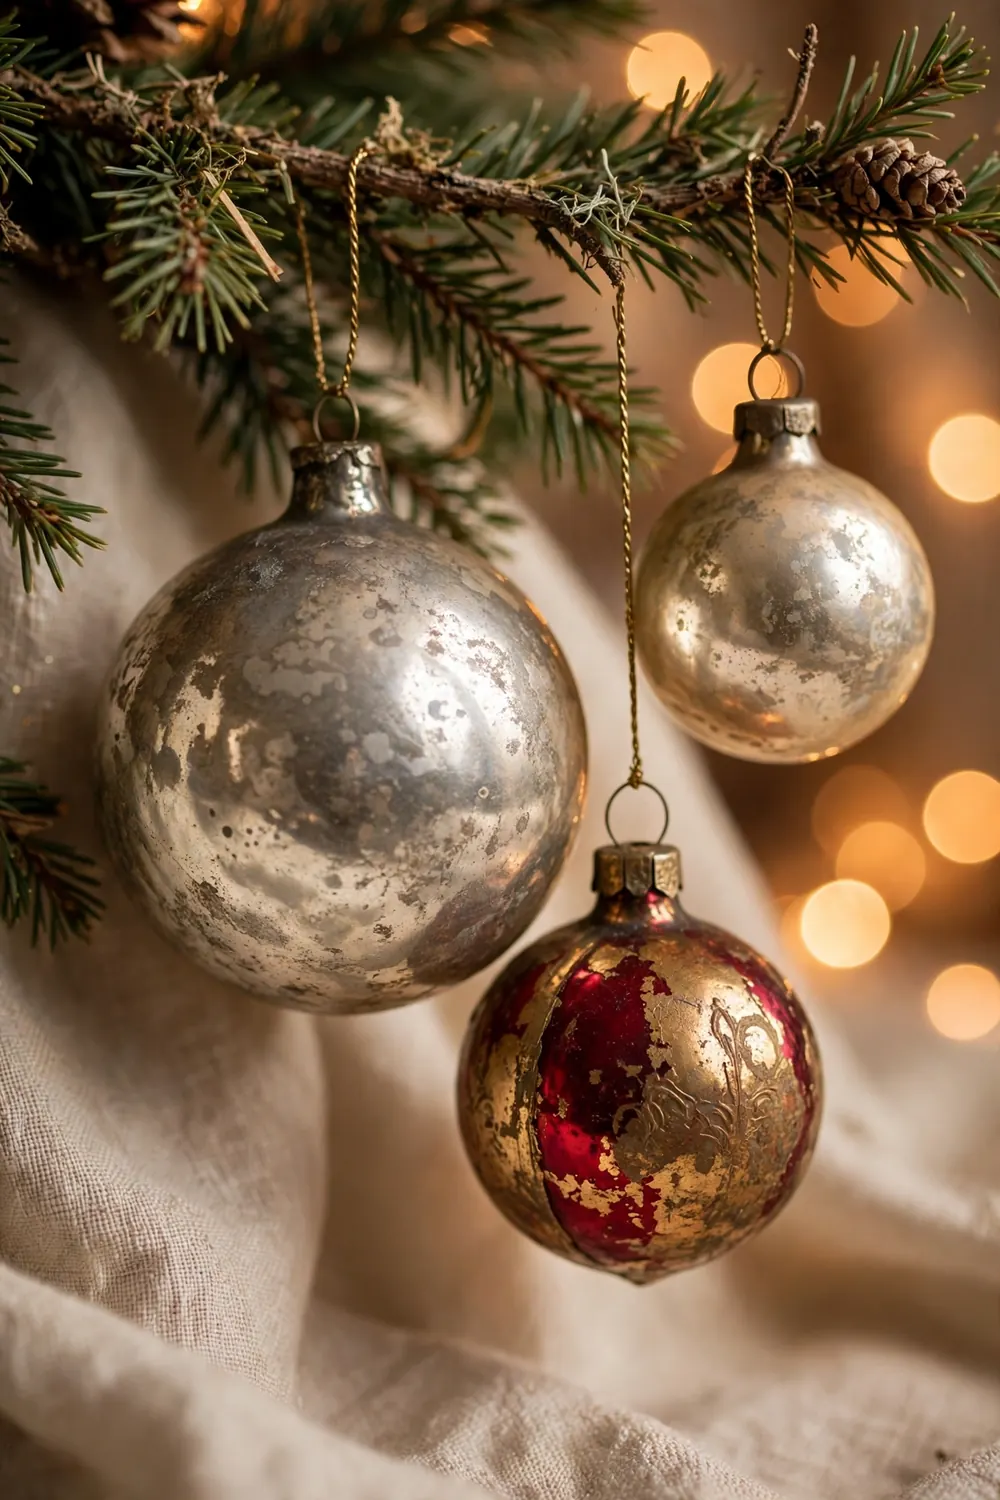
23. Faux Mercury Glass Baubles
Mercury glass has that mottled antique-mirror glow that makes a tree look a hundred years old in the best way, and the fake version costs about a dollar a bauble. Mist the inside of a clear glass bauble with a fine spray of water and vinegar, immediately spray in mirror-effect paint, roll it to spread, and repeat in two or three light layers until the mottling looks right.
You’ll need: clear glass baubles · mirror-effect spray paint · spray bottle with water and a splash of vinegar · Time: 20 minutes · Skill: Medium
Try it: Stop one layer earlier than you think you should. Mercury glass is mostly translucent with patches of mirror, and an over-sprayed bauble just looks like plain silver.

24
24. Glitter-Lined Glass Baubles
Glitter on the inside of the glass is the tidy person’s glitter ornament: all the sparkle, none of the shedding, forever. Squirt a little clear-drying glue or polycrylic inside a clear bauble, roll it to coat the walls, drain the excess, funnel in fine glitter, and shake until every patch is covered, then tip out the loose glitter and let it dry open for a few hours.
You’ll need: clear baubles · polycrylic or clear craft glue · fine glitter · funnel · Time: 15 minutes, plus drying · Skill: Easy
Try it: Mix two glitter sizes, fine plus a pinch of chunky, in deep cranberry or antique gold. The mixed grain catches light at different depths and looks far richer than one flat glitter.
Food and keepsake ornaments
25
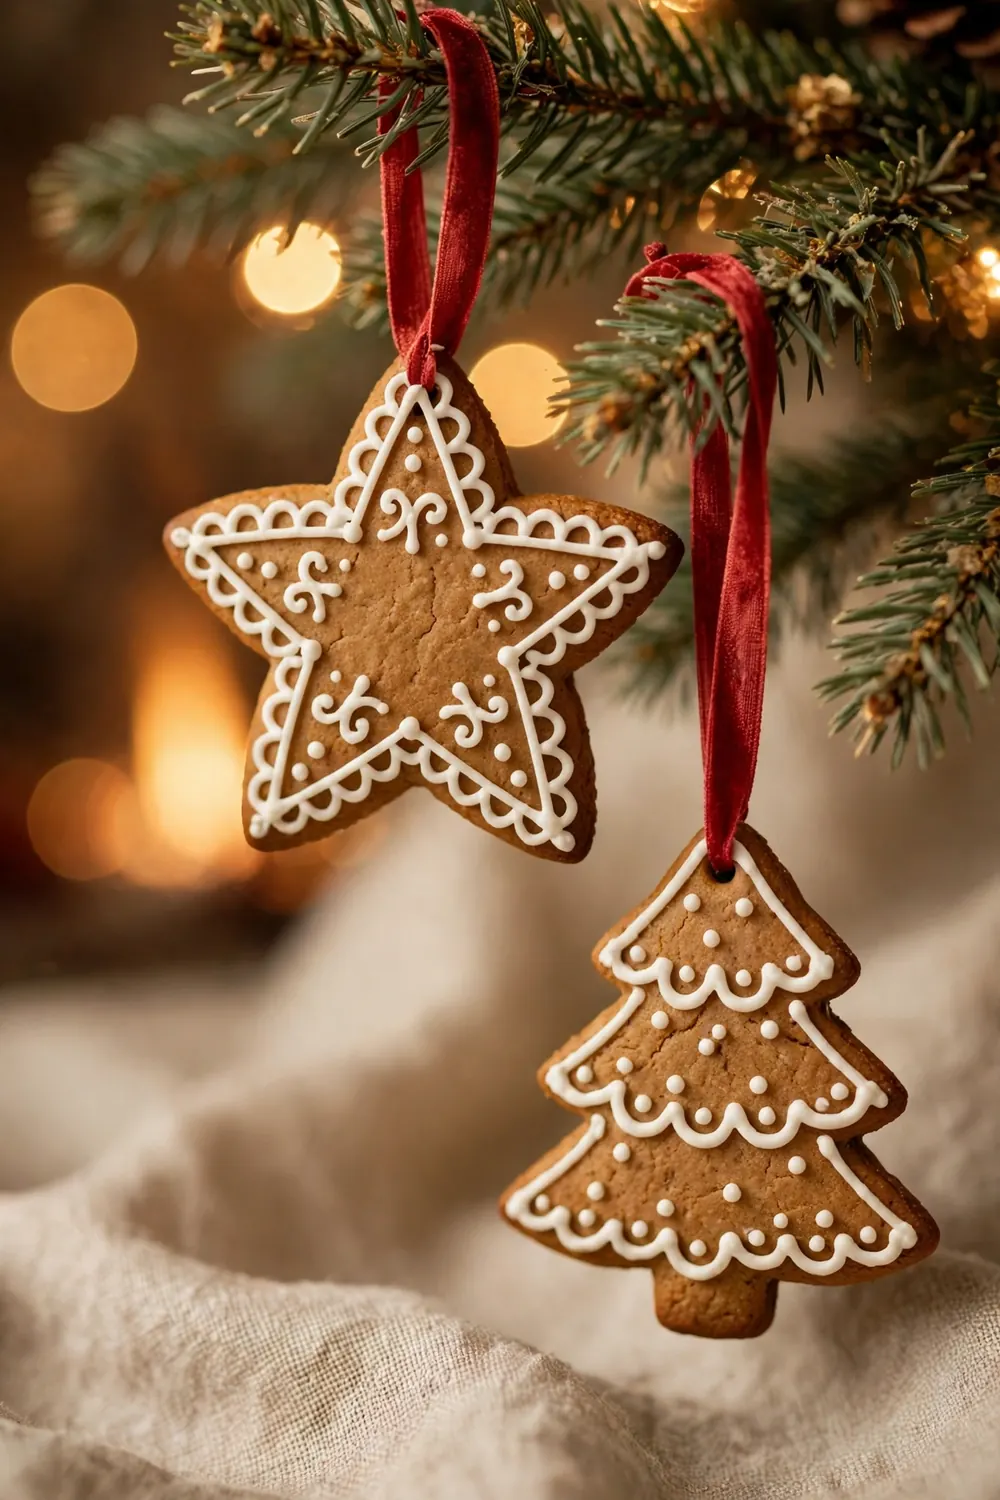
25. Gingerbread Cookie Ornaments
Gingerbread baked hard and dry, with extra spice and no leavening tenderness, becomes an ornament that scents the whole room and keeps for years if it stays dry. Roll a stiff gingerbread dough, cut shapes, poke a straw hole before baking, bake until very firm and dark at the edges, cool completely, pipe simple royal icing lines, and seal both sides with clear varnish once the icing is fully dry.
You’ll need: stiff gingerbread dough · cookie cutters · straw · royal icing · clear spray varnish · ribbon · Time: 45 minutes, plus cooling · Skill: Medium
Try it: Treat these as decoration only, and tell the household so. Once varnished they are keepsakes, not snacks, and a tiny ribbon tag that says the year doubles as the warning.
26
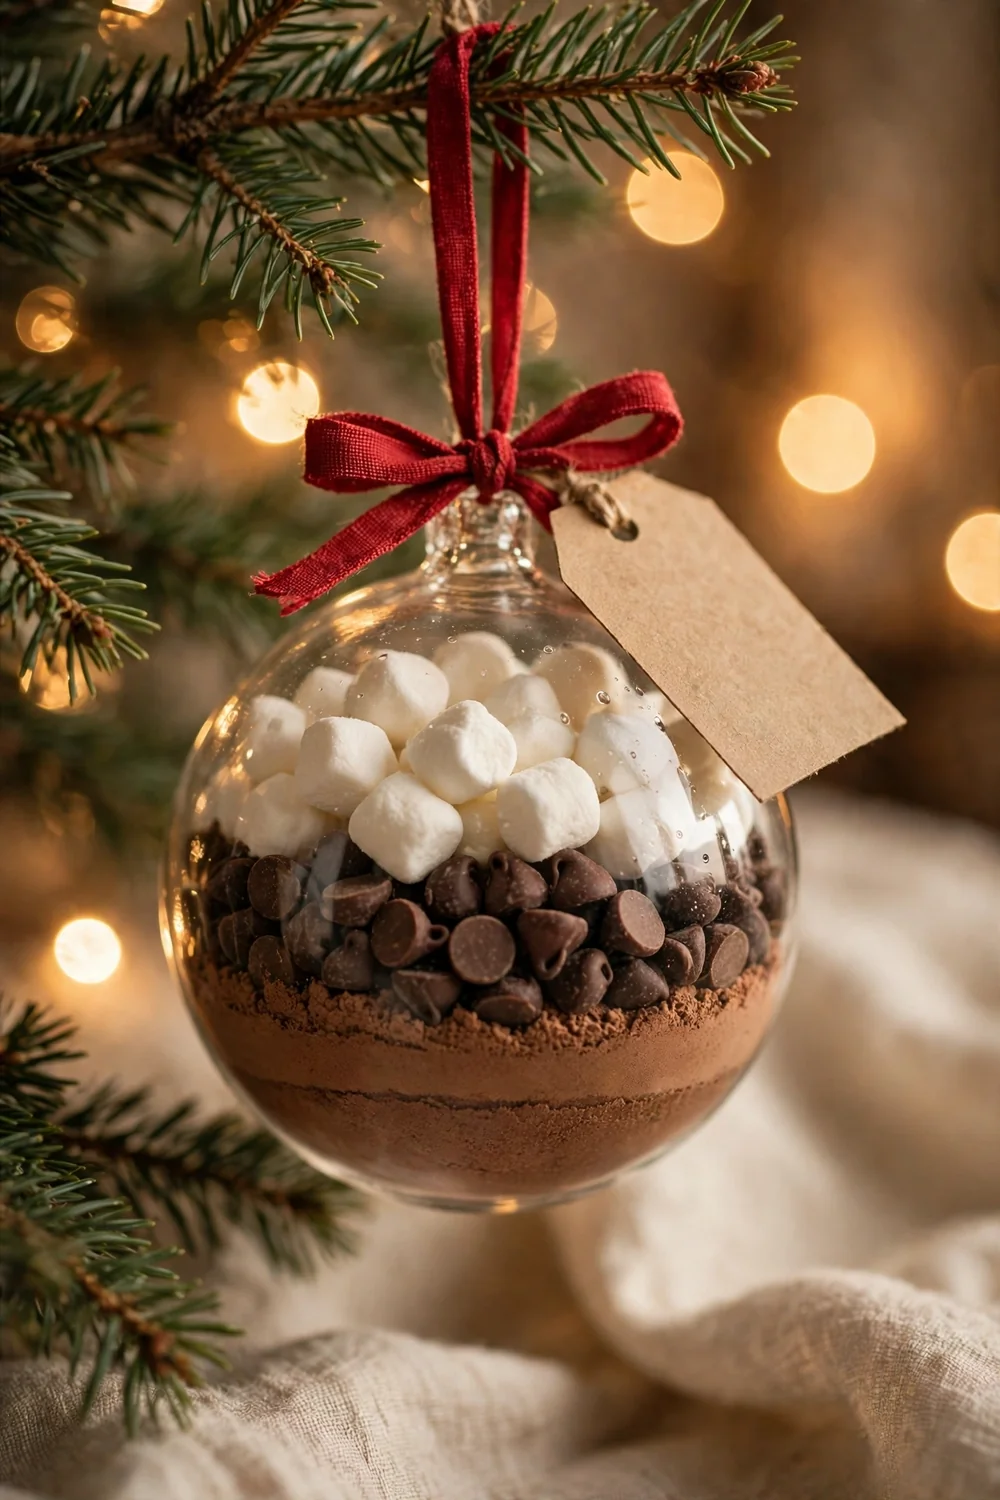
26. Hot Cocoa Mix Ornaments
A clear ornament layered with cocoa mix is the one food ornament that is meant to be eaten: it is a single serving of hot chocolate wearing a costume. Funnel in hot cocoa mix for the bottom two-thirds, add a layer of chocolate chips or crushed candy cane, top with mini marshmallows, cap it, and tie on a ribbon with a small tag that says to pour into a mug and add hot milk.
You’ll need: clear fillable ornaments · hot cocoa mix · mini marshmallows · chocolate chips or candy cane · tags and ribbon · Time: 10 minutes · Skill: Easy
Try it: Make these in the last week before gifting, not in November. The marshmallows stay soft for about a month, and a fresh batch tastes like a real drink rather than a decoration.
27
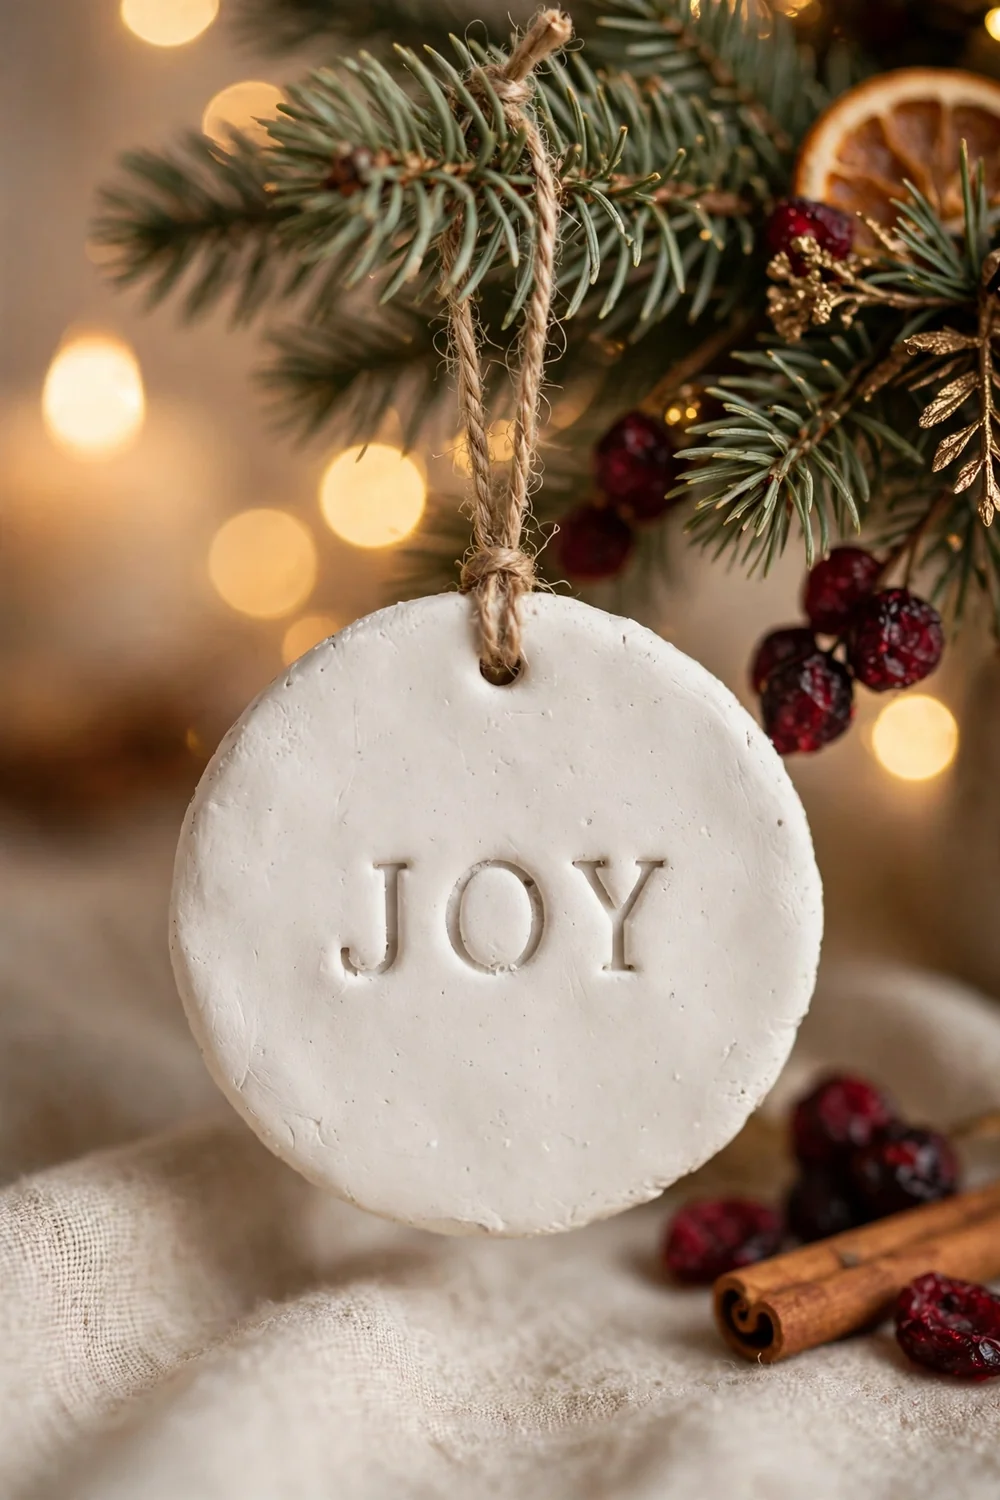
27. Personalized Clay Name Ornaments
Air-dry clay rolled flat and stamped with a name makes the ornament version of a place card, and a set of them on the tree doubles as your gift tags for the whole family. Roll the clay to about a quarter inch, cut a circle or tag shape, press letter stamps gently into the surface for the name, poke a hanging hole, and let it dry flat for 24 to 48 hours before tying on twine or velvet ribbon.
You’ll need: air-dry clay · rolling pin · round cutter · letter stamps · twine or ribbon · Time: 30 minutes, plus 24 to 48 hours drying · Skill: Medium
Try it: Sand the dry edges lightly and leave the clay unpainted, or wash it with one coat of diluted white paint. The matte stone finish is what makes stamped clay look like a boutique keepsake instead of a school project.

28
28. Vintage Map Decoupage Baubles
A bauble covered in an old map is the ornament for the family that travels: honeymoon cities, hometown streets, and the route of a big road trip all belong on the tree. Tear a vintage map (or a printout of one) into small pieces, glue them smoothly over a foam or papier-mâché bauble with decoupage medium, working the pieces flat with your fingers, then seal with a final coat and let the edges show like a globe’s seams.
You’ll need: old maps or map printouts · foam or papier-mâché baubles · decoupage glue · brush · Time: 25 minutes · Skill: Medium
Try it: Center one meaningful place name on the front of each bauble as you lay the pieces. A decoupage ball where the map lands randomly is pretty; one where “home” faces out is a keepsake.
Pro tip: Work assembly-line style and set a timer for the batch, not the ornament. Cut every felt shape, drill every wood slice, and pop every bauble cap before you start finishing any of them; a batch of twelve made this way takes about a third of the time of twelve made one by one, and the set matches because every decision was made once.
Three rules for ornaments that look heirloom, not homemade
Handmade ornaments fail in three predictable places: the finish, the palette, and the curing. These rules are the difference between a craft project and a keepsake.
- Finish the back, the cap, and the edge: The back of the ornament is what faces the room half the time it swings. Paint it, cover it, or sand it to the same standard as the front, seat the cap straight, and replace split or tarnished caps with new ones, because a fresh cap makes the whole piece look new.
- Hold a tight palette across every material: Cream, cranberry, and antique gold (or your own three colors) repeated across felt, wood, paper, and glass is what makes 28 different techniques read as one designed set. Let the materials vary wildly; let the colors barely vary at all.
- Seal it and let it cure before it hangs: Varnish the salt dough and gingerbread, spray the painted ceramic, and give poured paint its full 24 to 48 hours of draining. An ornament hung while still curing sticks to its neighbor, clouds its own finish, and rarely survives to a second Christmas.
Hanging, storing, and keeping ornaments safe around kids and pets
The prettiest set on the page still has to survive small hands, wagging tails, and eleven months in a box. A few placement and storage habits protect the whole collection.
- Hang in zones, heavy and fragile up high: Put the unbreakable felt, wood, bead, and paper ornaments on the low branches where toddlers and pets can reach, and keep glass, ceramic, and mercury glass in the top two-thirds of the tree. Use floral wire or locking ornament hooks on anything heavy, twisted tight to the branch, because a standard hook lets a weighty wood slice slide off the first time the tree is bumped.
- Store by material, not by year: Wrap glass and ceramic in tissue inside divided boxes, keep felt and fabric in a breathable bag away from anything painted, stand dried orange and gingerbread in a sealed container with a silica packet, and store cocoa ornaments in the kitchen, not the attic. Everything handmade lasts longer in a cool, dry room than in a hot loft.
- Keep food-based ornaments out of pet reach: Salt dough is the big one: it is not food, but it smells like it, and its high salt content makes it genuinely risky for dogs that chew it, so hang salt dough high or skip it in a dog household. Gingerbread, cinnamon bundles, and cocoa ornaments go on upper branches too, and any ornament small enough to swallow stays off the bottom of the tree entirely.
Questions readers ask
What are the easiest christmas ornaments to make at home?
The easiest are the no-dry, no-sew ones: snow-filled clear baubles, velvet ribbon baubles, and cinnamon stick bundles each take about 10 minutes and need no drying or curing. Glitter-lined baubles and wooden bead ornaments are close behind at about 15 minutes, and all five are forgiving enough for a first attempt.
What can I fill clear ornaments with?
You can fill clear ornaments with faux snow or Epsom salt, curled photos, dried orange slices and rosemary, mini pinecones with glitter, layered hot cocoa mix, sequins, tiny beads, or curled strips of sheet music. Anything dry and light works; the two limits are the width of the neck (about half an inch on standard baubles) and keeping food fills, like cocoa, fresh.
How do you make salt dough ornaments that do not crack?
Roll the dough an even quarter inch thick, dry the shapes slowly and flat (2 to 3 days in the air, turning once a day, or 2 to 3 hours at 200°F), and never rush them in a hot oven, because fast drying is what puffs and cracks the surface. Kneading the dough smooth for a full 5 minutes before rolling removes the air pockets that become cracks later.
What christmas ornaments can I make to sell?
The best sellers are the ones that personalize or gift well: stamped clay name ornaments, photo memory baubles, hot cocoa mix ornaments, and painted wood slices with local or family designs. They batch efficiently, survive shipping in tissue and a small box, and buyers pay the most for a name or a date, so build your pricing around personalization.
How far ahead can I make homemade ornaments before Christmas?
Most handmade ornaments can be made 2 to 3 months ahead and stored cool and dry: painted, quilled, felt, wood, and clay pieces are happiest made in October or November. The exceptions are food-based ones; make hot cocoa ornaments in the last week or two so the marshmallows stay soft, and bake gingerbread ornaments no more than a month ahead so they stay fragrant.
What is the best paint for glass ornaments?
For painting inside glass baubles, regular acrylic craft paint works best because it coats evenly as it drains and comes in metallics for the marble veining. For painting designs on the outside of glass or ceramic, acrylic paint pens give the most control, and a clear spray sealer over either method keeps the finish from scratching off in storage.
How do you hang heavy ornaments so they do not fall?
Hang heavy ornaments on floral wire or a locking hook twisted firmly around a sturdy inner branch, close to the trunk where the branch is thickest, never on the soft outer tips. A 3 to 4 inch wood slice or a full ceramic bauble is two to three times the weight of a standard bauble, so treat each one like a small picture frame and give it a real fixing.
Are homemade ornaments safe around dogs and cats?
Most are safe if you hang them thoughtfully: felt, wood, paper, and bead ornaments are fine on low branches, but keep salt dough high or out of a dog household entirely, because its salt content is harmful if a dog chews and swallows pieces. Glass, glitter fills, and anything with small swallowable parts belong in the top of the tree, well above tail and toddler height.
People Also Ask
What is the difference between a bauble and an ornament?
A bauble is one specific shape of ornament: the round ball. Ornament is the wider word for anything decorative hung on the tree, so wood slices, paper stars, felt figures, and framed photos are all ornaments, but only the round ones are baubles.
How long do dried orange slice ornaments last?
A properly dried orange slice ornament lasts one to two seasons looking bright, as long as it is stored dry with a silica packet between Christmases. By the third year the color dulls toward amber; many people simply make a fresh batch each year, since the oven time is the only real cost.
Can you make christmas ornaments with kids?
Yes, and the best kid-friendly picks from this list are salt dough shapes, wooden bead ornaments, snow-filled clear baubles (use plastic, not glass), and pinecone decorating, all of which tolerate small hands and uneven results. Save the wood-burning pen, the quilling, and the spray-painted mercury glass for adults working alongside them.
loved these ideas? ✿
Save this guide for later
Pin it to your board so it’s there when you’re ready to recreate it.

Curated by
Hey! I'm Sanaullah — visual curator and content creator. I search, curate, and test the best aesthetic ideas across Pinterest so you can easily transform your living space, style daily outfits, and try simple creative DIYs without the overwhelm.