
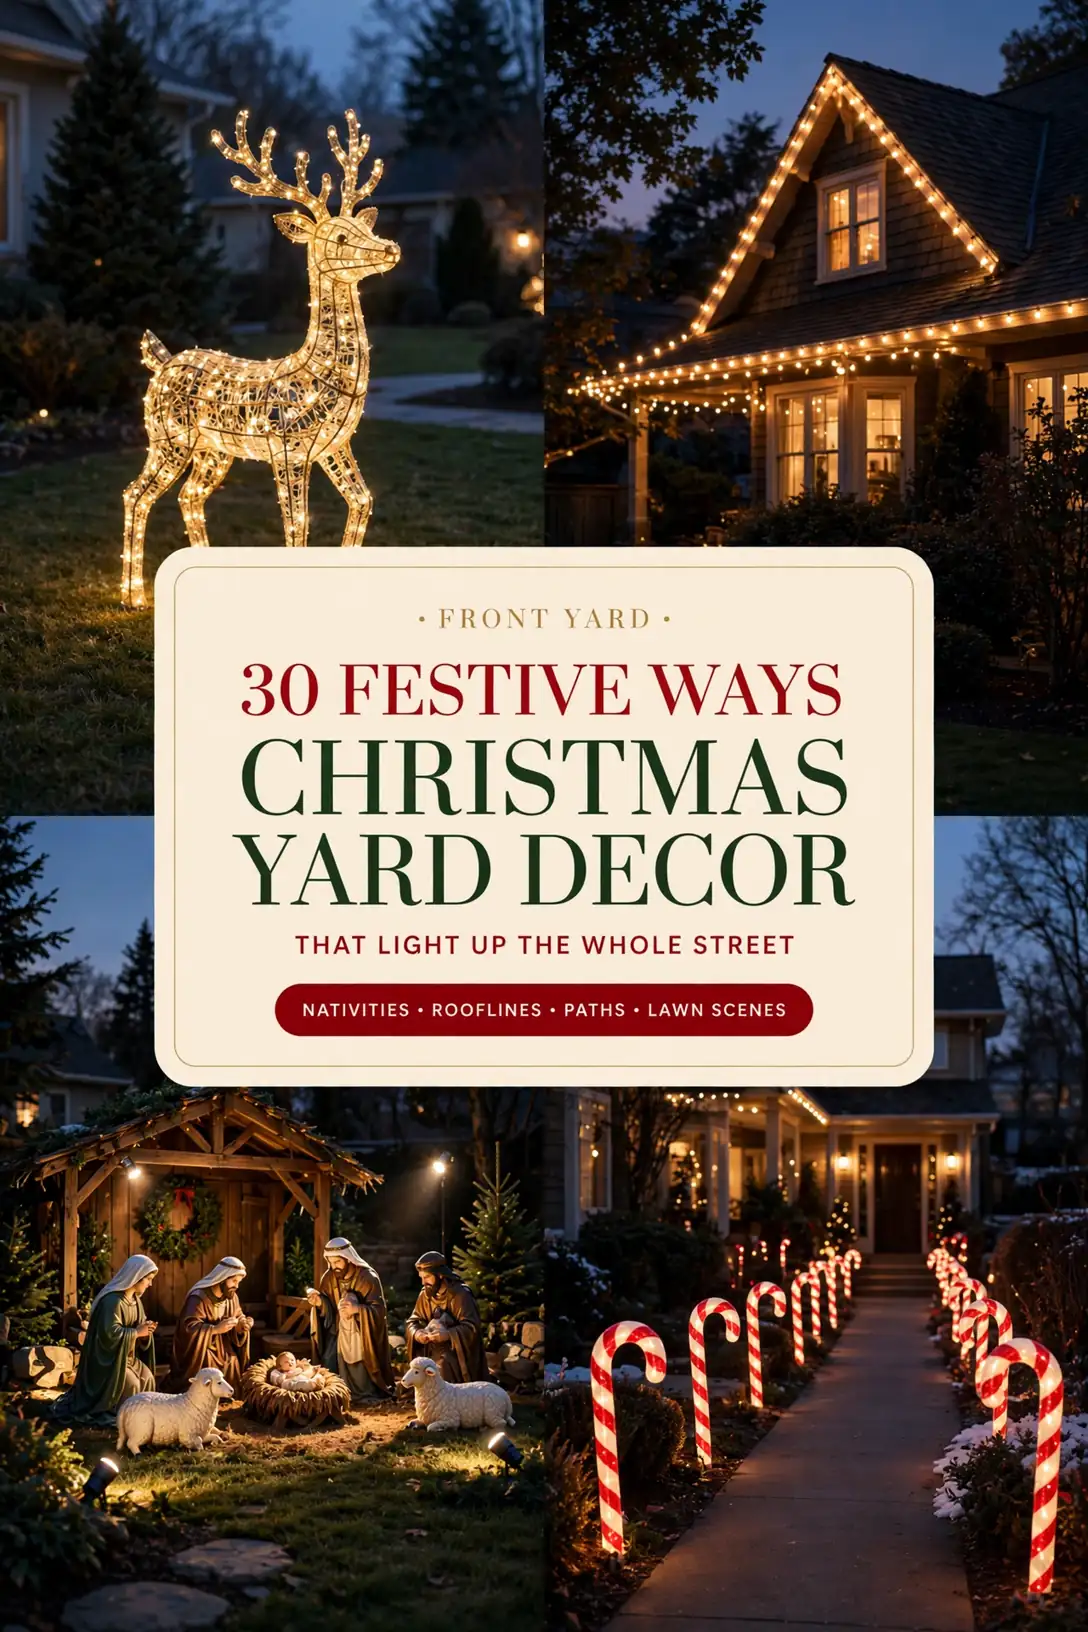
Your front yard is the one room every neighbor sees, and at Christmas it does the greeting long before you open the door. These christmas yard decor ideas are built around one anchor scene, layered light, and christmas decorations outdoor pieces rated to survive real December weather. Follow them zone by zone and your yard will be the one cars slow down for.
Quick Idea Summary
- The key takeaway: Build the yard around ONE anchor scene, a nativity, a reindeer group, or a snowman family, then support it with lights and small accents. One strong scene reads as designed; ten competing pieces read as a storage unit exploded.
- The detail most people miss: The display is judged at dusk from the street, not at noon from the porch. Set everything, then walk to the curb at twilight and check sightlines, dark gaps, and visible cords before you call it done.
- What it costs or how long it takes: Most ideas below run $15 to $60, and a full yard comes together in one weekend: Saturday for the anchor scene and roofline, Sunday for paths, fences, and accents.
At a glance
| Zone | Ideas | Budget |
|---|---|---|
| The lawn scene | 01–07 | $30–$150 |
| Roofline and lights | 08–13 | $20–$80 |
| Trees and greenery | 14–19 | $15–$60 |
| Paths, driveway, and street edge | 20–25 | $10–$50 |
| Fences, gates, and finishing touches | 26–30 | $10–$45 |
The ideas
01
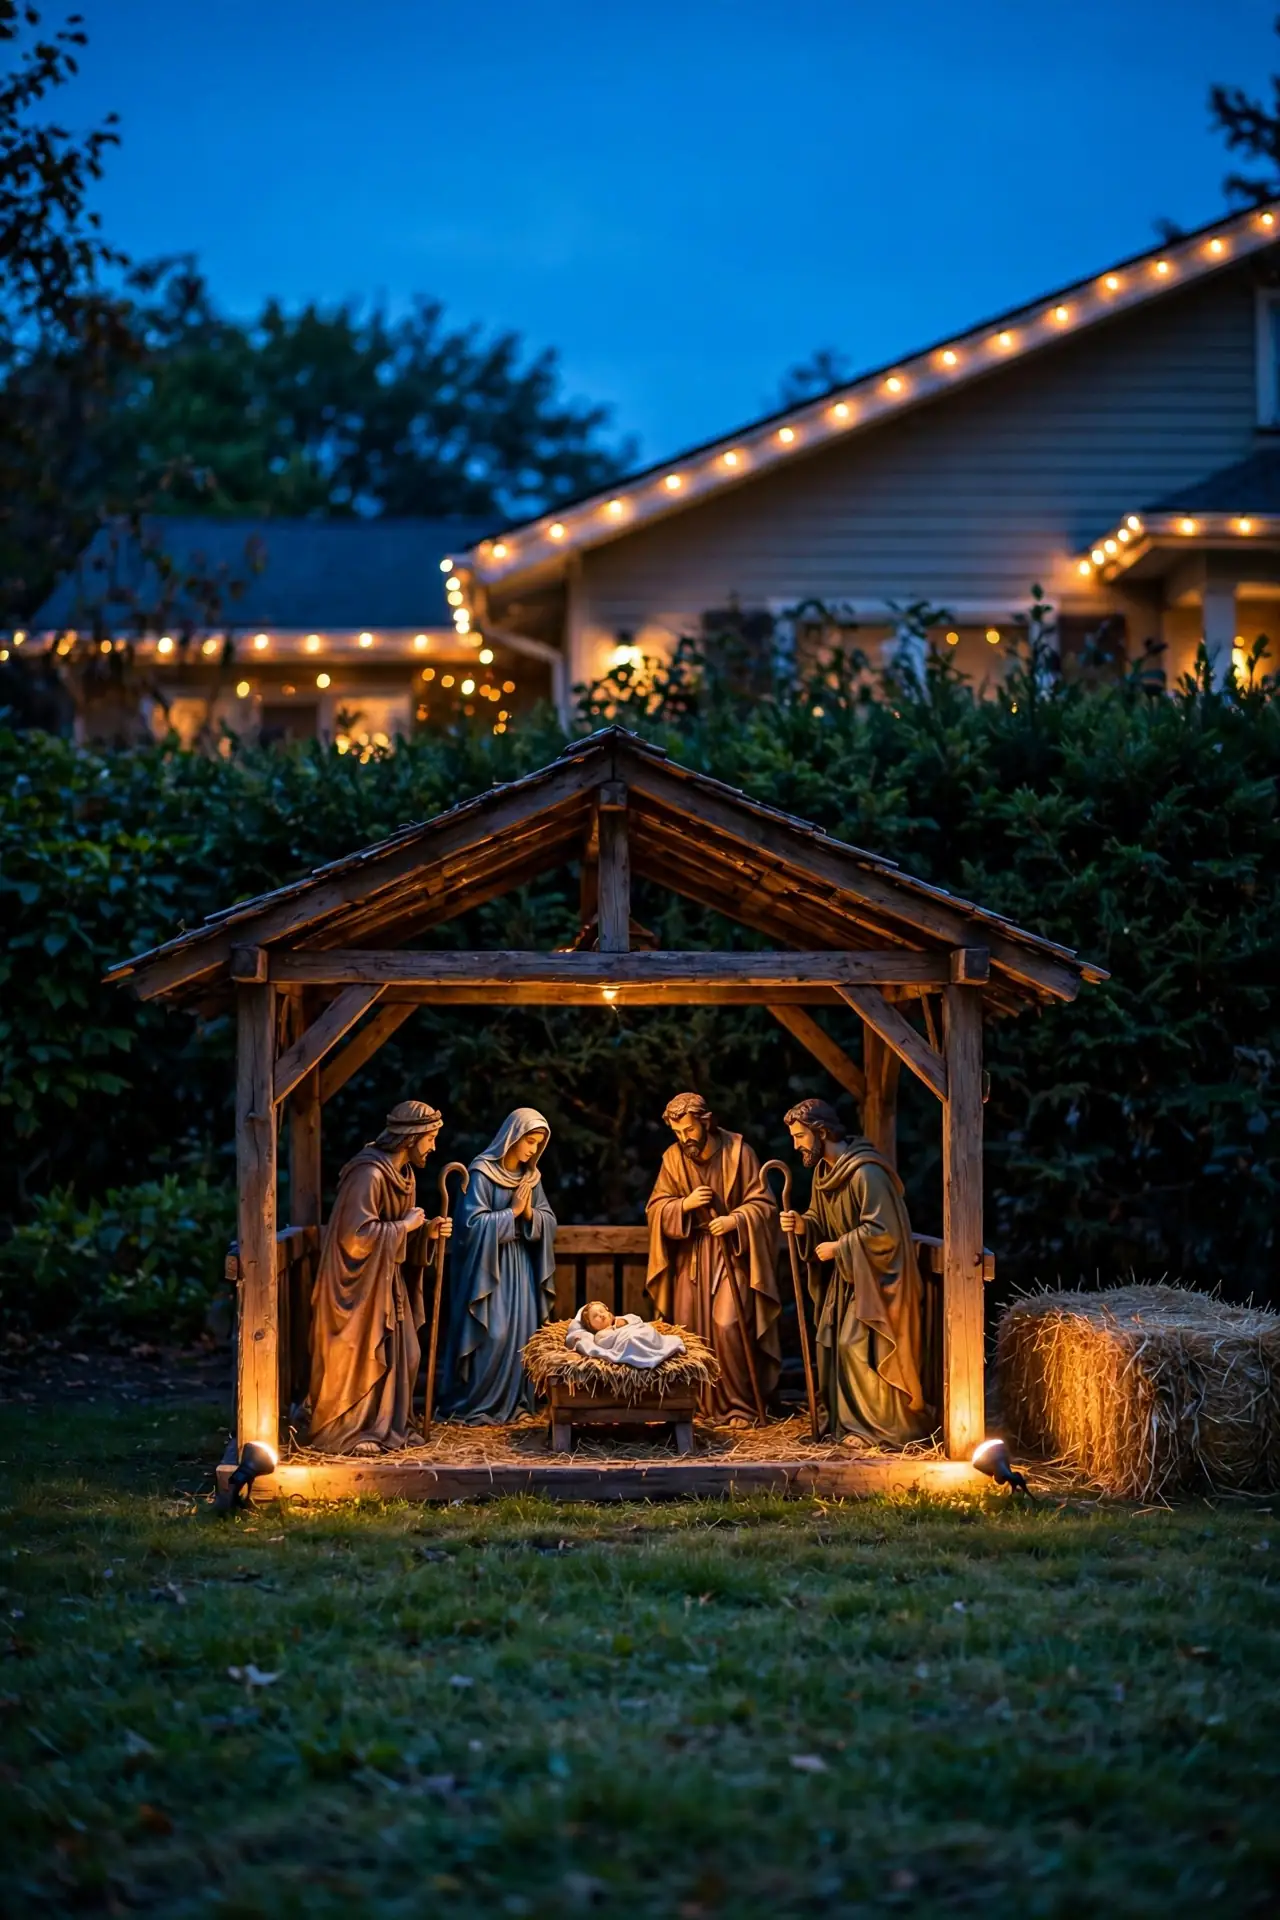
Anchor the Yard With an Outdoor Nativity Set
An outdoor nativity set is the strongest anchor a yard can have: it tells the whole story in one scene and gives every other decoration a supporting role. Choose figures 24 to 36 inches tall so the scene reads clearly from a car 30 feet away, and set it on flat ground against a dark backdrop like a hedge or the house wall. A stable, a simple frame of branches, or a small spotlight completes it.
Try it: Light the scene from the front with two warm spotlights at ground level, angled up about 30 degrees. Backlighting silhouettes the figures; front lighting shows their faces.
02
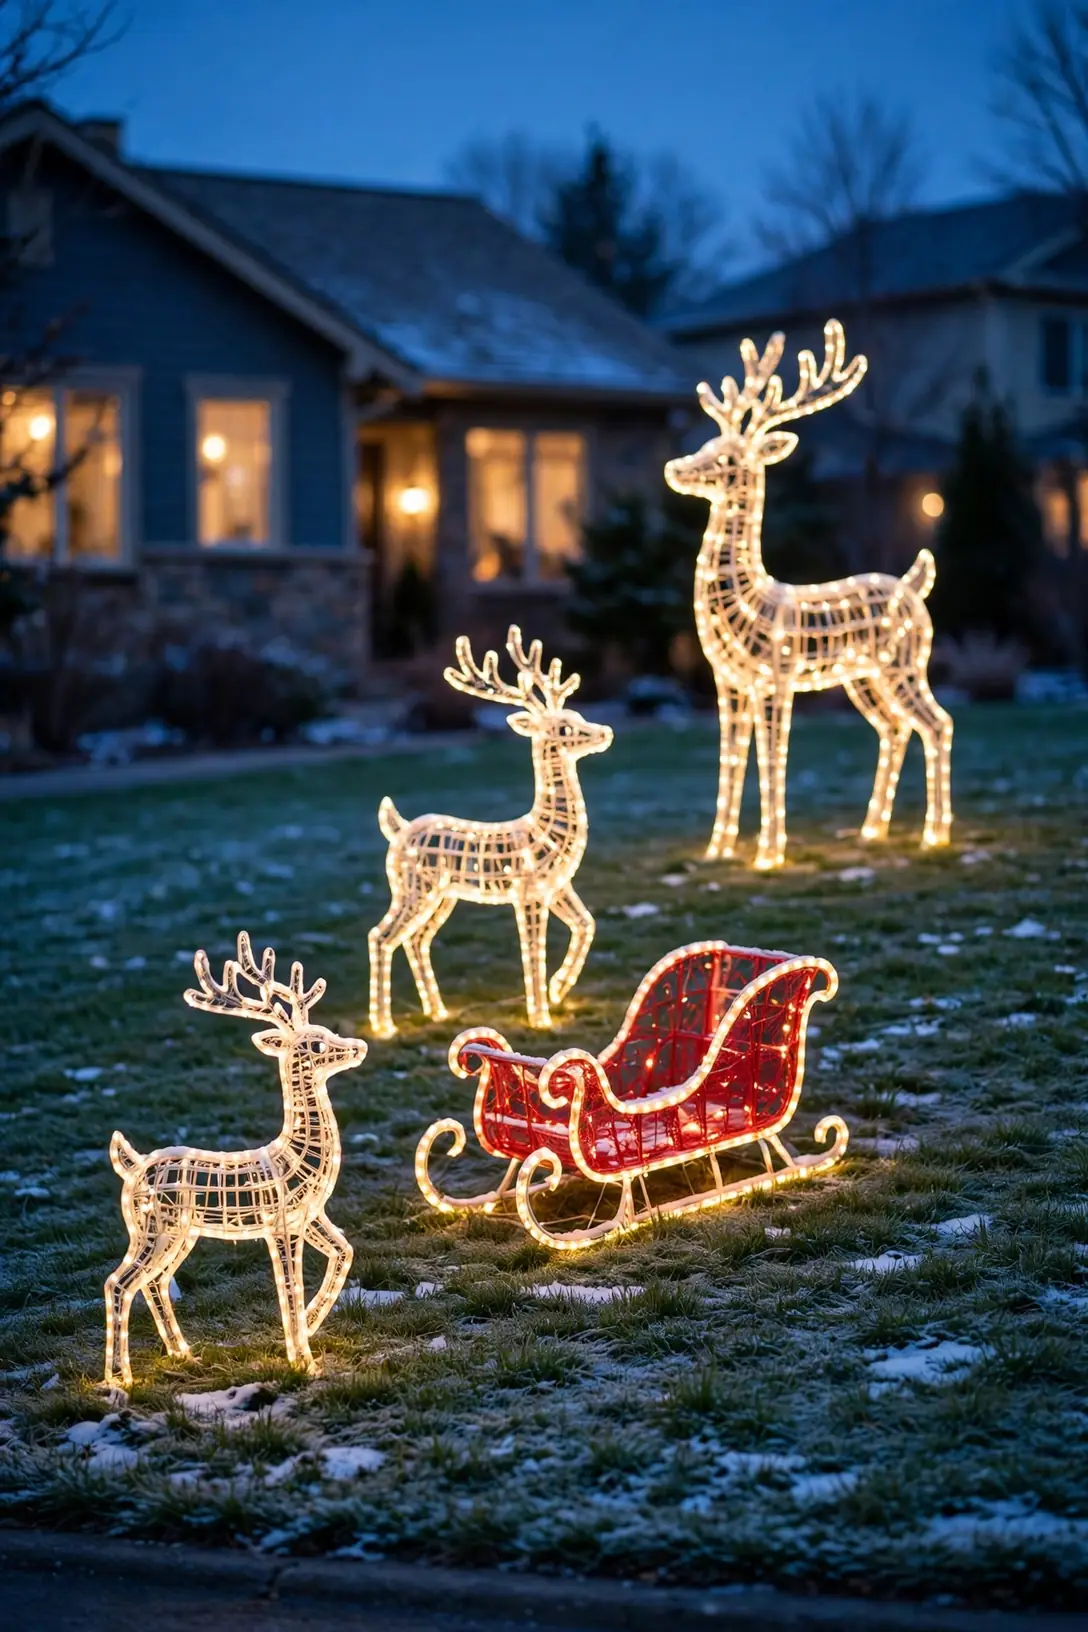
A Lighted Reindeer and Sleigh Group
Lighted reindeer are the classic christmas lawn decorations for a reason: they glow, they move the eye across the yard, and they photograph beautifully at dusk. Group three deer with a sleigh on a slight diagonal instead of a straight line, with the tallest deer at the back. The diagonal arrangement looks like a scene caught mid-moment rather than a product lineup.
Try it: Stake every leg, even on calm streets. Wire-frame figures are sails in a December wind, and one fallen deer takes the whole scene down with it.
03
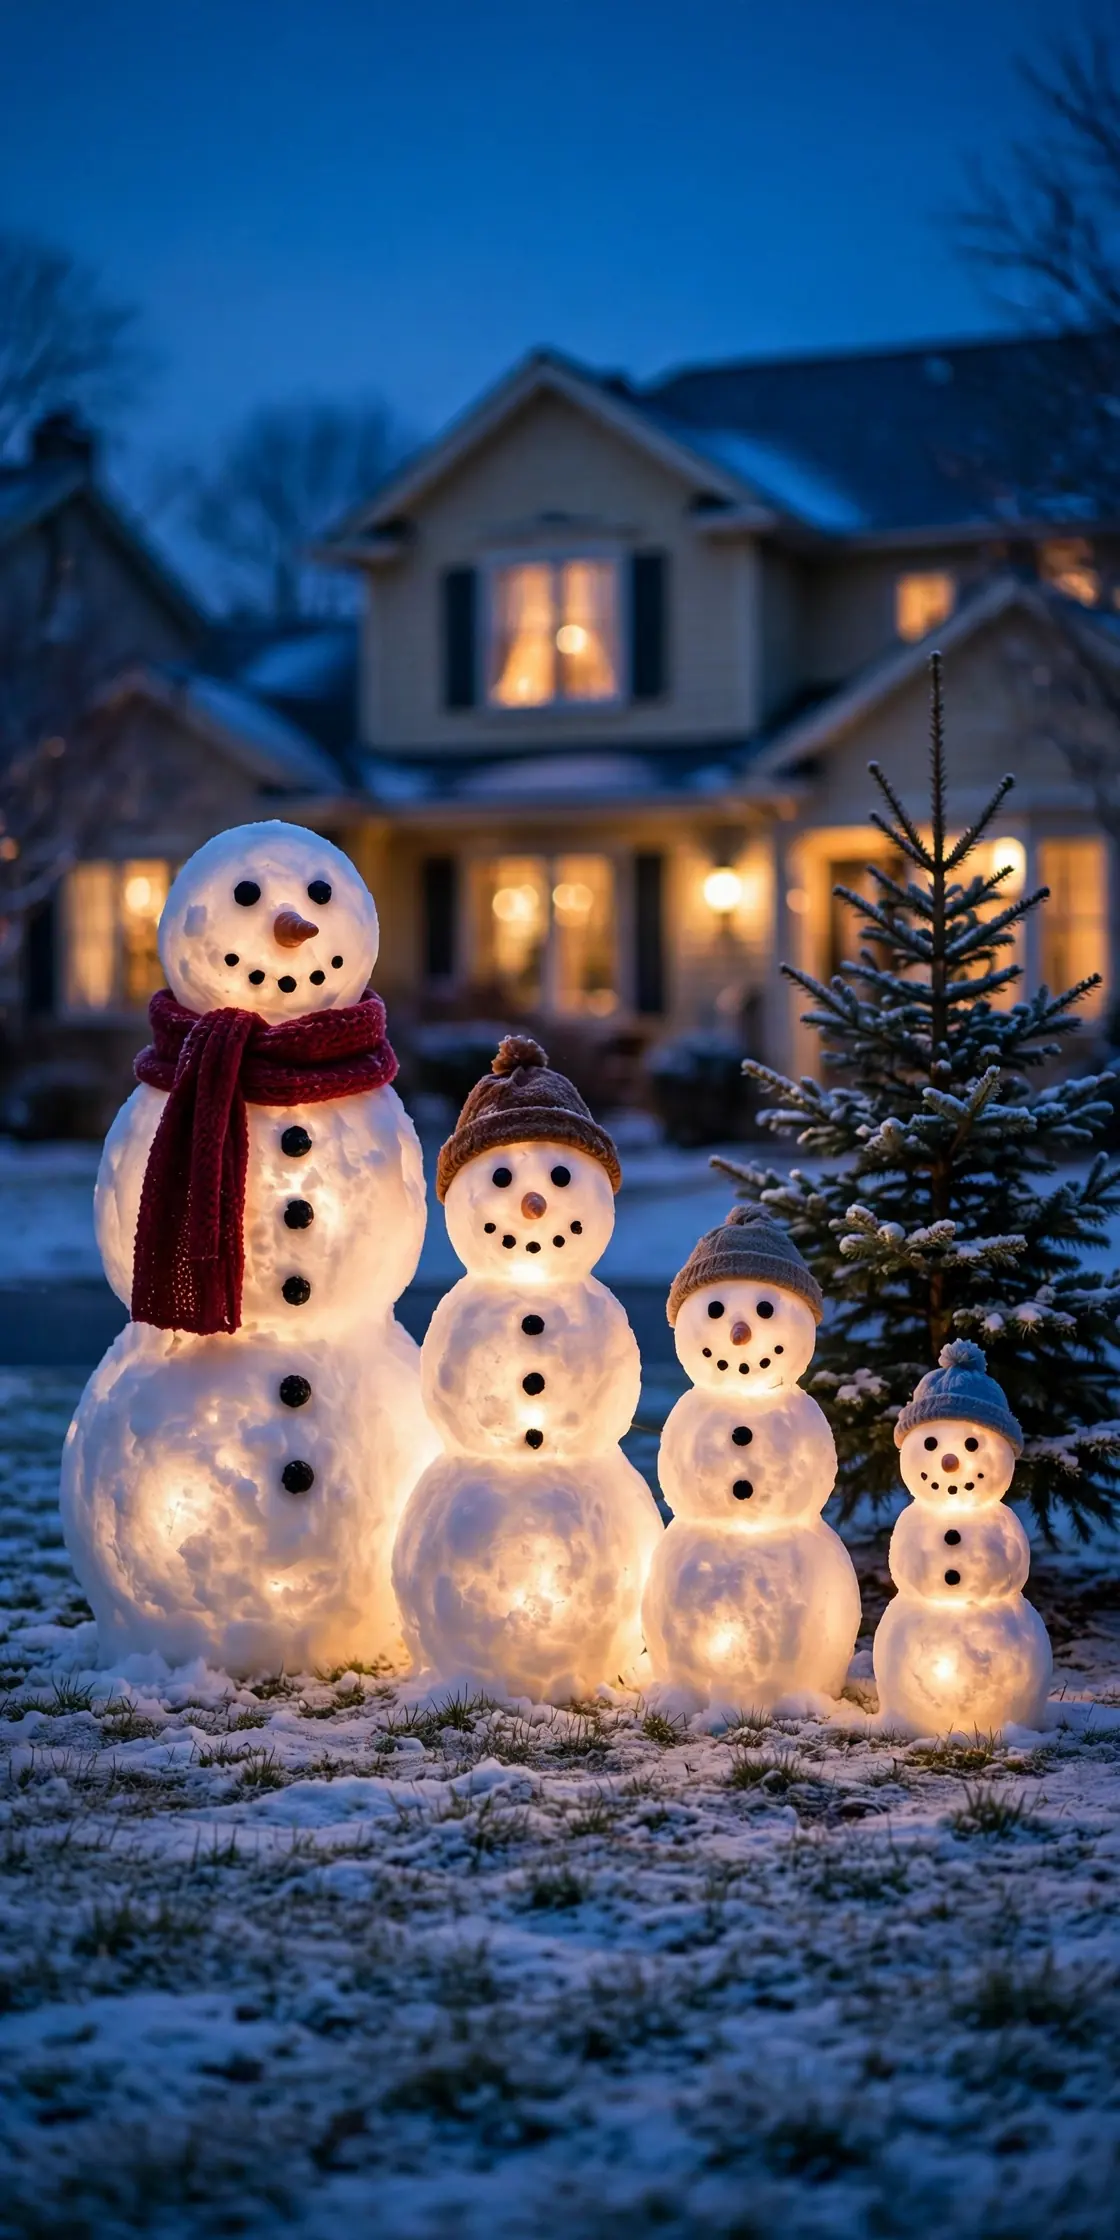
A Snowman Family That Matches Yours
Build a snowman family with one figure per family member, including the dog if you can find one. It is the display kids on the street will name and look for every year. Place the group near a tree or beside the path where headlights and porch light reach them.
Try it: Give the tallest snowman a scarf in your front door’s color. That one repeated color ties the lawn scene to the house.
04
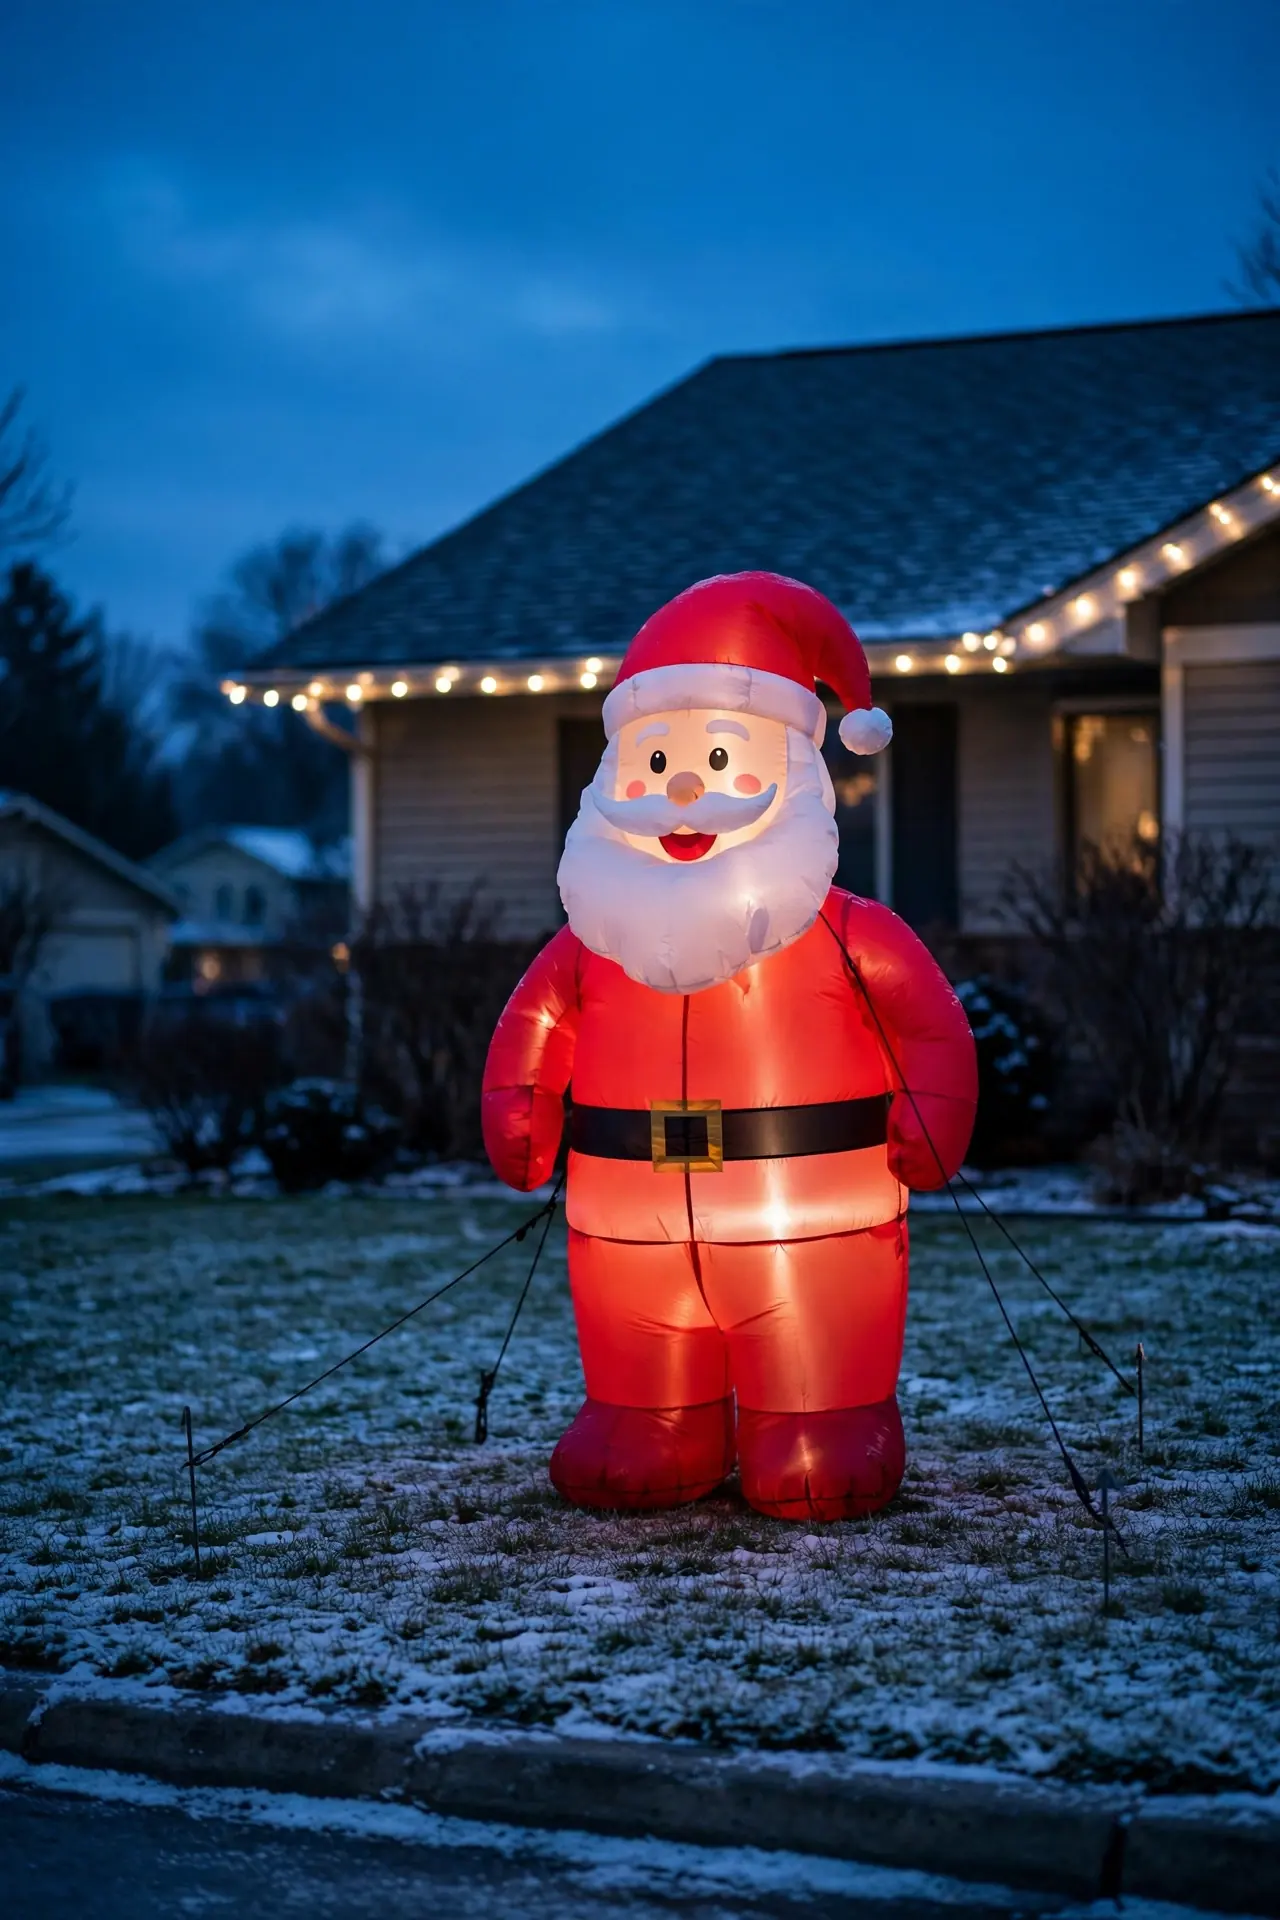
One Big Inflatable, Done Right
One statement inflatable, 8 to 12 feet tall, is charming; five small ones are a yard sale. Pick a single character with real height, anchor it with the included tethers plus a sandbag on the base, and run it on a timer from dusk to about 10 p.m. Inflated only in the evening, it looks deliberate and lasts far longer.
Try it: Keep at least 3 feet of clearance around the blower intake. A blower starved of air by mulch or snow is the number one reason inflatables sag.
05
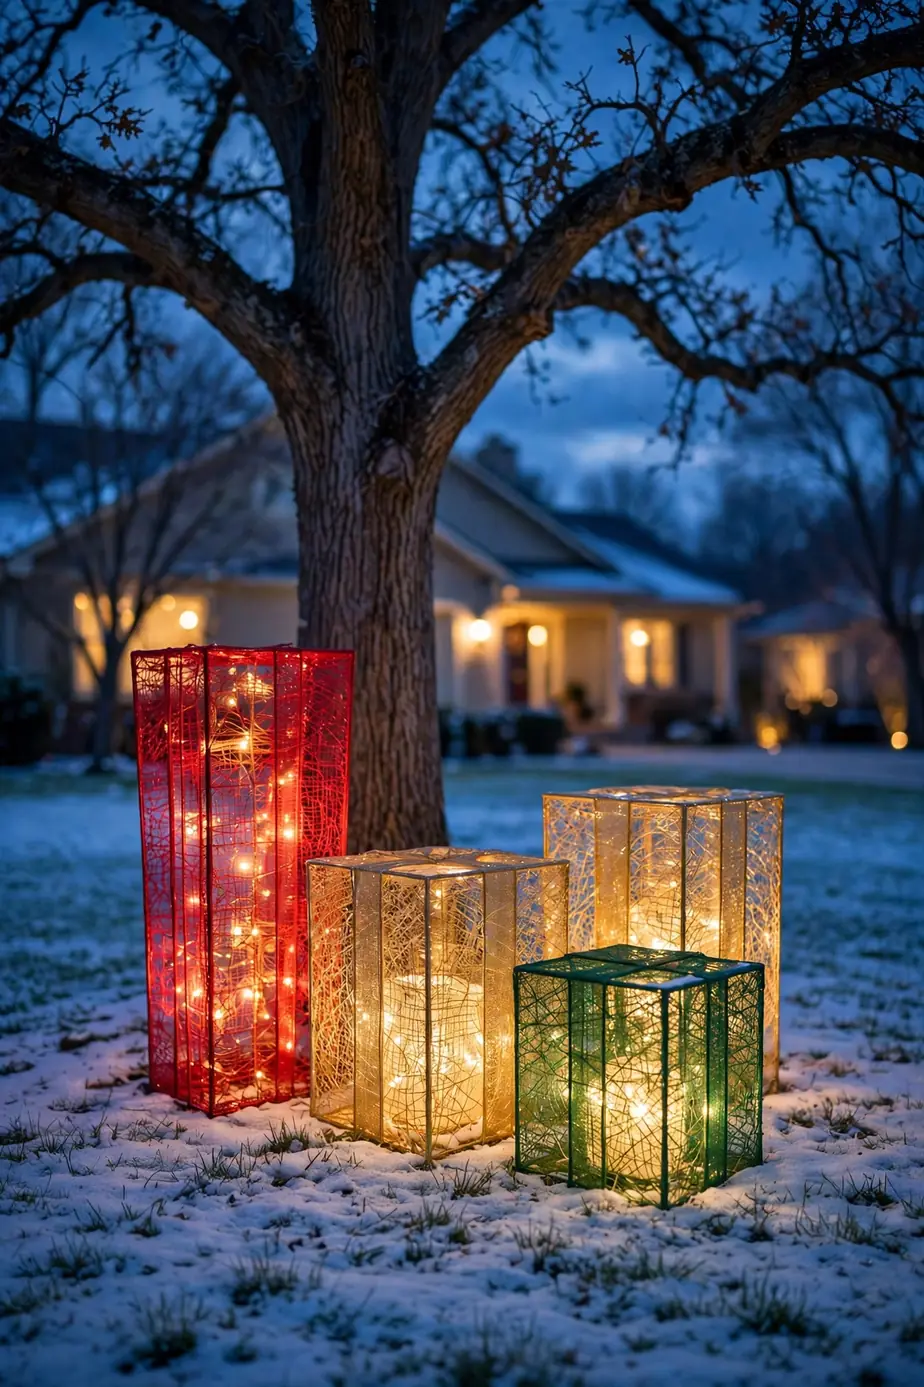
Lighted Gift Boxes Under the Biggest Tree
A cluster of lighted gift boxes under your largest yard tree turns dead space into a scene. Use three to five boxes in varied heights, 12 to 24 inches, in one color family. Mesh or acrylic boxes rated for outdoor use glow evenly and shrug off rain.
Try it: Slip a brick inside each base box. Light boxes are the first thing a gust rearranges, and weight keeps your grouping where you styled it.
06
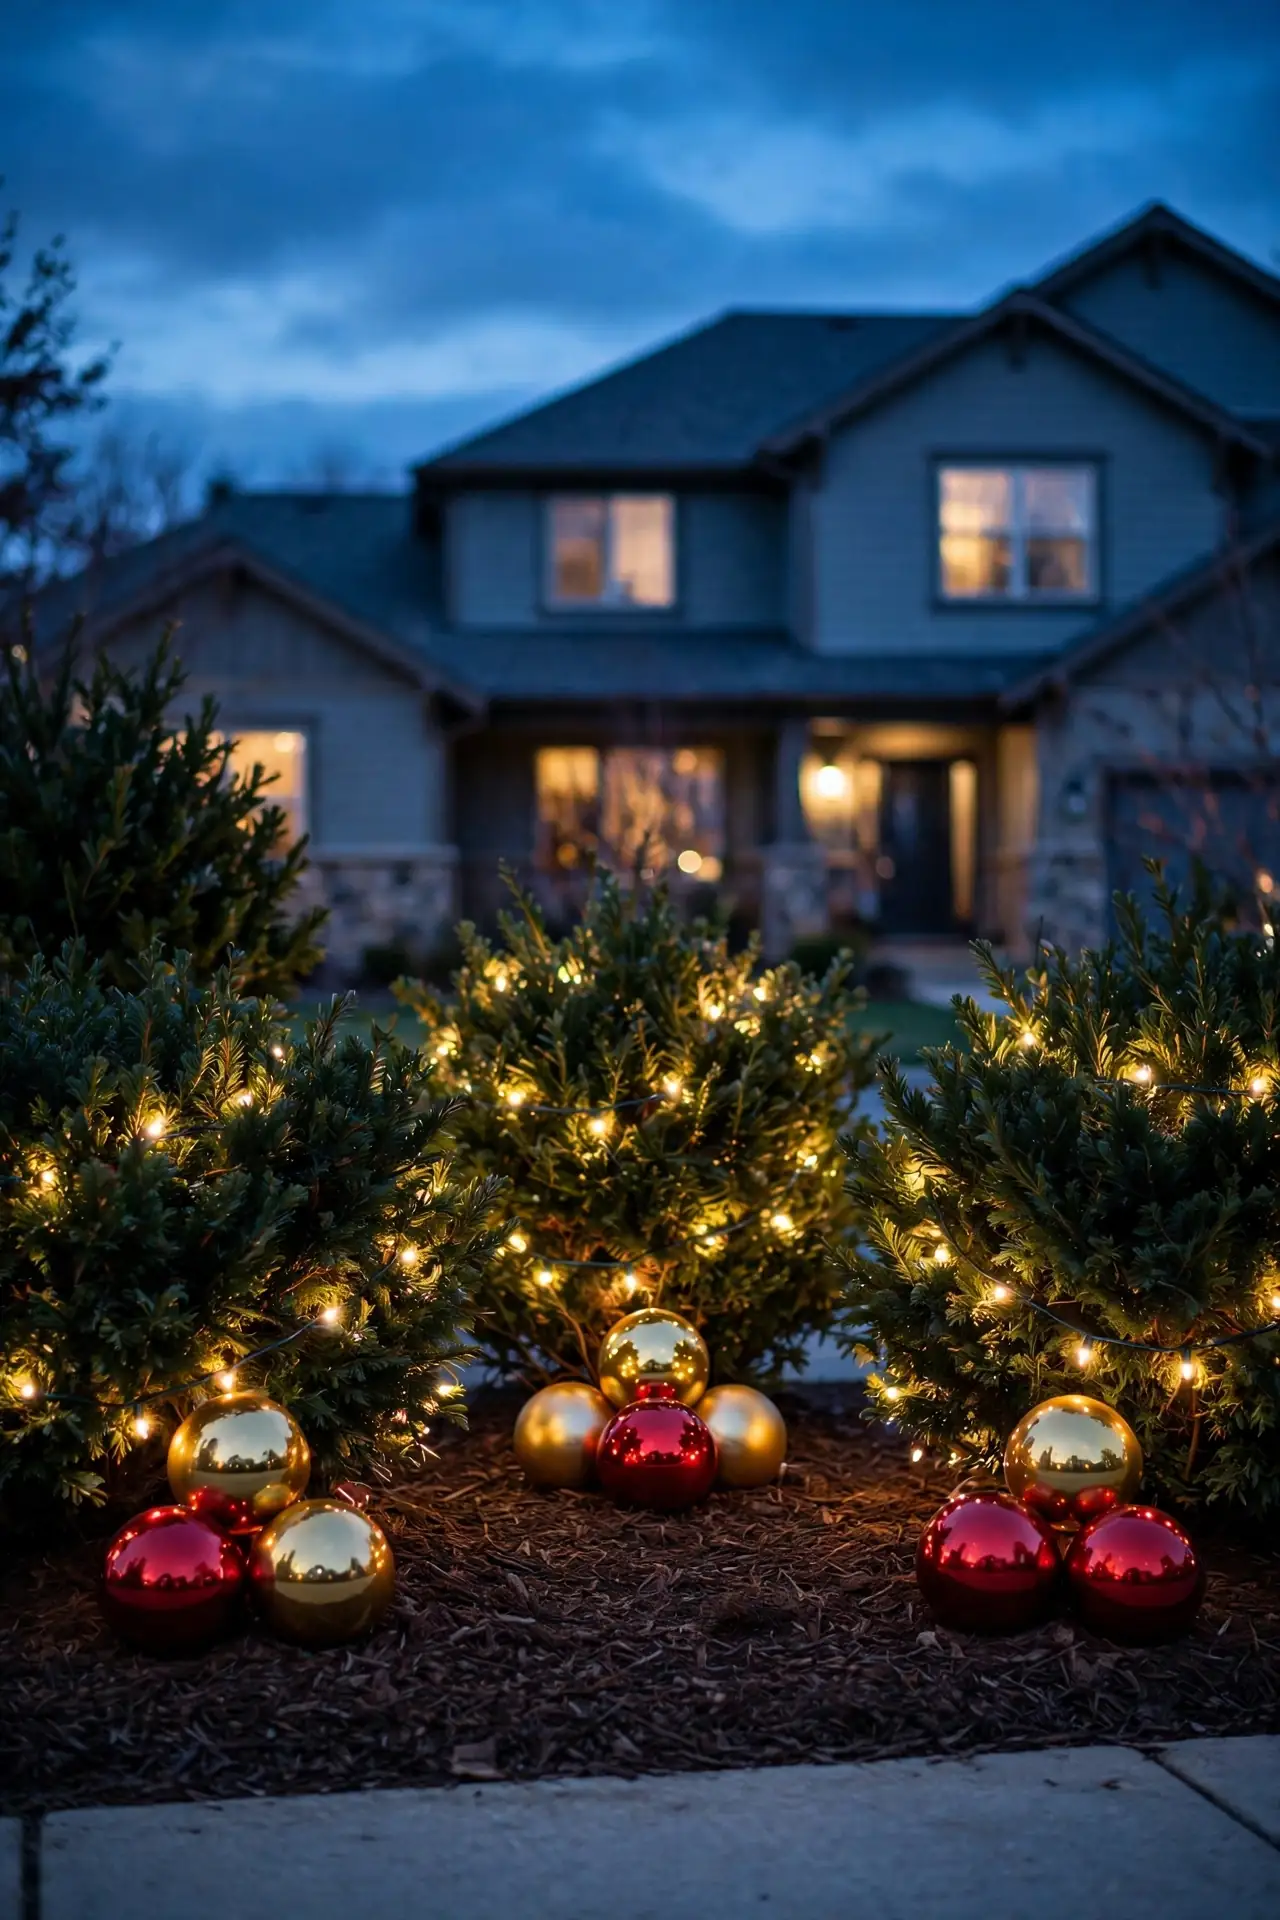
Oversized Christmas Yard Ornaments Scattered on the Lawn
Oversized christmas yard ornaments, shatterproof baubles 8 to 12 inches across, give a lawn instant scale and color that reads from the street. Scatter them in garden beds and at the base of shrubs in loose groups of three rather than spacing them evenly. Two or three colors maximum keeps it looking styled instead of spilled.
Try it: Push a landscape staple through each ornament’s cap loop before you set it down. Anchored ornaments stay put in wind and do not migrate across the lawn.
07
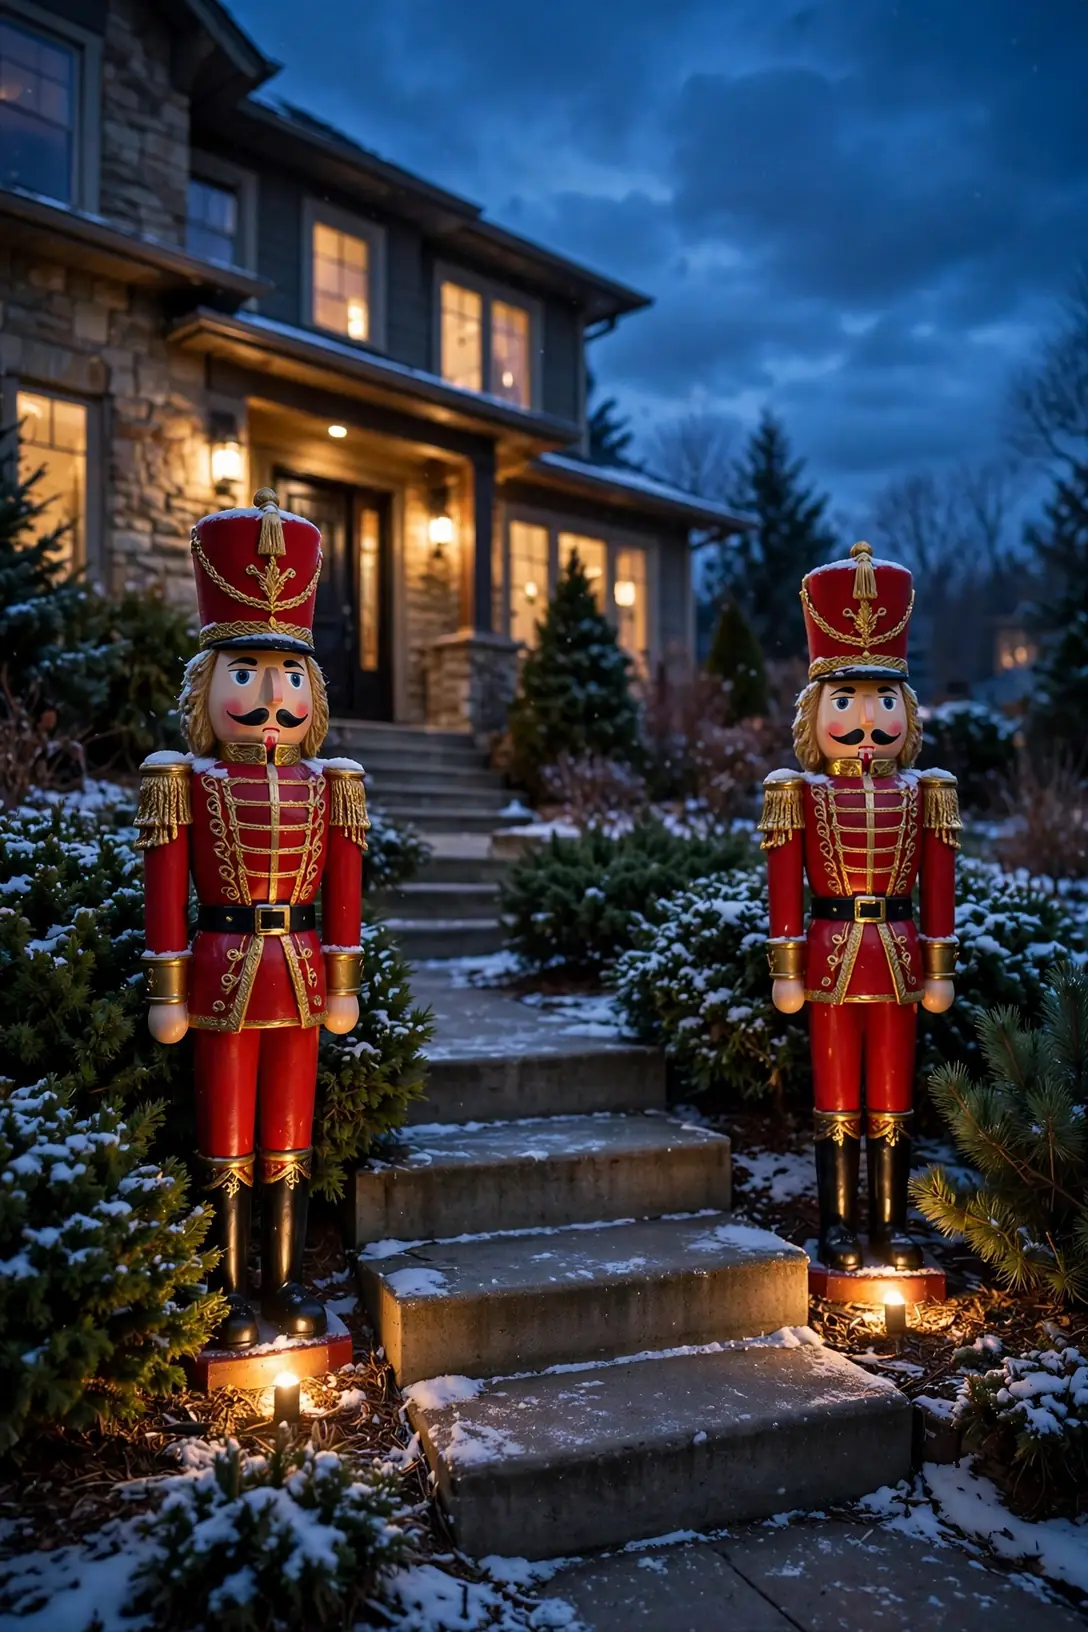
Nutcracker Sentries in the Garden Bed
A pair of 3 to 4 foot nutcrackers flanking the front steps or standing in the garden bed adds the formal, storybook note that balances playful pieces elsewhere. Symmetry is what makes them work, so buy a true matched pair and set them at identical heights. Solar or battery spotlights at their feet finish the guard-post effect.
Try it: Stand each nutcracker on a flat paver stone, not bare soil. Pavers stop the base from sinking and keep the pair level all season.
08
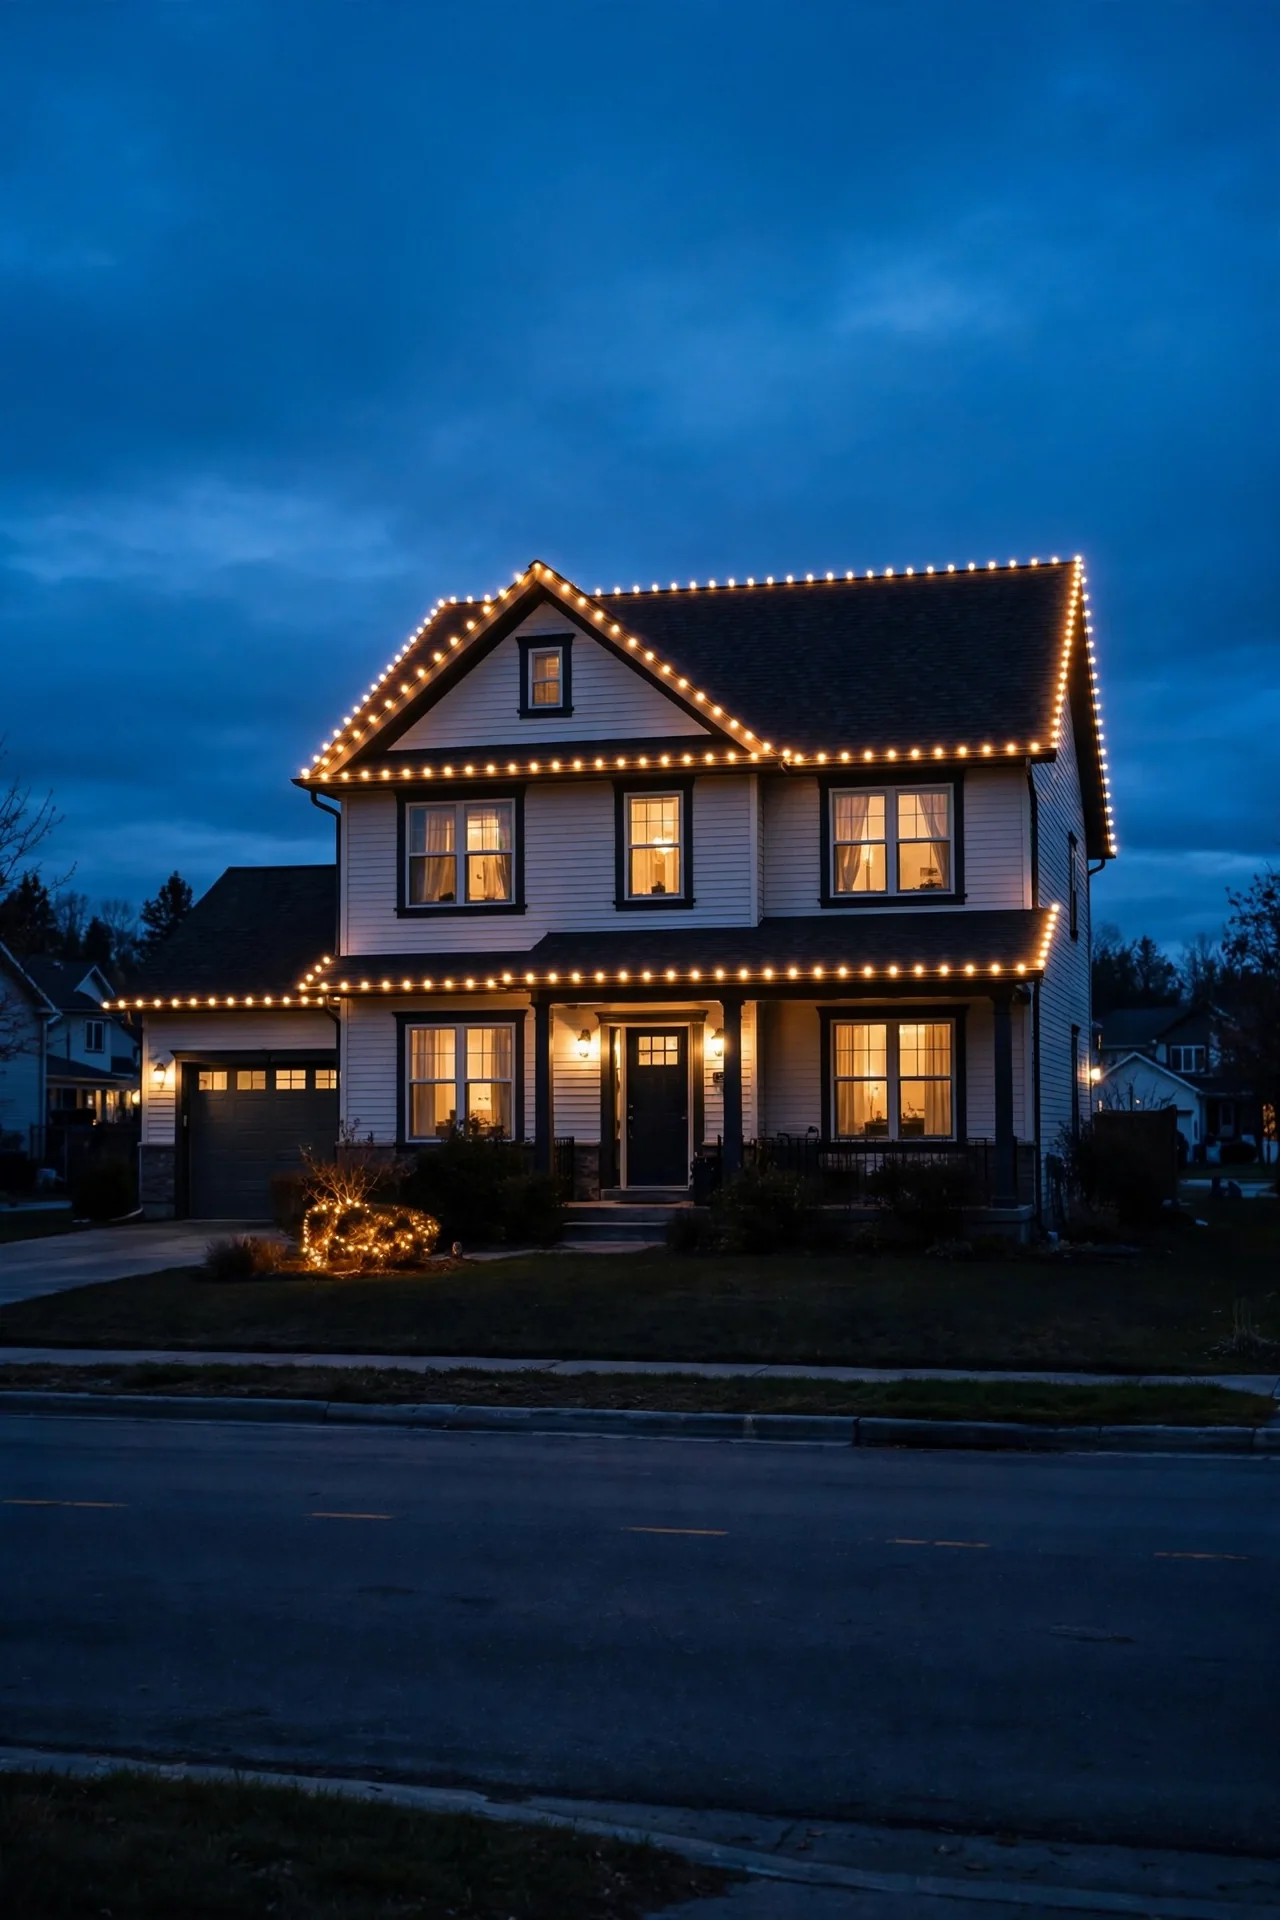
Outline the Roofline With C9 Bulbs
A clean roofline of C9 bulbs is the backbone of christmas decorations for outside: it defines the house shape and makes every yard piece below it look intentional. Measure the roofline first, buy LED C9 retrofits, and use clips matched to your gutters or shingles, spaced evenly along the whole run. Warm white is the classic choice and flatters every house color.
Try it: Clip the strand together on the ground before you climb. Attaching clips on the ladder, one bulb at a time, doubles the job and the wobble.
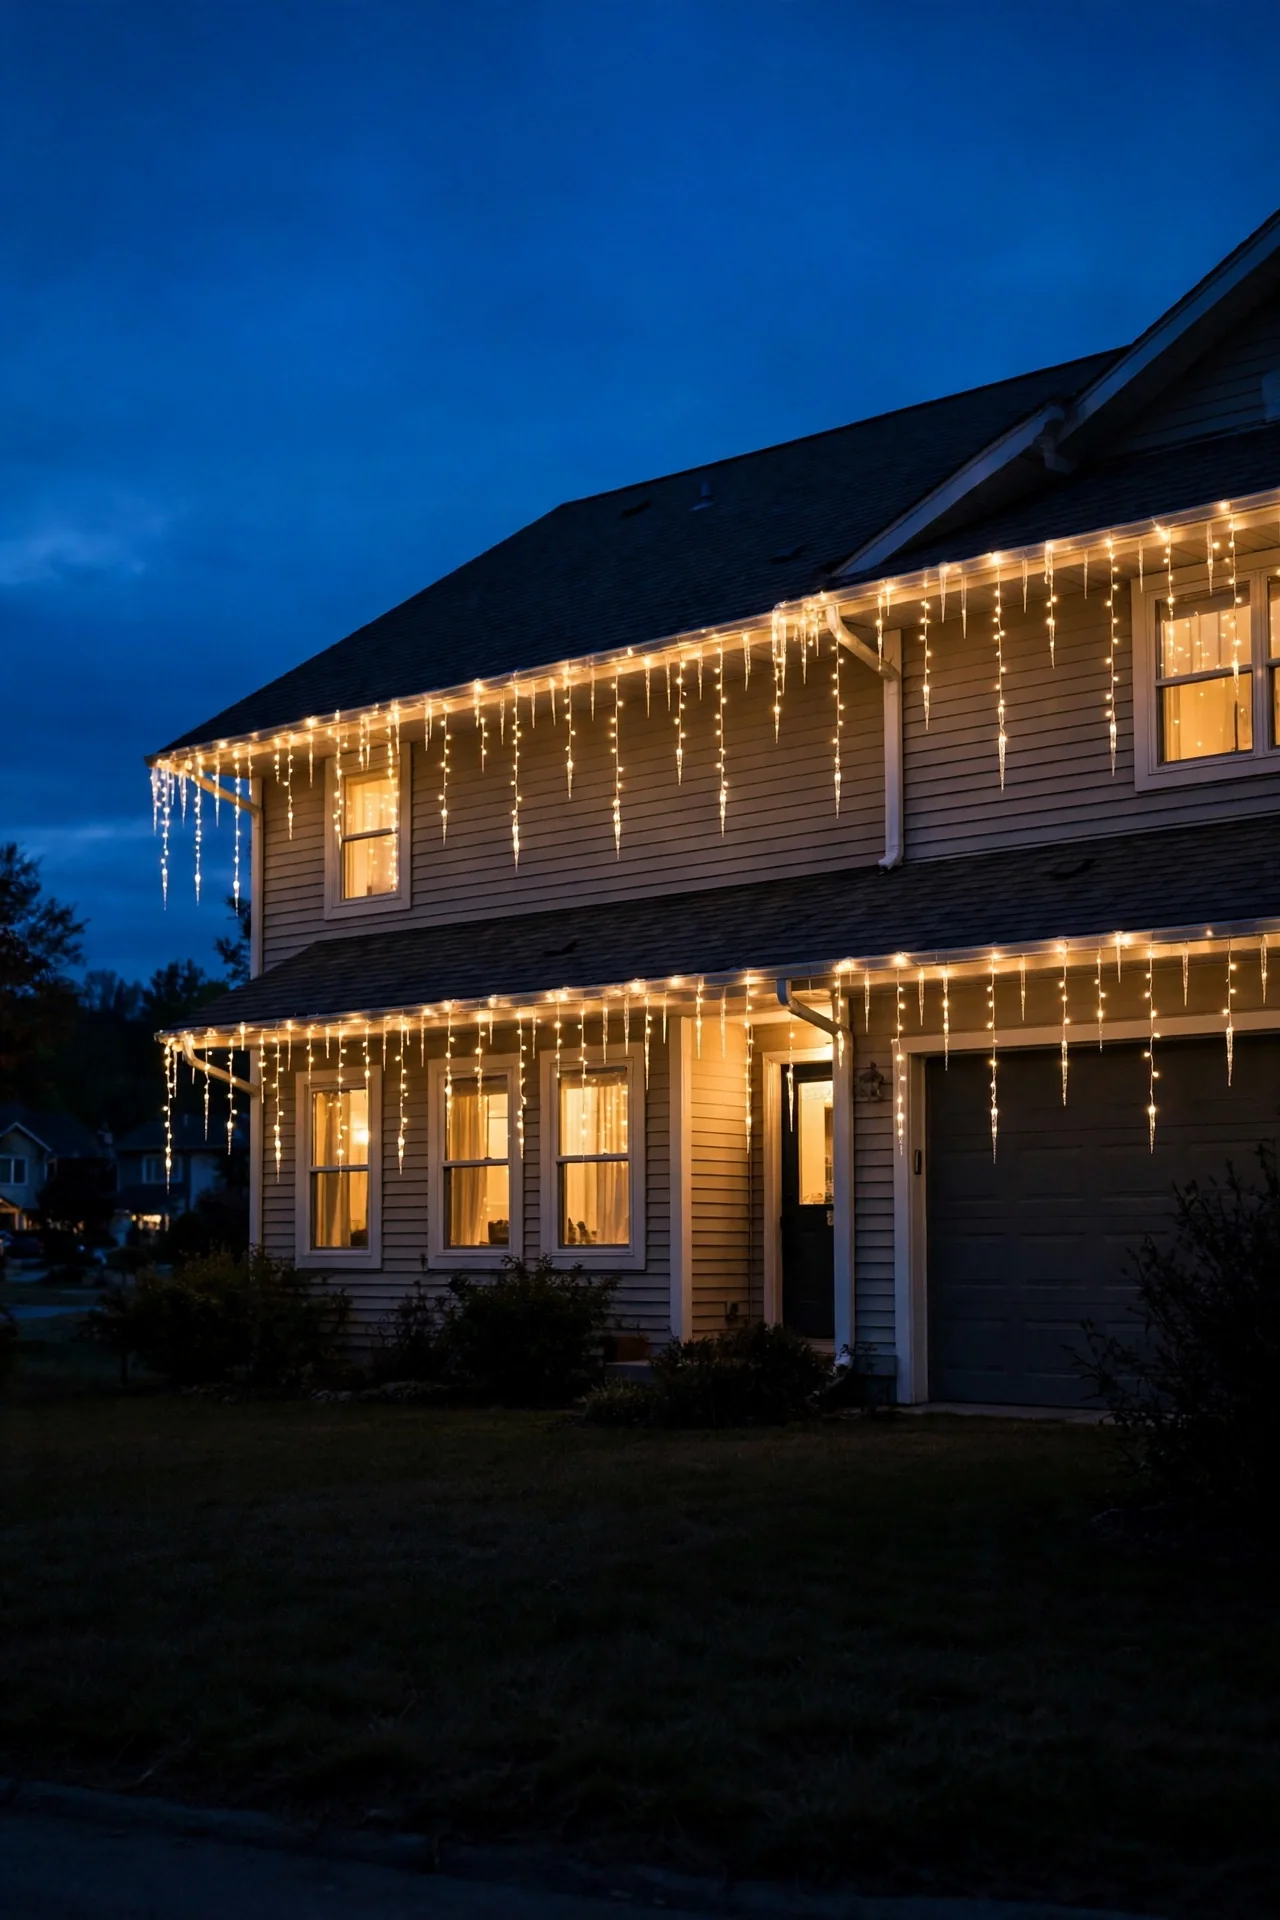
09
Icicle Lights Along the Eaves
Icicle lights soften a roofline and add the dripping, wintery movement that straight strands cannot. Hang them from the gutter edge so every drop hangs free, and keep the drop lengths in their natural random pattern rather than trying to even them out. On a two-story house, icicles on the lower roof plus a straight C9 line on the upper roof is the professional combination.
Try it: Hang icicle strands before the first hard freeze. Cold plastic clips snap; mild-weather clips flex and hold.
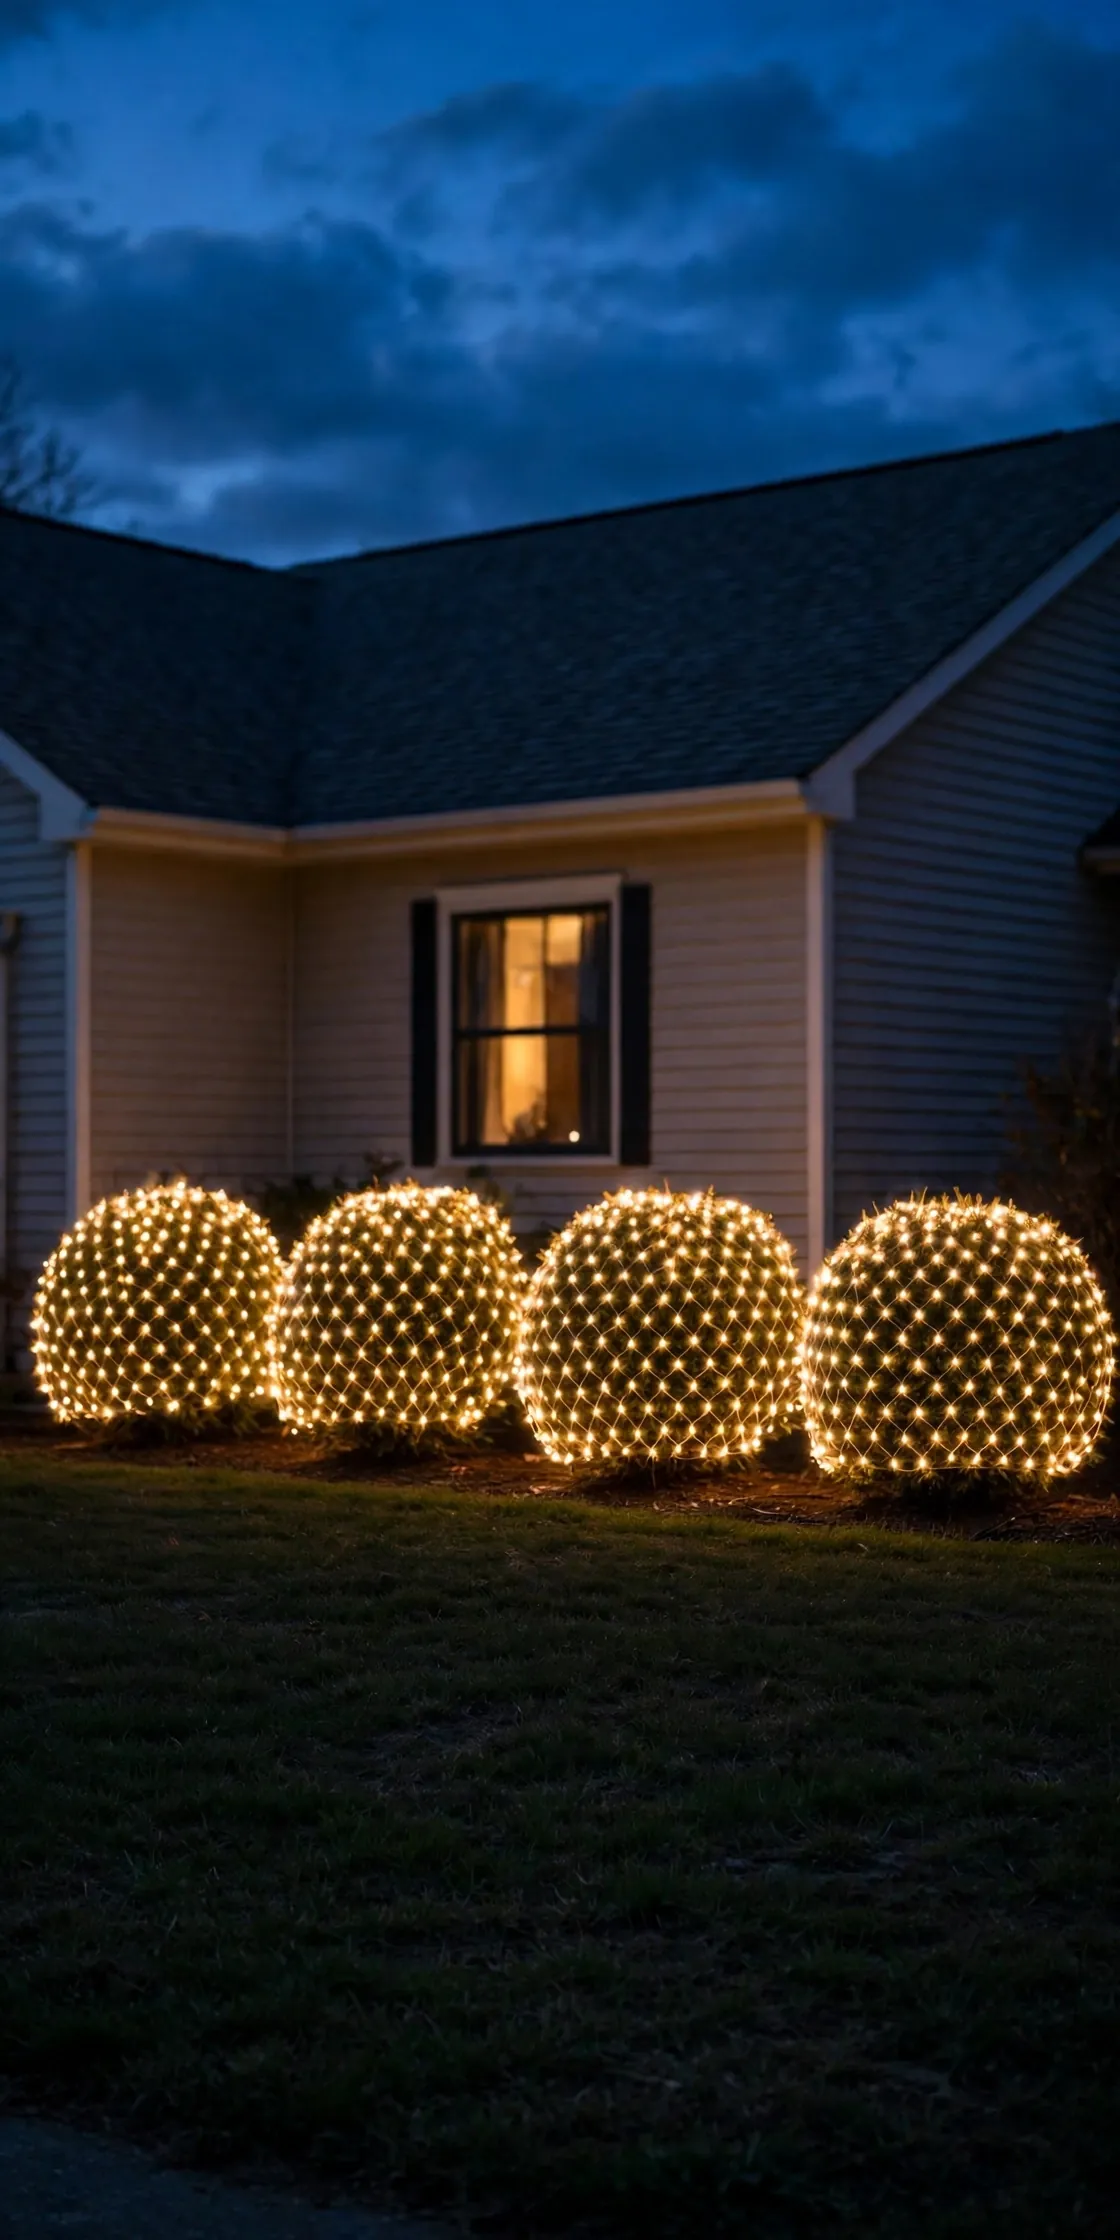
10
Net Lights Over Every Shrub
Net lights are the fastest coverage in the whole yard: drape a 4 by 6 foot net over a shrub, plug it in, and move on in about 10 minutes per bush. Three or four netted shrubs in a row create the lit foundation that makes the lawn scene glow by contrast. Match bulb color exactly across nets or the row looks patched.
Try it: Start draping at the back bottom of the shrub and work forward. The plug end then lands low and hidden, near your extension cord, instead of dangling at the front.
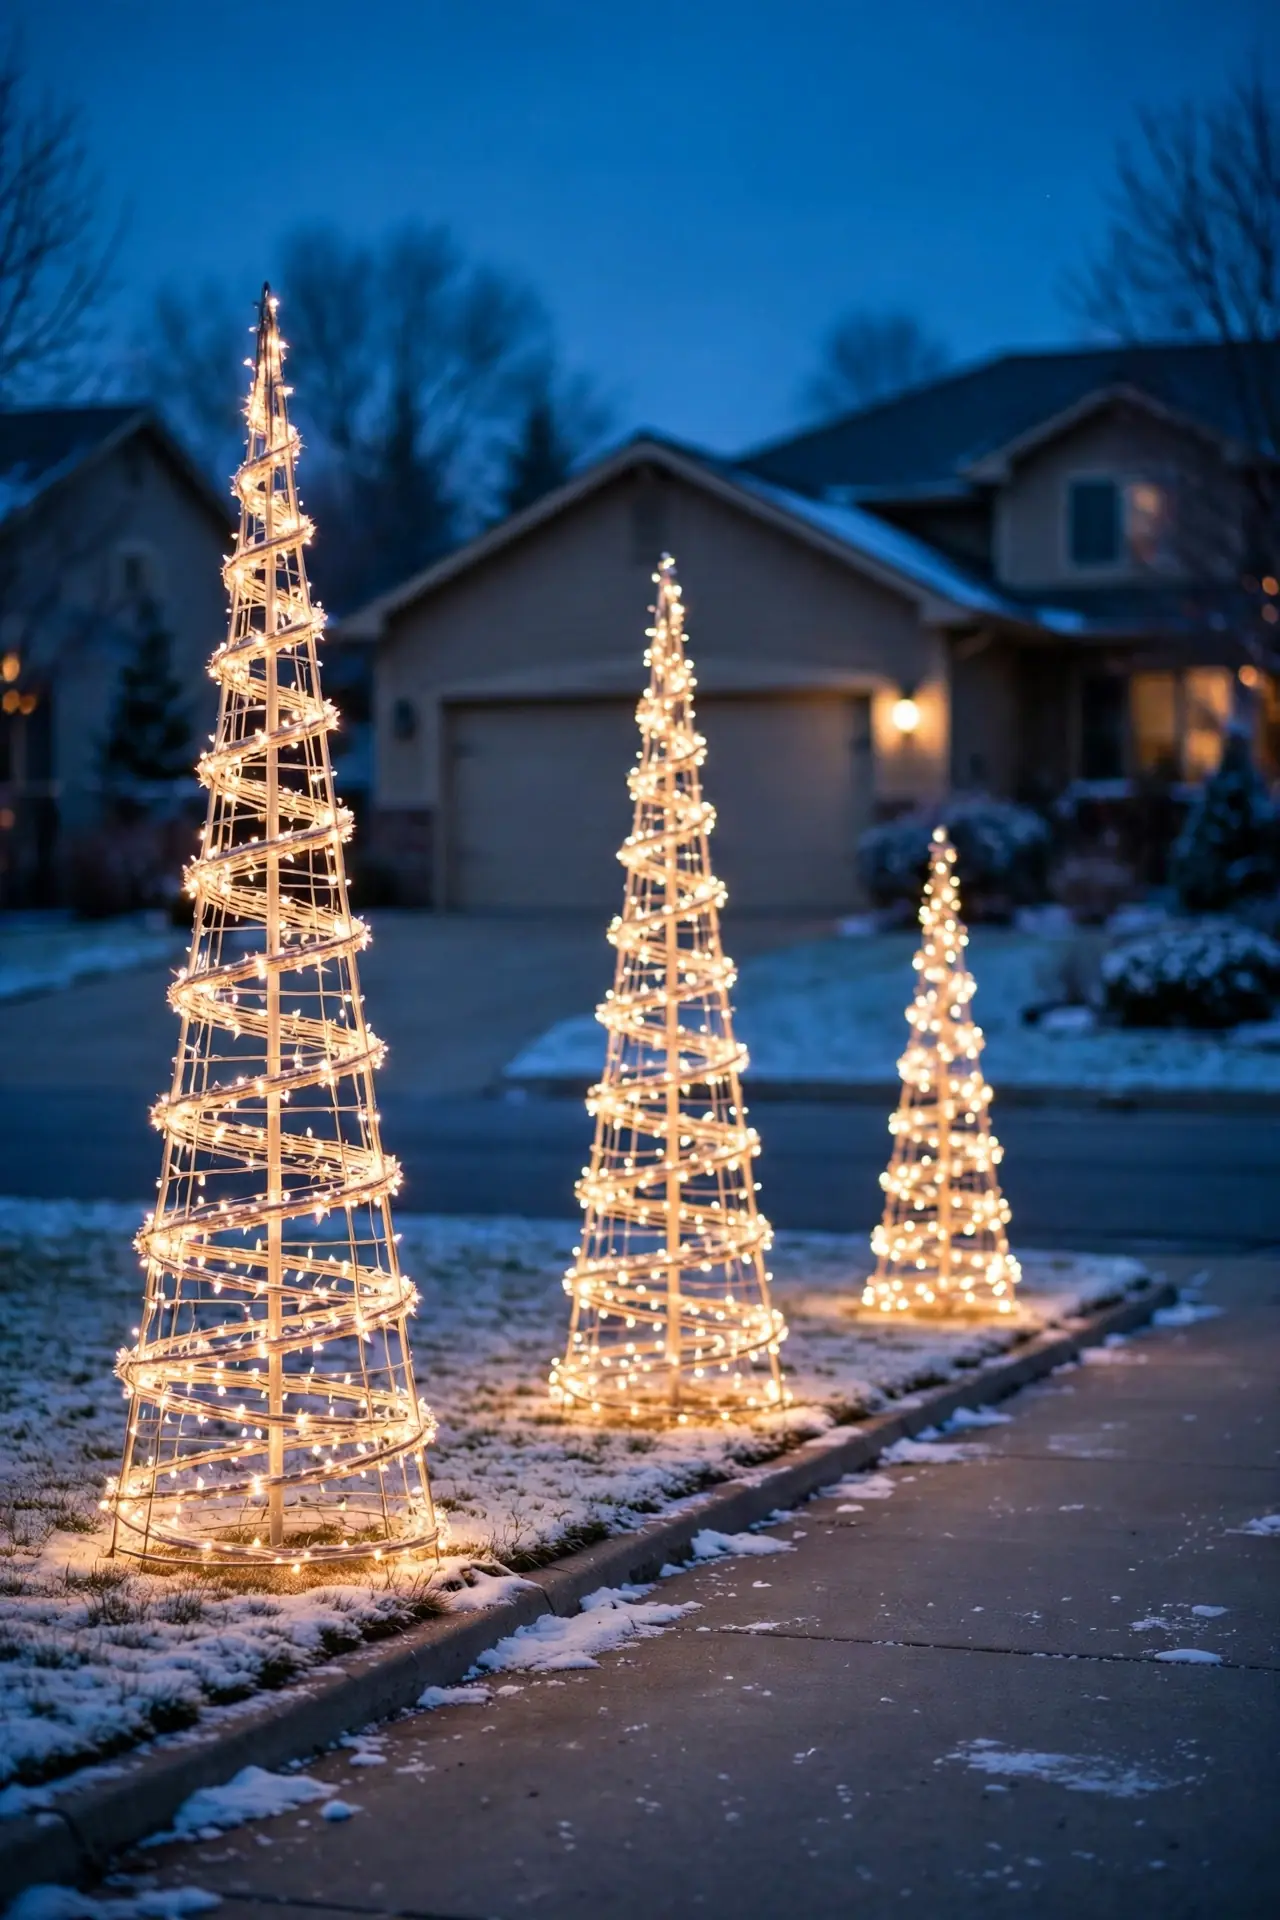
11
Spiral Cone Trees Along the Driveway
A set of three spiral light trees in descending heights, 6, 4, and 3 feet, lines a driveway or flanks a garage with almost no effort. They read as a designed set because the shapes repeat and the heights step down like a staircase. Stake the frames well; tall spirals catch wind at the top.
Try it: Run the heights descending toward the street. The eye travels down the line and lands on your anchor scene instead of stopping at the tallest tree.
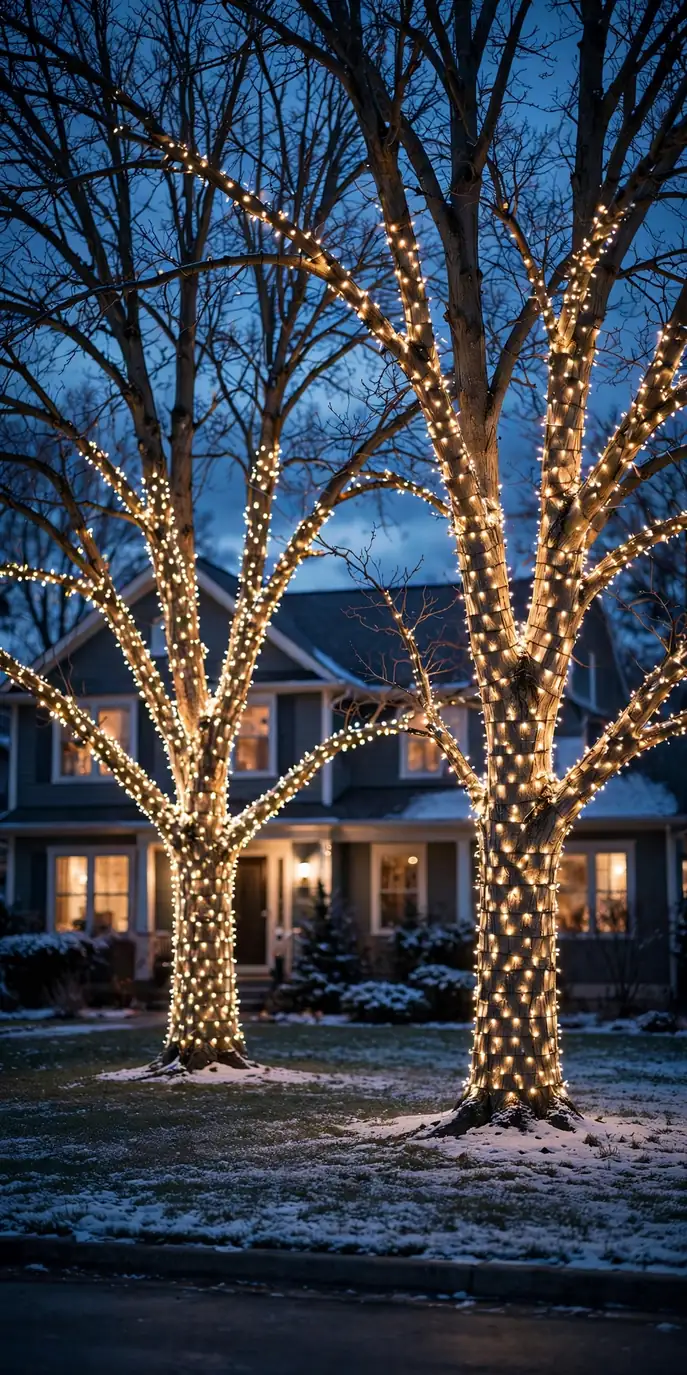
12
Wrap the Trunks of Your Yard Trees
Trunk wrapping turns ordinary yard trees into columns of light that frame the whole display. Wind mini lights around the trunk and up into the first branches, keeping about 4 inches between passes so the bark pattern still shows through. Green or brown wire disappears against bark; white wire glows like a candy cane and usually is not the goal.
Try it: Wrap upward from the base and let the connector end finish at the bottom. Plugs low to the ground are easy to reach, easy to cover, and easy to unplug in a storm.
13
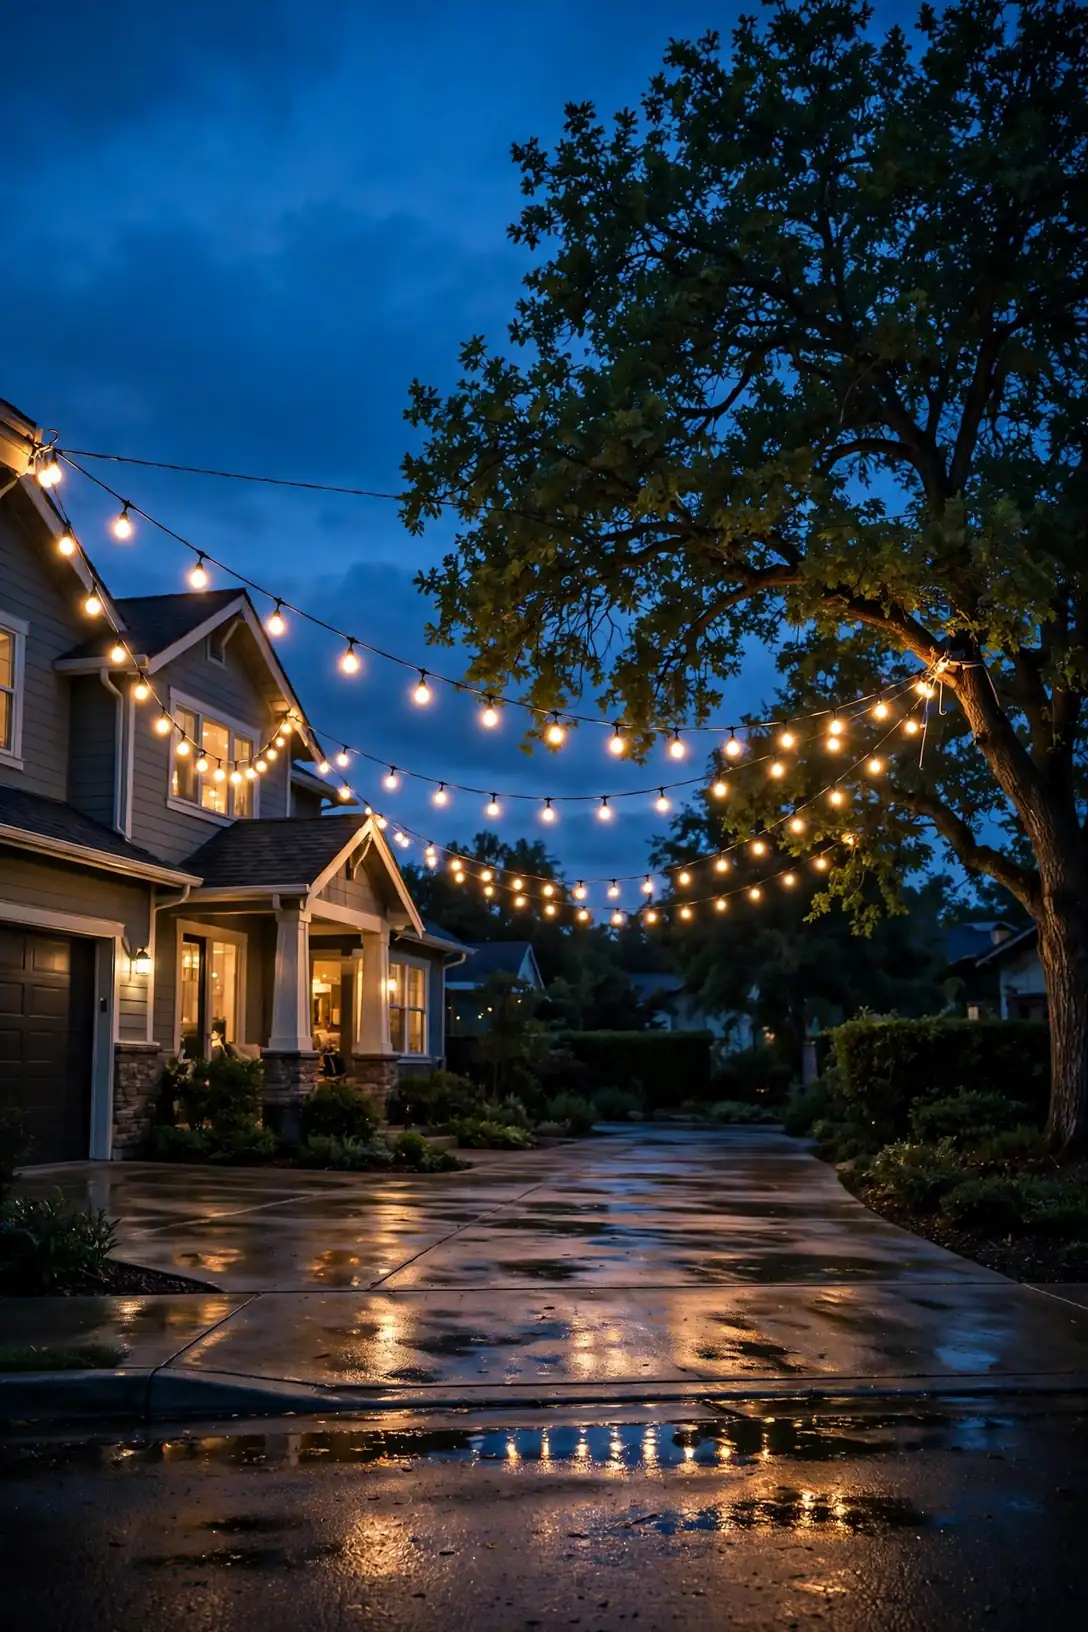
Swag String Lights Over the Driveway
Swags of commercial-grade string lights strung between the house, garage, and a sturdy tree create a canopy of light guests drive under. It is the highest-impact lighting move in the yard and the one people ask about. Space swags 6 to 8 feet apart so the catenary curves read as rhythm, not clutter.
Try it: Hang a steel guide cable first and clip the lights to it. Light strands are not built to carry their own weight across a 20-foot span and will stretch and fail by January.
14
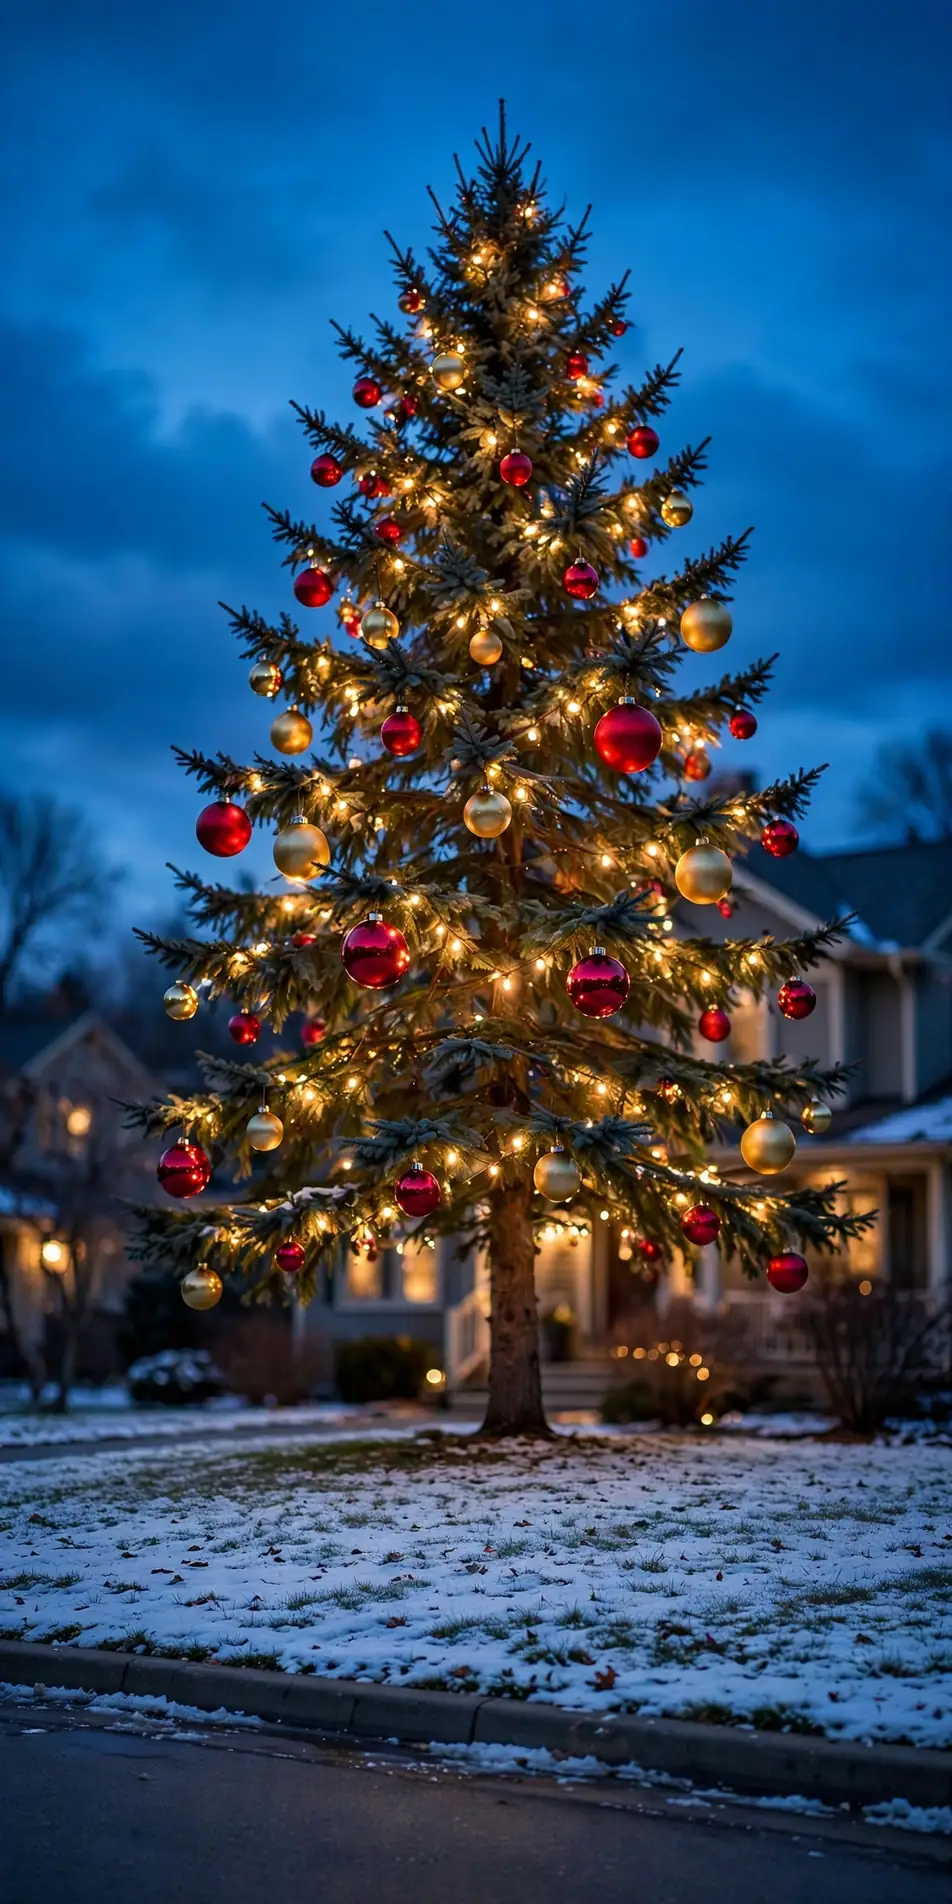
Dress the Evergreens You Already Have
The evergreens already growing in your yard are free outdoor xmas decorations waiting for lights and a dozen oversized shatterproof ornaments. Dress one tree completely instead of sprinkling a few lights on five; a single finished tree looks intentional from the street. Keep ornaments on the street-facing side where they are actually seen.
Try it: Hang the biggest ornaments on the outer third of the branches. Ornaments buried deep in the foliage are invisible after dark; outer ones catch the light.
15
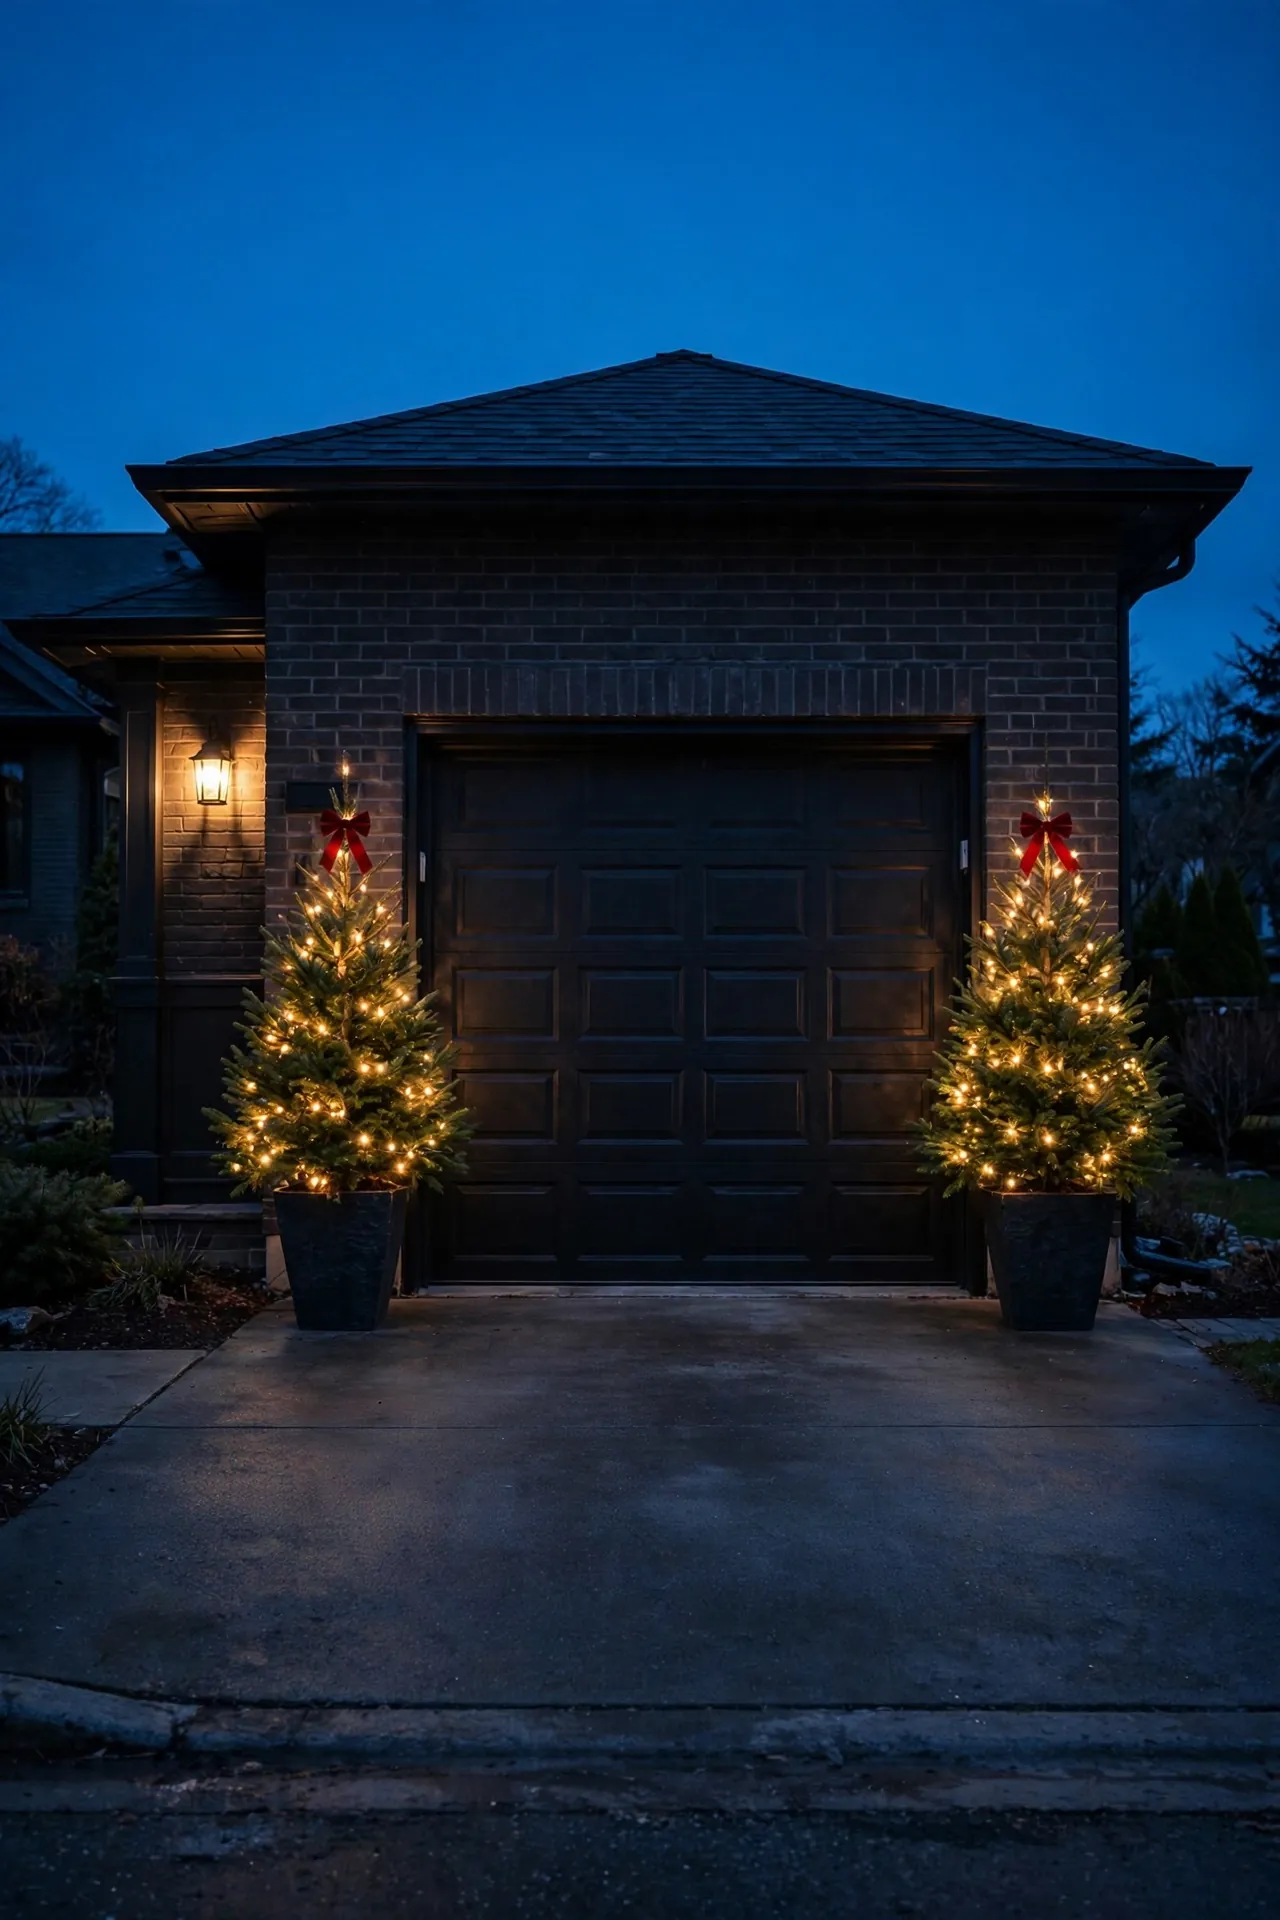
Potted Mini Trees Flanking the Garage
A matched pair of 3 to 4 foot potted trees flanking the garage door gives the plainest elevation on the house a finished frame. Add battery mini lights and a red bow at each top and the garage stops being the blank spot in your display. Heavy pots matter more than pretty ones out here.
Try it: Drop a brick or two in the bottom of each pot before adding soil. Garage doors sit in wind tunnels, and top-heavy trees tip first.
16
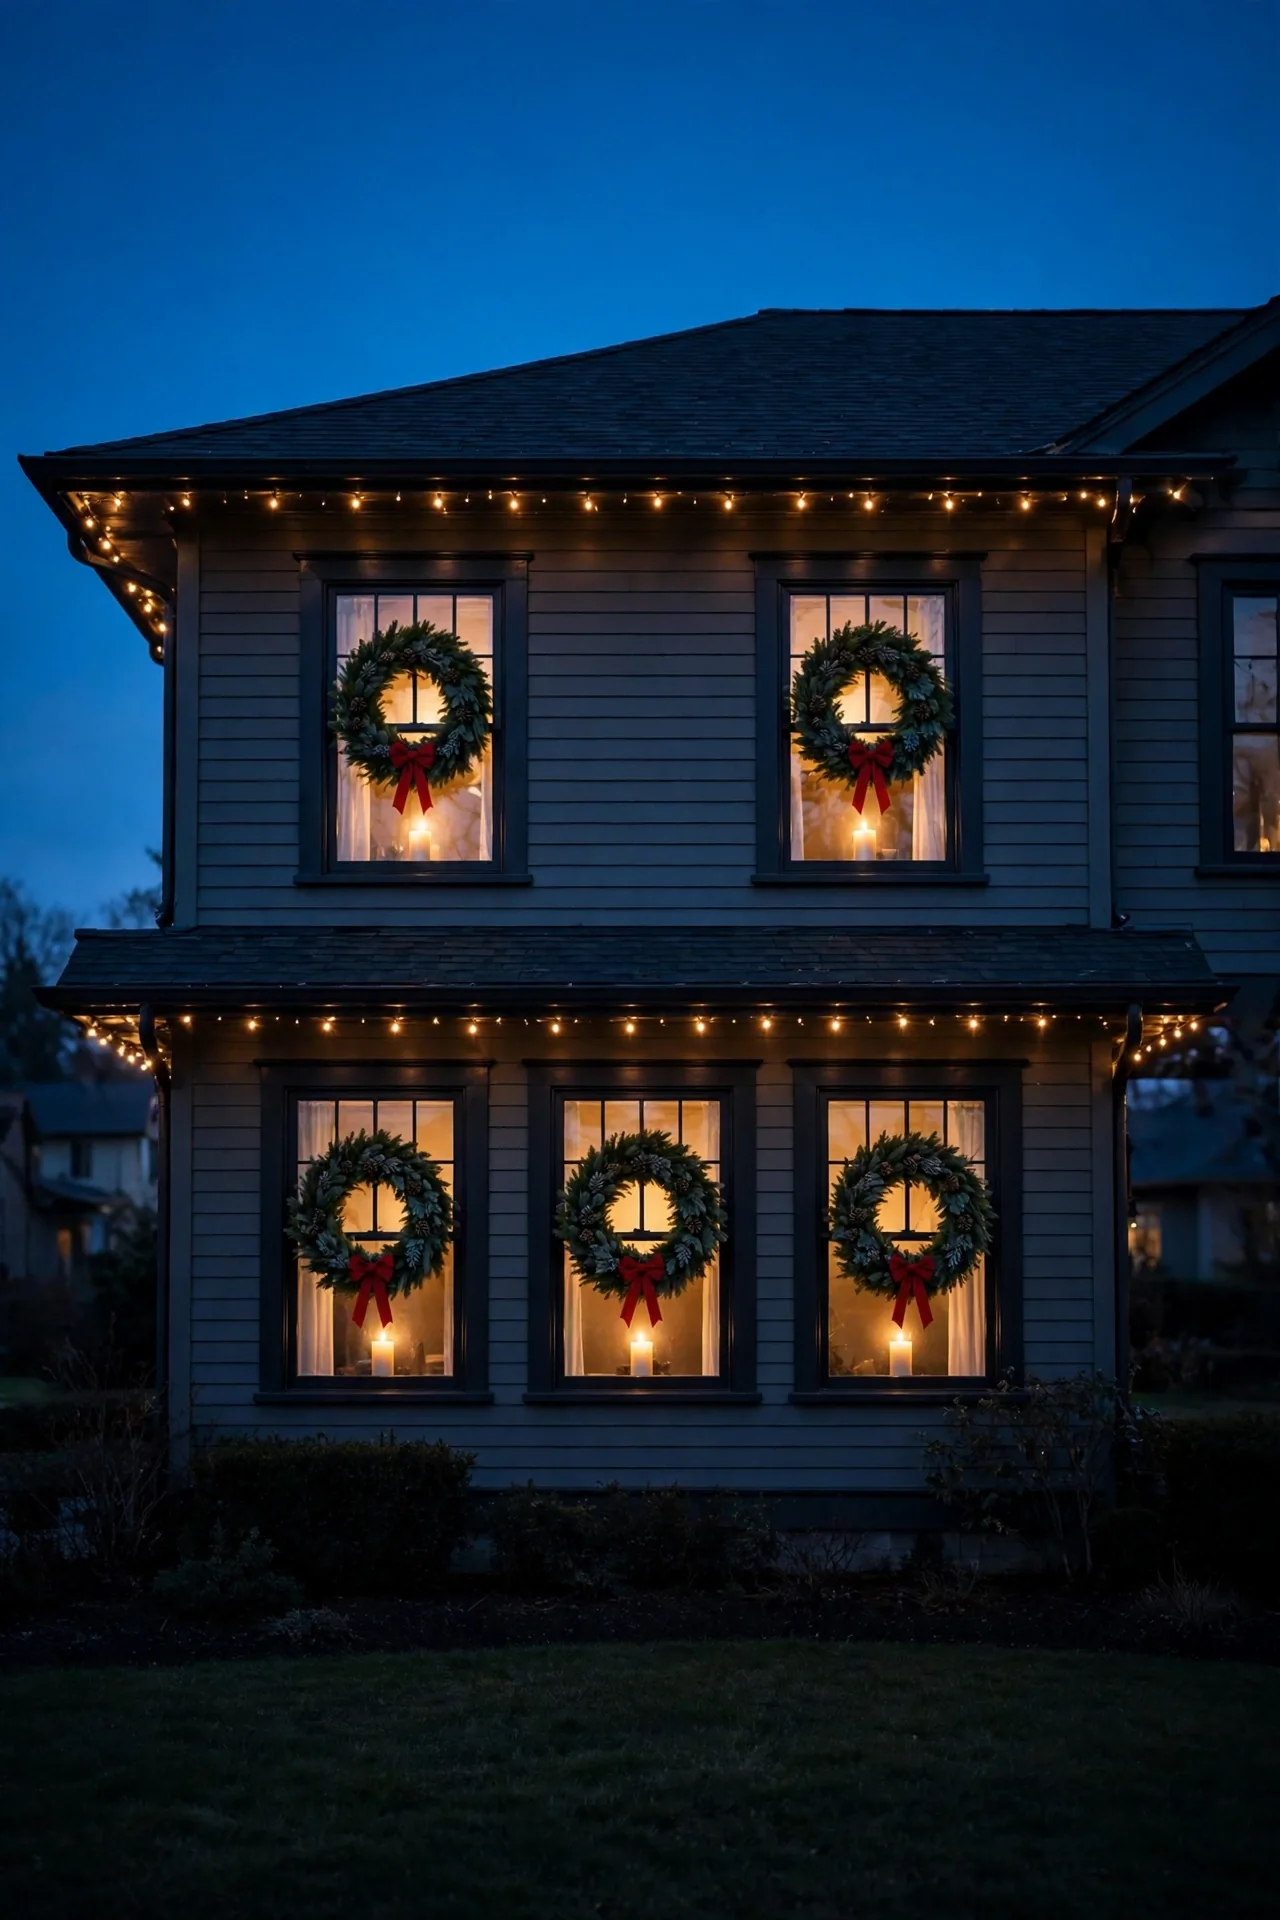
A Wreath on Every Street-Facing Window
From the yard, a row of matching window wreaths completes the face of the house and connects the roofline to the lawn scene below. Use the same size, about 24 inches, on every street-facing window, hung at exactly the same height. Battery candles in the windows behind them double the effect after dark.
Try it: Measure each wreath’s height from the ground line, not the window frame. Frames vary; the ground line is what the street sees, so the row looks level from the curb.
17
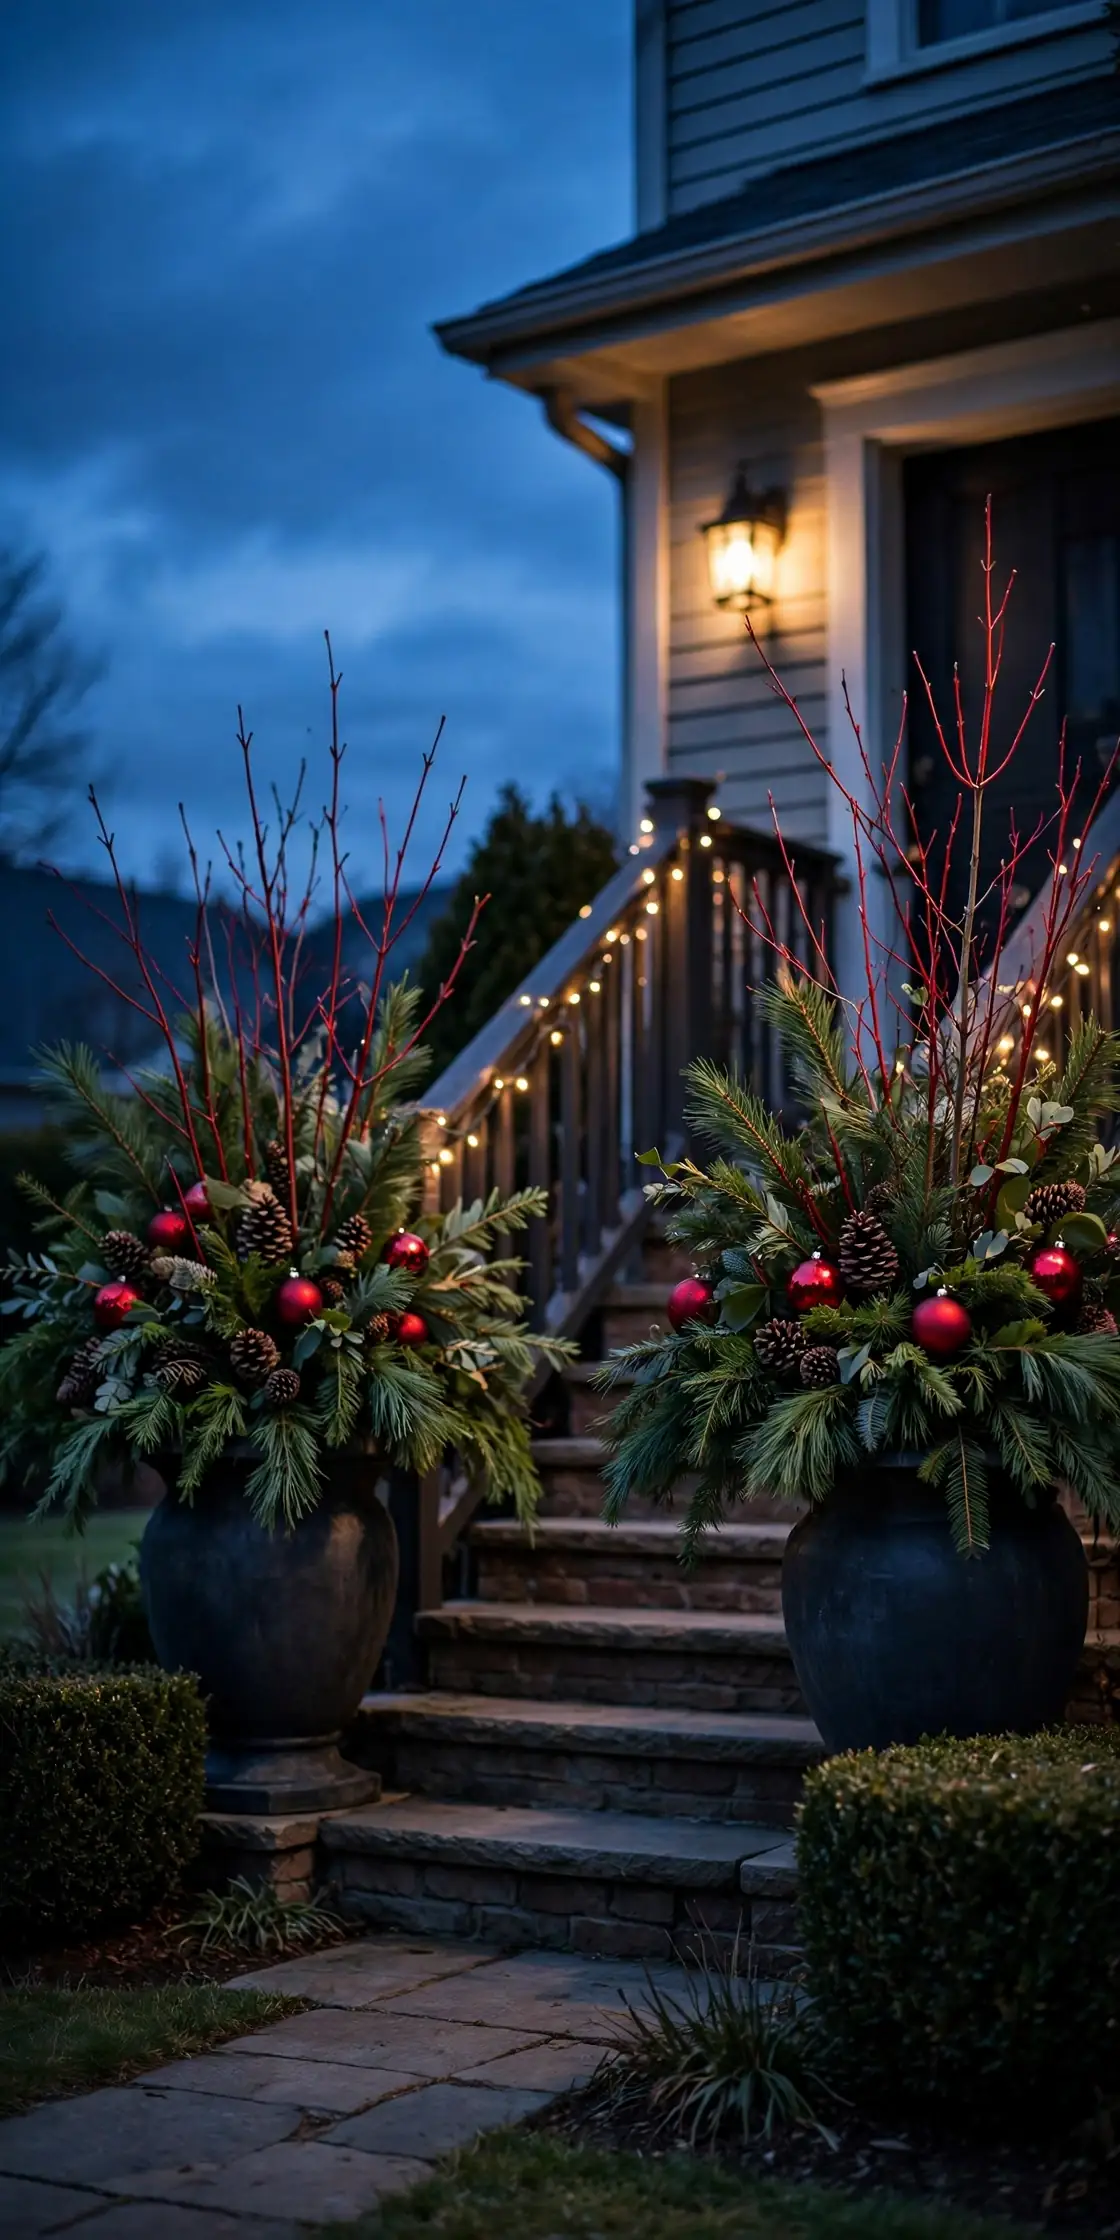
Urns and Planters Full of Winter Greens
Fill the planters that held summer flowers with evergreen cuttings, red twig dogwood, pinecones, and a few shatterproof ornaments pushed into the soil. It costs almost nothing if you trim your own shrubs, and it carries the display right up to the front steps. Cut greens after the first frost and they hold their needles for about six weeks outdoors.
Try it: Push stems at least 4 inches into the soil so freeze and thaw cycles do not heave them out. A planter that spits its greens by mid-December was planted too shallow.
18
A Rustic Sign Cluster in the Garden Bed
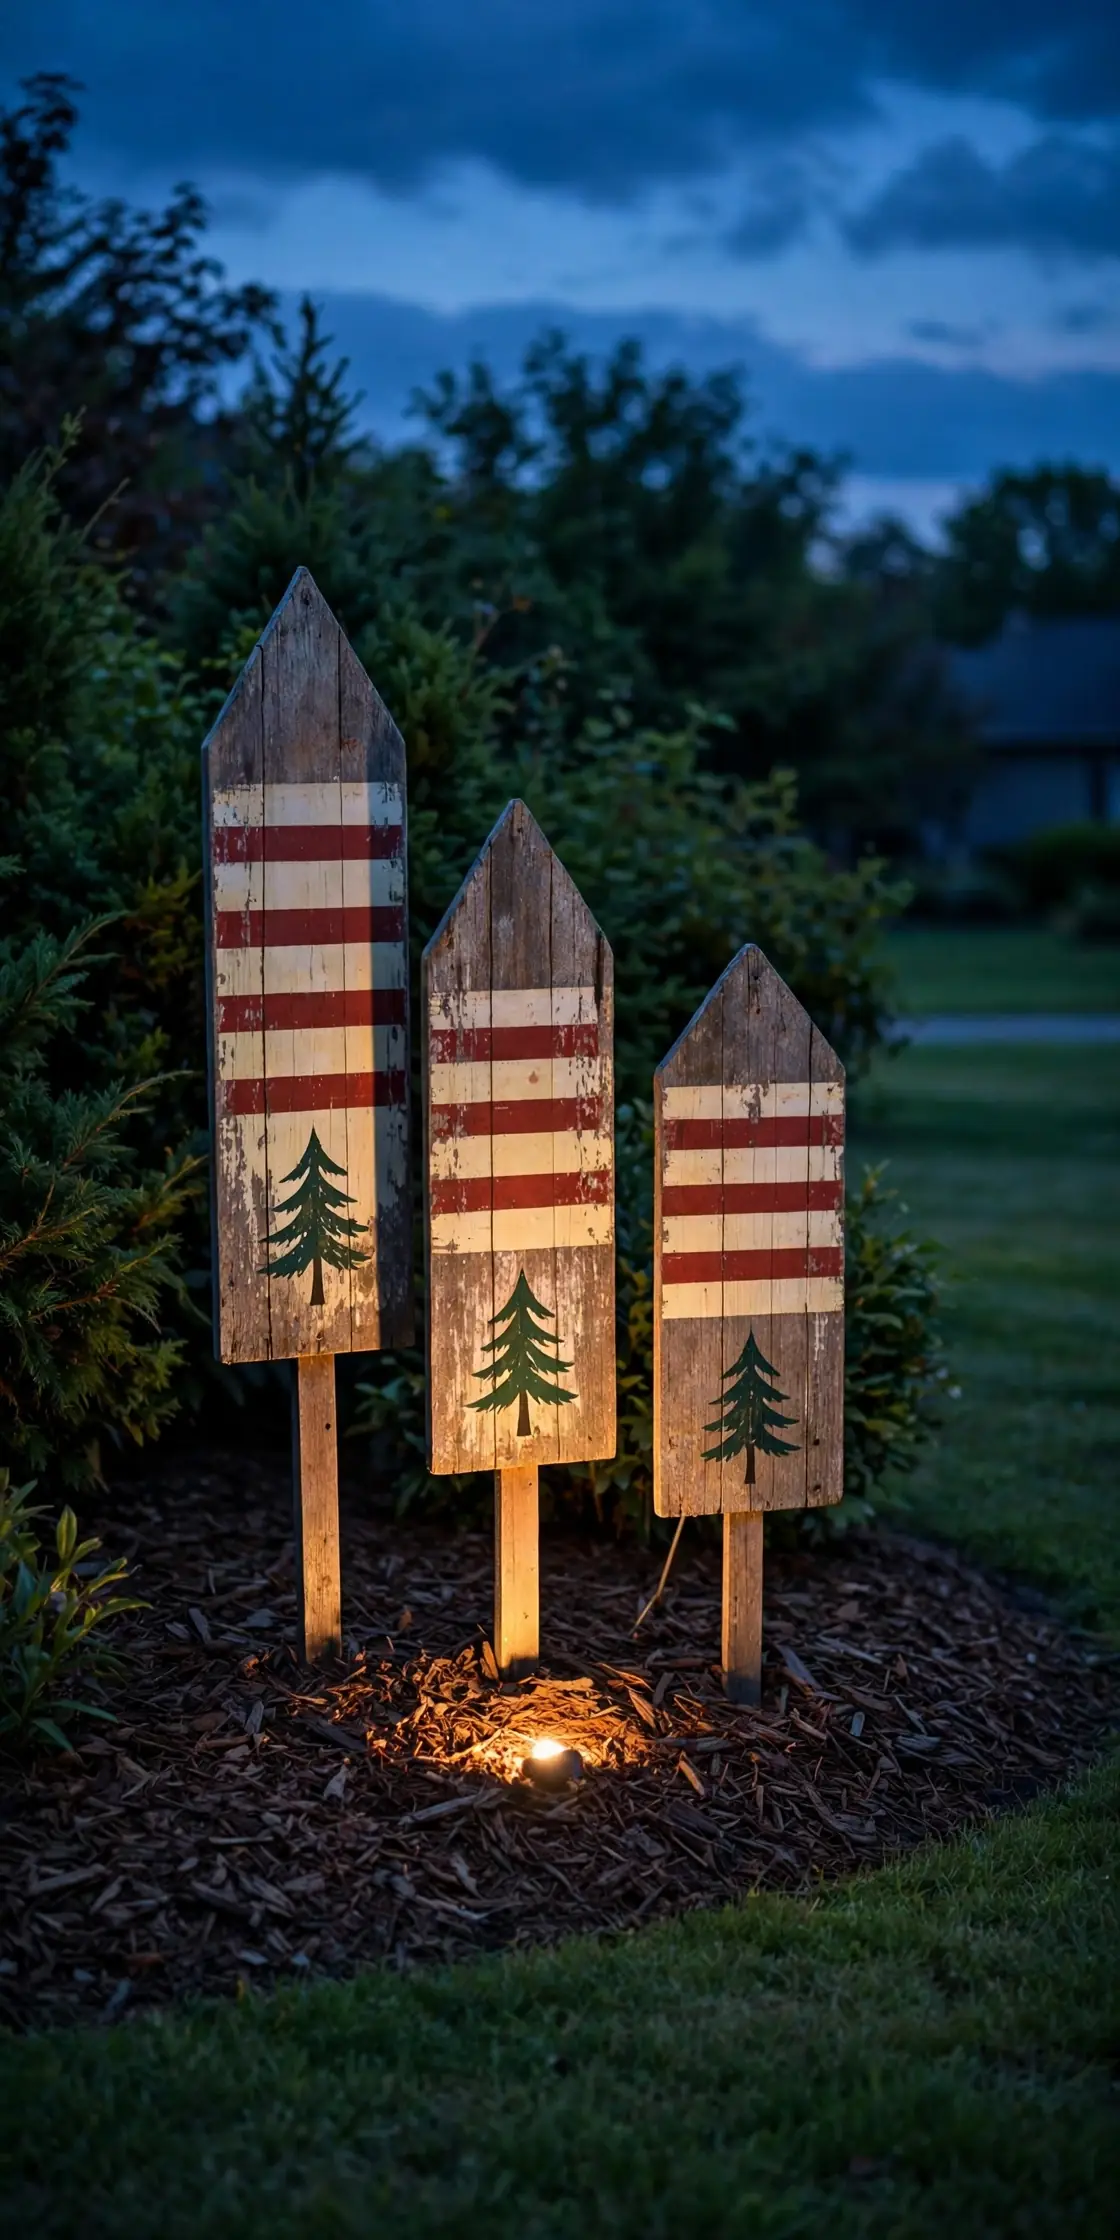
A cluster of rustic wooden signs, Merry Christmas, North Pole, fresh trees, staked into a garden bed adds the handmade note that keeps a light-heavy yard from feeling plastic. Group three signs at staggered heights, 18 to 36 inches, and lean the middle one a few degrees for a casual, found look. One small spotlight at the base makes the words readable at dusk.
Try it: Seal homemade signs with outdoor polyurethane before they go out. One wet week warps unsealed boards and runs painted letters.
19
Hang Oversized Ornaments From Low Branches
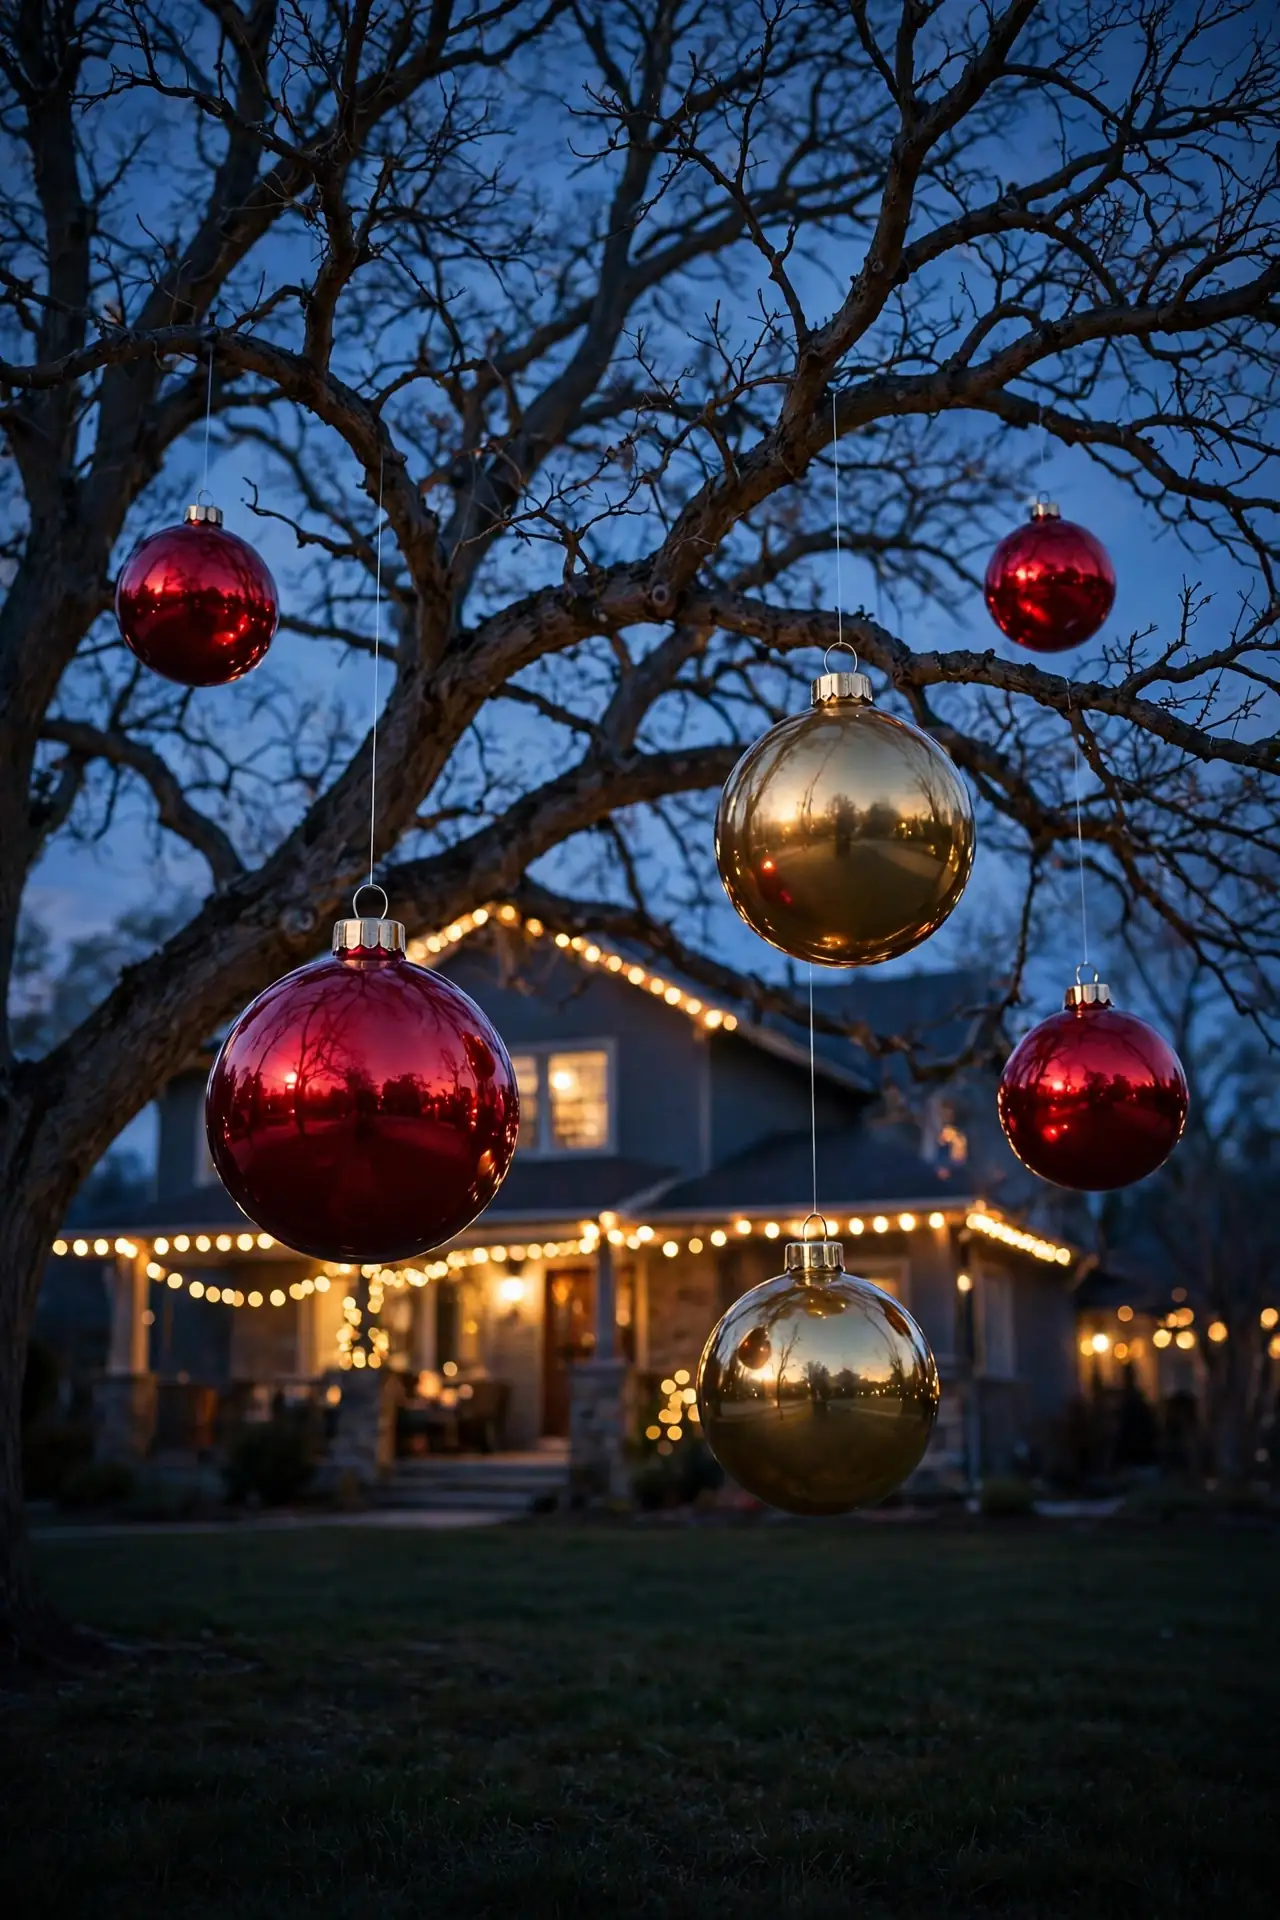
Hang your largest shatterproof ornaments from the lowest branches of a yard tree so they float over the lawn at eye level. Hung at varied heights on clear fishing line, they look like they are drifting down through the branches. Six to eight is plenty; this is seasoning, not a main course.
Try it: Hang them 5 to 6 feet off the ground. That height clears heads on the path and keeps the ornaments swinging free instead of resting on lower branches.
20
Candy Cane Stakes Down the Walkway
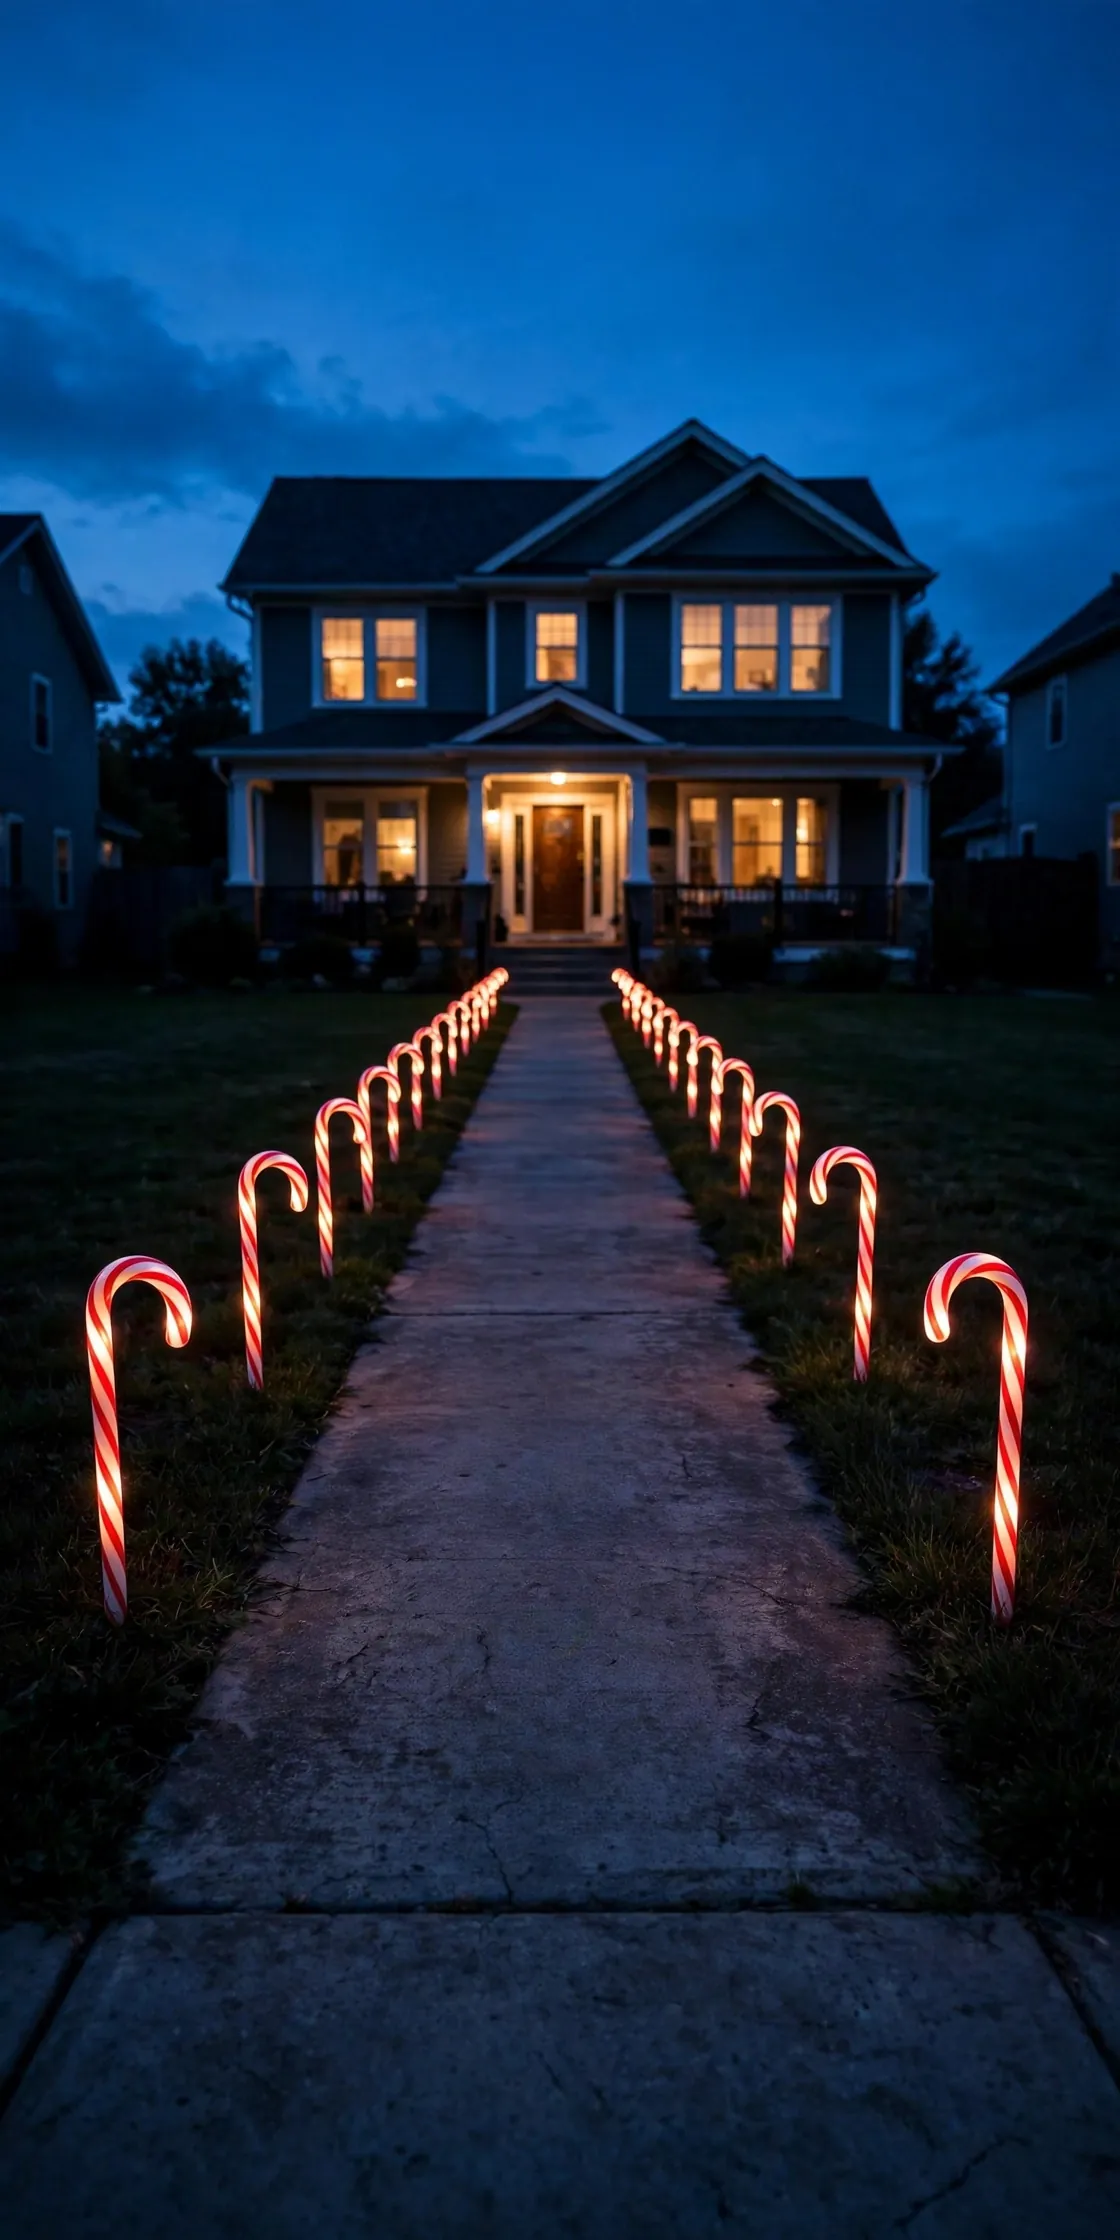
Candy cane stakes lining both sides of the front walk are the friendliest path lighting there is, and guests navigate by them without thinking. Set them every 3 feet in a straight, measured line, because the whole effect depends on the rhythm being even. Push them in before the ground freezes hard or they will lean all season.
Try it: Run a string line along the path edge first and place every stake on the line. Eyeballing a 30-foot run guarantees a gentle, visible wobble.
21
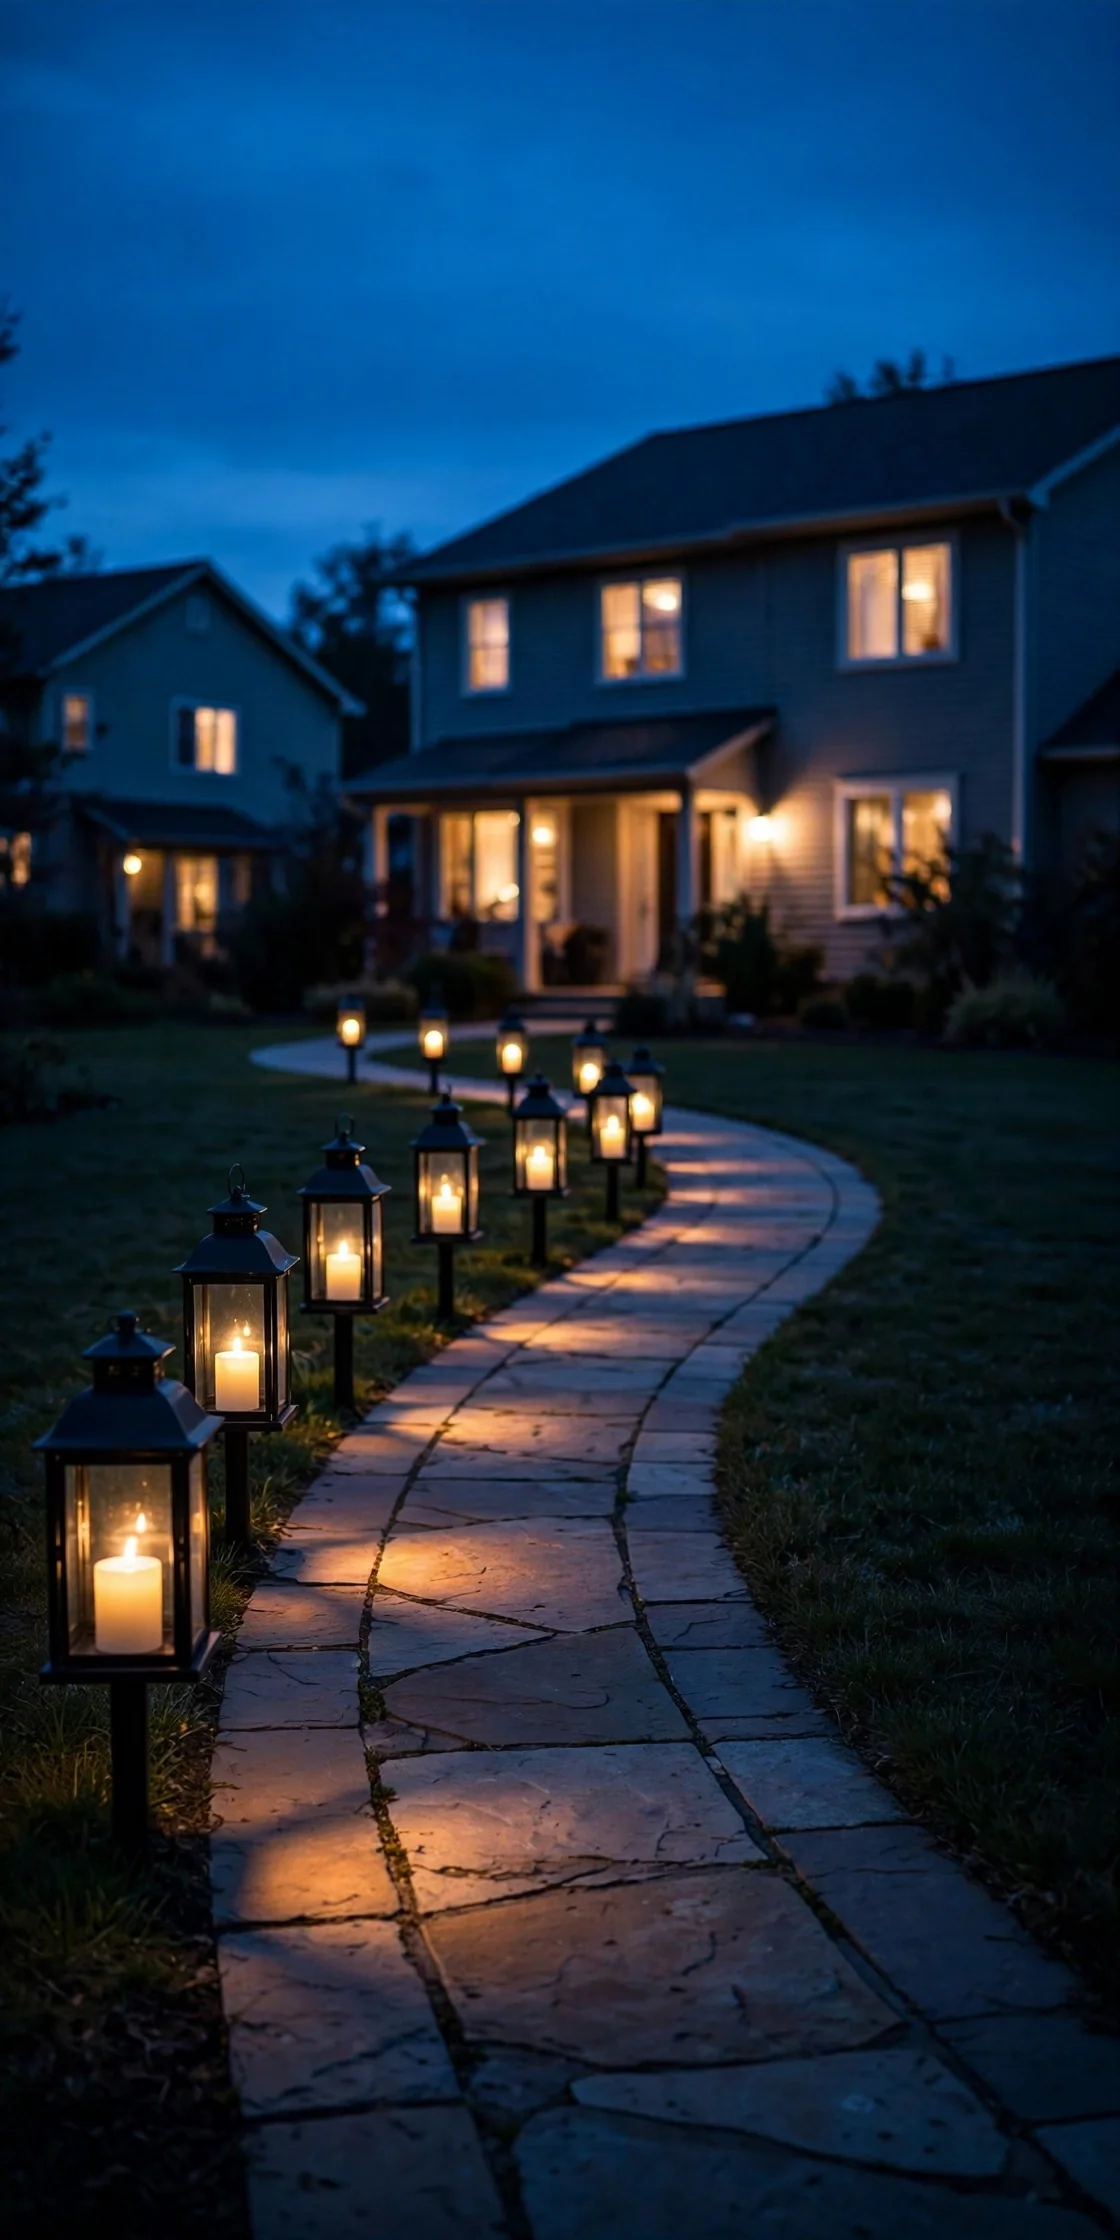
Lanterns and Luminarias Guiding the Path
A row of lanterns with flameless candles on timers gives the walkway a soft, flickering edge that stake lights cannot match. Weight each lantern with sand so it stays upright, and choose lanterns tall enough, 12 inches or more, to read from the street. In wet climates, lanterns outlast paper luminarias by weeks.
Try it: Set the candle timers to switch on 30 minutes before sunset. The path is lit when the first guests and the mail carrier need it, not after dark has already fallen.
22
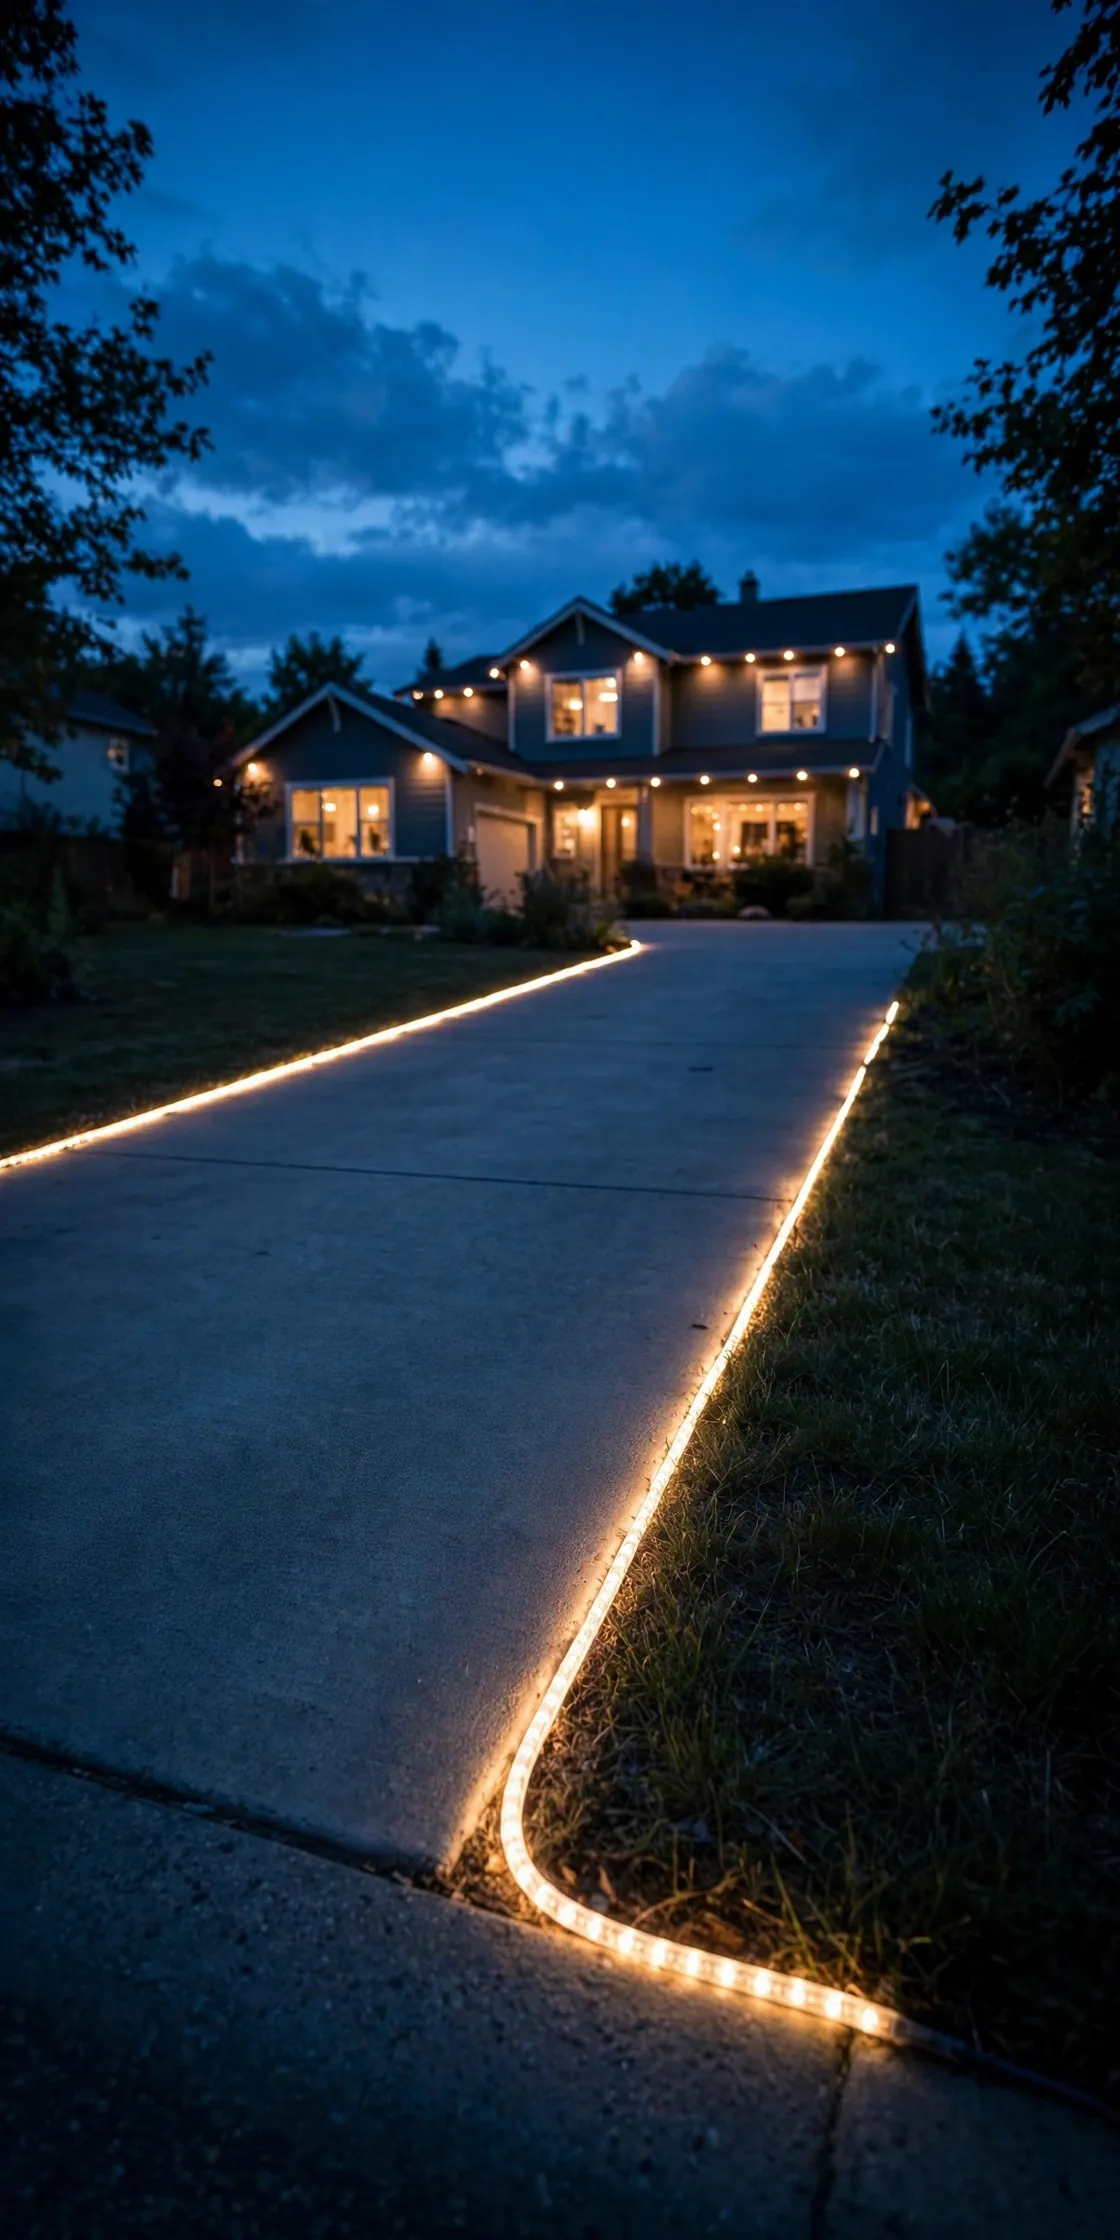
Light the Driveway Edge
A line of rope light or ground stakes along the driveway edge defines where guests park and keeps cars off your lawn and garden beds. It is a quiet, practical glow rather than a showpiece, and it makes the anchor scene look brighter by contrast. Keep the line continuous; gaps read as burned-out sections.
Try it: Set the lights about 12 inches back from the pavement. Car doors swing wide, and snow shovels wander; 12 inches of clearance saves both.
23
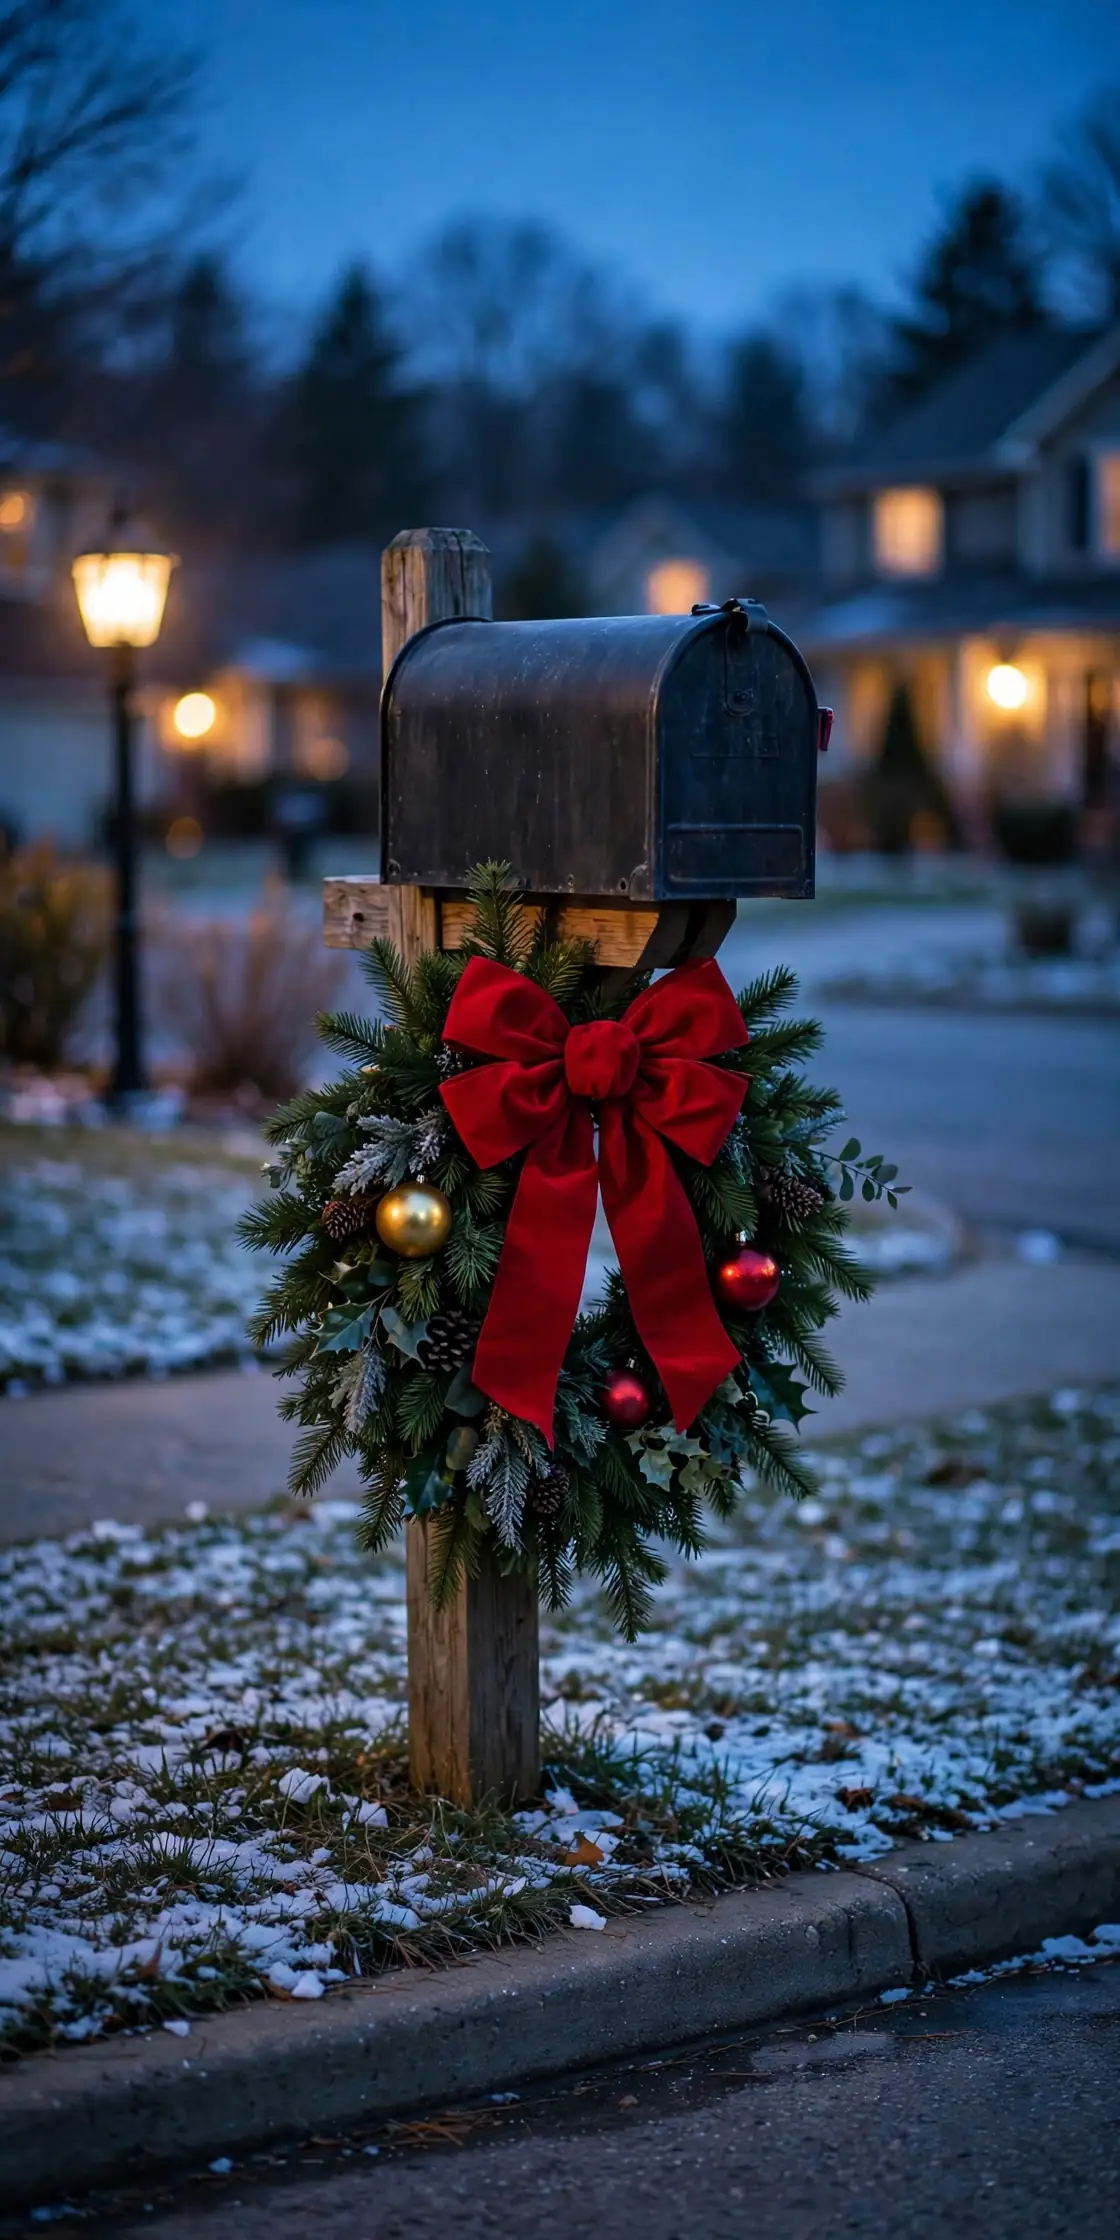
Dress the Mailbox for the Street
The mailbox is the farthest point your display reaches, and a greenery swag with a big bow carries christmas decorations for outside all the way to the street. Add two or three shatterproof ornaments tucked into the greens and it reads from a moving car. Keep the flag free and the house number fully visible.
Try it: Attach the swag to the post, not the box lid. A swag glued to the lid fights the mail carrier daily and loses by the second week.
24
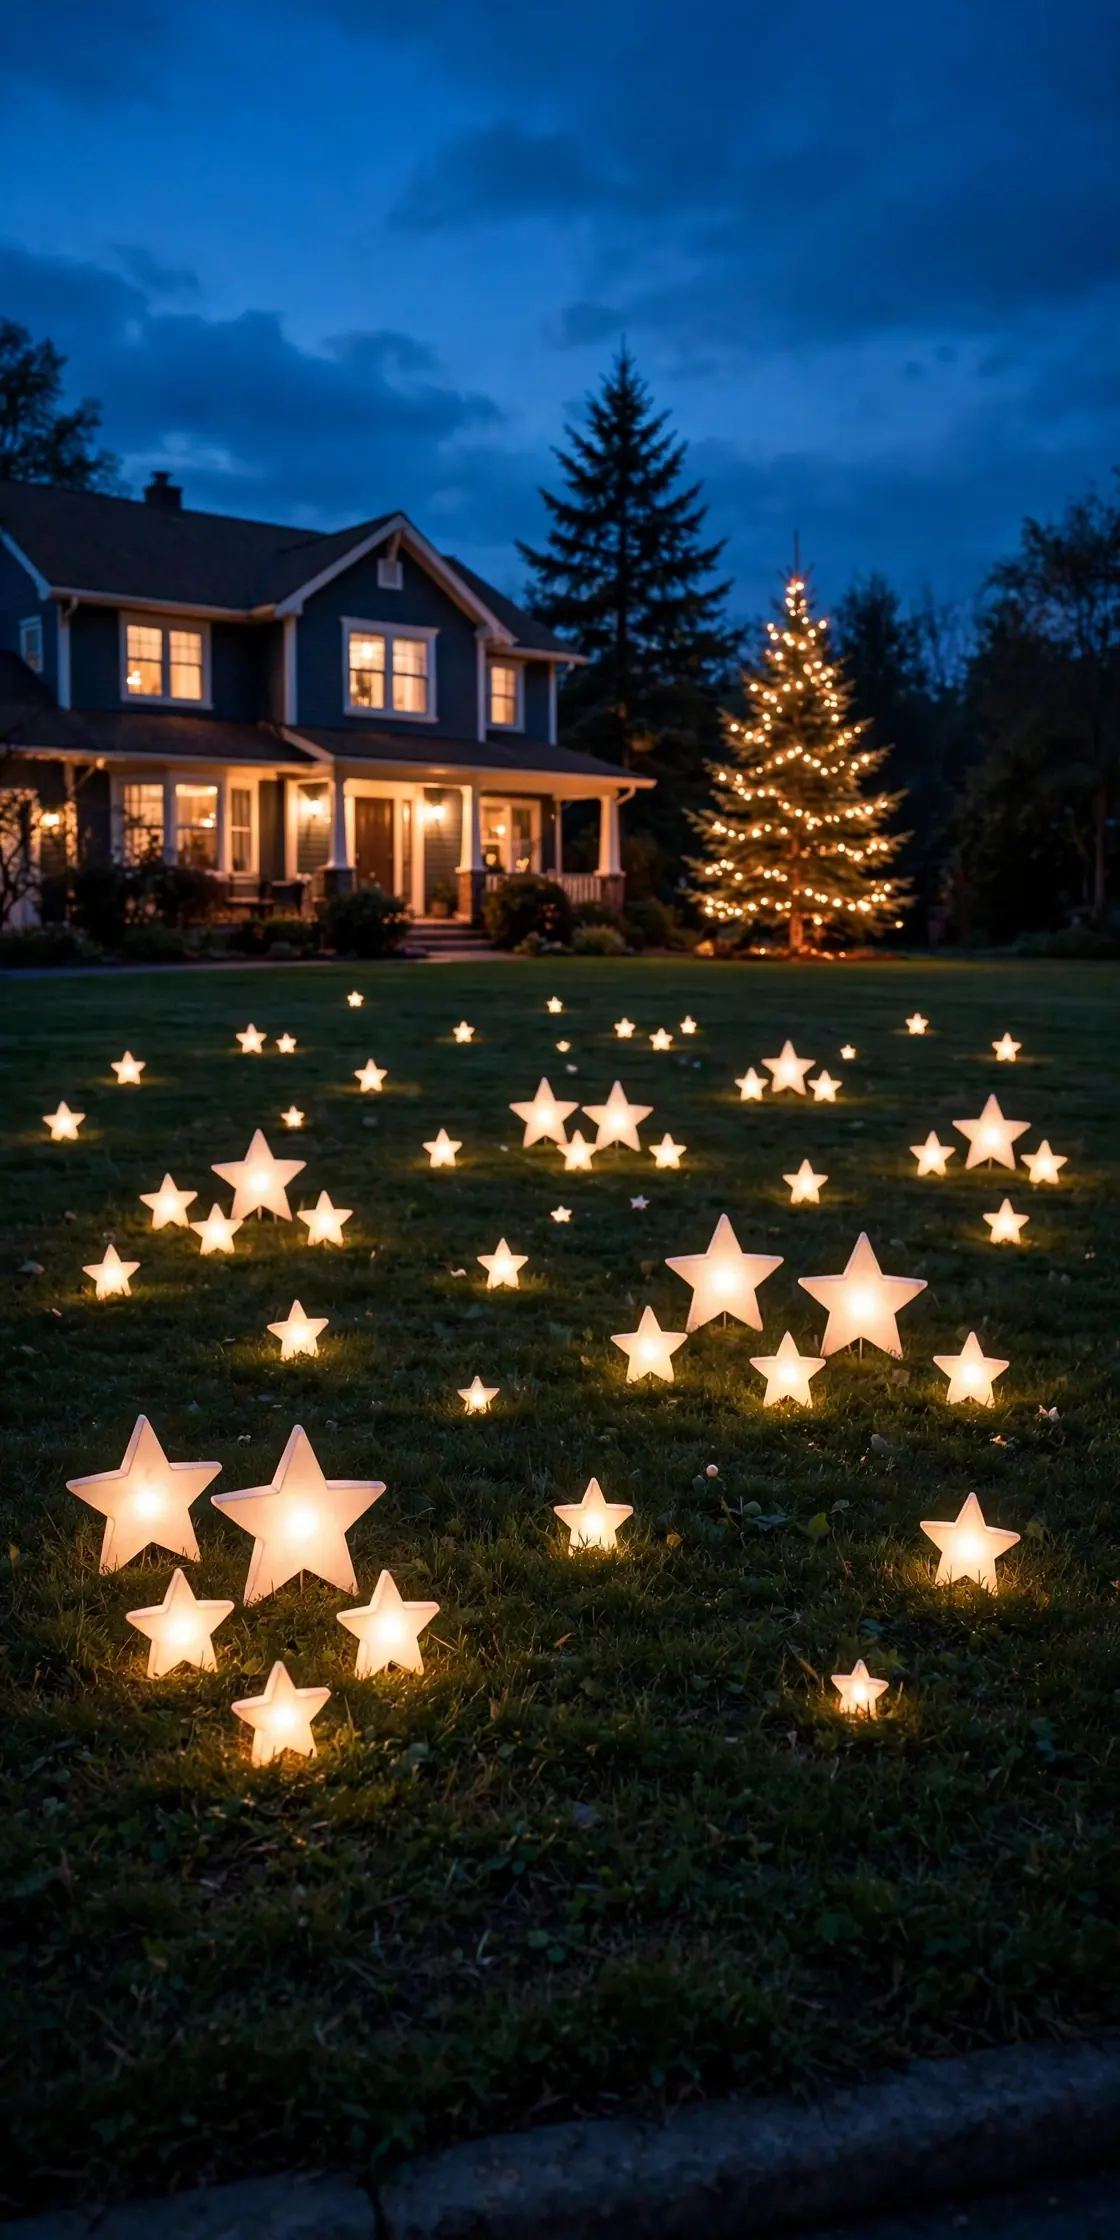
Glowing Stars Scattered Across the Lawn
Glowing star stakes scattered across the open lawn turn empty grass into a fallen night sky after dark. Mix two sizes and cluster them in loose triangles rather than rows or grids. Odd spacing is the whole trick; stars in a line look like runway markers.
Try it: Place the biggest star nearest your anchor scene and let sizes shrink as they scatter outward. The gradient pulls the eye toward the scene you built.
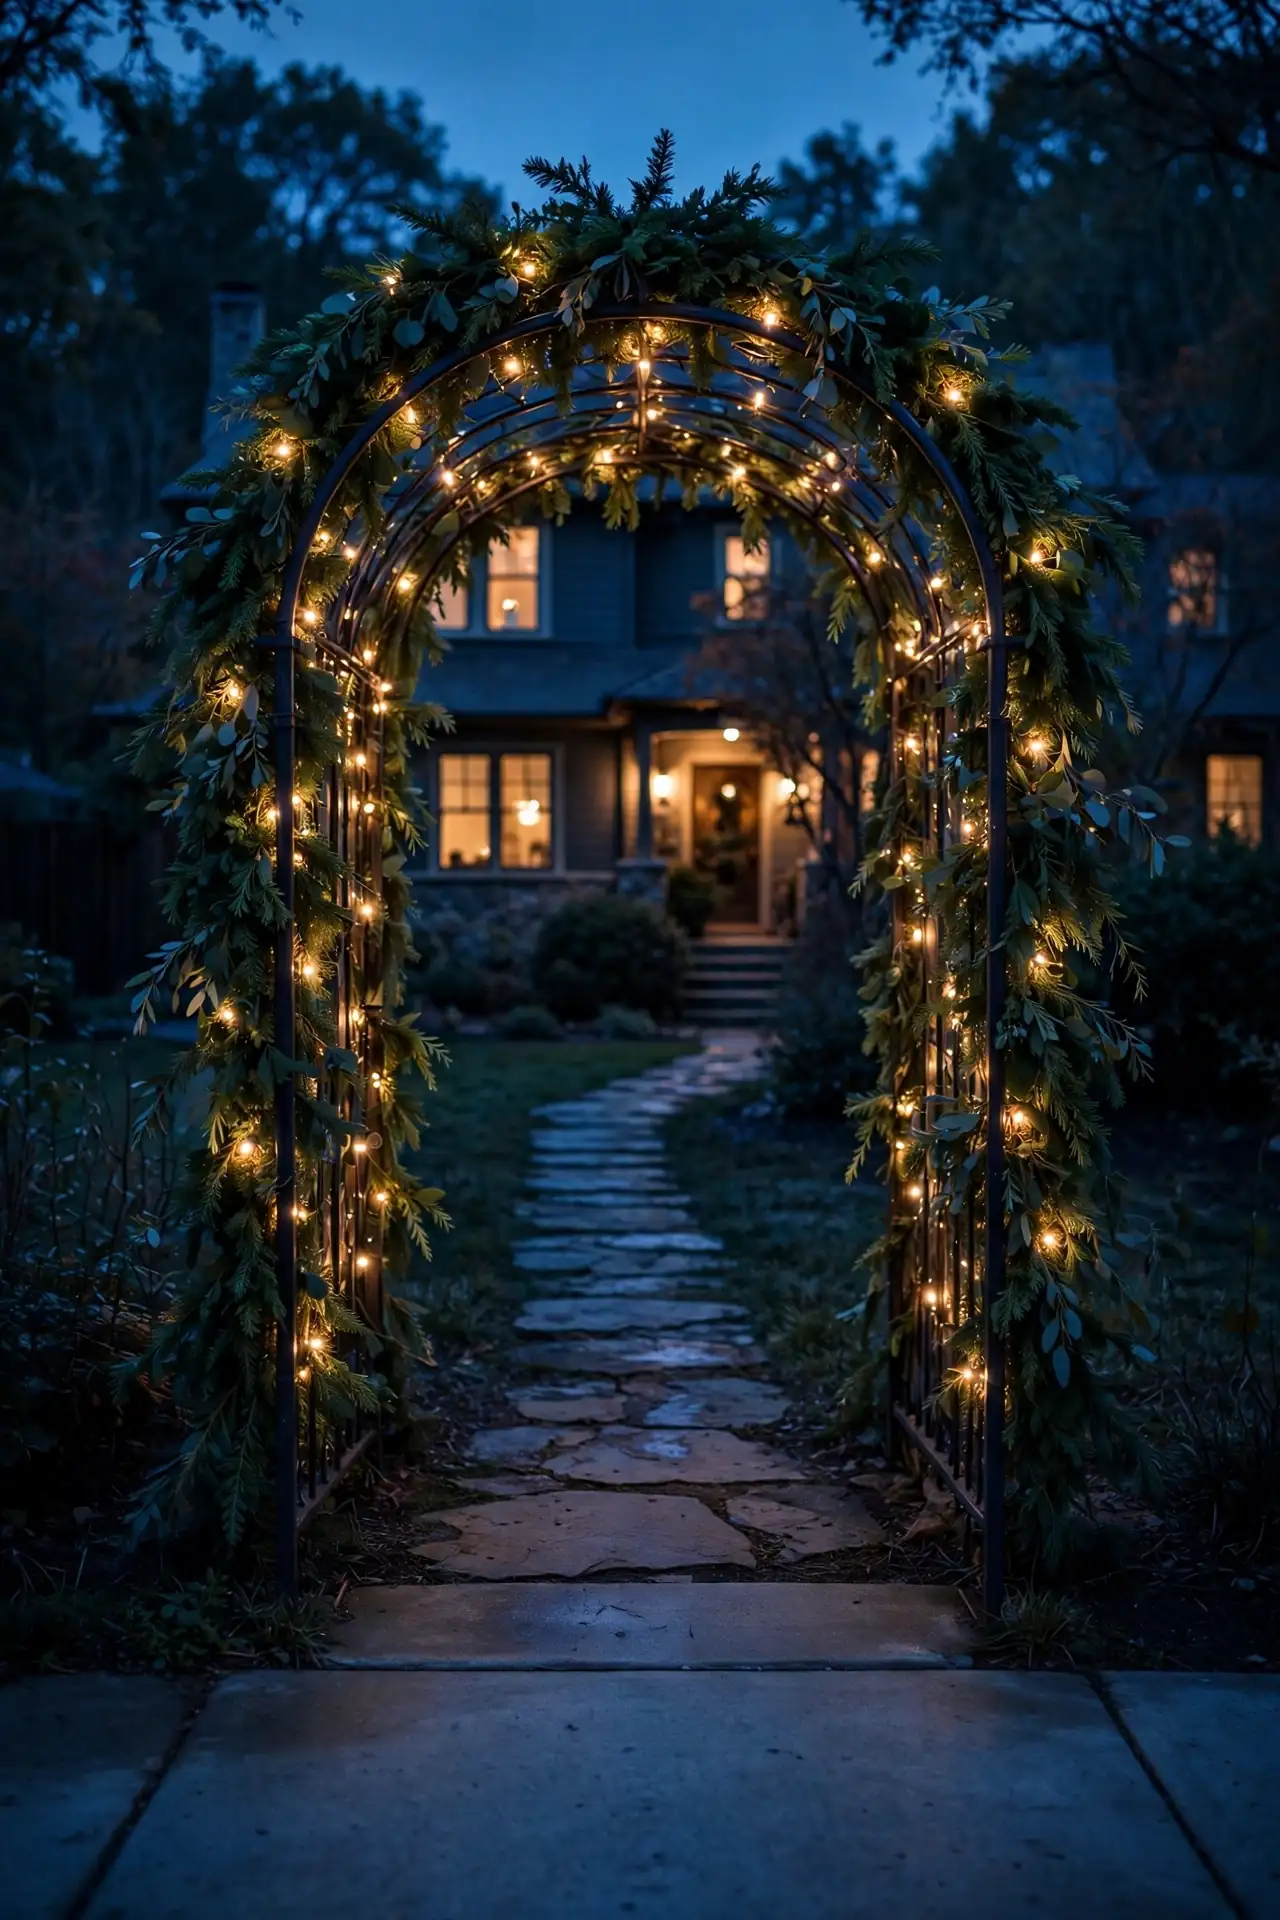
25
An Arch of Lights Where the Path Meets the Sidewalk
A garden arch wrapped in garland and mini lights at the start of your walkway gives guests a doorway into the display. It marks the boundary between the public street and your scene, and it frames the house for the season’s photos. Keep at least 7 feet of head clearance at the arch’s center.
Try it: Wrap the garland first and add lights second, in the opposite spiral direction. Counter-wrapping locks both layers in place so neither slides down the frame.
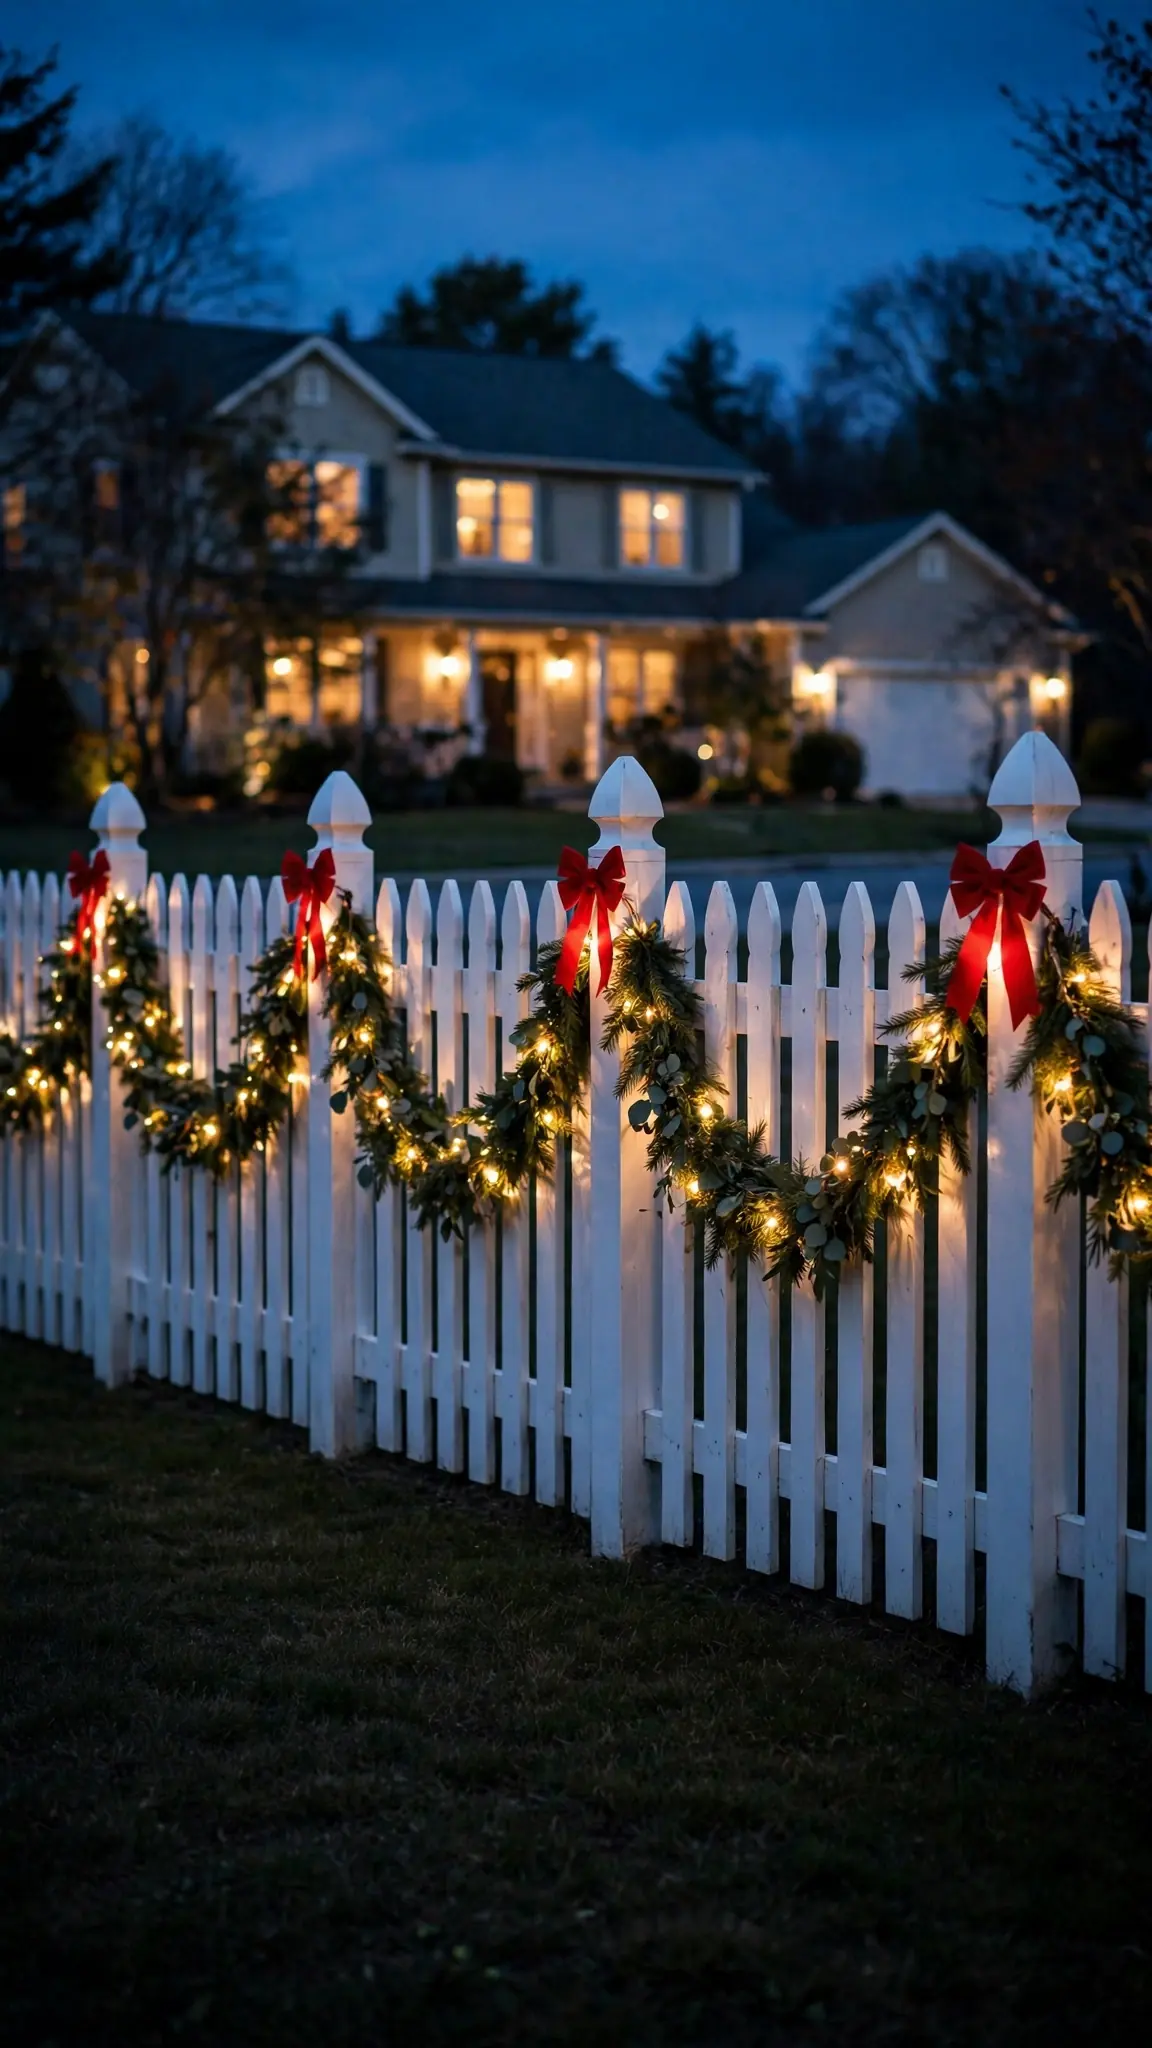
26
Garland Swags Along the Fence
Swagged garland turns a plain front fence into a decorated boundary that matches the house. Measure one fence bay, then cut every swag to that same length so the scallops repeat evenly, and fix a red bow at each post. Uniform swags look custom; uneven ones look like leftovers.
Try it: Let each swag dip about one third of the fence height at its center. Shallower dips look strained, deeper dips drag in snow and mulch.
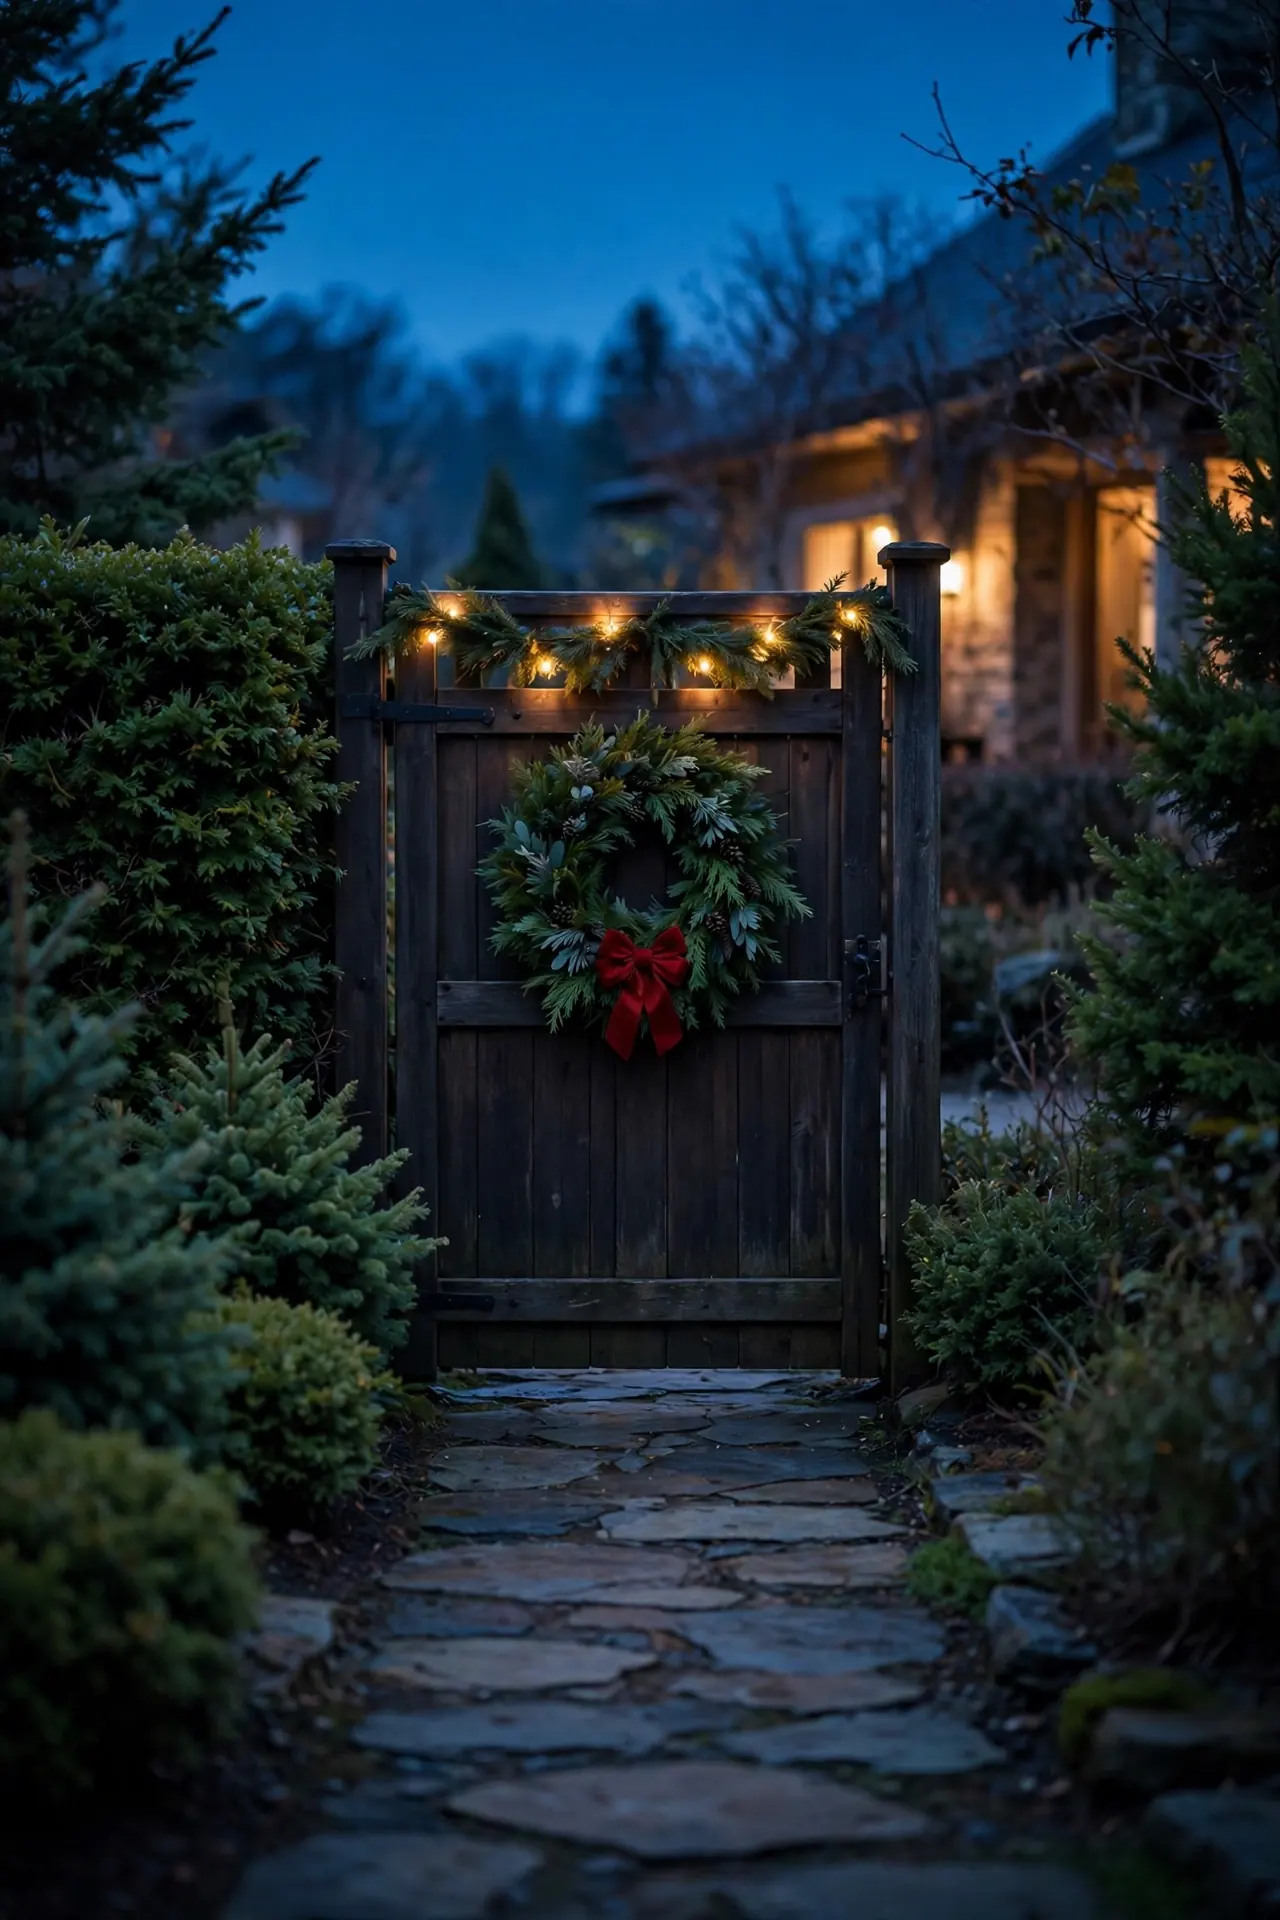
27
A Wreath and Garland on the Gate
The gate gets used daily, so decorate it to move: a wreath centered on the gate and a short garland along its top rail, both fixed with zip ties. Battery lights only here, because a cord across a swinging gate lasts about one day. The wreath traveling with the gate is a small delight every single time it opens.
Try it: Leave the ties near the hinge side slightly looser than the latch side. The gate swings without pinching or chewing the garland.
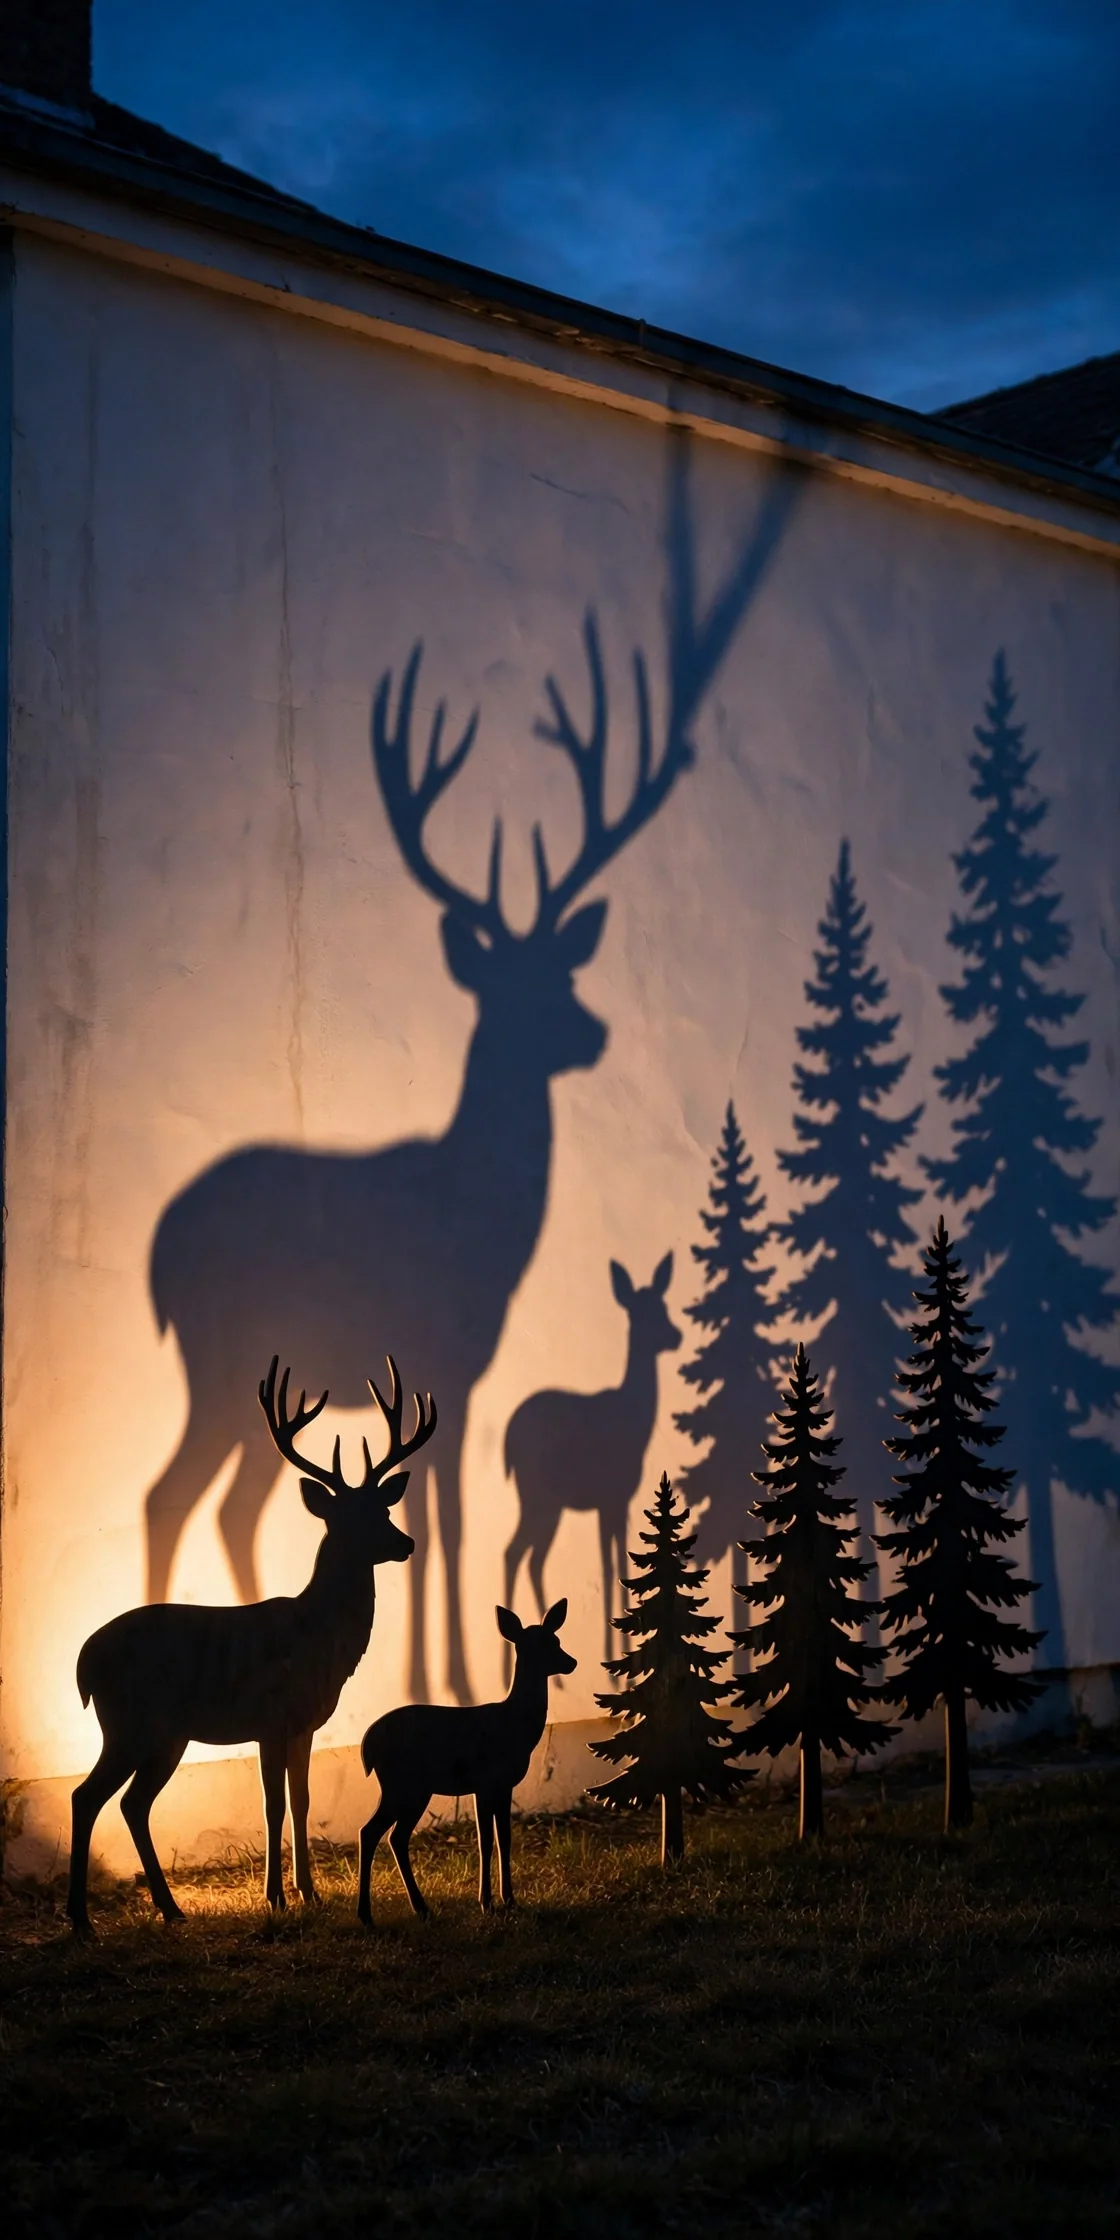
28
Silhouette Cutouts Against the House Wall
Plywood silhouettes of deer, trees, and a sleigh, painted matte black and backlit by a single spotlight, turn a blank house wall into shadow theater. It is one of the cheapest holiday yard decorations to build and one of the most striking after dark. A sheet of exterior plywood yields a whole forest for under $40.
Try it: Set the spotlight 6 to 8 feet in front of the cutouts, low to the ground. That distance throws big, crisp shadows instead of small blurry ones.
29
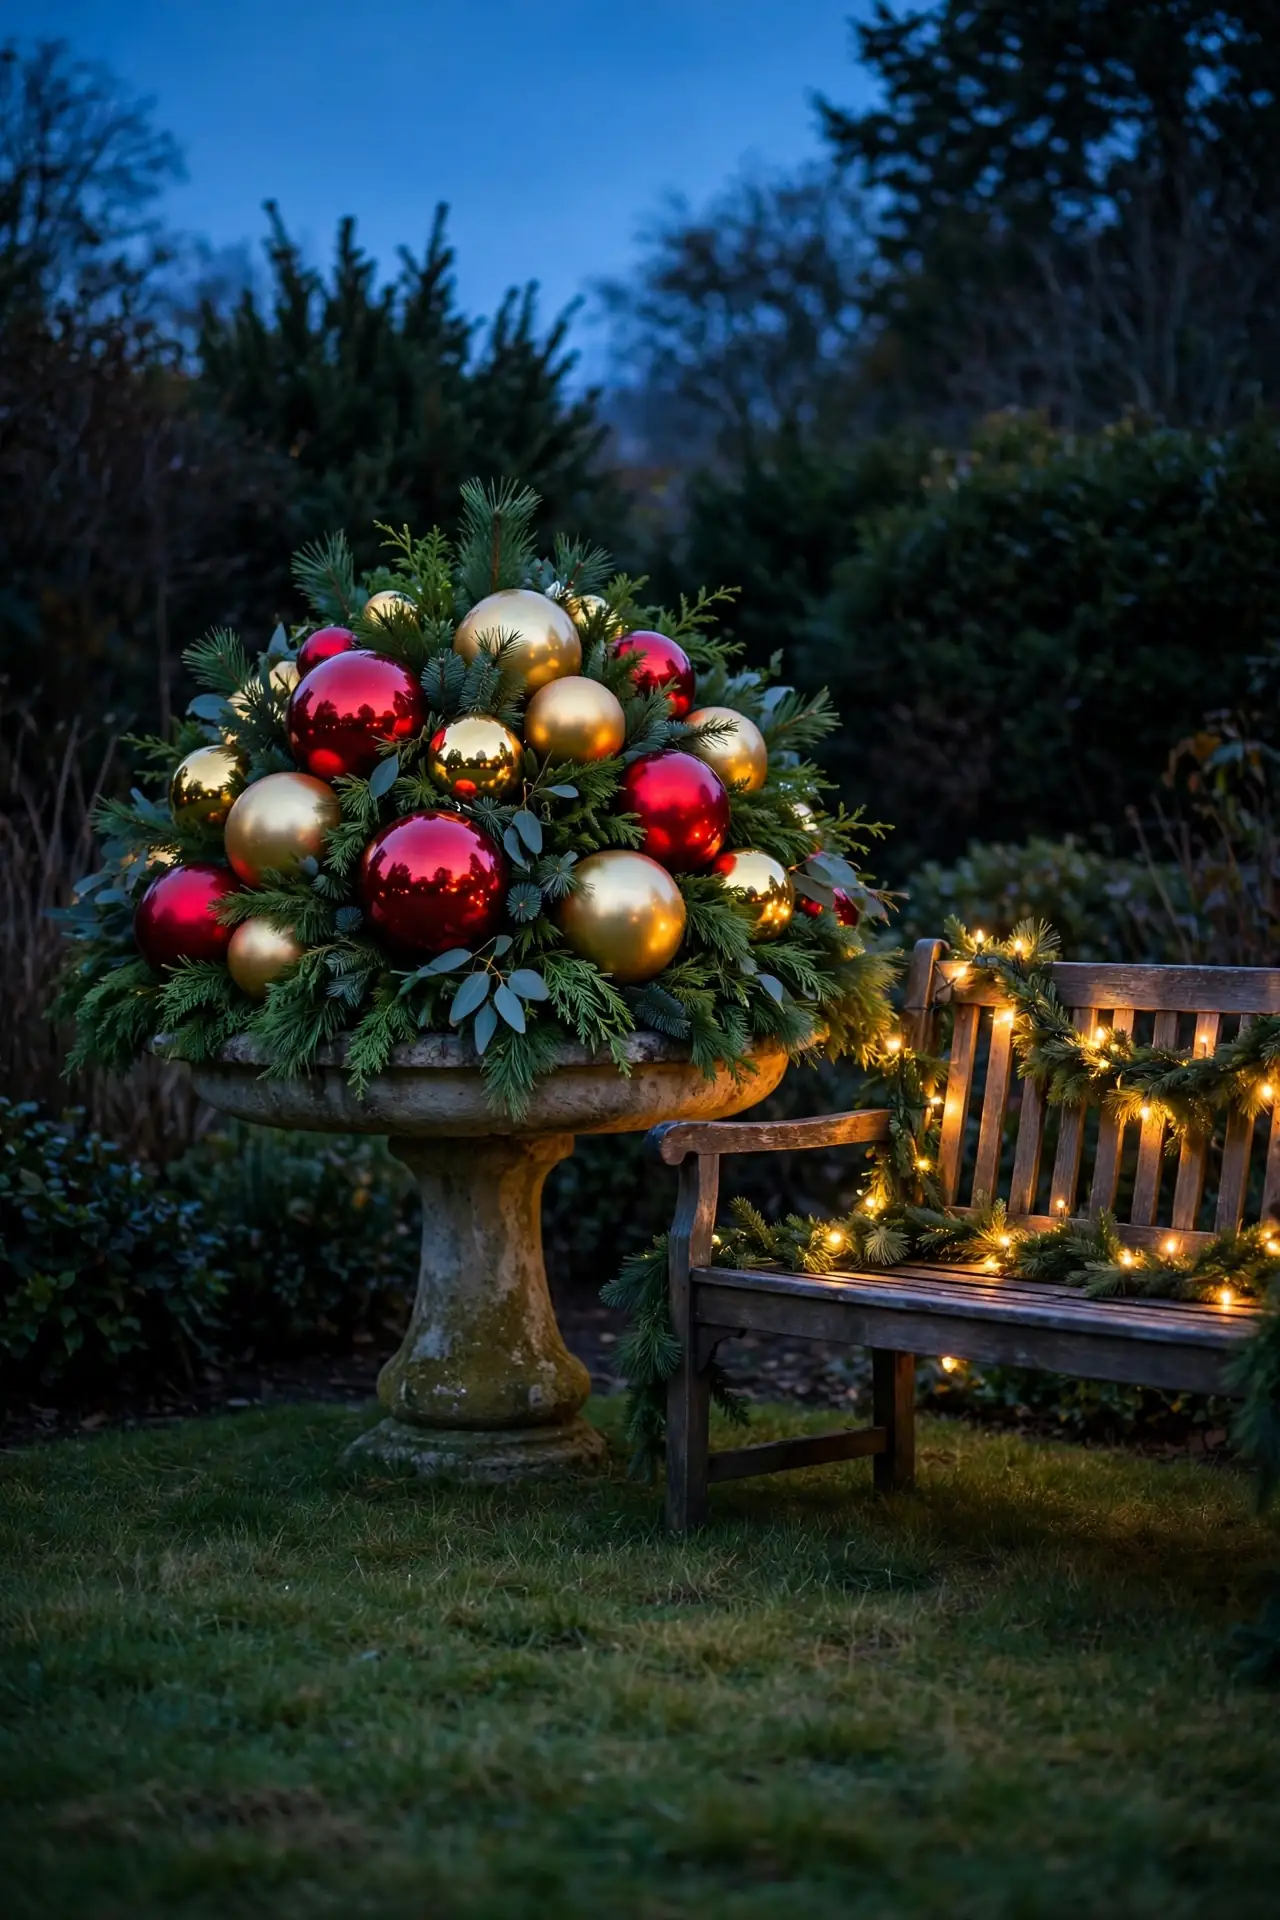
Dress the Birdbath and Garden Features
Fill the birdbath with a mound of greenery and oversized ornaments, wrap the garden bench in garland, and your existing garden features join the display instead of sitting it out. These are the details neighbors notice on the second look, the ones that make a yard feel fully considered. Drain the birdbath first so freezing water cannot crack the basin.
Try it: Build the birdbath mound on a wreath form laid flat in the basin. The form lifts the greens into a dome and keeps ornaments from rolling out.
30
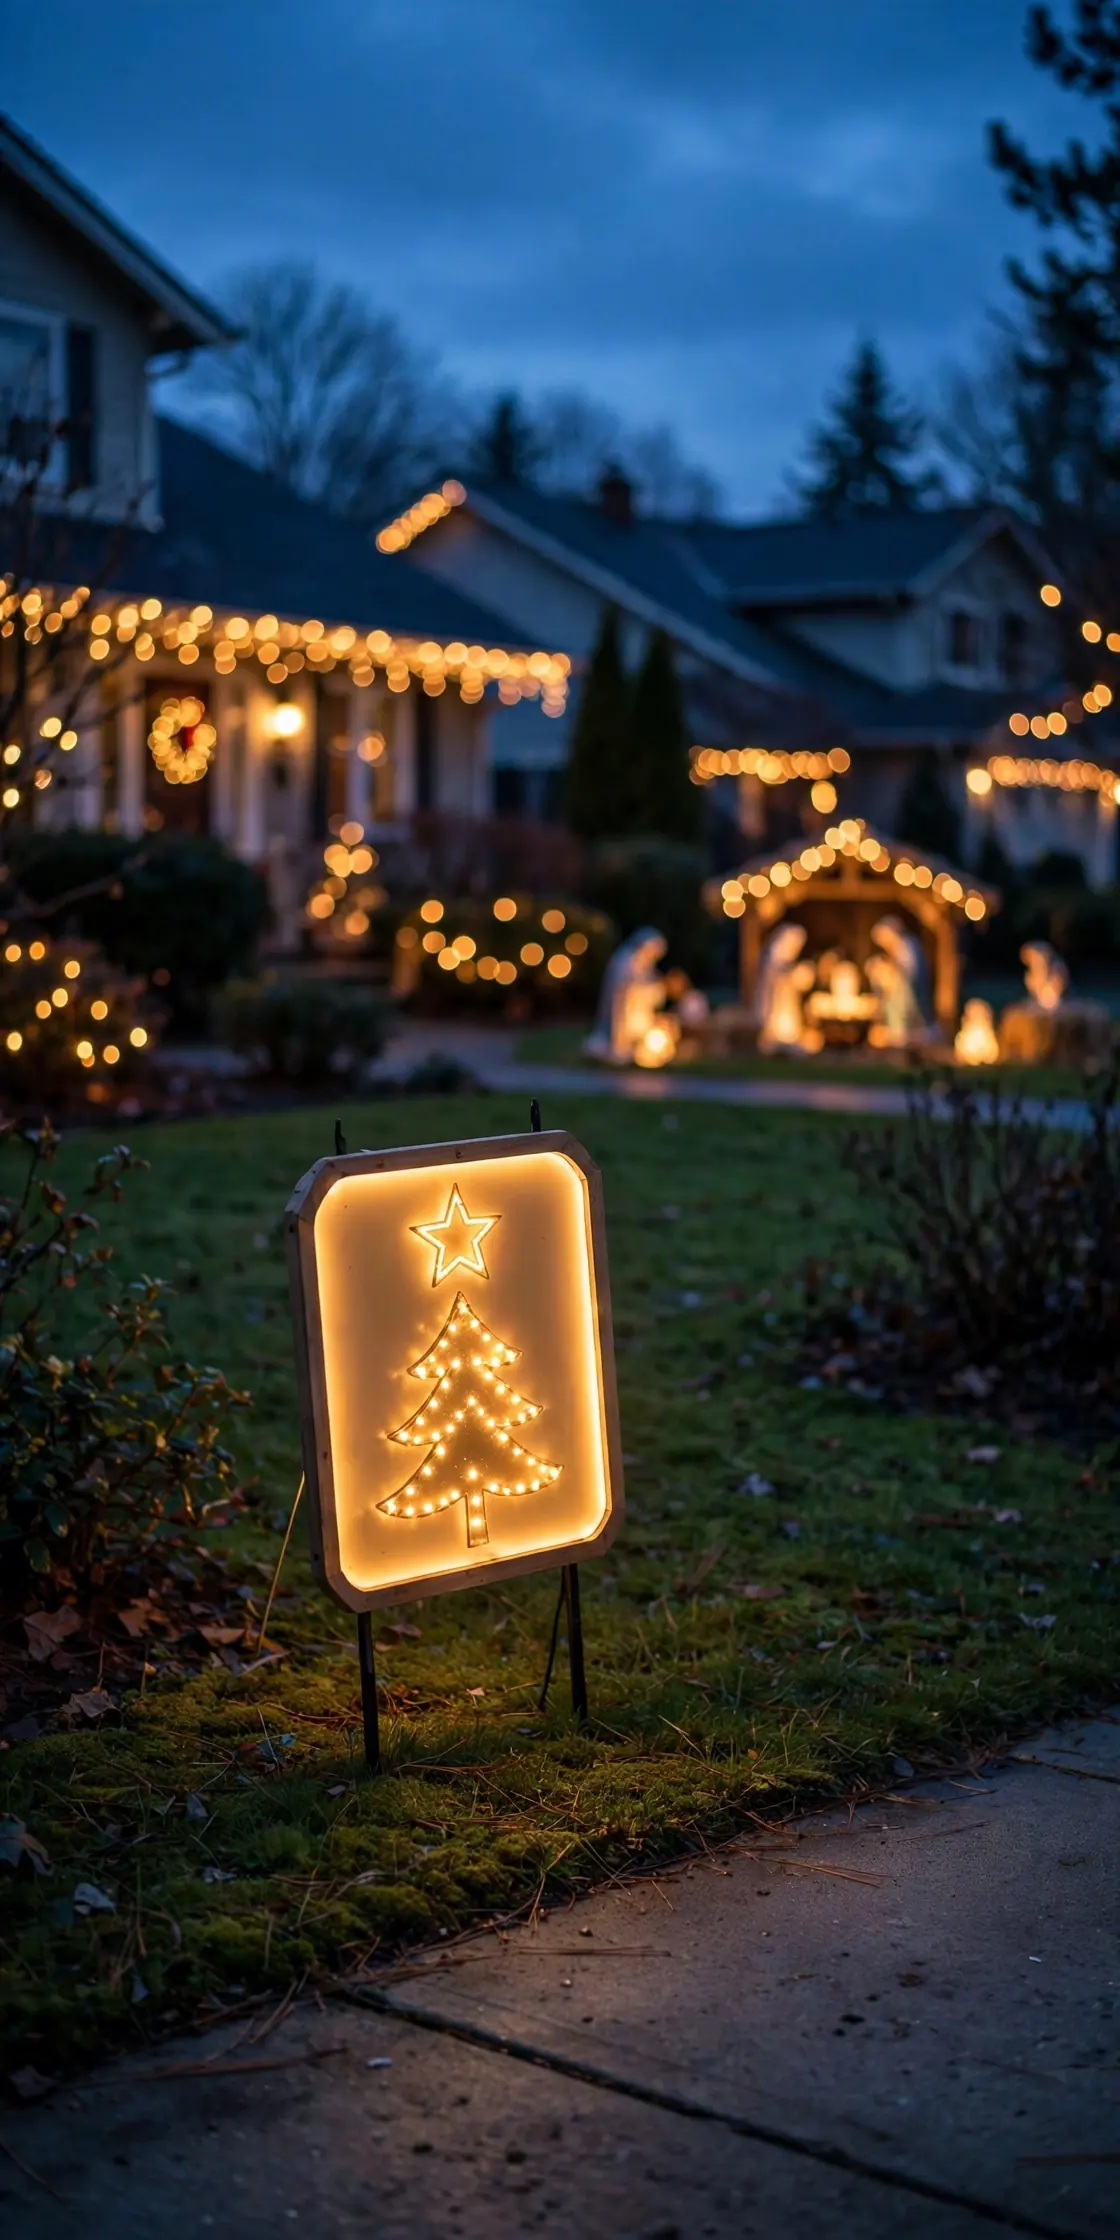
A Light-Up Welcome Sign by the Sidewalk
Finish the yard with a lighted Merry Christmas sign staked near the sidewalk, angled slightly toward approaching cars and walkers. It is the display’s handshake, the last piece read and the first one photographed. Keep it at the edge of your property line where it greets the street without blocking the path.
Try it: Angle the sign about 20 degrees toward oncoming foot traffic, not square to the house. Signs are read by people moving along the sidewalk, not standing in your driveway.
Pro tip: Build the yard in layers over two weekends instead of one exhausting day. Weekend one: the anchor scene and roofline. Weekend two: paths, fence, and accents. A display built in layers gets adjusted between rounds, and the second round is where the dark gaps and crooked lines get fixed.
Three rules for christmas yard decor
- One anchor, everything else supports: Choose a single hero scene and let lights, paths, and accents point toward it. Two heroes in one yard cancel each other out, and three is a crowd scene with no star.
- Weather-rated or it does not go out: Every piece, cord, and plug must be rated for outdoor use, with connections raised off the ground and plugged into a GFCI outlet. Indoor decor in a wet yard is a short circuit waiting for a rainy night.
- Judge it from the street at dusk: Walk to the curb when the lights come on and look at what a driver sees: one clear hero, even light, no dark holes, no visible cords. If it works from 40 feet at twilight, it works from everywhere.
After Christmas: packing up the yard
- Dry everything before it goes in a bin: Run inflatable blowers for 30 minutes after the last night and let lighted figures air out in the garage for a day. Boxing damp decor is how January purchases become next December’s moldy surprises.
- Stakes, clips, and cords in one labeled bucket: Gather every ground stake, roofline clip, and extension cord into a single bucket labeled “yard hardware.” The decorations are easy to find next year; the 40 small parts are what go missing.
- Photograph the layout before teardown: Take three photos from the street, left, center, and right, plus a note of which outlet fed which zone. Next year’s setup takes half the time when you are copying a photo instead of reinventing the yard.
More ideas you’ll love: outdoor christmas decor ideas, christmas patio decor ideas, christmas front porch ideas, and plenty more in the Christmas Decor archive.
Questions readers ask
How much does it cost to decorate a yard for Christmas?
A good-looking yard costs about $150 to $400 the first year: $80 to $150 for an anchor scene, $60 to $120 for lights, and the rest for paths and accents. After that, most people spend $30 to $50 a year replacing a strand or adding one piece.
What are the best christmas decorations outdoor for a small yard?
Scale down, do not spread out. One compact anchor like a nativity or a single lighted deer, net lights on the shrubs, and candy cane stakes on the path fill a small yard completely. Skip inflatables over 6 feet; they swallow small lawns whole.
How do I use xmas yard decorations without the yard looking cluttered?
Pick one anchor, one light color, and group everything else in odd numbers. All warm white lights, or all multicolor, but never a mix of both across the yard. Clutter is almost always competing pieces and competing colors, not too many decorations.
How long can I run a Christmas inflatable each day?
Run it on a timer from dusk to about 10 p.m., roughly 5 hours a night. Most blowers draw around 100 watts, so a season of evenings costs a few dollars, and the fabric and motor last several seasons longer than they would running around the clock.
How do I keep holiday yard decorations from blowing away?
Stake every piece, add 10 to 20 pound sandbags inside inflatable bases, and anchor lawn ornaments with landscape staples through their caps or frames. When gusts over 35 mph are forecast, deflate inflatables and bring in the lightest figures rather than trusting the stakes.
Are solar or plug-in lights better for christmas decorations for outside?
Plug-in wins for rooflines and anchor scenes, where brightness and reliability matter. Solar stakes work well along paths in yards that get at least 6 hours of direct sun, but a week of cloudy December days leaves them dim by evening.
When should christmas lawn decorations go up and come down?
Up the weekend after Thanksgiving is the standard, and the anchor scene plus roofline takes most of a day. Down by mid-January, or the first mild weekend after New Year, whichever your weather offers first.
How do I protect outdoor electrical connections from rain and snow?
Use outdoor-rated cords only, keep every plug connection raised off the ground or inside a weatherproof connection cover, and form a drip loop so water runs down and away from the plug. Everything should land on a GFCI-protected outlet, no exceptions.
People Also Ask
What is the most popular outdoor Christmas decoration?
The roofline string light outline is the most popular, followed closely by lighted reindeer and window wreaths. If a yard has only one thing, it is almost always lights along the roof edge.
Can christmas yard ornaments stay out in snow and rain?
Yes, if they are rated for outdoor use, ideally IP44 or higher for anything electrical. Shatterproof plastic, resin, and powder-coated metal handle a normal December fine; fabric and unrated indoor pieces should come in during storms.
How do I make a small budget look like a big display?
Concentrate everything in one zone near the street instead of spreading it thin. One finished 15-foot scene with all warm white lights reads as expensive, while the same money scattered across a whole yard reads as unfinished.
loved these ideas? ✿
Save this guide for later
Pin it to your board so it’s there when you’re ready to recreate it.

Curated by
Hey! I'm Sanaullah — visual curator and content creator. I search, curate, and test the best aesthetic ideas across Pinterest so you can easily transform your living space, style daily outfits, and try simple creative DIYs without the overwhelm.