
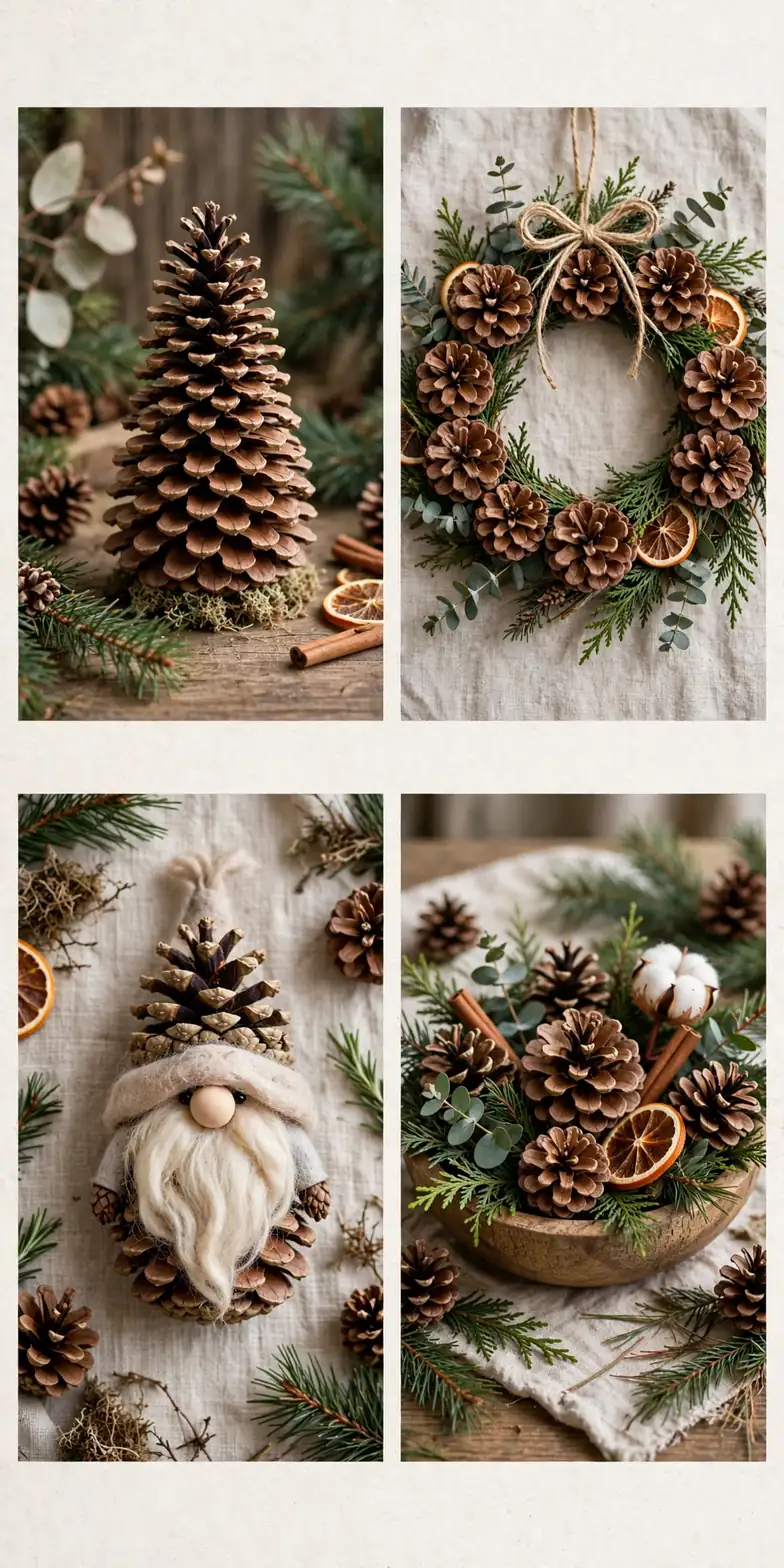
A house dressed only with shop-bought decorations can feel like a catalogue page, because every bauble and garland looks the same as every other house on the street. A house dressed with pinecone christmas crafts feels gathered and personal, because every cone was picked up, cleaned, painted, or glittered by hand. Most pinecone christmas crafts fail in the same way: people craft with dirty cones, skip the baking step, or glue cones that are still closed and damp, and end up with sticky wreaths, shedding ornaments, and bugs indoors. This list works the other way around. These 22 pinecone christmas crafts are grouped by build, trees, wreaths and swags, ornaments, garlands and hanging decor, and table and home decor, and every make comes with real steps, starting with how to clean and bake your cones, so you can pick one build, finish it, and have something handmade on display by the weekend. If you want the fullest version of this list, start with the easiest group and work toward the fiddliest, and your whole house will carry foraged texture by Christmas Eve, not just the mantel.
- The key takeaway: Clean and bake your cones before you craft with them. A cone that is baked open, dry, and bug free glues cleanly and holds paint, while a damp, closed cone sheds scales and drops off its wreath.
- The detail most people miss: Size sorting matters more than paint colour. Large pine cones for decorating suit wreaths and centrepieces, small pine cones for crafts suit ornaments and garlands, and mixing the two without a plan makes a build look accidental.
- What it costs or how long it takes: Most of these 22 ideas cost $0 to $12 in supplies if you forage your cones, and each takes 20 minutes to 2 hours of active work plus baking and drying time. Pinecone christmas crafts are often the cheapest handmade decorations in the house, because the main material grows on trees.
At a glance
| Group | Ideas | Materials | Best for |
|---|---|---|---|
| Pinecone Trees | 01-04 | Pinecones, paint, pots, bases | Tables, windowsills, and gifts |
| Pinecone Wreaths and Swags | 05-08 | Pinecones, wreath forms, greenery | Doors, walls, and porches |
| Pinecone Ornaments | 09-12 | Pinecones, felt, paint, loops | Trees and gift toppers |
| Pinecone Garlands and Hanging Decor | 13-16 | Pinecones, twine, berries, hoops | Mantels, stairs, and windows |
| Pinecone Table and Home Decor | 17-22 | Pinecones, bowls, candles, pots | Tables, fireplaces, and entryways |
Jump to an idea ↓
- 01 Classic Pinecone Christmas Tree
- 02 Mini Pinecone Trees in Pots
- 03 Snowy Pinecone Tree with Frosted Tips
- 04 Gold-Dipped Pinecone Tree
- 05 Full Pinecone Wreath
- 06 Pinecone and Greenery Wreath
- 07 Pinecone Door Swag
- 08 Bleached Pinecone Wreath
- 09 Pinecone Bauble Ornaments
- 10 Pinecone Gnome Ornaments
- 11 Pinecone Owl Ornaments
- 12 Pinecone Snowman Ornaments
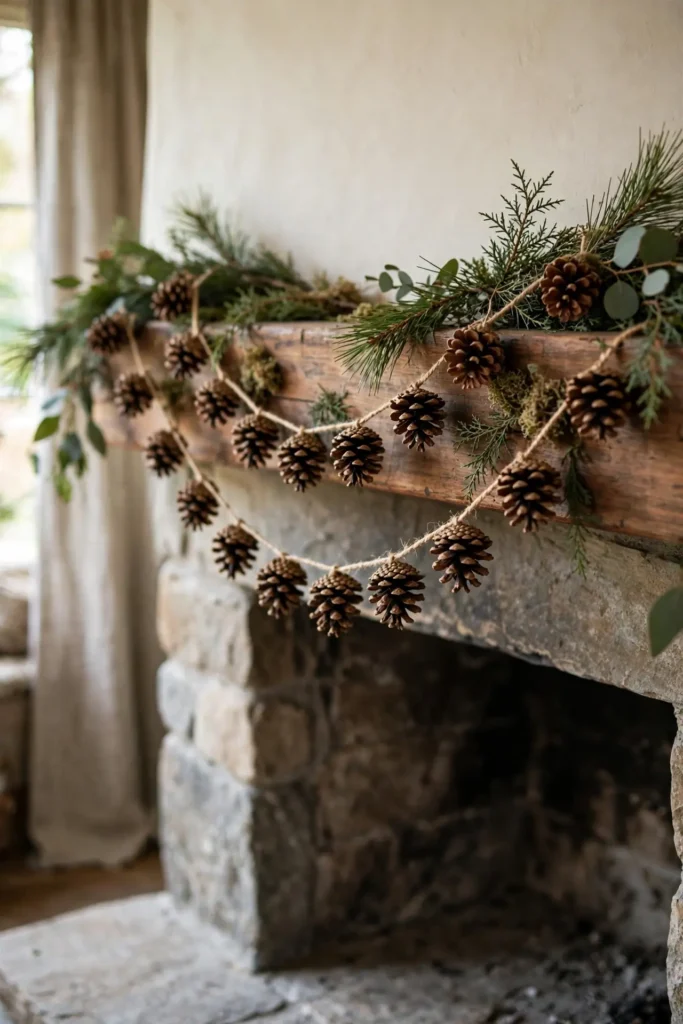
- 13 Pinecone Garland for the Mantel
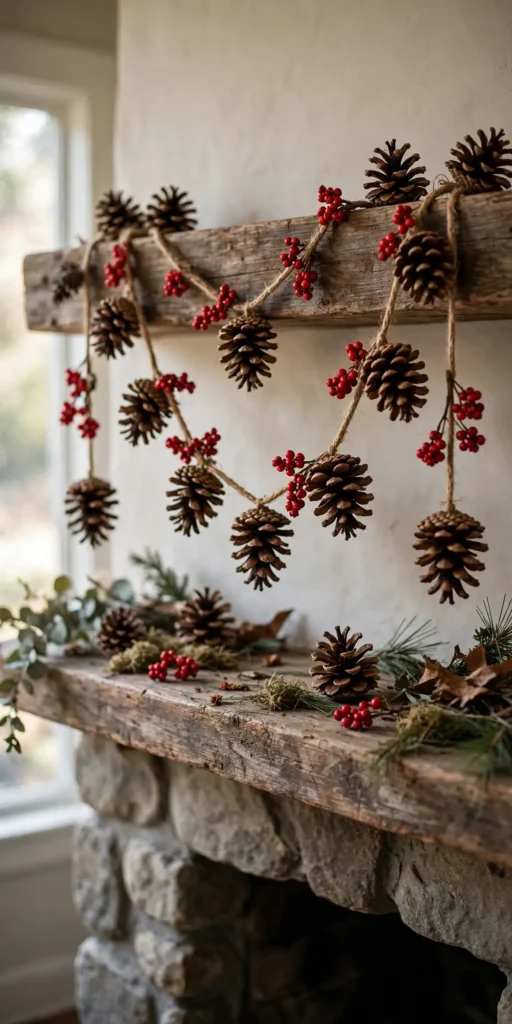
- 14 Pinecone and Berry Garland
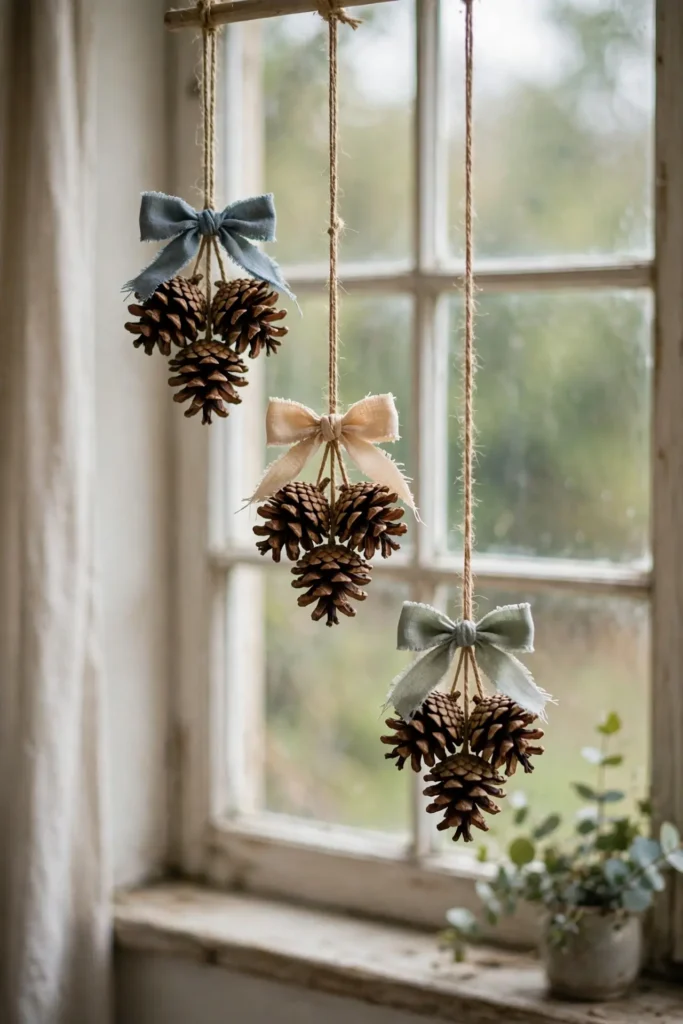
- 15 Pinecone Cluster Hanging Decorations
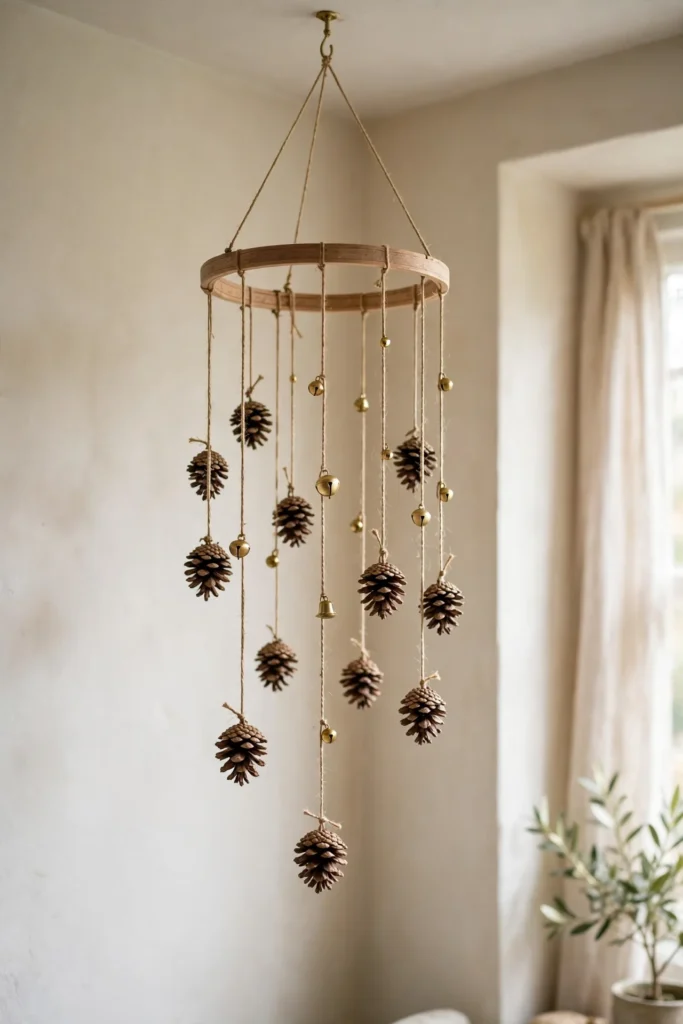
- 16 Pinecone Hanging Mobile
- 17 Pinecone Centrepiece in a Bowl
- 18 Pinecone Candle Holders
- 19 Pinecone Place Card Holders
- 20 Pinecone Basket Display
- 21 Pinecone Topiary
- 22 Scented Pinecone Bowl Filler
Pinecone Trees
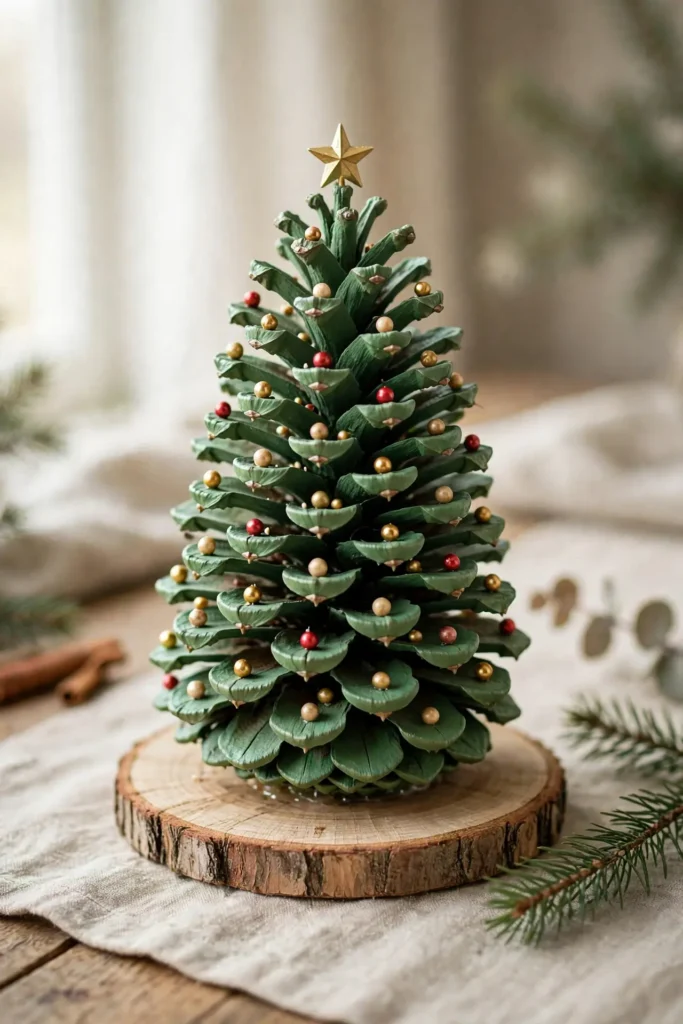
01
Classic Pinecone Christmas Tree
A table dressed only with candles can look bare in December, because candles alone give no shape. A classic pinecone christmas tree, one large cone painted green and set on a base, gives the table a tree shape, because the cone already grows in a tree silhouette. Steps: 1. Clean and bake a large pinecone, following the cleaning steps in the questions section, so it opens fully and dries out. 2. Paint the cone green with a dry brush, leaving the scale tips darker for depth, and let it dry. 3. Glue the cone to a small wooden slice base, add tiny beads as baubles, and top it with a small star.
Try it: Dry brush the paint, do not soak the cone. A cone soaked in paint closes up and stays damp, while a dry brushed cone keeps its open scales and dries in hours.
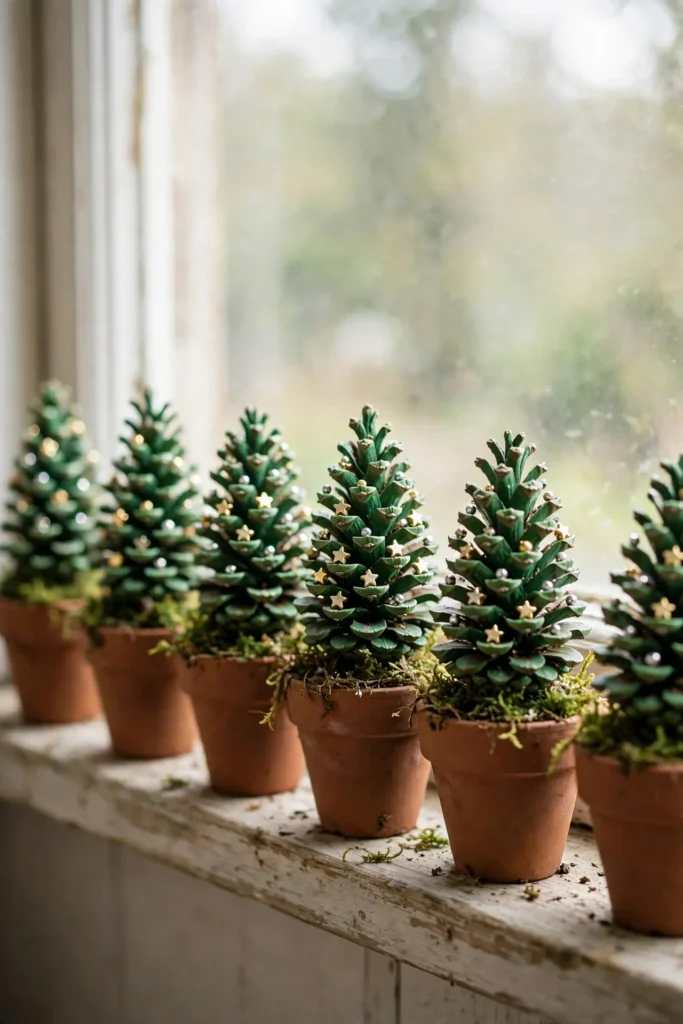
02
Mini Pinecone Trees in Pots
A windowsill dressed only with one large decoration can look unbalanced, because one object leaves the rest of the sill empty. Mini pinecone trees in pots, tiny cones set in terracotta pots, give the sill a little forest, because several small trees read as a group. Steps: 1. Pick tiny pine cones for crafts, clean and bake them, and paint them green. 2. Set each cone upright in a mini terracotta pot with a ball of air dry clay or floral foam to hold it. 3. Cover the foam with moss, add a tiny bead star on top, and line the pots along the sill.
Try it: Use odd numbers of pots, three or five, not two or four. An even row reads as bookends, while an odd group reads as a little woodland.
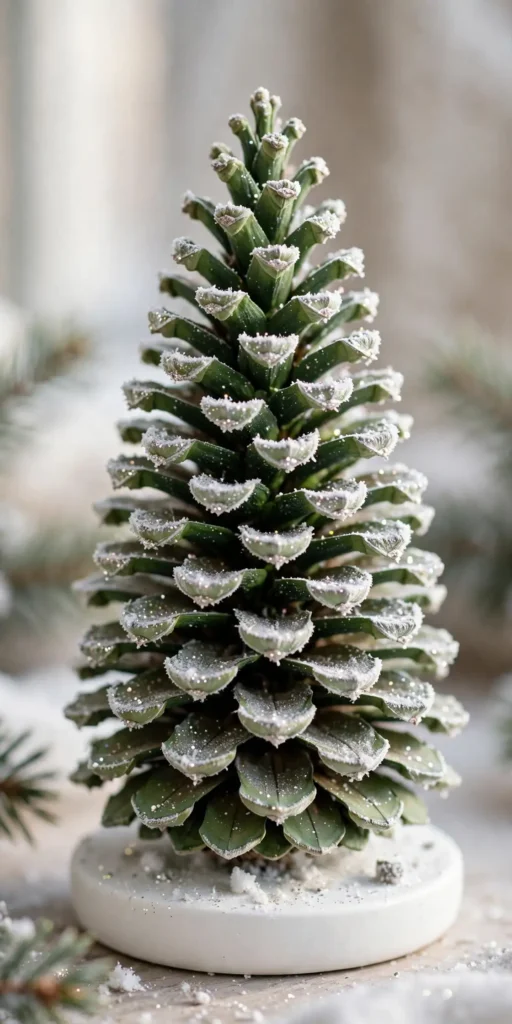
03
Snowy Pinecone Tree with Frosted Tips
A green pinecone tree can disappear against a green wreath or a real tree, because green on green has no contrast. A snowy pinecone tree with frosted tips stands out, because white dusted scale tips read as snow against any background. Steps: 1. Clean and bake a large cone and paint it green, letting it dry fully. 2. Dip a stiff brush in white paint and dab only the outer tips of the scales, working from the top down. 3. Sprinkle fine white glitter over the wet tips, let it dry, and set the tree on a white doily or a snowy base.
Try it: Frost the tips only, not the whole cone. A fully white cone reads as a painted cone, while white tips on green read as snow on a real tree.
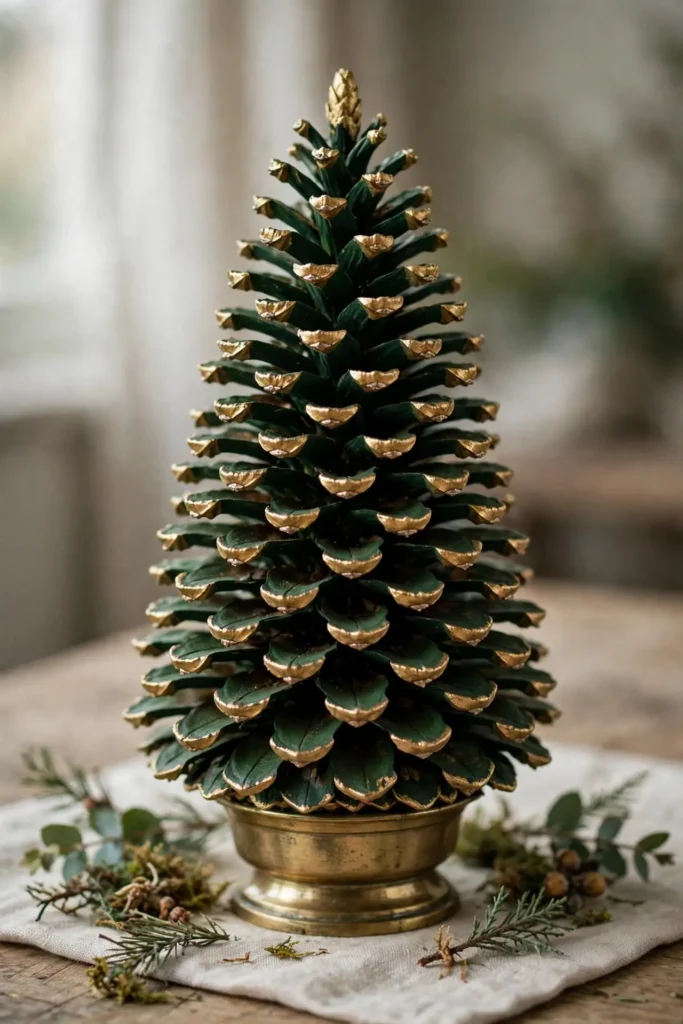
04
Gold-Dipped Pinecone Tree
A table dressed only in matte decorations can look dull under tree lights, because matte surfaces absorb light. A gold-dipped pinecone tree catches the light, because gold tips on a dark cone glow under lamps. Steps: 1. Clean and bake a large cone and paint it dark green or leave it natural. 2. Dip the outer scale tips in gold paint, or brush gold onto the tips with a dry brush, and let it dry. 3. Set the cone on a gold or brass base and add no other decoration, since the gold is the point.
Try it: Dip the tips in gold, not the whole cone. A fully gold cone looks like a spray painted prop, while gold tips on a dark cone read as gilded and expensive.
Pinecone Wreaths and Swags
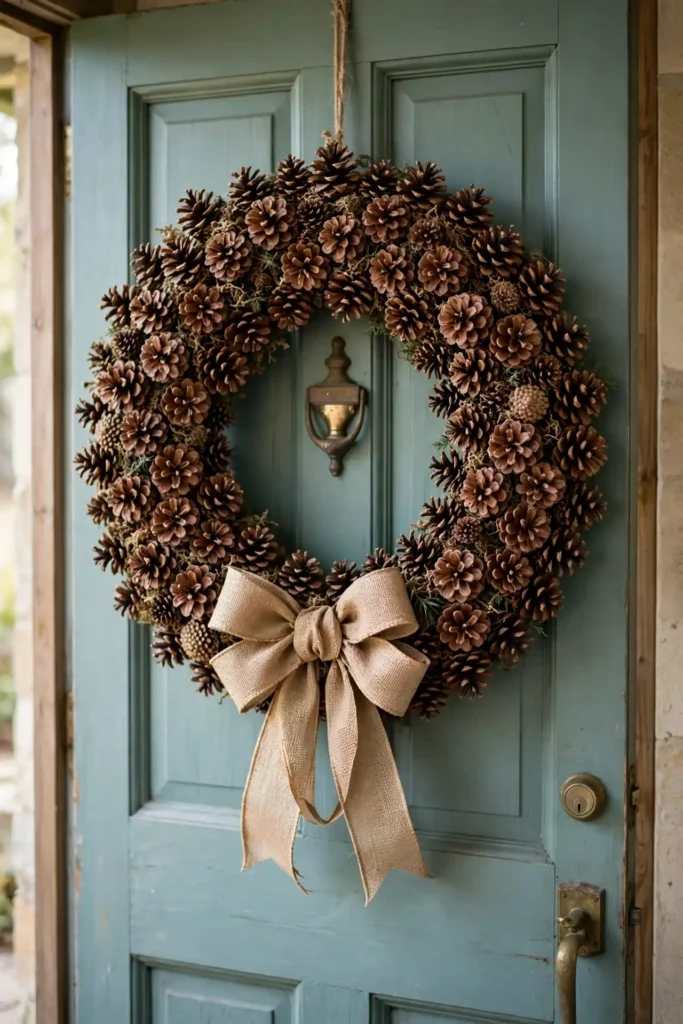
05
Full Pinecone Wreath
A front door dressed only with a bow can look unfinished, because a bow alone gives no body. A full pinecone wreath, cones wired all around a wreath form, gives the door weight and texture, because the cones cover the whole ring. Steps: 1. Clean and bake about 30 medium cones and sort them by size. 2. Wire the largest cones to a wire wreath form first, spacing them evenly, then fill the gaps with smaller cones, wiring each one at its base. 3. Add a bow at the bottom and hang the wreath on a sturdy hook, since a full cone wreath is heavy.
Try it: Wire every cone, do not rely on glue alone. A glued cone wreath sheds cones in cold weather, while a wired wreath survives the whole season on the door.
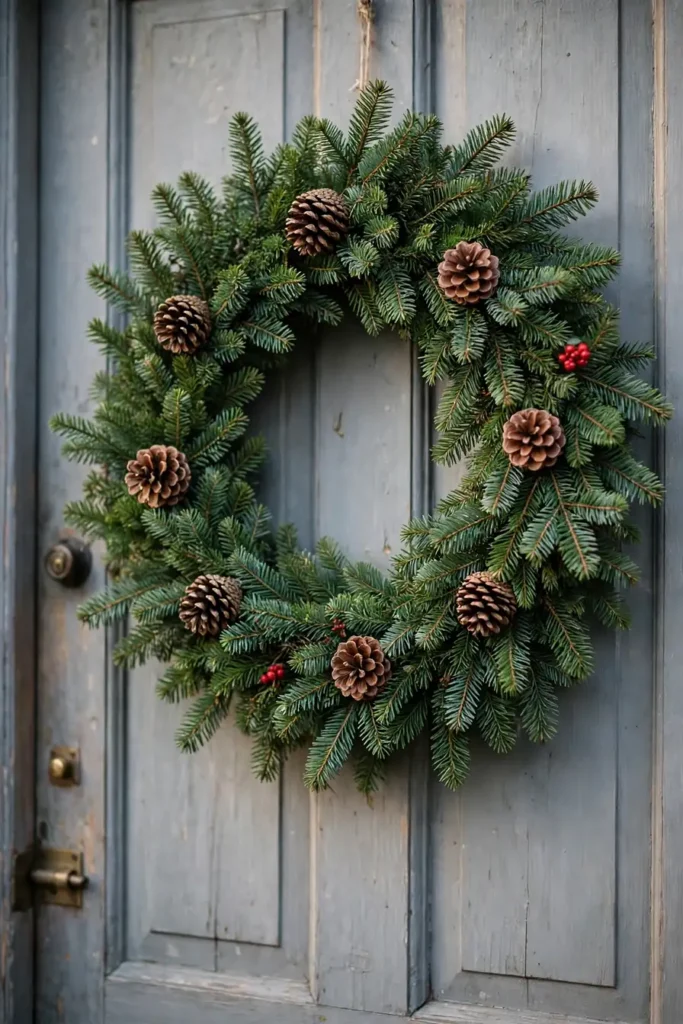
06
Pinecone and Greenery Wreath
A wreath made only of pinecones can look heavy and brown, because cones alone give no green. A pinecone and greenery wreath balances the brown, because fresh fir or faux greenery between the cones reads as a woodland wreath. Steps: 1. Start with a grapevine or wire wreath form and wire on fir branches or faux greenery all around. 2. Wire medium cones into the greenery at even intervals, about eight to ten cones for a standard wreath. 3. Add a few red berries and a ribbon bow, and hang the wreath where the greenery will not dry out too fast.
Try it: Put the greenery on first and the cones second. Cones wired first leave no room for greenery, while greenery first lets you place each cone where it shows best.
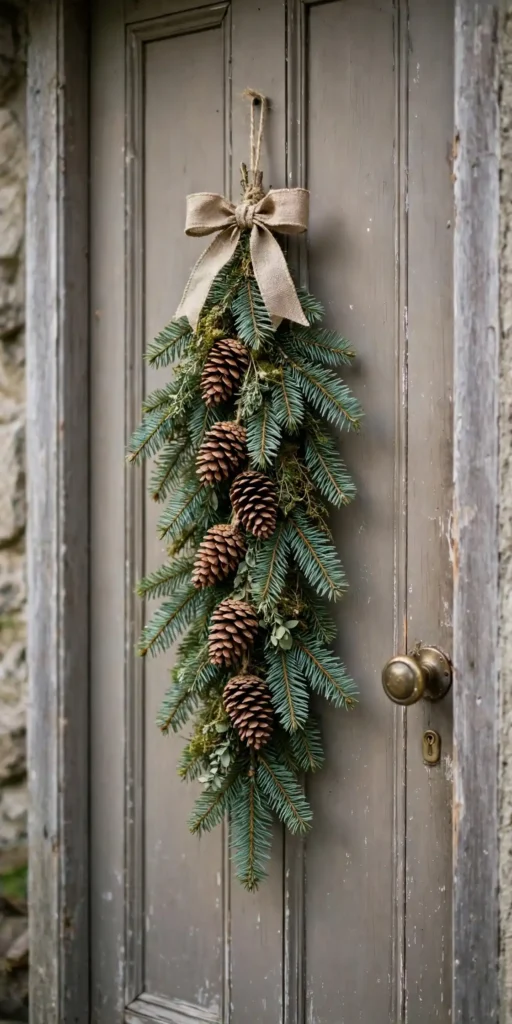
07
Pinecone Door Swag
A narrow door or a porch post can be overwhelmed by a full round wreath, because a big ring leaves no room around it. A pinecone door swag, a vertical bundle of greenery and cones tied at the top, fits a narrow space, because the swag hangs down instead of spreading out. Steps: 1. Bundle three or four fir branches together and tie them at the top with wire. 2. Wire five to seven cones down the front of the bundle, largest at the bottom, smallest at the top. 3. Tie a bow over the top tie point and hang the swag from a hook or a nail.
Try it: Hang the swag with the tie point hidden under the bow. A visible wire tie reads as unfinished, while a bow over the tie reads as the design.
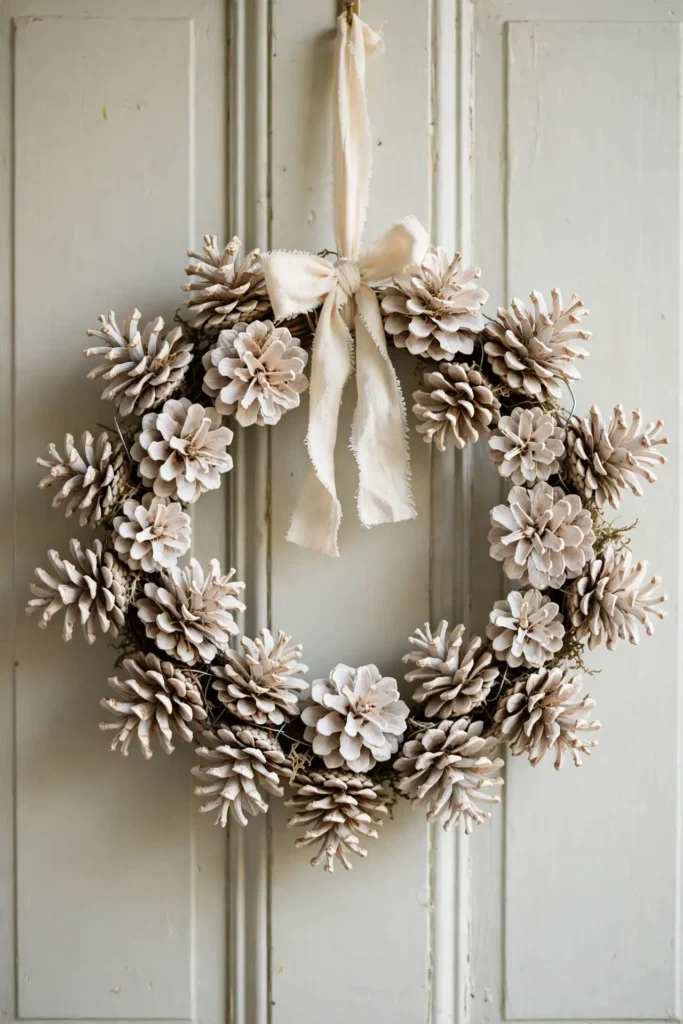
08
Bleached Pinecone Wreath
A dark pinecone wreath can look sombre on a pale door, because dark brown absorbs light. A bleached pinecone wreath lightens the door, because pale, bleached cones read as driftwood against white paint. Steps: 1. Soak clean cones in a bleach and water solution outdoors, wearing gloves, then rinse and bake them dry until they open. 2. Wire the bleached cones to a wreath form, mixing sizes for texture. 3. Add a white or cream ribbon and hang the wreath on a pale door or white wall.
Try it: Bleach outdoors and rinse well, and never skip the baking step after bleaching. Bleached cones that are not baked stay damp and closed, while baked bleached cones open wide and pale.
Pinecone Ornaments
09
Pinecone Bauble Ornaments
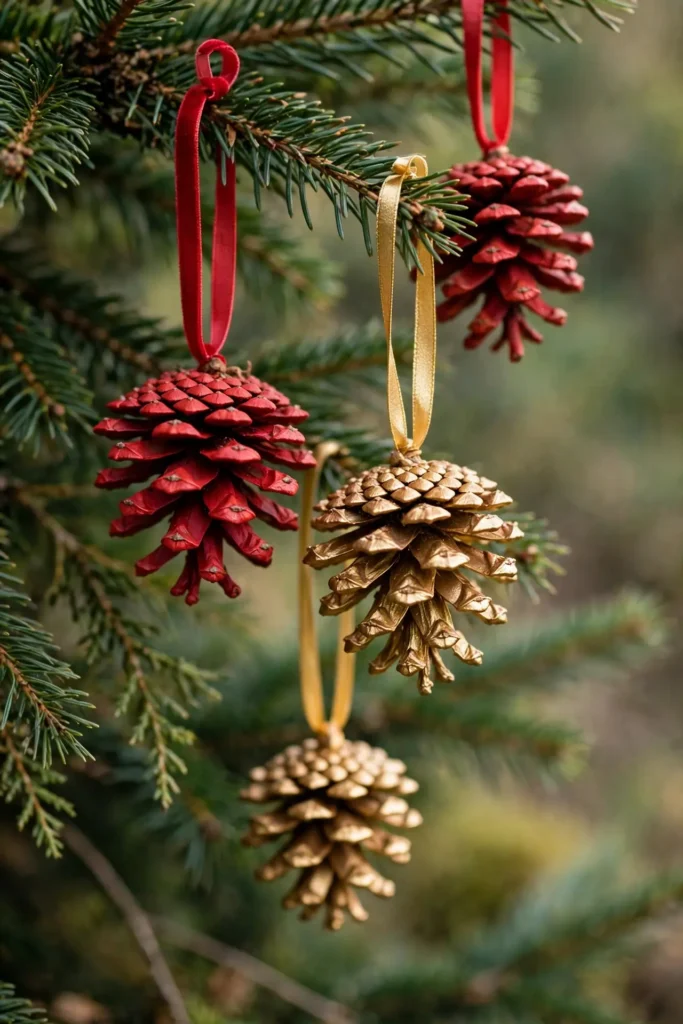
A tree dressed only in shop baubles can look identical to every other tree, because factory baubles repeat. Pinecone bauble ornaments, painted cones with a hanging loop, give the tree baubles with handmade texture, because the cone scales catch light like cut glass. Steps: 1. Clean and bake small to medium cones and paint them in one colour family, red, gold, or white. 2. Screw a small eye hook into the top of each cone and thread a ribbon loop through it. 3. Add a dusting of glitter while the paint is tacky, let them dry, and hang them on outer branches.
Try it: Paint pinecone ornaments in one colour family, all reds or all golds. Baubles in mixed colours look like a paint experiment, while one family reads as a set.
10
Pinecone Gnome Ornaments
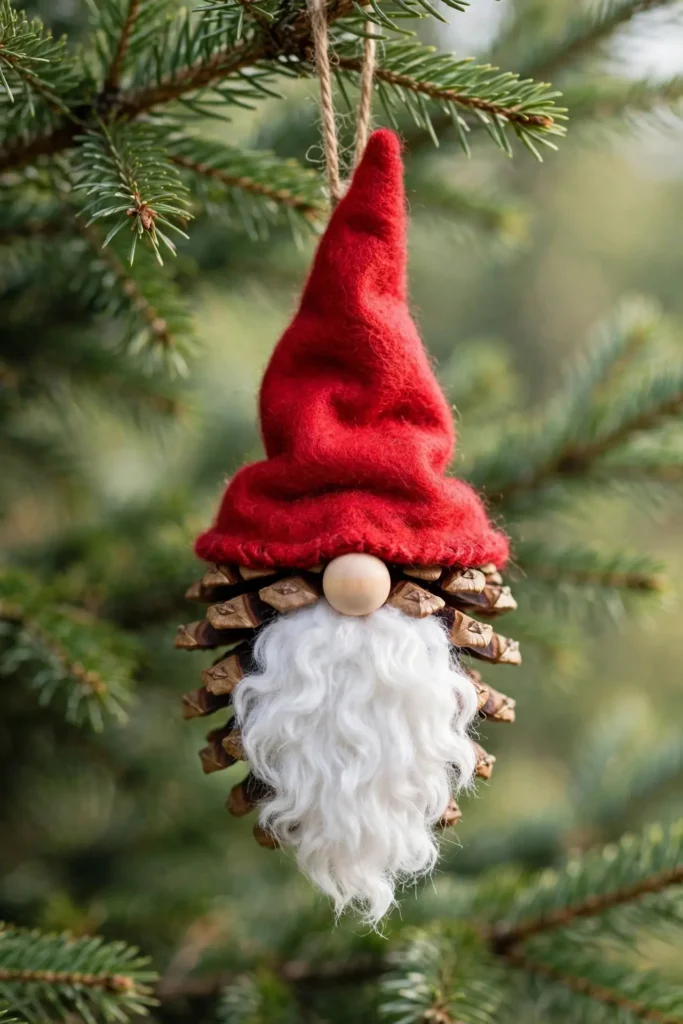
A tree with only classic shapes can feel predictable, because stars and baubles repeat every year. Pine cone gnomes, cone bodies with felt hats and beards, give the tree characters guests ask about, because the gnome shape is funny and unmistakable. Steps: 1. Clean and bake a medium cone and glue a small wooden bead on top as a nose. 2. Cut a felt triangle for a tall hat, glue it over the top of the cone, and glue a small beard of faux fur or cotton under the nose. 3. Add a ribbon loop to the hat and hang the gnome on a front branch.
Try it: Make the hat tall and the beard full. A gnome with a short hat looks like a cone with a cap, while a tall hat and a full beard read as a gnome at a glance.
11
Pinecone Owl Ornaments
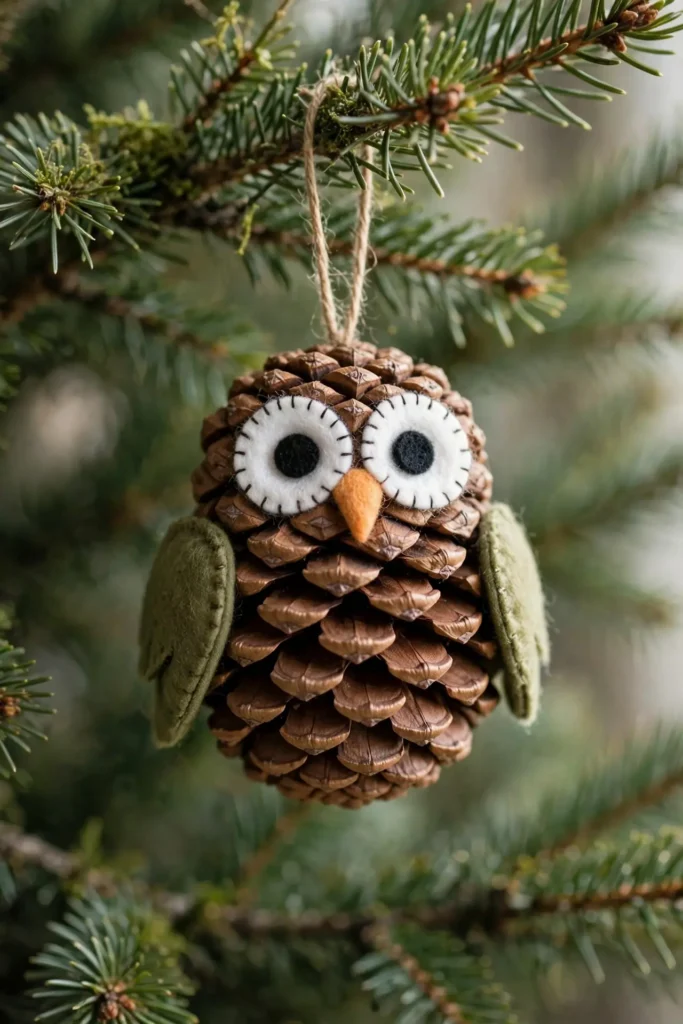
A tree with only abstract shapes can feel like it forgot the birds, because birds are the living detail of a winter tree. A pinecone owl ornament, a cone body with felt eyes and wings, gives the tree a woodland bird, because the cone scales already look like feathers. Steps: 1. Clean and bake a short, fat cone and set it upright. 2. Cut two felt circles for eyes, glue them near the top, and add two felt wings at the sides. 3. Add a small felt beak between the eyes, glue on a ribbon loop, and hang the owl near the lights.
Try it: Use a short, fat cone, not a long thin one. A long cone reads as a pinecone with eyes, while a short fat cone reads as an owl body.
12
Pinecone Snowman Ornaments
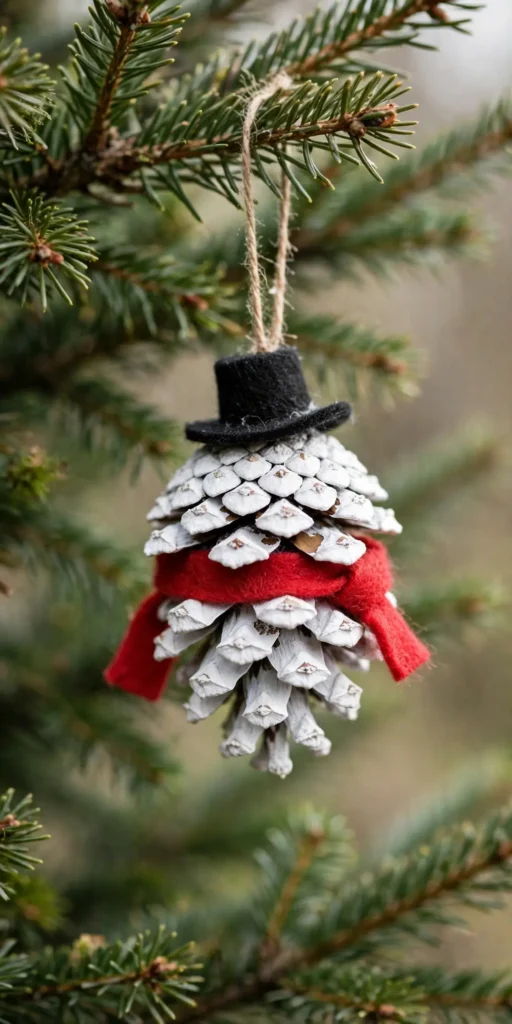
A tree dressed only in red and green can feel one note, because warm colours repeat everywhere. A pinecone snowman ornament, a cone painted white with a tiny hat and scarf, gives the tree a cool white figure, because the white cone reads as snow against the green. Steps: 1. Clean and bake a small cone and paint it white, letting it dry fully. 2. Glue a tiny black felt hat on top and wrap a thin strip of red felt around the middle as a scarf. 3. Add two black dot eyes and a ribbon loop, and hang the snowman on an outer branch.
Try it: Paint the cone white in two thin coats, not one thick coat. One thick coat clogs the scales, while two thin coats keep the cone texture visible under the white.
Pinecone Garlands and Hanging Decor
13
Pinecone Garland for the Mantel
A mantel dressed only with candles can look empty between the candles, because candles alone leave gaps. A pinecone garland for the mantel fills the gaps, because cones strung on twine drape in a natural curve. Steps: 1. Clean and bake about 15 small to medium cones. 2. Drill or poke a hole through the base of each cone, or wire a loop at each base, and thread them onto sturdy twine with knots between cones to hold the spacing. 3. Drape the garland along the mantel, letting it sag slightly in the middle, and tuck greenery behind it.
Try it: Knot the twine between cones, do not let them slide freely. Cones that slide bunch at the lowest point, while knotted cones stay spaced along the whole mantel.
14
Pinecone and Berry Garland
A plain pinecone garland can look brown and quiet, because cones alone give no colour pop. A pinecone and berry garland adds red, because clusters of red berries between the cones read as festive from across the room. Steps: 1. String cones onto twine as in the plain garland, with knots between them. 2. Wire small clusters of faux red berries between every second cone, so the red repeats evenly. 3. Drape the garland on the mantel or stair rail and fluff the berry clusters outward.
Try it: Use faux berries, not fresh ones, for a garland that hangs all season. Fresh berries dry and drop within days, while faux berries stay red until January.
15
Pinecone Cluster Hanging Decorations
A window dressed only with curtains can look plain in December, because curtains give no seasonal signal. Pine cone hanging decorations, clusters of three cones tied with ribbon, give windows a seasonal drop, because the clusters hang at eye level. Steps: 1. Clean and bake small cones and tie three together at their bases with wire, leaving the scales fanned outward. 2. Tie a ribbon bow over the wire join and add a long ribbon loop for hanging. 3. Hang the clusters from curtain rods, hooks, or branches, at different heights.
Try it: Hang clusters at different heights, not all level. Clusters hung level read as a row, while clusters at mixed heights read as natural and woodland.
16
Pinecone Hanging Mobile
A corner dressed only with a floor plant can look dark, because the plant fills the floor but not the air above it. A pinecone hanging mobile fills the air, because cones hung at different lengths from a hoop turn slowly in the draught. Steps: 1. Take a wooden or metal hoop and tie fishing line or fine twine at several points around it. 2. Tie a small cleaned cone to the end of each line, at different lengths, and add a bead or a tiny bell to a few lines. 3. Hang the hoop from the ceiling with three even cords and let it turn gently.
Try it: Keep the mobile light, with small cones only. A mobile with large cones hangs unevenly and tangles, while small cones balance and turn cleanly.
Pinecone Table and Home Decor
17
Pinecone Centrepiece in a Bowl
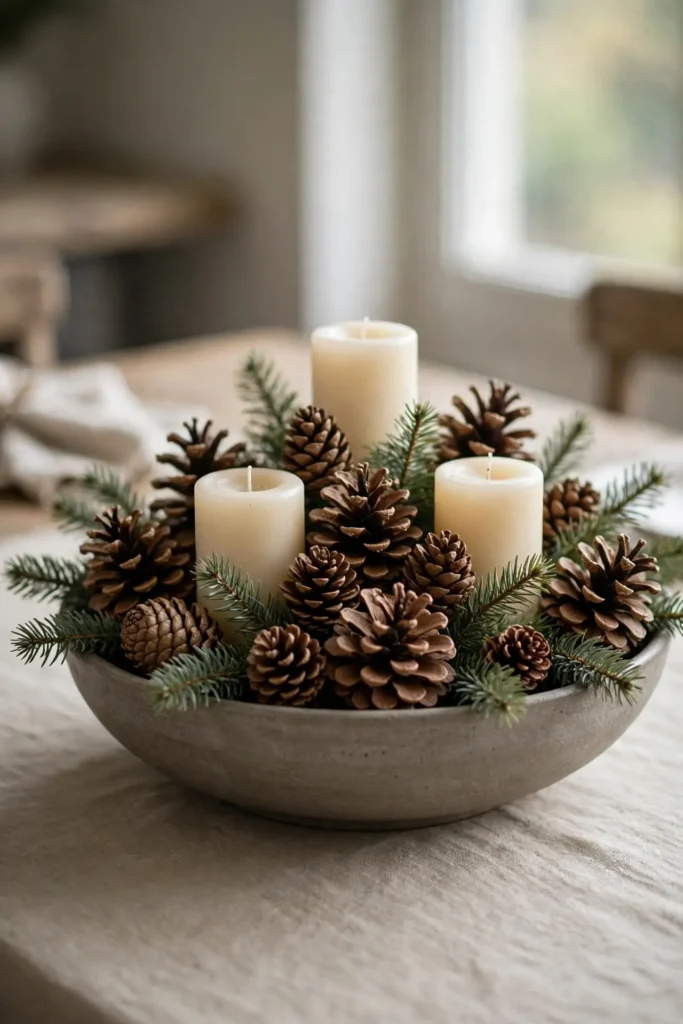
A dining table dressed only with a tablecloth can look unfinished, because a bare cloth gives no focal point. A pinecone centrepiece in a bowl gives the table a focal point, because a low bowl of cones, greenery, and candles reads as a woodland table. Steps: 1. Choose a low, wide bowl and fill it with a mix of large decorative pine cones and small cones. 2. Tuck sprigs of fresh fir or faux greenery between the cones and nest two or three pillar candles among them. 3. Place the bowl in the centre of the table and keep the candles clear of greenery when lit.
Try it: Keep the centrepiece low, no taller than a wine glass. A tall centrepiece blocks conversation across the table, while a low bowl lets guests see each other.
18
Pinecone Candle Holders
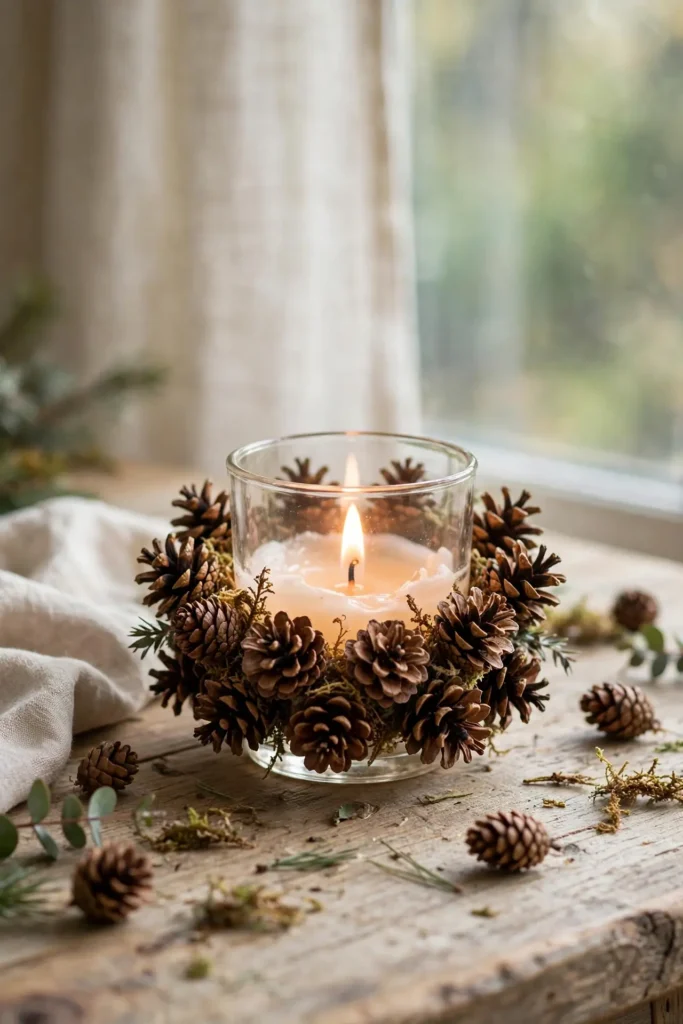
A table dressed only with plain candles can look bare, because a candle alone gives no texture. Pinecone candle holders, a ring of small cones around a candle, give the candle a woodland base, because the cones frame the flame. Steps: 1. Clean and bake small cones and glue them in a ring around the base of a glass candle holder, scales facing outward. 2. Let the glue dry fully, then set a candle inside the glass. 3. Place the holders on the table or mantel, keeping the cones clear of the flame at all times.
Try it: Use a glass holder between the candle and the cones, never an open flame next to dry cones. Dry cones catch fire easily, while glass keeps the flame safely separate.
19
Pinecone Place Card Holders
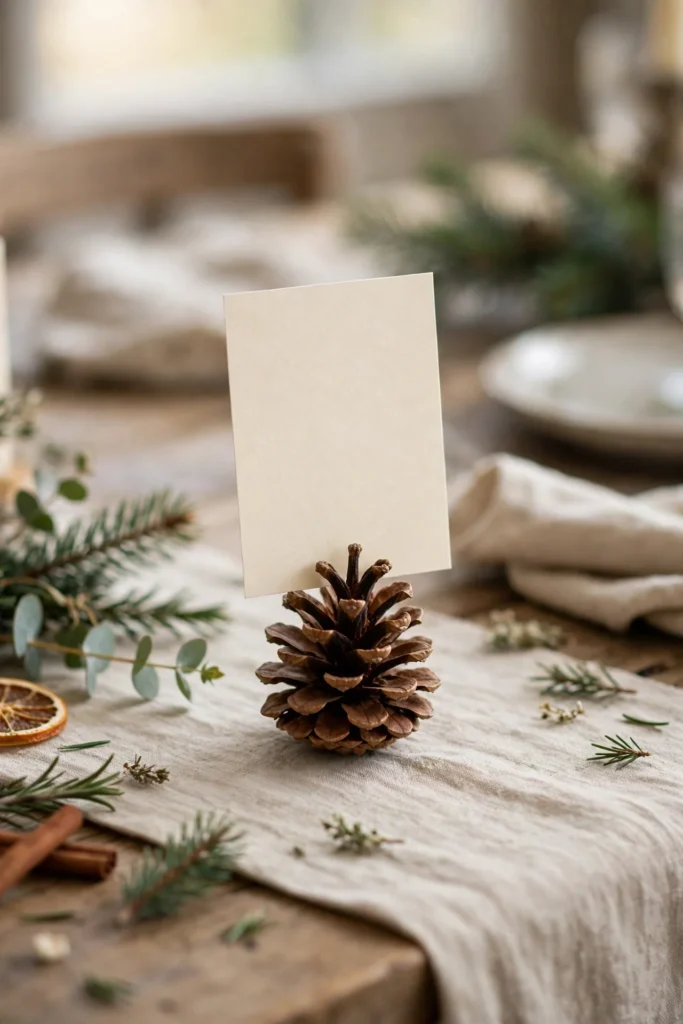
A Christmas table dressed only with plates can feel impersonal, because nothing on it names the guests. Pinecone place card holders, single cones holding a name card, give the table a personal touch, because each guest finds their own cone. Steps: 1. Clean and bake small cones with a flat base so they stand steady. 2. Cut a shallow slit across the top of each cone with a craft knife, or wire a small card clip to the top. 3. Write each guest name on a small card, slot it into the cone, and set one cone at each place.
Try it: Pick cones with flat bases, not round ones. A round based cone topples when the card goes in, while a flat based cone stands steady all through dinner.
20
Pinecone Basket Display
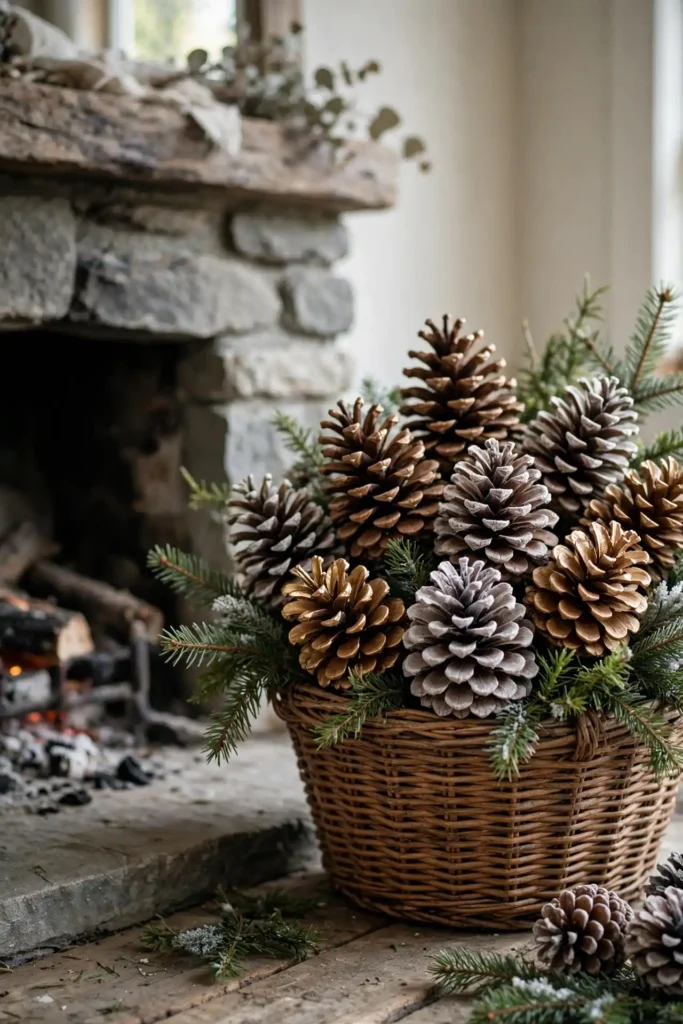
A fireplace hearth dressed only with logs can look utilitarian, because logs read as fuel, not decoration. A pinecone basket display, a basket of large pine cones for decorating beside the fire, gives the hearth a seasonal look, because the basket reads as gathered woodland. Steps: 1. Choose a sturdy basket and fill it with large pine cones, mixing natural, frosted, and gilded cones. 2. Tuck a few fir sprigs and a string of fairy lights among the cones, keeping lights clear of any real flame. 3. Set the basket beside the fireplace or by the front door, where guests see it on arrival.
Try it: Mix three finishes, natural, frosted, and gilded, in one basket. A basket of only natural cones reads as firewood, while mixed finishes read as decoration.
21
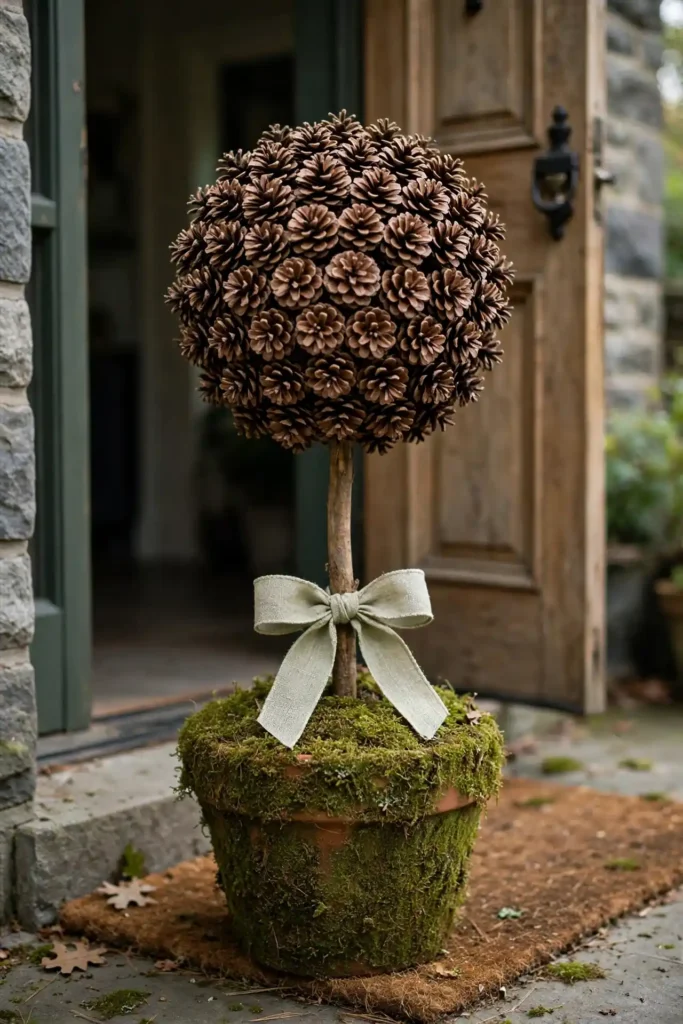
Pinecone Topiary
An entryway dressed only with a console table can look flat, because the table gives no height. A pinecone topiary, a ball of cones on a stem in a pot, gives the entryway height, because the ball sits at eye level. Steps: 1. Clean and bake small to medium cones and glue them all over a foam ball, scales facing outward, until no foam shows. 2. Push a wooden dowel into the ball as a stem and set it in a pot filled with plaster or floral foam. 3. Cover the pot filling with moss, add a bow at the stem base, and place the topiary by the door.
Try it: Glue the cones tightly, with no foam gaps. A topiary with foam showing reads as unfinished, while a fully covered ball reads as a solid pinecone sphere.
22
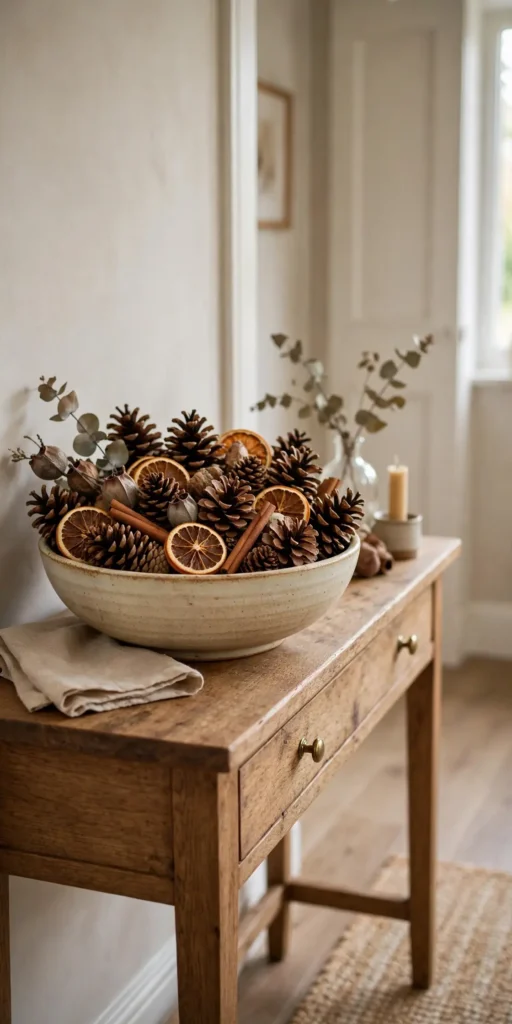
Scented Pinecone Bowl Filler
A hallway dressed only with a console table can smell of nothing, because a table gives no scent. Scented pinecone bowl filler, cones scented with cinnamon oil in a bowl, gives the hallway a Christmas smell, because the cones release scent for weeks. Steps: 1. Clean and bake cones and place them in a sealed bag with several drops of cinnamon essential oil. 2. Shake the bag and leave it sealed for a week, shaking once a day, so the scent soaks in. 3. Tip the cones into a bowl, add a few dried orange slices, and set the bowl in the hallway or on the mantel.
Try it: Scent the cones in a sealed bag for a full week, not a day. A day of scenting fades in days, while a week of scenting lasts through Christmas.
Pro tip: Bake every cone before you craft, even cones you bought as craft cones. A cone that is baked open, dry, and clean glues better, paints better, and never brings sap or bugs indoors, and the baking step takes less time than fixing a shedding wreath later.
Three rules for pinecone crafts that look intentional, not gathered
Most pinecone christmas crafts look unfinished for the same three reasons, and all three are fixable.
- First, clean and bake first, craft second. Cones that are dirty, damp, or closed shed scales, drop off wreaths, and bring sap onto tables, while baked cones hold glue and paint.
- Second, sort by size before you build. Large pine cones for decorating belong on wreaths and centrepieces, small pine cones for crafts belong on ornaments and garlands, and a build that mixes sizes without a plan looks accidental.
- Third, limit the finishes. One or two finishes per build, natural and frosted, or natural and gilded, read as designed, while natural, frosted, gilded, and glittered all on one wreath read as leftovers.
Storing and reusing your pinecone Christmas crafts
Pinecone christmas crafts last for years if you store them properly, and the storage step is part of the making, not an afterthought.
- First, store wreaths and garlands hanging, not stacked. Pinecone wreaths crush under weight and lose scales, so hang each wreath on a hook in a dry cupboard.
- Second, store ornaments in their own boxes. Pinecone ornaments chip and shed against each other, so tissue paper and a box per shape are worth the minute they take.
- Third, keep pinecones dry and away from damp. Pinecones close up and grow mould in a damp attic, so store pinecone crafts in a dry cupboard, and re-scent bowl filler cones each December instead of storing them scented.
Questions readers ask
How do I clean pinecones before crafting?
You clean pinecones before crafting by shaking off loose dirt outdoors, soaking them briefly in water with a splash of vinegar, rinsing them, and then baking them dry, because cleaning removes dirt, sap, and bugs before they reach your table. Never craft with uncleaned cones, since sap stains tables and bugs hide between closed scales.
How do I bake pinecones to open them?
You bake pinecones to open them by placing clean cones on a foil lined tray in a low oven, around 100 degrees Celsius, for one to two hours, until the scales open and the cones feel dry, because heat opens closed scales and kills bugs. Watch the cones while they bake, since the pine cone christmas tree how to make guides all start with this step for a reason.
What is the easiest pinecone christmas craft for beginners?
The easiest pinecone christmas craft for beginners is a scented pinecone bowl filler or a pinecone centrepiece in a bowl, because both need only clean cones, a bowl, and no glue, and mistakes are invisible. Start with a bowl filler, since it takes ten minutes and teaches you how to clean and bake cones.
How do I make a pinecone christmas tree?
You make a pinecone christmas tree by cleaning and baking a large cone, painting it green with a dry brush, gluing it to a wooden slice base, and adding tiny beads as baubles with a star on top, because the cone already grows in a tree shape. A pine cone christmas tree craft works best with a large, fully opened cone, not a small or half closed one.
How do I paint pinecones without closing them?
You paint pinecones without closing them by dry brushing or spray painting in thin coats, never soaking the cone in paint, because wet paint soaks between the scales and pulls them shut as it dries. Let each thin coat dry fully before adding the next, and the cone will keep its open shape.
Can kids make pinecone christmas crafts?
Yes, kids can make pinecone christmas crafts, and the best projects are pinecone centrepieces, scented bowl fillers, and painted pinecone ornaments, because all of them are safe, forgiving, and genuinely useful as decorations. Keep ovens, craft knives, and hot glue for adults, and let children choose colours and placements.
How long do pinecone christmas crafts last?
Pinecone christmas crafts last for many seasons when stored dry, because cones themselves are durable and only glue, paint, and scent fade over time. Re-glue any loose cones each December, touch up paint where it chips, and re-scent bowl filler cones, and a pinecone wreath or garland will last five years or more.
How do I store pinecone christmas crafts so they last?
You store pinecone christmas crafts so they last by hanging wreaths and garlands instead of stacking them, keeping ornaments in tissue lined boxes, and storing everything in a dry cupboard away from damp and sunlight. Stored this way, pinecone trees, wreaths, ornaments, and centrepieces will last for many seasons.
People Also Ask
What is the 70/30 rule for pinecone christmas crafts?
The 70/30 rule for pinecone christmas crafts means roughly 70 percent of the display stays as it is, and 30 percent carries pinecone decoration. The rule is a guide, not a law, but a room that follows it will read as festive rather than cluttered.
How do I make my pinecone crafts look shop bought, not homemade?
You make your pinecone crafts look shop bought, not homemade, by baking cones until fully open, sorting by size, gluing every cone firmly, and keeping one or two finishes across each build. A craft with open cones, firm glue, and a clear finish reads as designed, while dirty cones and mixed finishes read as a school project.
What pinecone christmas crafts should beginners avoid?
Beginners should avoid full pinecone wreaths and pinecone topiaries on a first attempt, because each of those needs many cones, firm wiring or gluing, and patience to cover a form fully. Start with a bowl filler, a centrepiece, or painted ornaments, and save wreaths and topiaries for a second session.
loved these ideas? ✿
Save this guide for later
Pin it to your board so it’s there when you’re ready to recreate it.

Curated by
Hey! I'm Sanaullah — visual curator and content creator. I search, curate, and test the best aesthetic ideas across Pinterest so you can easily transform your living space, style daily outfits, and try simple creative DIYs without the overwhelm.