
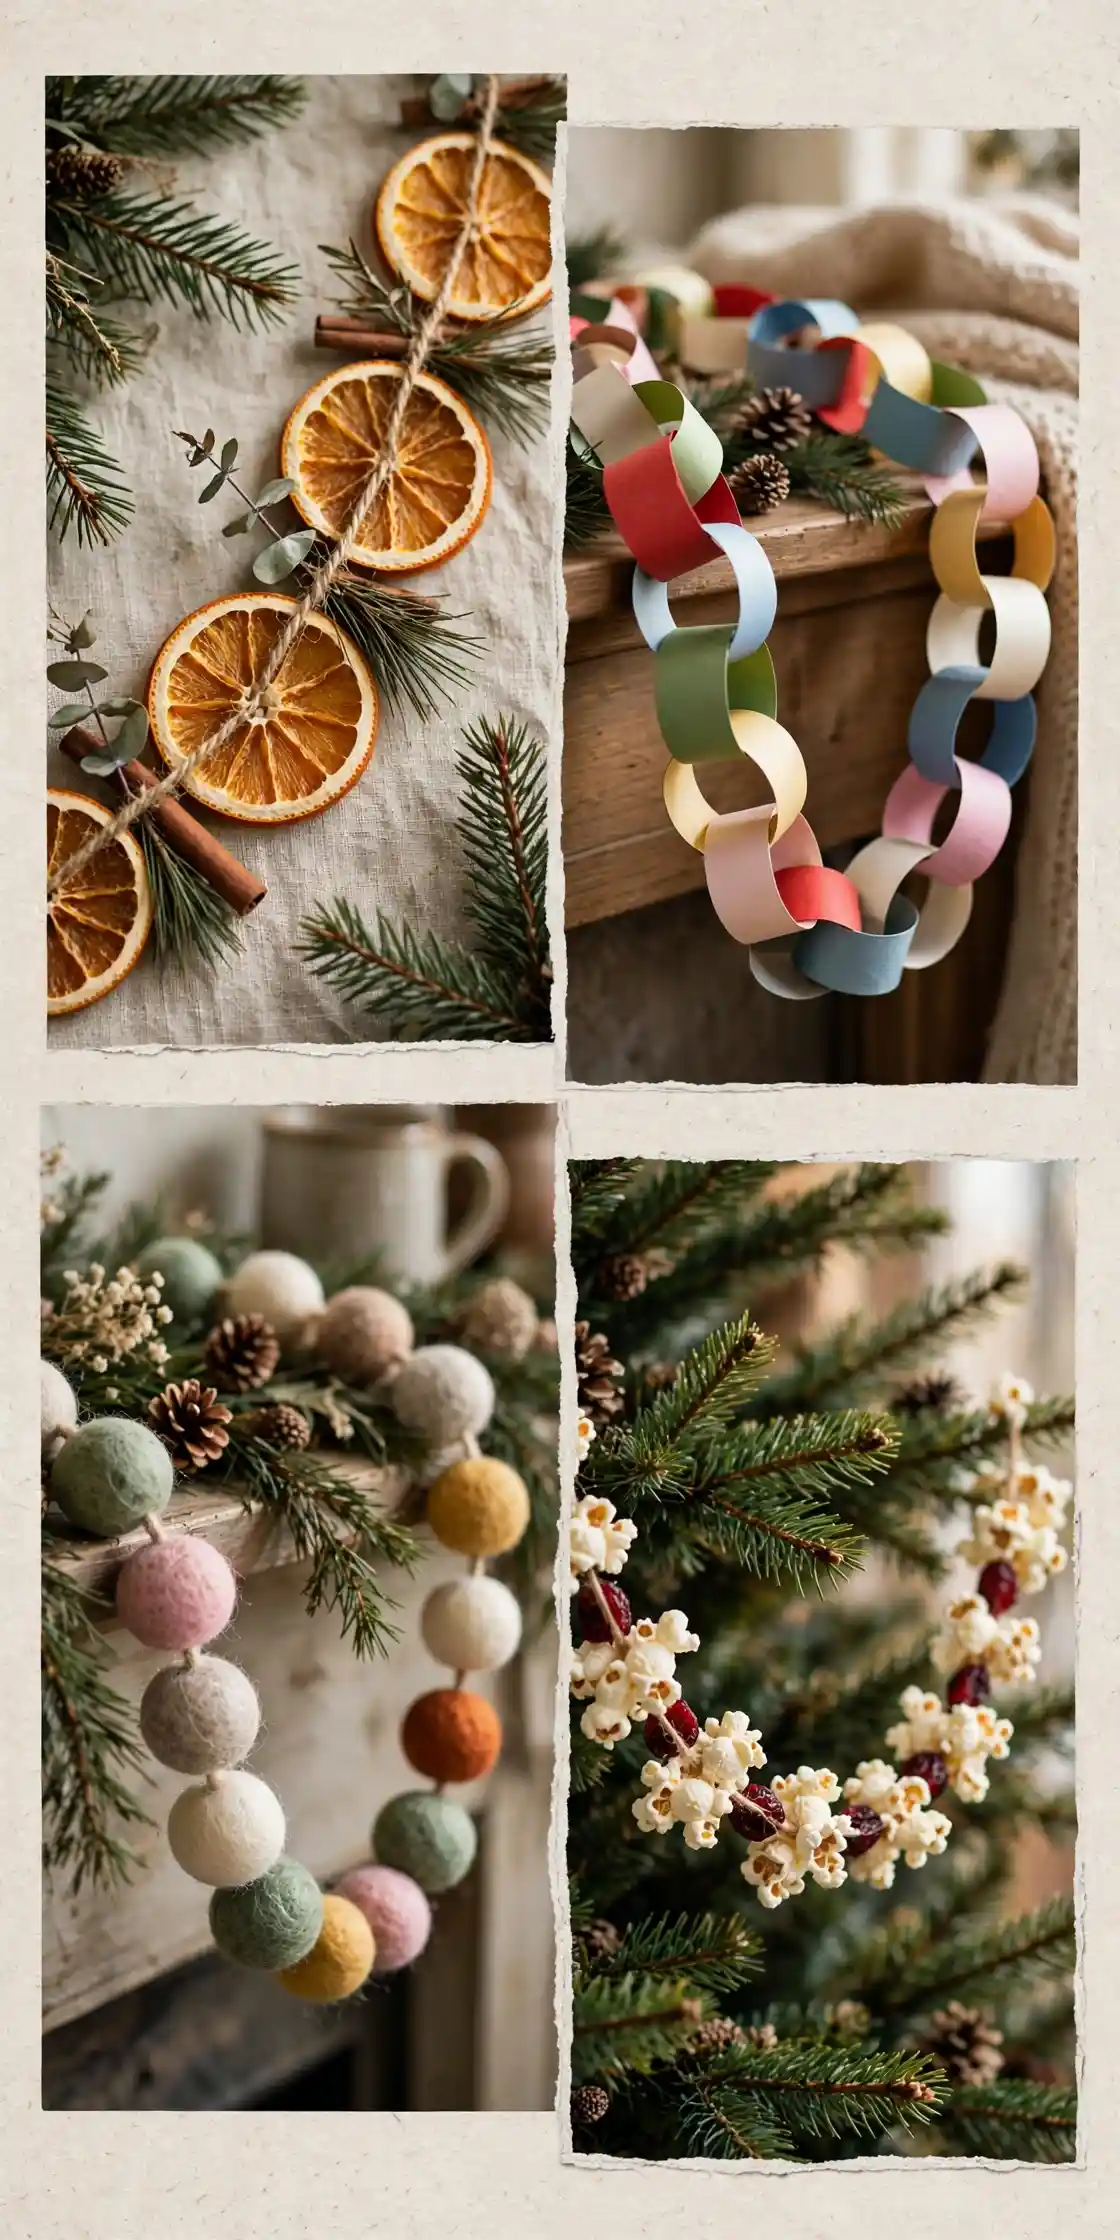
A shop bought garland can look perfect and still feel like someone else’s Christmas, because it arrived finished and you had no hand in it. A garland you make yourself feels like yours, because every branch, bead, and paper link went on by your own decision. Most diy christmas garland projects fail in the same way: people pick a garland type that does not suit their tools, string pieces too far apart so the garland looks thin, or run out of material halfway along the mantel, and end up with a half finished strand in a drawer. This list works the other way around. These 22 diy christmas garland ideas are grouped by build, fresh greenery, dried, paper, felt, bead, fabric, and food, and every idea comes with real make steps, a material list, and a hanging method, so you can pick one build, gather the supplies, and finish a garland in one afternoon. For the wider garland picture, including ready-made styles and every placement in the house, see Christmas Garland Ideas. Pick one build here, make it this weekend, and your mantel, tree, or staircase will carry a garland no other house on the street has.
- The key takeaway: The build decides the tools. A fresh garland wants wire and bundles, a paper garland wants scissors and glue, and a bead garland wants a needle and cord, so choose the build first and the supplies second.
- The detail most people miss: Make the garland longer than the spot. A garland cut to the exact length looks stretched, while a garland with extra length gives you swags and drops, because length is what makes a garland look generous.
- What it costs or how long it takes: Most of these 22 builds cost $3 to $30 in supplies, and each takes 20 minutes to 2 hours of active work. A paper chain garland sits at the bottom of the range, while a fresh fir garland on a wire base sits at the top, and every build here beats the price of the same garland bought finished.
| Group | Ideas | Materials | Best for |
|---|---|---|---|
| Fresh Greenery Builds | 01-04 | Fir, cedar, pine, eucalyptus, boxwood | Mantels, stairs and scented rooms |
| Dried Builds | 05-07 | Dried orange, flowers, cinnamon, star anise | Scented trees and hallway walls |
| Paper Builds | 08-10 | Coloured paper, card, glue, string | Kids crafts and budget decorating |
| Felt Builds | 11-13 | Wool felt, stuffing, embroidery thread | Soft garlands and family rooms |
| Bead and Bauble Builds | 14-16 | Wooden beads, baubles, gold beads, berries | Trees and mantels that need sparkle |
| Fabric Builds | 17-19 | Burlap, fabric scraps, yarn, ribbon | Farmhouse rooms and rustic trees |
| Food Builds | 20-22 | Popcorn, cranberries, gingerbread, peppermint | Kitchen trees and edible decorating |
Jump to an idea ↓
- 01 Fresh Fir Wired Garland
- 02 Cedar and Pine Mixed Garland
- 03 Eucalyptus Stair Garland
- 04 Boxwood Table Garland
- 05 Dried Orange Slice Garland
- 06 Dried Flower and Lavender Garland
- 07 Cinnamon and Star Anise Garland
- 08 Paper Chain Garland
- 09 Paper Snowflake Garland
- 10 Paper Fan Garland
- 11 Felt Ball Garland
- 12 Felt Star Garland
- 13 Felt Leaf Garland
- 14 Wooden Bead Garland
- 15 Bauble Garland DIY
- 16 Gold Bead and Berry Garland
- 17 Burlap Strip Garland
- 18 Fabric Scrap Rag Garland
- 19 Yarn Tassel Garland
- 20 Popcorn and Cranberry Garland
- 21 Gingerbread Garland
- 22 Peppermint Candy Garland
Fresh Greenery Builds
01
Fresh Fir Wired Garland
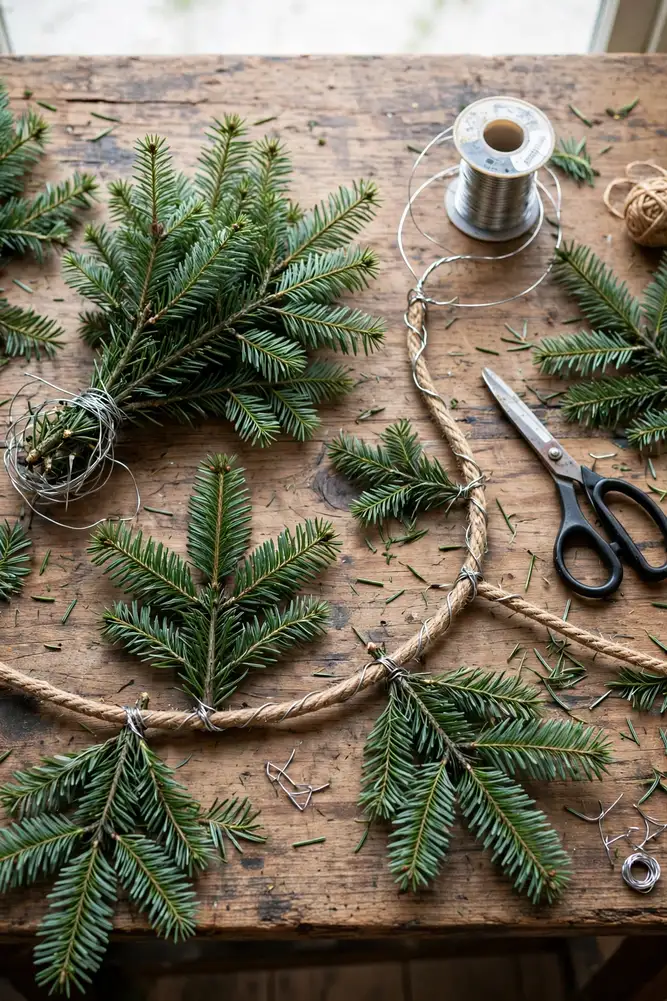
A bare mantel at Christmas can look unfinished, because a fireplace with nothing across it gives the eye nowhere to rest. A fresh fir wired garland fixes that with the classic build, because fir bundles wired onto a cord read as Christmas in under an hour. Steps: 1. Cut fresh fir branches into 20 cm sprigs and make small bundles of three sprigs each. 2. Lay the first bundle on a length of sturdy cord or wire, wrap florist wire around the bundle stems and the cord, and keep adding bundles in the same direction, overlapping each bundle over the last. 3. Finish the ends with a bow or a tuck, hang the garland with hooks at 60 cm intervals, and mist it every few days. A diy christmas garland in fresh fir suits a living room mantel best, because the scent greets visitors before they see the fireplace.
Try it: Wire the bundles in one direction only, all clockwise or all counter-clockwise. Bundles wired in mixed directions stick out at odd angles, while bundles wired one way lie flat like a bought garland.
02
Cedar and Pine Mixed Garland
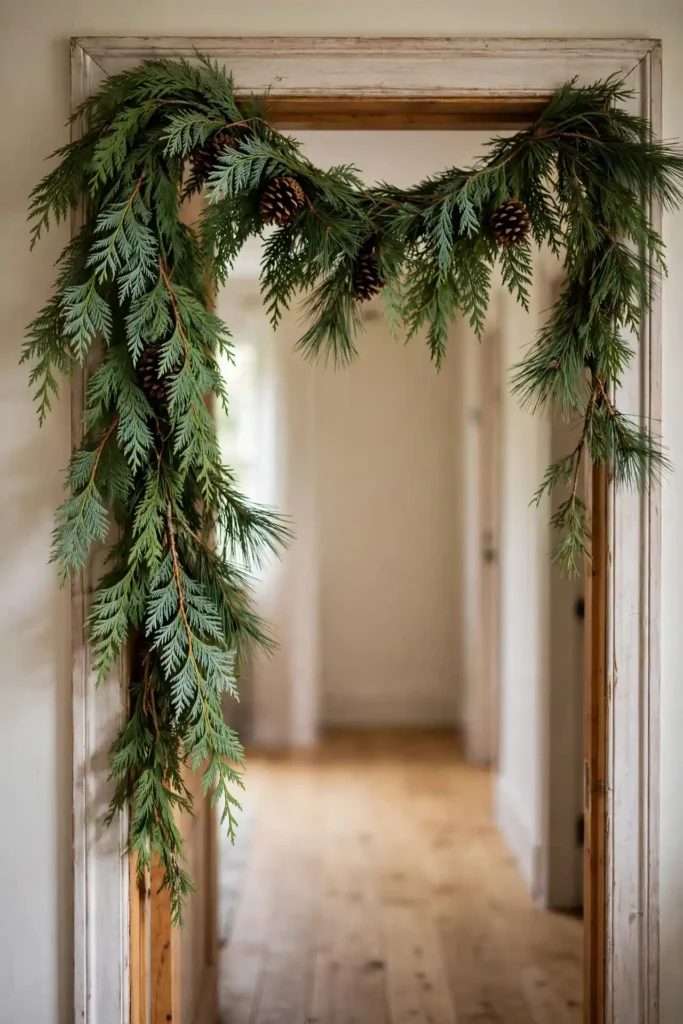
A fir garland on its own can look one note, because one green repeated gives one texture. A cedar and pine mixed garland breaks the flatness, because soft cedar fronds and stiff pine needles together read as a fuller, more interesting garland. Steps: 1. Buy one bunch of cedar and one bunch of pine, and cut both into 20 cm sprigs. 2. Make mixed bundles, two cedar sprigs and one pine sprig per bundle, and wire them onto a cord in one direction, overlapping each bundle over the last. 3. Add a few pinecones wired in at intervals, hang the garland on a mantel or doorway, and mist it lightly twice a week. A diy garland for christmas in mixed greenery suits a hallway doorway best, because the mixed texture shows from both sides.
Try it: Mix the cedar and pine in every bundle, not in separate sections. A garland built in sections reads as two garlands joined, while a garland mixed in every bundle reads as one full garland.
03
Eucalyptus Stair Garland
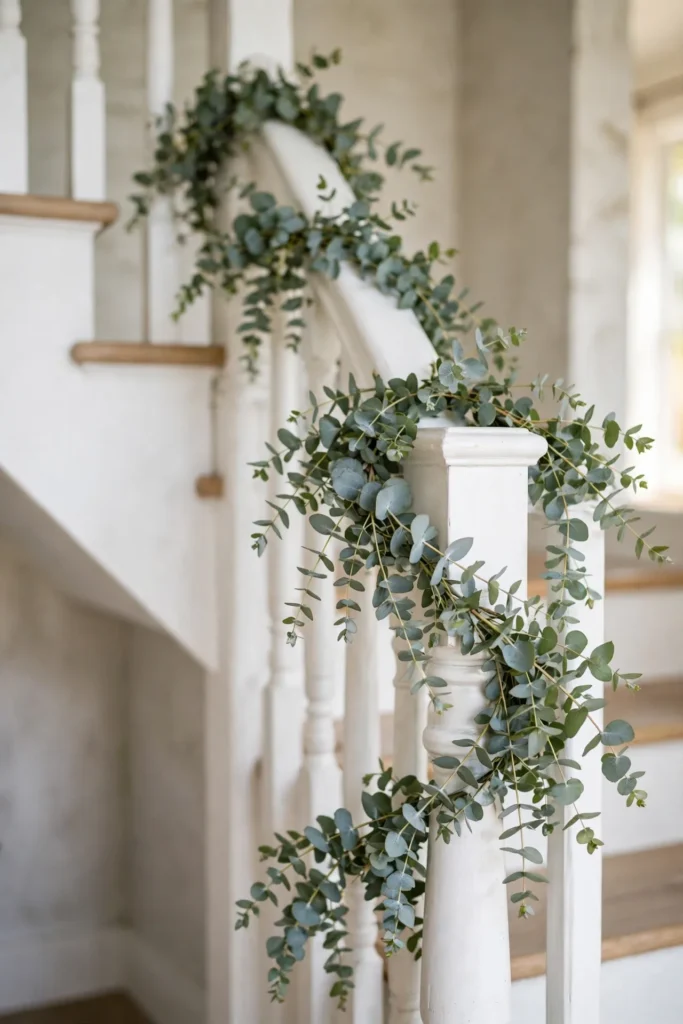
A staircase garland in heavy fir can droop and shed, because fir branches are stiff and dry fast in a heated hallway. A eucalyptus stair garland drapes better, because eucalyptus stems are flexible, light, and slow to dry. Steps: 1. Buy several bunches of fresh eucalyptus and cut the stems into 30 cm lengths. 2. Wire the stems into bundles and wire the bundles onto a long cord, overlapping each bundle over the last, until the garland matches your banister length plus 30 cm. 3. Wind the garland loosely around the banister, tying it at every second spindle, and let the ends drop at the newel posts. A diy garland for stairs in eucalyptus suits a bright hallway best, because the silver green leaves lift a pale staircase.
Try it: Wind the garland loosely around the banister, not tightly. A tightly wound garland looks strapped down, while a loosely wound garland swags naturally between ties.
04
Boxwood Table Garland
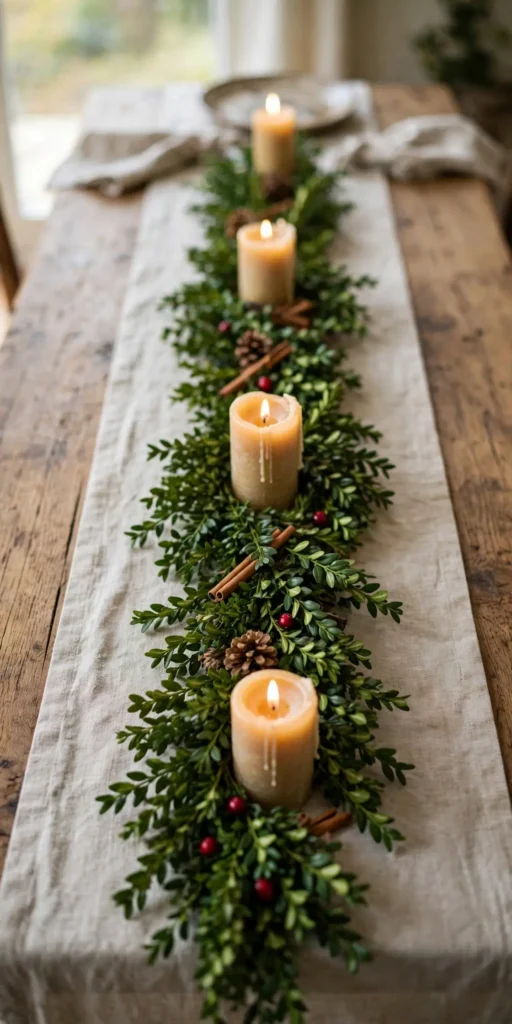
A Christmas table with only a centrepiece can look empty at the ends, because the decoration sits in one spot. A boxwood table garland runs the whole table, because the dense little leaves carry the decoration from end to end. Steps: 1. Buy fresh or faux boxwood stems and cut them into 15 cm sprigs. 2. Wire the sprigs into a slim garland on a cord, keeping it narrow, about 8 cm wide, so it leaves room for plates and glasses. 3. Lay the garland down the centre of the table, letting the ends drop slightly over each end, and set candles along it. A homemade christmas garland in boxwood suits a dining table best, because the slim, dense leaves read as a runner, not as a hedge.
Try it: Keep a table garland slim, about 8 cm wide, not full size. A full size garland crowds the plates, while a slim garland leaves room for glasses and cutlery.
Dried Builds
05
Dried Orange Slice Garland
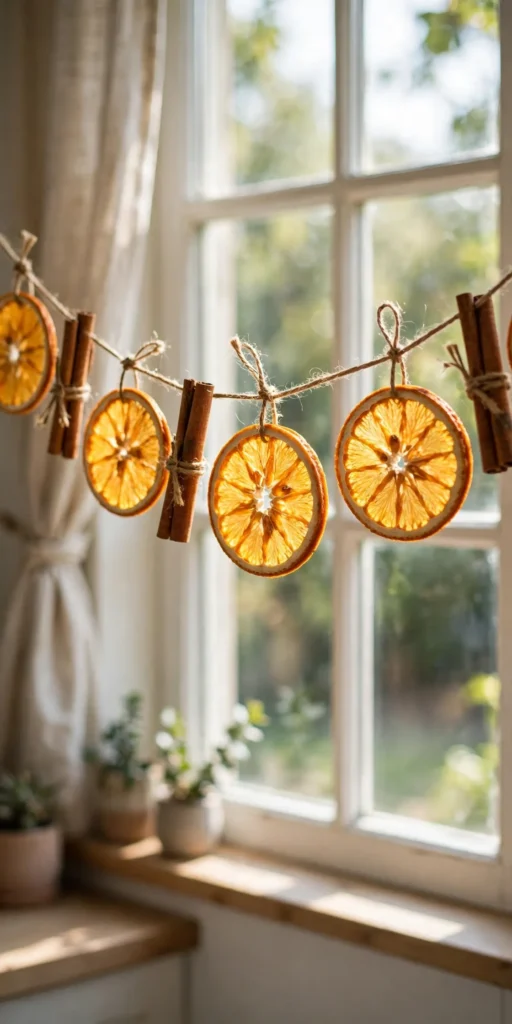
A fresh garland needs misting and lasts weeks, because fresh branches dry out in a heated room. A dried orange slice garland needs no misting at all, because dried fruit keeps its colour and scent for years in a dry cupboard. Steps: 1. Slice oranges about 5 mm thick and dry them in a low oven until fully crisp, turning them once. 2. Thread a needle with sturdy twine and pass it through the top of each slice, spacing the slices about 10 cm apart, and knot the twine behind each slice so it does not slide. 3. Add a cinnamon stick between every third slice if you like, and hang the garland across a mantel, a window, or a tree. A diy dried orange garland suits a kitchen window best, because the light shines through the slices like stained glass.
Try it: Dry the slices until fully crisp, not just warm. Half dried slices go soft and sticky within a week, while fully crisp slices stay firm all season.
06
Dried Flower and Lavender Garland
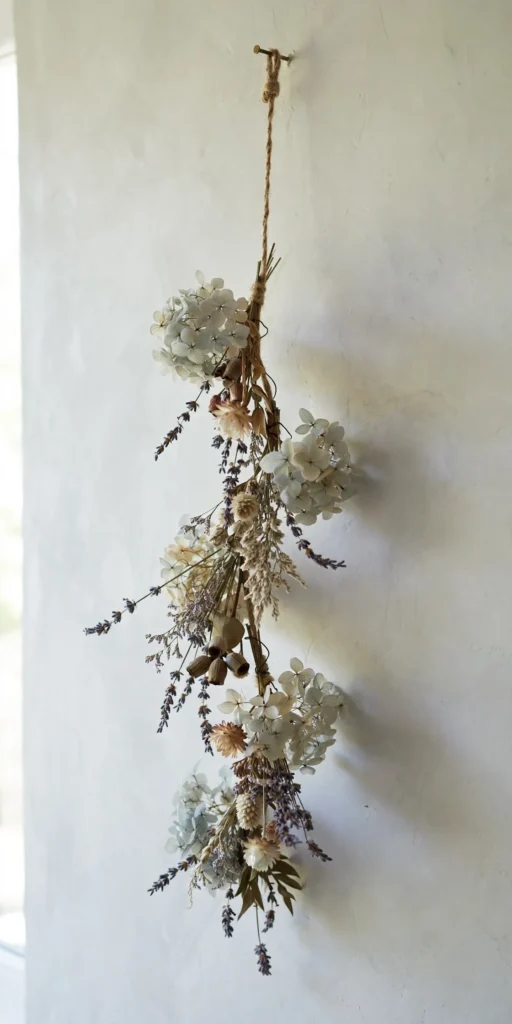
A garland in green alone can look dark in a pale room, because dark green fights light walls. A dried flower and lavender garland lightens the room, because pale lavender, strawflower, and hydrangea heads give soft colour without paint. Steps: 1. Dry flower heads fully, hanging them upside down for two weeks, or buy them ready dried. 2. Wire small bunches of flowers and lavender onto a cord, spacing the bunches about 15 cm apart, and fill the gaps with a little dried moss or eucalyptus. 3. Hang the garland on a pale mantel or a bedroom wall, where the light colours show best. A diy natural christmas garland in dried flowers suits a cottage bedroom best, because the flowers read as summer kept for winter.
Try it: Wire each flower bunch in, do not just tuck it. Flowers tucked loose fall out when the garland is brushed, while flowers wired in stay put all season.

07
Cinnamon and Star Anise Garland
A tree or mantel with no scented garland can smell of nothing, because plastic and glass give off no fragrance. A cinnamon and star anise garland fixes that, because the spice releases scent for weeks. Steps: 1. Take cinnamon sticks and star anise pieces, and thread them onto sturdy twine with a needle, alternating three cinnamon sticks and one star anise. 2. Knot the twine behind each piece so the pattern holds, and add a dried orange slice every 30 cm for colour. 3. Hang the garland on a tree, a mantel, or a doorway, away from direct heat. A make your own christmas garland in spice form suits a hallway tree best, because the scent greets visitors before they see the tree.
Try it: Knot the twine behind each spice piece, not just at the ends. A garland knotted only at the ends slides into a bunch, while a garland knotted behind each piece keeps its pattern.
Paper Builds
08
Paper Chain Garland
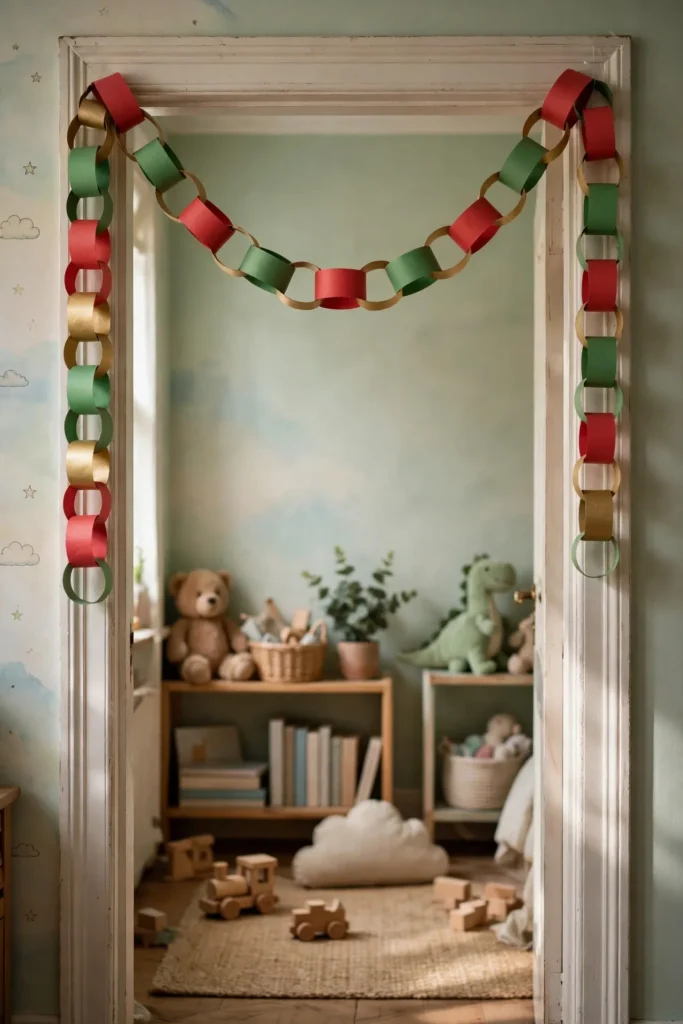
A shop bought garland can feel impersonal in a kids room, because nothing on it was made by the children. A paper chain garland fixes that, because paper links made by hand are the decoration children remember. Steps: 1. Cut coloured paper into strips, about 3 cm wide and 20 cm long, in two or three colours. 2. Loop the first strip into a circle and glue or staple the ends, then thread the next strip through the first loop and close it, repeating until the chain matches your spot. 3. Hang the chain across a doorway, a kids bedroom wall, or a tree, and keep it indoors, since paper suits a dry room. A christmas garland diy paper build in chain form is the best first garland for a beginner, because the materials cost almost nothing and a mistake costs one strip.
Try it: Alternate two or three colours in a set pattern, not randomly. A random chain reads as scraps, while a patterned chain reads as designed.
09
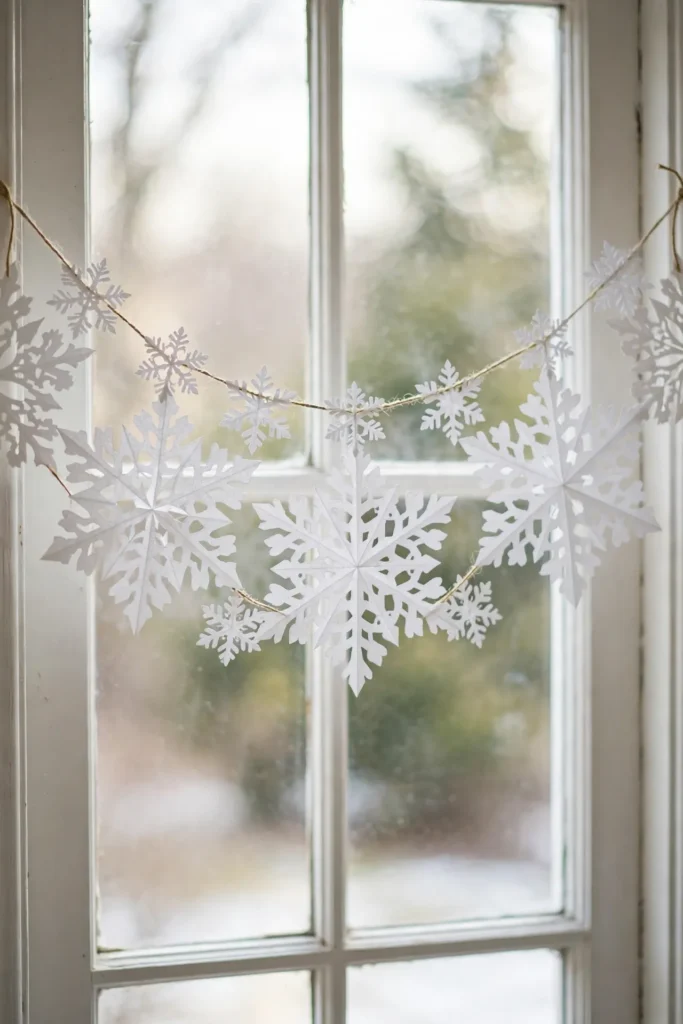
Paper Snowflake Garland
A paper chain can look simple on a window, because round links give no winter shape. A paper snowflake garland gives the window its winter, because snowflake cutouts strung together read as falling snow. Steps: 1. Fold white paper squares into triangles and cut small shapes from the folded edges, then open each one into a snowflake. 2. Make snowflakes in two sizes, large and small, and thread them onto a cord with a needle, alternating sizes and spacing them about 15 cm apart. 3. Hang the garland across a window or a wall, where the light shows through the cutouts. A christmas paper garland diy build in snowflake form suits a front window best, because the cutouts glow against the glass.
Try it: Cut the snowflakes from thin paper, not card. Card snowflakes hang stiff and heavy, while thin paper snowflakes flutter slightly and read as snow.
10
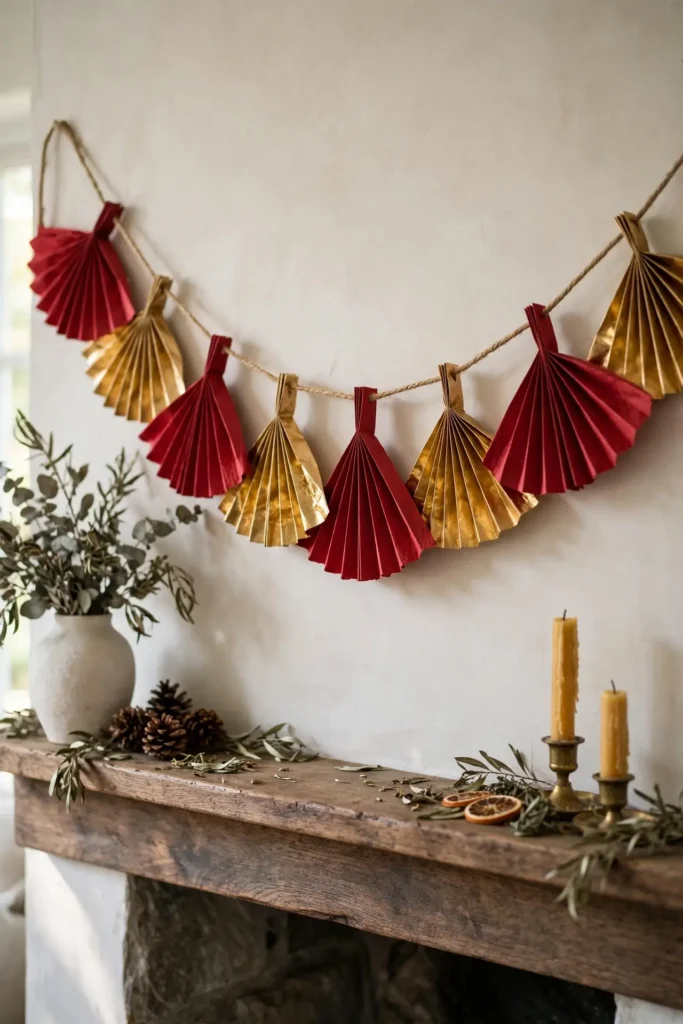
Paper Fan Garland
A flat paper garland can look two dimensional, because flat shapes give no depth. A paper fan garland gives depth, because folded fans stand out from the cord in every direction. Steps: 1. Cut coloured paper into rectangles and fold each one back and forth like an accordion. 2. Fold each accordion in half, glue the inner edges together to form a fan, and glue or tie the fans onto a cord, spacing them about 20 cm apart. 3. Alternate two colours, and hang the garland across a mantel or a party wall. A diy paper garland christmas build in fan form suits a party room best, because the fans read as celebration.
Try it: Glue each fan closed at the centre fold, not just at the edges. A fan glued only at the edges springs open, while a fan glued at the centre holds its shape.
Felt Builds
11
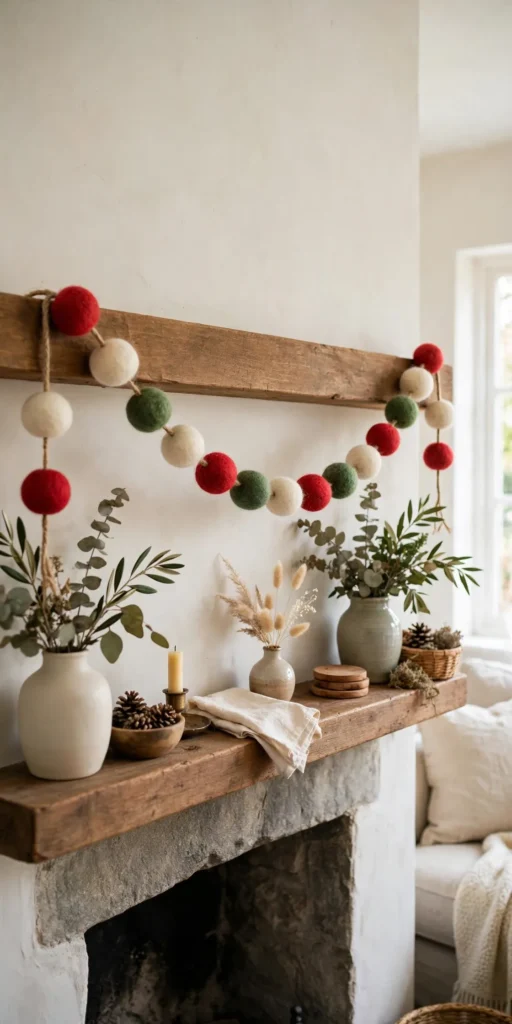
Felt Ball Garland
A garland in hard materials can feel cold in a family room, because glass and metal give no softness. A felt ball garland warms the room, because soft wool balls strung together read as handmade and gentle. Steps: 1. Buy or make felt balls in two or three colours, about 2 cm across, and thread a long needle with sturdy cord. 2. Pass the needle through the centre of each ball, spacing the balls about 5 cm apart, and knot the cord behind every fifth ball so the spacing holds. 3. Hang the garland across a mantel, a tree, or a kids bedroom wall. Homemade garland ideas in felt ball form suit a family room best, because the balls are soft enough for small hands and safe around pets.
Try it: Knot the cord behind every fifth ball, not behind every ball. A knot behind every ball makes the garland stiff, while a knot every fifth ball keeps it draped and flexible.
12
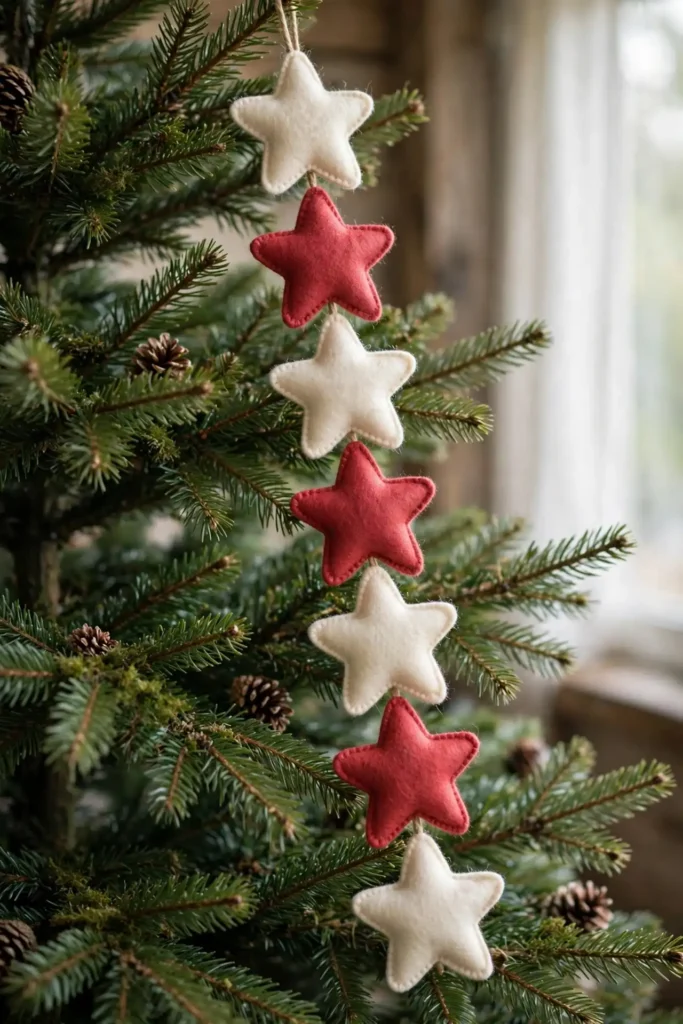
Felt Star Garland
A felt ball garland can look soft all over, because round balls give no shape. A felt star garland gives the garland its shape, because stars cut from felt read as Christmas at a glance. Steps: 1. Cut star shapes from wool felt in two colours, slightly larger than your hand, cutting two identical stars per star. 2. Sew or glue each pair together around the edges, leaving a small gap, stuff lightly with wool, and close the gap. 3. Thread the stars onto a cord through one point of each star, spacing them about 20 cm apart, and hang the garland on a tree or a wall. A diy holiday garland in felt star form suits a kids bedroom best, because the stars are soft, light, and made to be handled.
Try it: Stuff the stars lightly, not firmly. A firmly stuffed felt star looks like a cushion, while a lightly stuffed star keeps its flat star shape.
13
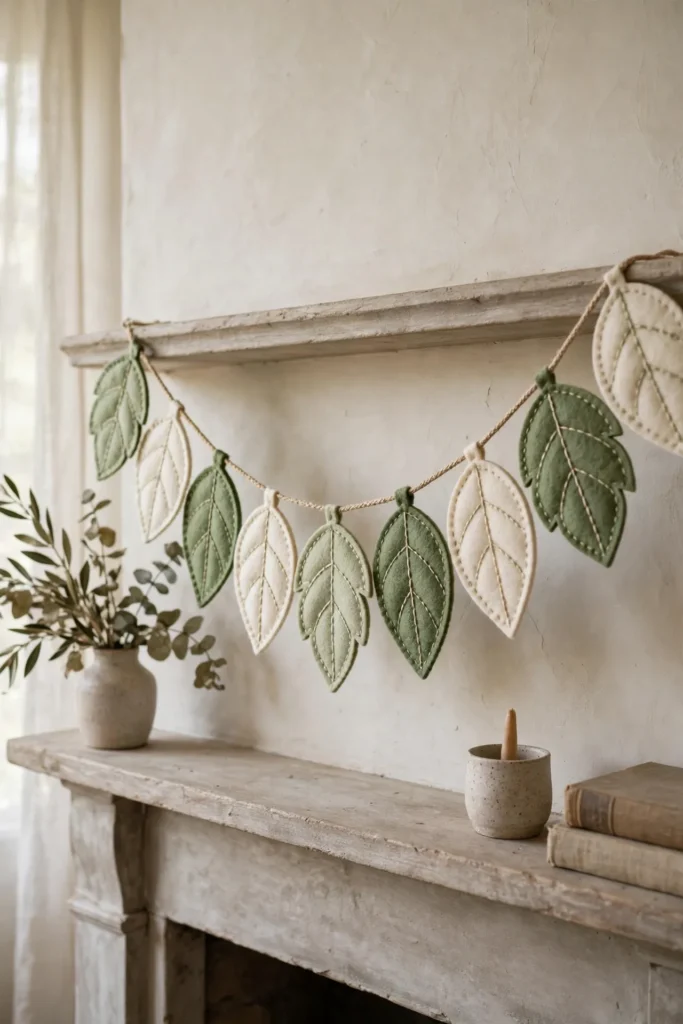
Felt Leaf Garland
A garland in stars and balls alone can look like a toy shop, because every shape is a symbol. A felt leaf garland calms the garland, because leaf shapes in green and cream read as foliage, not as toys. Steps: 1. Cut leaf shapes from green and cream felt, and stitch a simple vein down the centre of each leaf with embroidery thread. 2. Sew or glue the leaves onto a cord in pairs, facing opposite directions, spacing each pair about 10 cm apart. 3. Hang the garland across a mantel or a doorway, where the leaves read as a vine. Diy christmas garland ideas in felt leaf form suit a natural themed room best, because the leaves echo the tree and the wreath.
Try it: Stitch a vein down each leaf, do not leave the leaves plain. A plain felt leaf reads as a cutout, while a stitched vein reads as a leaf.
Bead and Bauble Builds
14
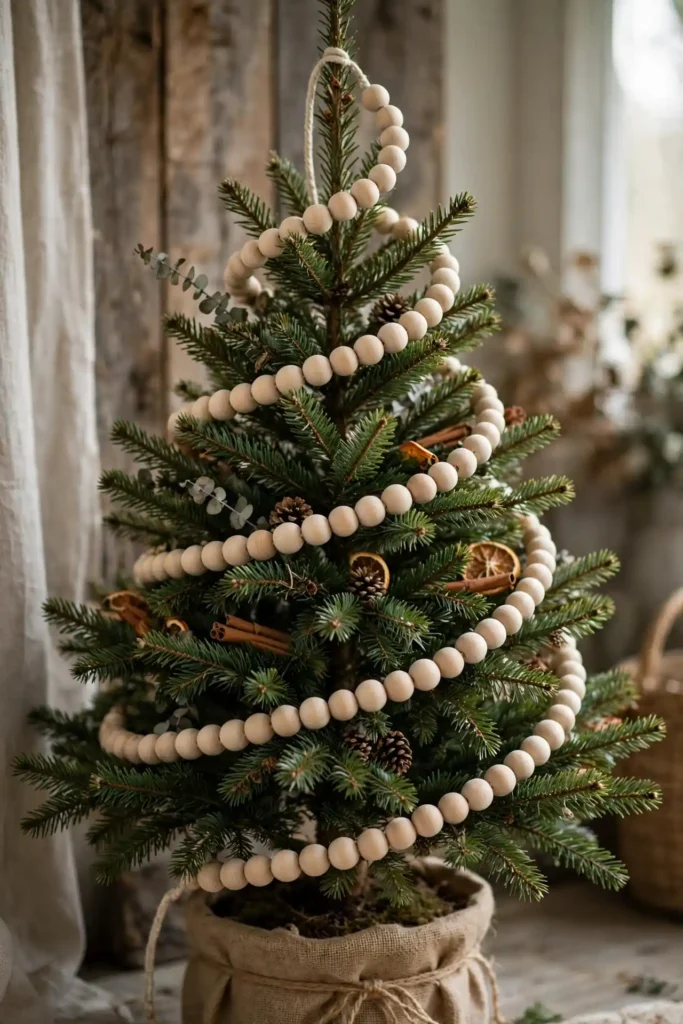
Wooden Bead Garland
A tree dressed only with baubles can look heavy, because round glass ornaments give the eye no light line to follow. A wooden bead garland gives the tree its line, because beads strung together spiral down the tree and tie the baubles together. Steps: 1. Buy wooden beads in one or two natural tones, about 2 cm across, and thread a long needle with sturdy cord. 2. Pass the beads onto the cord, alternating tones if you use two, and knot the cord every 30 cm so the beads do not all slide to one end. 3. Wind the bead garland down the tree in a loose spiral, fixing the ends behind branches. A diy ornament garland for tree use in wooden bead form suits a rustic tree best, because the wood reads as natural against green branches.
Try it: Knot the cord every 30 cm along a bead garland. A bead garland knotted only at the ends slides into a bunch at the bottom, while a garland knotted along its length keeps its spacing.
15
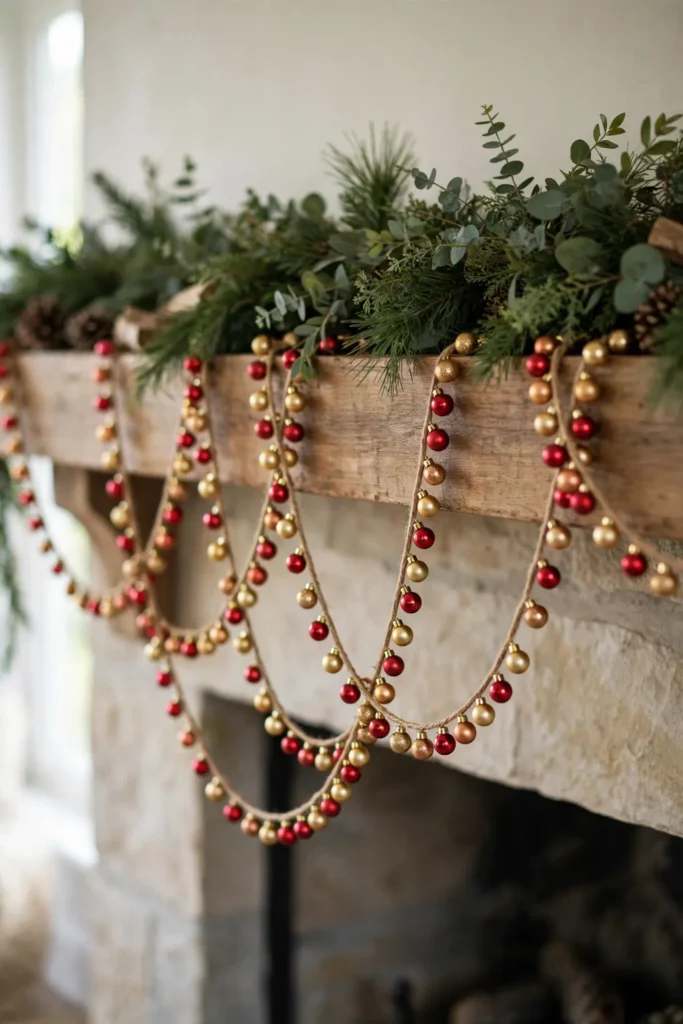
Bauble Garland DIY
A mantel garland can look green all over, because greenery dominates every garland. A bauble garland diy build breaks the green, because the whole garland is made of baubles strung together. Steps: 1. Buy small baubles in one colour family, about 40 for a mantel length garland, and thread them onto strong cord or wire through their caps. 2. Alternate two sizes if you like, large and small, and knot the cord behind every fifth bauble so the spacing holds. 3. Drape the bauble garland across a mantel, a staircase, or a doorway, and pair it with a plain greenery garland behind it, so the baubles show against the green. A bauble garland diy build is also a dollar tree christmas garland in disguise, because the form, the baubles, and the cord all come from one cheap shop for a few dollars.
Try it: Alternate two colours at most, not five. Five colours read as a jumble, while two colours read as a designed garland.
16
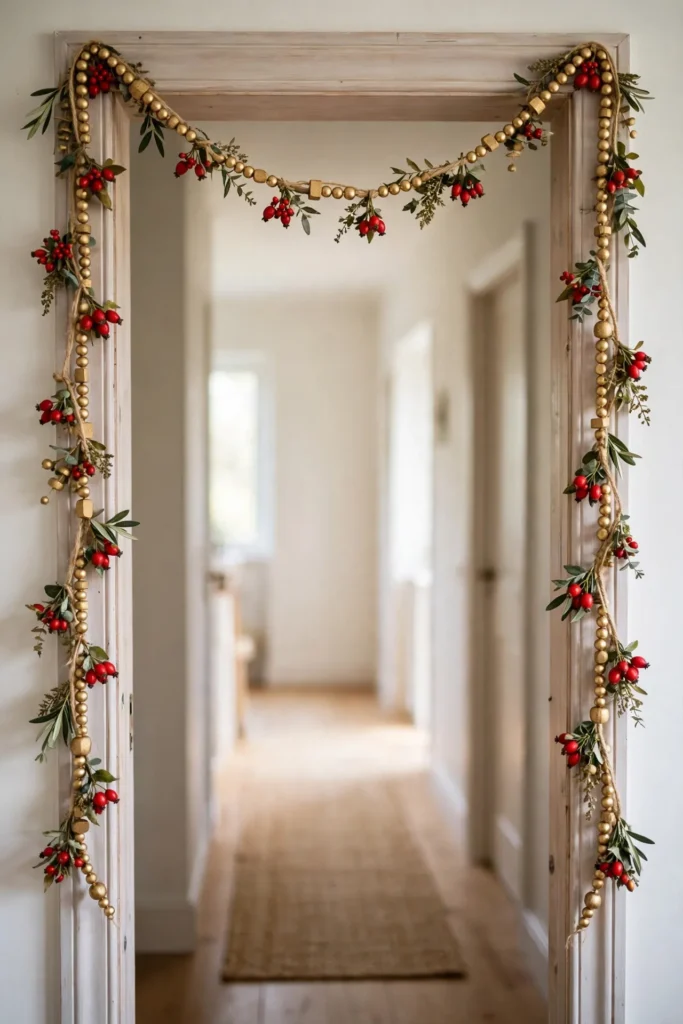
Gold Bead and Berry Garland
A doorway garland in green alone can look dark, because green on a dark door frame gives little contrast. A gold bead and berry garland lifts the doorway, because gold beads and red berries catch the light. Steps: 1. Buy gold wooden or glass beads and faux red berry clusters, and thread them onto sturdy cord, alternating three beads and one berry cluster. 2. Knot the cord behind each berry cluster so the pattern holds, and make the garland long enough to run up one side, across the top, and down the other side of the doorway. 3. Fix the garland with removable hooks at the top corners and the middle of the top run. A diy ornament garland for doorway use in gold and berry form suits a front hallway best, because the gold is what guests see first.
Try it: Fix the top run at three points, both corners and the middle, not just the corners. A top run held only at the corners sags in the middle, while a middle fixing keeps the garland level.
Fabric Builds
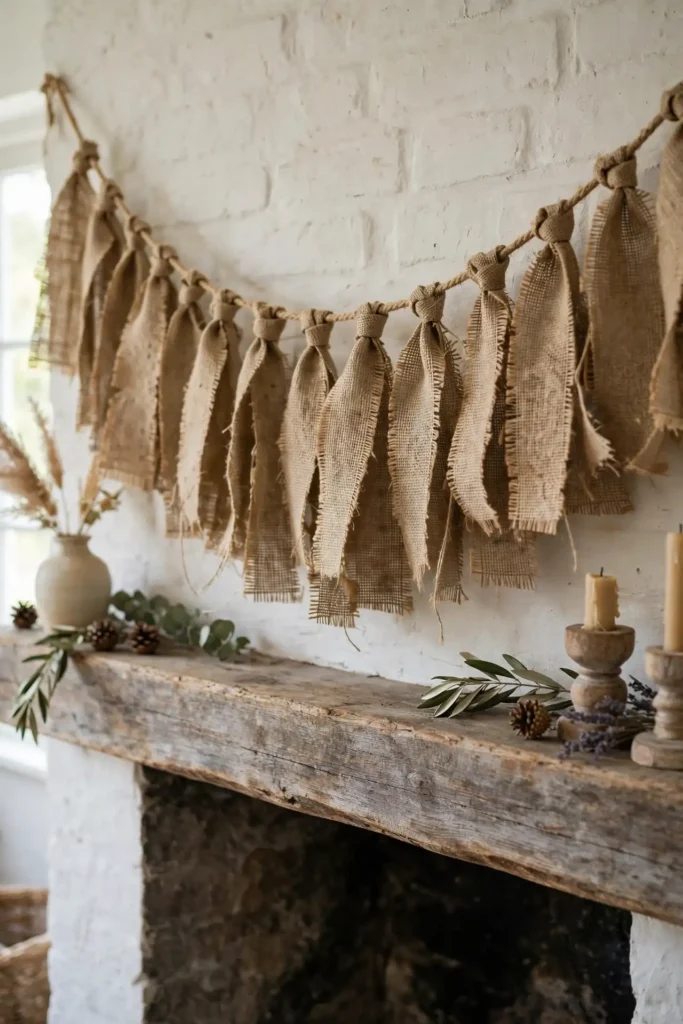
17
Burlap Strip Garland
A garland in shiny materials can look loud on a rustic mantel, because glitter fights natural wood. A burlap christmas garland calms the mantel, because rough woven strips read as farmhouse, not flash. Steps: 1. Cut burlap fabric into strips, about 5 cm wide and 25 cm long, and fray the long edges slightly by pulling a few threads. 2. Tie each strip onto a cord with a simple knot, spacing the strips about 3 cm apart, until the cord is covered. 3. Hang the garland across a mantel or a doorway, and keep it indoors, since burlap suits a dry room. A burlap strip garland suits a farmhouse living room best, because the rough weave echoes linen and wood elsewhere in the room.
Try it: Use wired burlap ribbon if you can find it, not plain burlap, for the strips. Plain burlap slips and bunches on the cord, while wired burlap holds its shape.
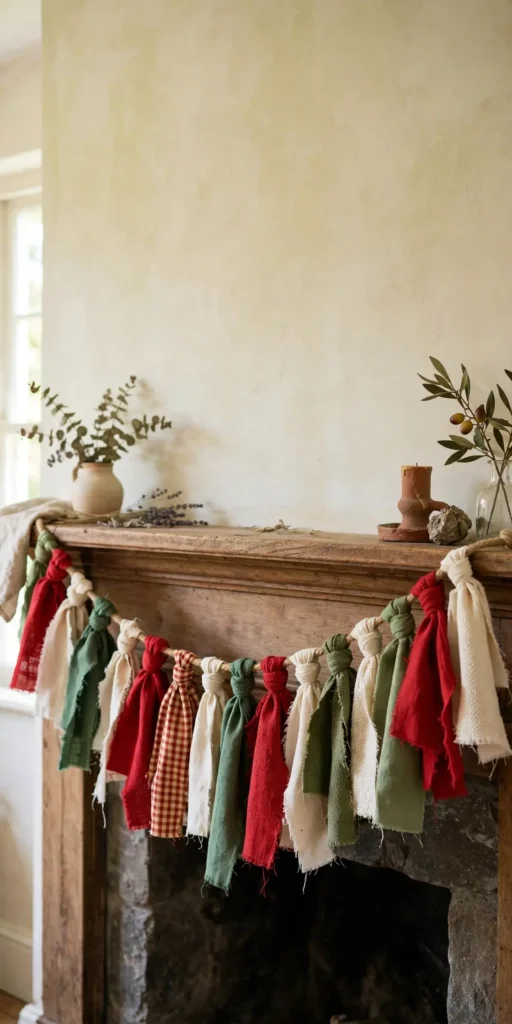
18
Fabric Scrap Rag Garland
A box of fabric scraps can sit in a cupboard for years, because nobody knows what to do with offcuts. A fabric scrap rag garland turns that box into a decoration, because coloured rags tied onto a cord read as a patchwork. Steps: 1. Cut fabric scraps into strips, about 4 cm wide and 20 cm long, in a palette of two or three colours. 2. Tie each strip onto a cord with a simple knot, packing the strips tightly until no cord shows. 3. Trim the strip ends to an even length if you like a tidy garland, or leave them uneven for a rustic look, and hang the garland across a mantel or a kids room wall. An inexpensive christmas garland in rag form is the cheapest fabric build in this list, because the material is already in the house.
Try it: Pack the strips tightly, with no cord showing between them. A rag garland with cord gaps reads as unfinished, while a tightly packed garland reads as a solid band of colour.
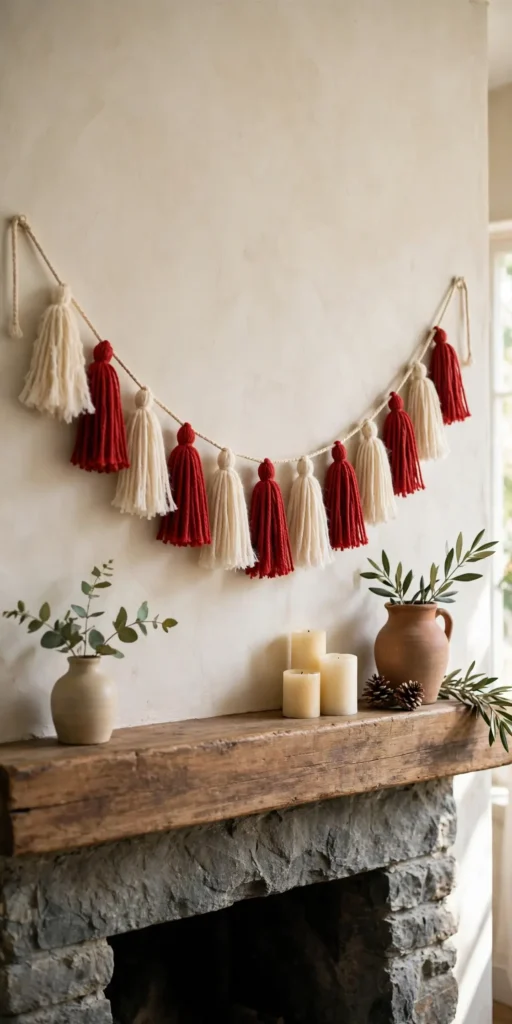
19
Yarn Tassel Garland
A garland in flat shapes can look two dimensional, because flat pieces give no movement. A yarn tassel garland adds movement, because hanging tassels sway when the garland is brushed. Steps: 1. Wrap yarn around a small piece of card about 20 times per tassel, tie the top of the bundle firmly, slide it off the card, and tie a second band near the top to form the tassel head. 2. Cut the bottom loops open and trim the ends evenly, then thread the tassels onto a cord through their top loops, spacing them about 20 cm apart. 3. Hang the garland across a mantel or a tree, and mix two yarn colours for depth. A diy christmas garland with ribbon can use the same tassel method with ribbon lengths instead of yarn, because the tassel head works for any soft material.
Try it: Wrap the yarn at least 20 times per tassel, not fewer. A tassel wrapped only a few times looks thin, while a tassel wrapped 20 times reads as full.
Food Builds
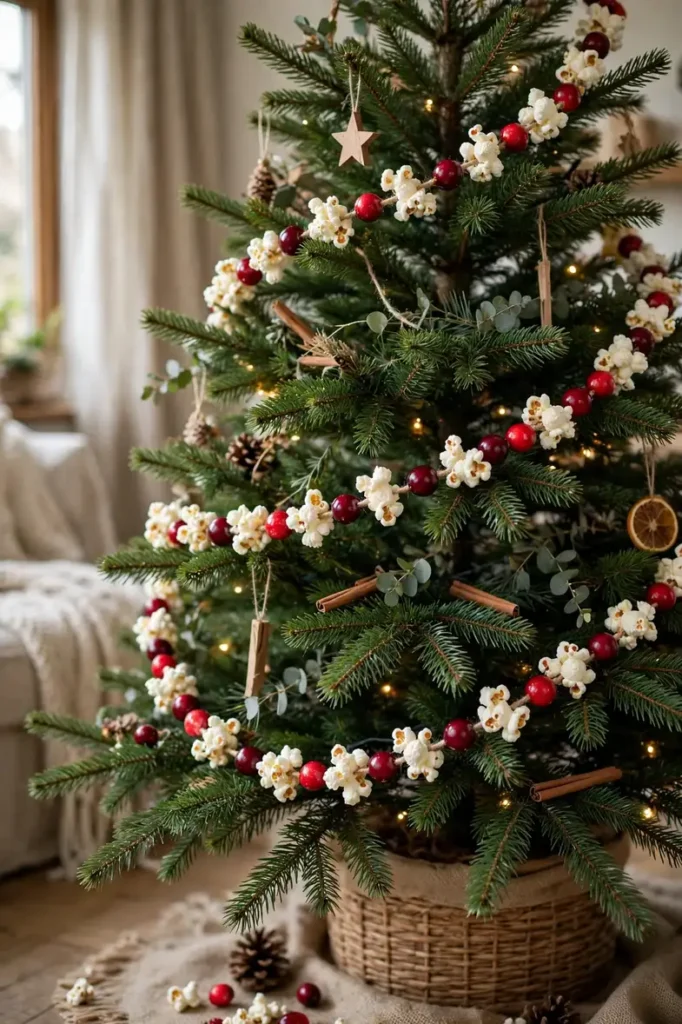
20
Popcorn and Cranberry Garland
A tree dressed only in shop bought ornaments can feel impersonal, because nothing on it was made by the family. A popcorn and cranberry garland fixes that, because the oldest tree garland is made by hand, one piece at a time. Steps: 1. Pop plain popcorn, without butter or salt, and let it cool fully, and sort fresh cranberries, discarding any soft ones. 2. Thread a long needle with sturdy thread, and pass it through the centre of each popcorn piece and cranberry, alternating three popcorn pieces and one cranberry. 3. Knot the thread every 30 cm so the pieces do not slide, and wind the garland around the tree, keeping it away from pets. A popcorn garland how to make project suits a family tree best, because stringing popcorn is the craft children remember.
Try it: Use plain popcorn, not buttered or salted. Buttered popcorn goes stale and greasy within days, while plain popcorn stays crisp for weeks on the tree.
21
Gingerbread Garland
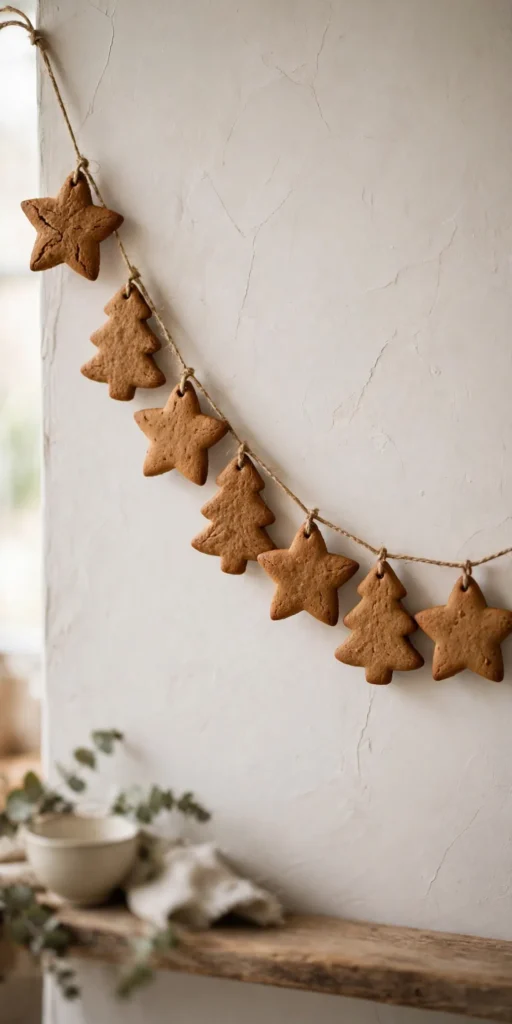
A garland in paper and felt can look like decoration only, because nothing on it smells of Christmas. A gingerbread garland smells of Christmas, because gingerbread shapes strung together release spice scent for weeks. Steps: 1. Bake small gingerbread shapes, stars, trees, and hearts, and poke a small hole near the top of each shape before baking. 2. Let the shapes cool fully and harden for a day, then thread them onto sturdy twine through the holes, spacing them about 15 cm apart. 3. Knot the twine behind each shape so the spacing holds, and hang the garland across a mantel or a kitchen wall. A diy gingerbread garland suits a kitchen best, because the scent belongs where the baking happens.
Try it: Bake the shapes until fully hard, not soft. A soft gingerbread shape bends and breaks on the twine, while a hard shape hangs cleanly all season.
22
Peppermint Candy Garland
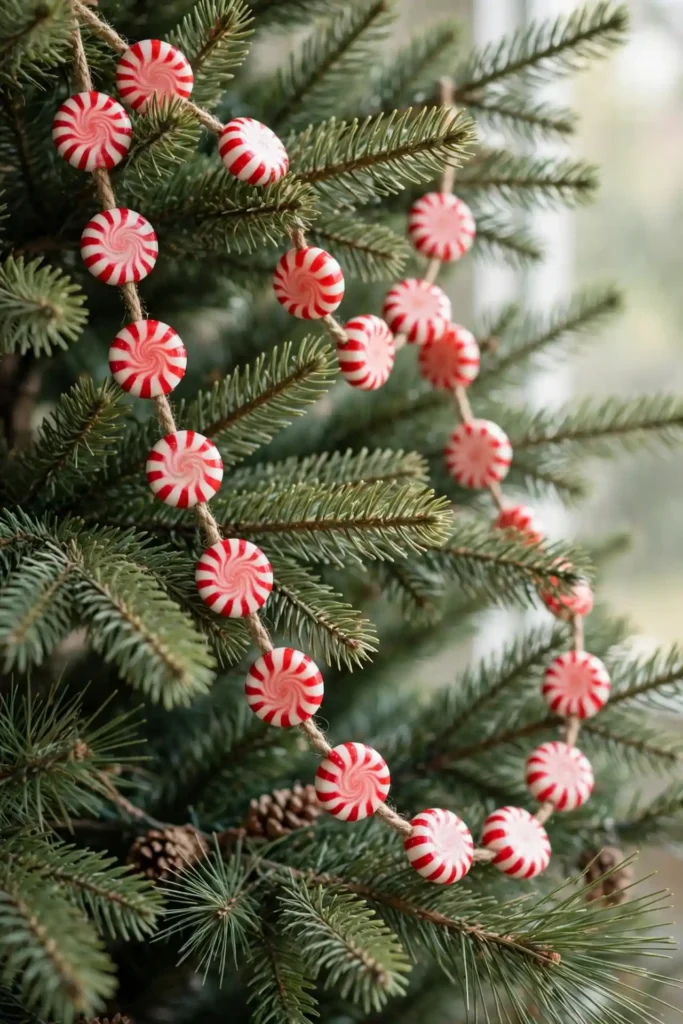
A garland in warm colours can look heavy, because reds and greens dominate every garland. A peppermint candy garland lightens the garland, because red and white candy reads as bright and crisp. Steps: 1. Buy peppermint candies with holes, or wrap hard peppermint sweets in small squares of cellophane and twist the ends closed. 2. Thread the candies onto sturdy cord, alternating red and white, and knot the cord behind each candy so the spacing holds. 3. Hang the garland on a tree or a mantel, and keep it out of damp, since candy softens in humidity. A diy peppermint garland, a candy garland diy build, suits a kids room tree best, because the candy is the part children notice first.
Try it: Wrap each candy in cellophane before threading, even if the candy has a hole. An unwrapped candy sticks to its neighbours in warmth, while a wrapped candy stays separate and clean.
Pro tip: Make the garland, then hang it and step back to the doorway before you add anything else. A garland that looks full from close up can look thin from the doorway, and a garland checked from the room entrance is the only one you can trust.
Three rules for DIY garlands that look intentional, not thrown together
Most diy christmas garlands look unfinished for the same three reasons, and all three are fixable.
- First, make it longer than the spot. A garland cut to the exact length looks stretched, while a garland with extra length gives you swags and drops to work with, because length is what makes a garland look generous.
- Second, fix the spacing as you go. A garland strung without knots slides into a bunch at the bottom, while a garland knotted behind every piece, or every fifth piece for beads and felt, keeps its pattern all season.
- Third, keep one palette per garland. A garland in one colour family, with one accent at most, reads as designed, while a garland in five mixed colours reads as leftovers, because the eye spots the jumble at once.
Storing and reusing your DIY Christmas garlands
DIY Christmas garlands last for years if you store them properly, and the storage step is part of the making, not an afterthought.
- First, store garlands hanging, not boxed flat. A garland crushed in a box loses its shape and sheds, so hang each garland on a hook in a dry cupboard or garage.
- Second, compost what has failed, keep what has lasted. A fresh fir garland, a popcorn garland, and a gingerbread garland should be composted in January, while dried orange, felt, bead, and fabric garlands keep for years.
- Third, keep stored garlands dry and out of sunlight. Faux greenery fades in sun and felt crushes under weight, so store paper, felt, bead, and fabric garlands in a dry cupboard away from direct sun, and check each one once before hanging each year.
Questions readers ask
How do you make a diy christmas garland?
You make a diy christmas garland by choosing one build, fresh greenery, dried, paper, felt, bead, fabric, or food, gathering the matching materials, and stringing, wiring, or tying the pieces onto a cord until the cord is fully covered. A christmas garland how to make project starts with the build, not the decorations, since the build decides whether you wire, glue, string, or tie.
What is the easiest diy christmas garland for beginners?
The easiest diy christmas garland for beginners is a paper chain garland or a popcorn and cranberry garland, because both need only paper or food, a cord, and glue or a needle, and mistakes hide easily under more links or more popcorn. Start with the paper chain build, since cutting and gluing is the whole job and it takes under 30 minutes.
How long should a diy garland be for a mantel or stairs?
A diy garland should be at least 30 cm longer than a mantel, and 60 cm longer if you want drops at the sides, because a garland cut to the exact length looks stretched. For stairs, a diy garland for staircase use should match the banister length plus enough to wind loosely around it, since a garland wound tight looks strapped down.
How do you keep a diy garland from sagging?
You keep a diy garland from sagging by fixing it every 60 cm along its length, not just at the ends, because gravity pulls on every unsupported section. A garland with baubles or beads should be fixed even more often, since the weight adds up along the run.
Can I make a christmas garland from dollar tree supplies?
Yes, you can make a christmas garland from dollar tree supplies, and the best builds are a bauble garland and a paper chain garland, because the baubles, the paper, and the cord all come from one shop for a few dollars. Buy all the baubles in one colour family, pack them tightly, and the finished garland reads as designed, not as cheap.
How do you dry orange slices for a garland?
You dry orange slices for a garland by slicing oranges about 5 mm thick and drying them in a low oven until fully crisp, turning them once. A slice dried until fully crisp stays firm all season, while a half dried slice goes soft and sticky within a week.
How long does a homemade christmas garland last?
A fresh homemade christmas garland lasts three to five weeks with misting and shelter, while a faux garland made from felt, beads, or fabric lasts for years with proper storage. A homemade garland built on a reusable cord can be refreshed each year, by swapping the greenery and keeping the cord, the wire, and the bows.
How do I store a diy garland so it lasts?
You store a diy garland so it lasts by hanging it on a hook in a dry cupboard, away from sunlight and weight. Stored this way, dried orange, felt, bead, and fabric garlands last for many seasons, while fresh and food garlands should be composted and only their reusable cords kept.
People Also Ask
What is the 70/30 rule for diy christmas garlands?
The 70/30 rule for diy christmas garlands means roughly 70 percent of the garland stays as its base material, and 30 percent carries decoration, such as baubles, bows, or berries. The rule is a guide, not a law, but a garland that follows it will read as full rather than cluttered.
How do I make my diy garland look shop bought, not homemade?
You make your diy garland look shop bought, not homemade, by covering the cord completely, knotting the spacing as you go, and keeping one colour family across the whole garland. A garland with no cord showing, firm spacing, and a clear palette reads as designed, while gaps, sliding pieces, and mixed colours read as a school project.
What diy christmas garlands should beginners avoid?
Beginners should avoid fresh fir wired garlands and gold bead and berry doorway garlands on a first attempt, because each of those needs careful wiring or long measuring to look clean. Start with a paper chain garland, a felt ball garland, and a popcorn and cranberry garland, and save wiring and doorway measuring for a second season.
loved these ideas? ✿
Save this guide for later
Pin it to your board so it’s there when you’re ready to recreate it.

Curated by
Hey! I'm Sanaullah — visual curator and content creator. I search, curate, and test the best aesthetic ideas across Pinterest so you can easily transform your living space, style daily outfits, and try simple creative DIYs without the overwhelm.