
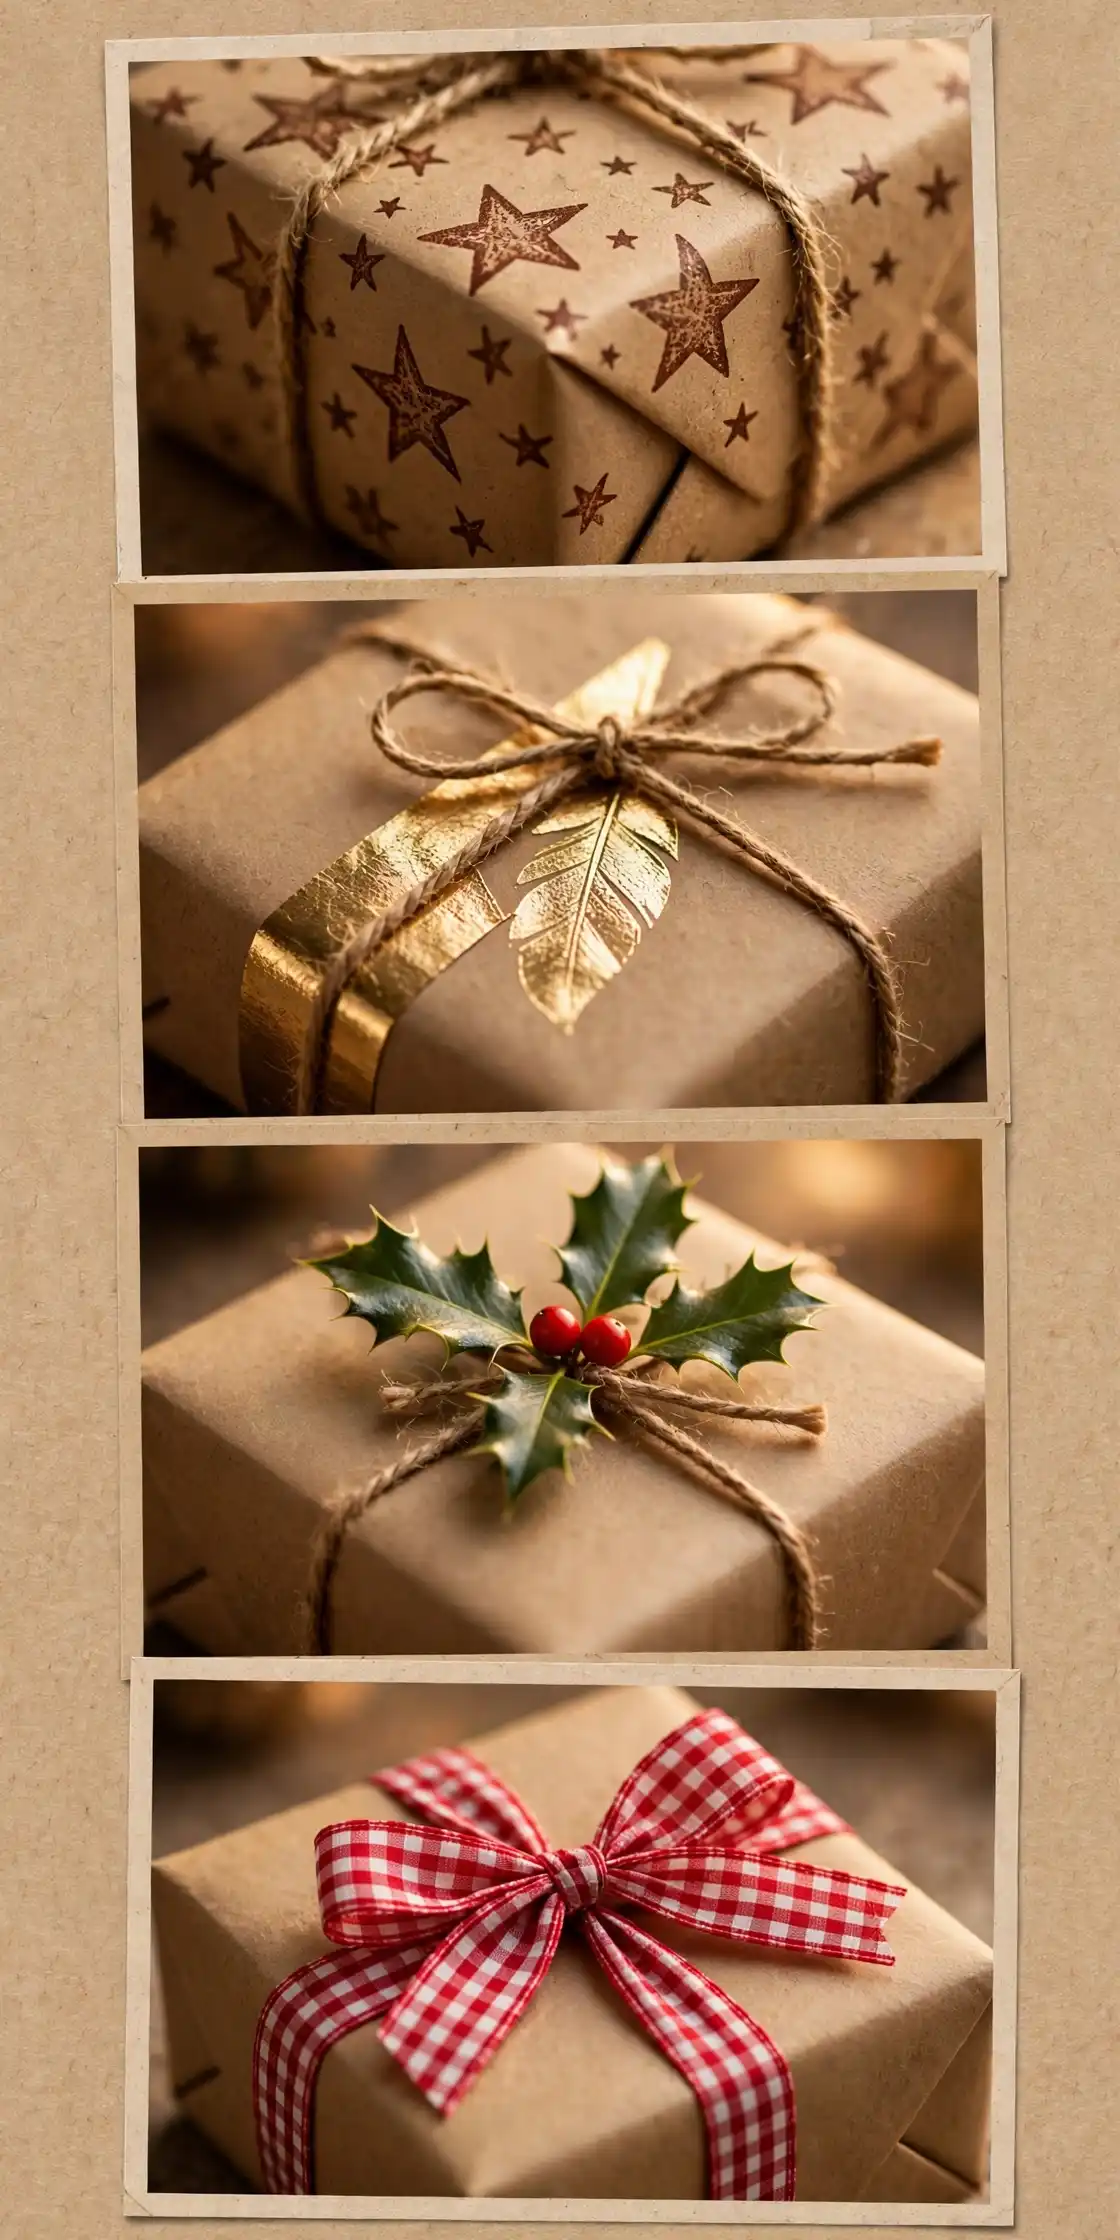
A pile of gifts in shiny patterned paper can look loud under a calm tree, because every box shouts a different print. A pile of gifts in brown paper looks calm from the doorway, because every box shares one warm colour, and the decorations you add are the only things that change. Most brown paper christmas wrapping fails in the same way: people wrap every gift in plain brown paper, add nothing, and wonder why the pile looks like parcels from the post office rather than presents. This list works the other way around. These 22 brown paper christmas wrapping ideas are grouped by treatment, stamps and prints, paper layers, colour pairings, natural toppers, tags and trims, and fabric and texture, so you can pick one treatment and carry it across every gift under the tree. If you want the fuller versions first, our Christmas Gift Wrapping Ideas covers 24 wraps for every gift and budget. Pick one group here, gather only what fits it, and your gifts will look rustic and considered, not plain and forgotten.
- The key takeaway: Brown paper is a background, not a finished wrap. One decoration system, stamps, layers, a colour pairing, or a topper, repeated across the pile, turns plain brown paper into a design, while undecorated brown paper just reads as unfinished.
- The detail most people miss: The paper weight matters more than the decoration. Thick kraft paper holds crisp folds and carries stamps cleanly, while thin brown paper tears at the corners and wrinkles under paint.
- What it costs or how long it takes: Most of these 22 ideas cost $5 to $25 in total for a whole tree of gifts, and each gift takes 5 to 20 minutes to wrap and decorate. Brown paper christmas wrapping is often the cheapest pile of presents you will ever dress, because a roll of kraft paper costs little and the decorations come from stamps, scraps, and the garden.
At a glance
| Group | Ideas | Materials | Best for |
|---|---|---|---|
| Stamps and Prints | 01-04 | Potato, stencil, rubber stamp, chalk | Handmade, personal piles |
| Paper Layers | 05-08 | Doilies, sheet music, maps, tissue | Vintage and romantic piles |
| Colour Pairings | 09-12 | Foil, gingham, velvet, twine | Bold, modern rustic piles |
| Natural Toppers | 13-16 | Citrus, rosemary, spice, holly | Scented, farmhouse piles |
| Tags and Trims | 17-19 | Kraft tags, photos, bells | Personal gifts and keepsakes |
| Fabric and Texture | 20-22 | Pom-poms, thread, fabric strips | Soft, tactile piles |
Jump to an idea ↓
- 01 Potato Print Christmas Trees
- 02 Stencil Snowflake Repeat
- 03 Hand-Carved Rubber Stamp Border
- 04 White Chalk Doodle Wrap
- 05 Doily Overlay Wrap
- 06 Sheet Music Wrap
- 07 Old Map Wrap
- 08 Tissue Paper Ruffle Wrap
- 09 Brown and Gold Foil Accents
- 10 Brown and Red Gingham Bow
- 11 Brown and Green Velvet Ribbon
- 12 Brown and White Striped Twine Crosshatch
- 13 Dried Citrus Garland Across the Box
- 14 Mini Rosemary Wreath Topper
- 15 Cinnamon and Star Anise Cluster
- 16 Holly and Red Berry Sprig
- 17 Layered Kraft Tag Stack
- 18 Photo Tag on Twine
- 19 Jingle Bell Cluster Trim
- 20 Pom-Pom Trim
- 21 Embroidered Running Stitch Border
- 22 Fabric Strip Bow
Stamps and Prints
01
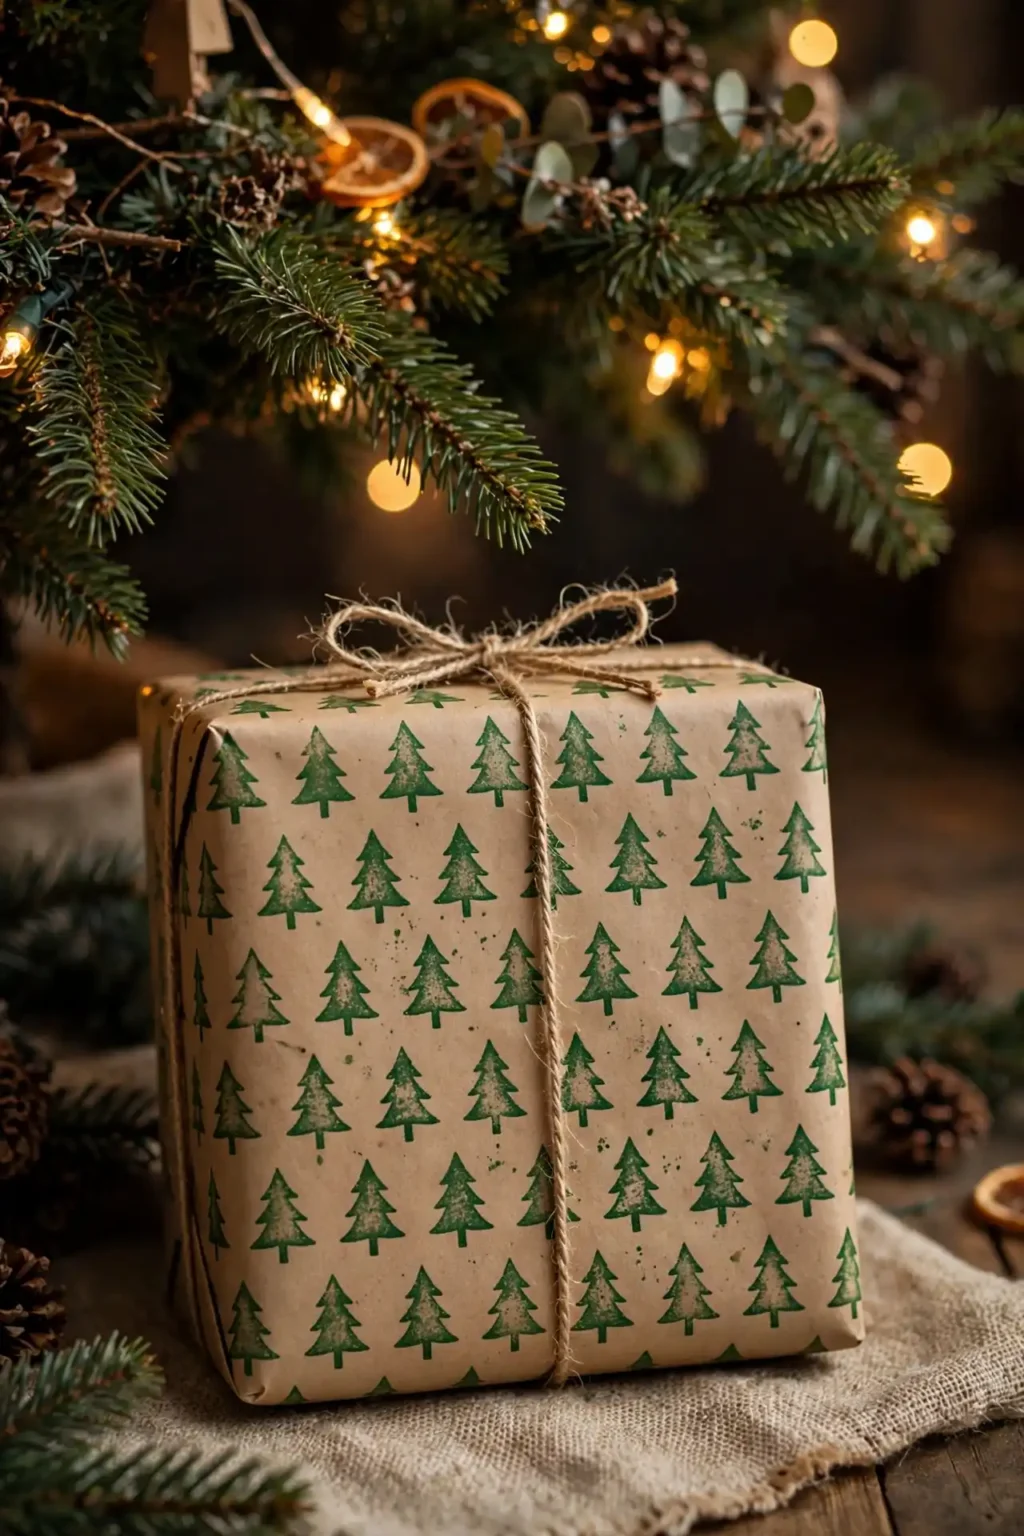
Potato Print Christmas Trees
A gift wrapped in plain brown paper can look like a parcel, because brown paper on its own carries no Christmas at all. Potato print Christmas trees change that in minutes, because a potato cut into a tree shape, dipped in green paint, and pressed in rows across brown paper wrapping paper christmas style turns the paper itself into the decoration. Steps: 1. Cut a potato in half and carve a simple tree shape into the flat side with a knife. 2. Brush the carved face with green paint, not too thick, and press it onto the brown paper in neat rows, re-inking each time. 3. Let the prints dry fully, then wrap the gift with the printed side out and finish with plain twine.
Try it: Print the paper flat before you wrap the gift, not after. Prints made on a wrapped box smudge at the corners, while prints made on flat paper stay crisp across the whole sheet.
02
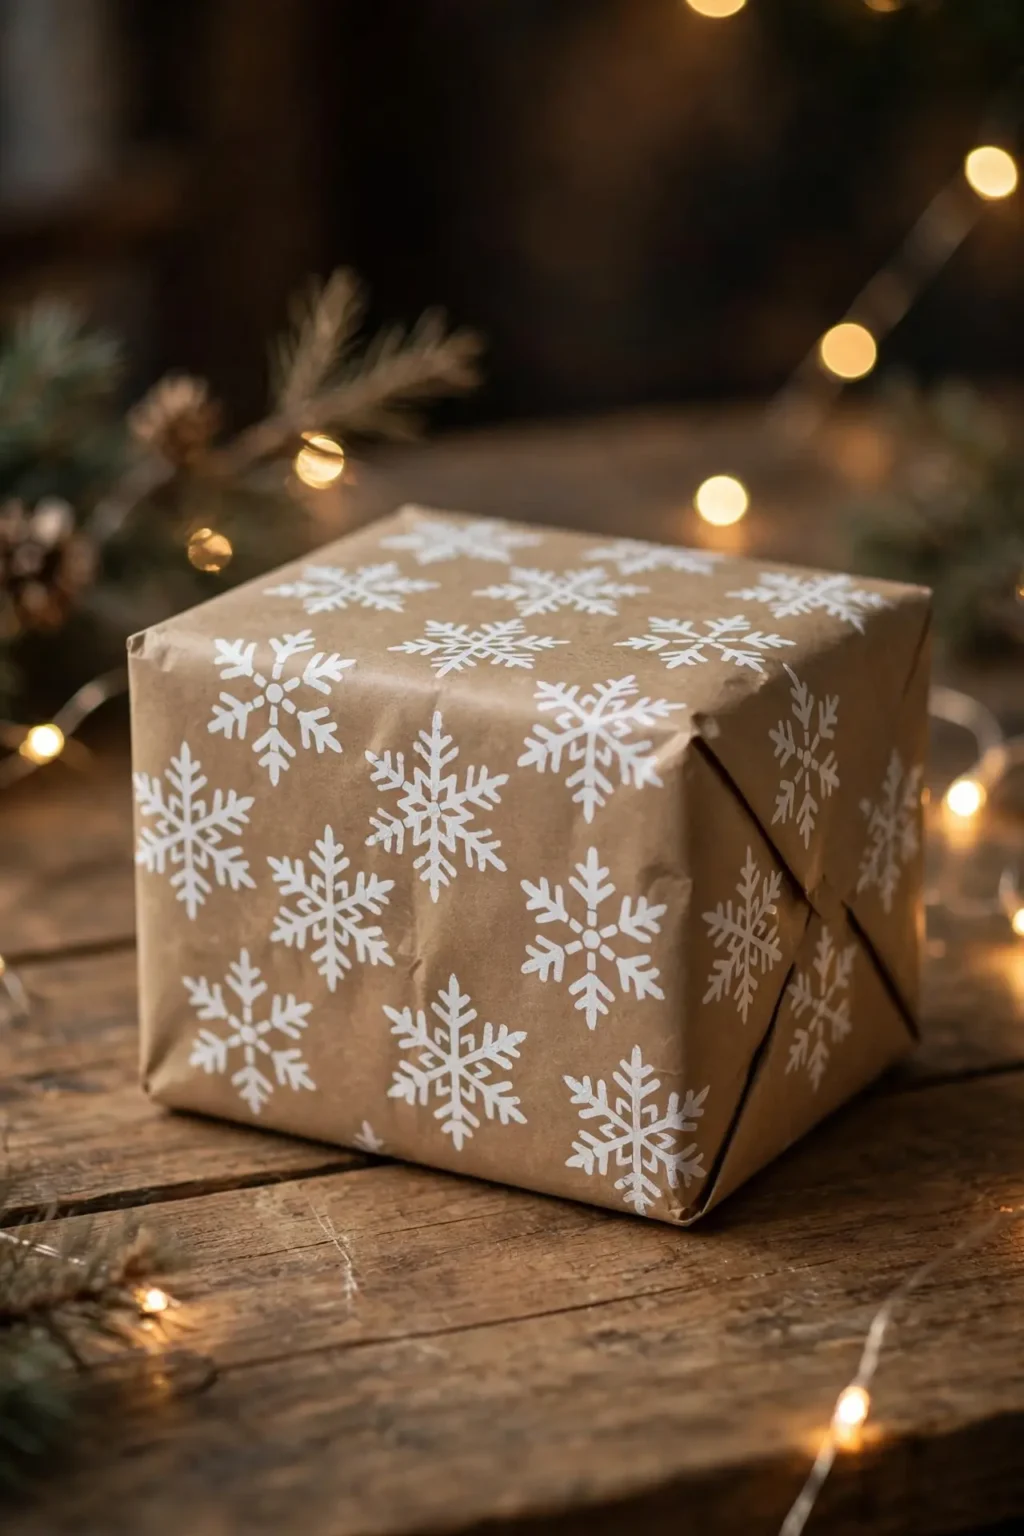
Stencil Snowflake Repeat
A gift wrapped in shop-bought patterned paper can look identical to every other gift under the tree, because the pattern repeats on every box. A stencil snowflake repeat on brown xmas wrapping paper is personal without being busy, because one snowflake stencil, dabbed in white paint across the paper in a loose grid, gives every gift the same quiet pattern in your own hand. Steps: 1. Lay the brown paper flat and tape a snowflake stencil to one corner. 2. Dab white paint through the stencil with a sponge, lift it cleanly, and move it along in a grid, leaving a hand’s width between snowflakes. 3. Let the paint dry, then wrap with the stencilled side out and no ribbon at all.
Try it: Dab the paint, never brush it. Brushed paint creeps under the stencil edge and blurs the snowflake, while dabbed paint stays sharp.
03
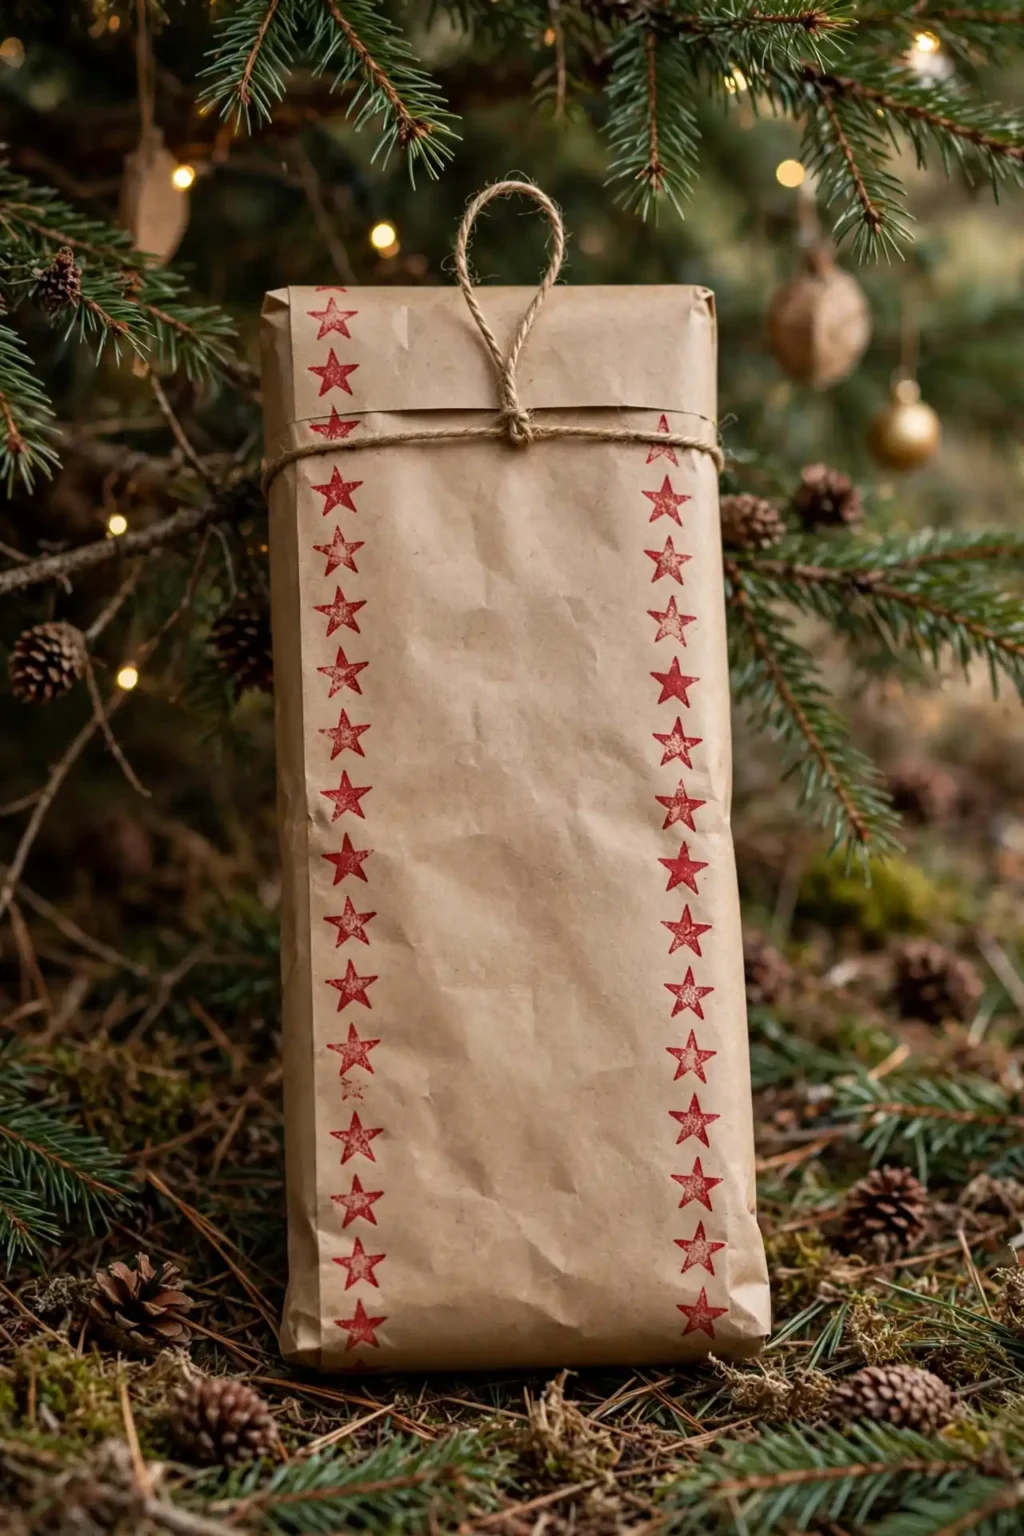
Hand-Carved Rubber Stamp Border
A gift wrapped in plain kraft christmas wrapping paper can look unfinished at the edges, because the eye finds nothing to stop on. A hand-carved rubber stamp border, a small star or tree stamp repeated along the two long edges of the paper, frames the gift like a picture, because the border gives the plain centre something to sit inside. Steps: 1. Carve a simple star into a rubber eraser with a craft knife. 2. Ink the stamp in red or gold and press it along both long edges of the paper, evenly spaced. 3. Let the ink dry, wrap the gift, and finish with a single loop of twine so the border stays visible.
Try it: Stamp the border before wrapping, and keep the stamps off the fold lines. Stamps that land on a fold crack and fade, while stamps on flat paper stay sharp all season.
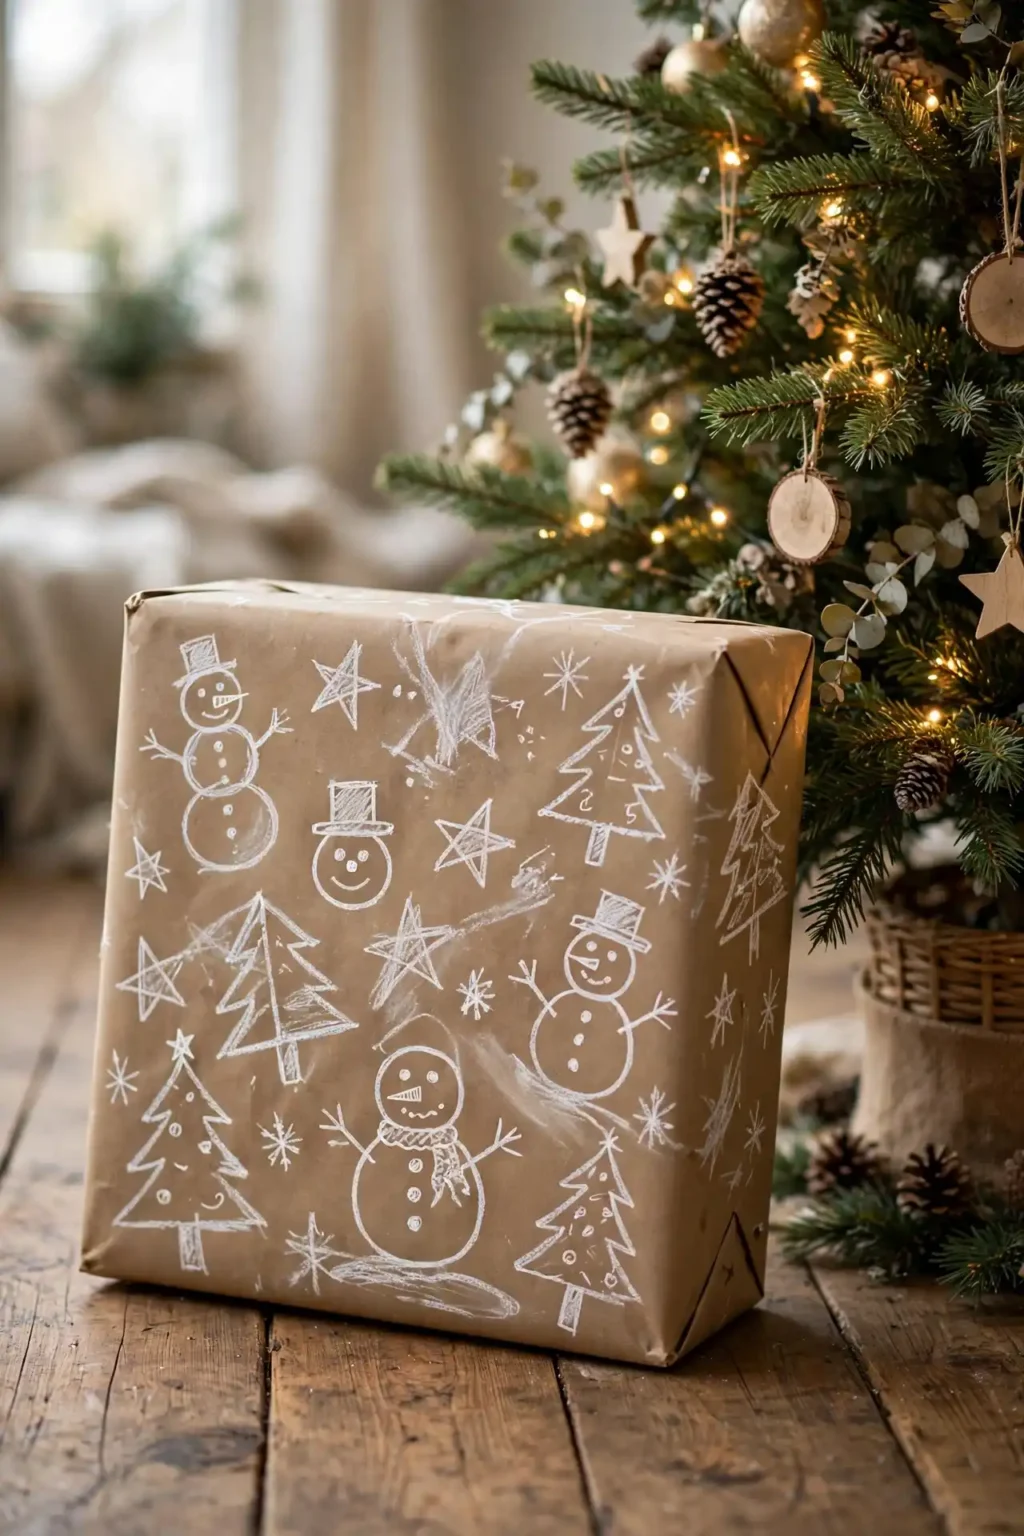
04
White Chalk Doodle Wrap
A gift wrapped in brown paper for a child can look too grown up, because brown paper is serious and children love pictures. White chalk doodles, stars, trees, snowmen, and names drawn directly onto the brown paper with a chalk pen, turn the wrapping into a drawing the child can keep, because chalk on brown reads like a blackboard. Draw the doodles after wrapping, since chalk on a flat sheet shifts when the paper folds, and finish with no ribbon so the drawing stays the whole decoration.
Try it: Fix the chalk with a light spray of hairspray once the drawing is done. Unfixed chalk smudges the moment the gift is handled, while a fixed drawing survives under the tree.
Paper Layers
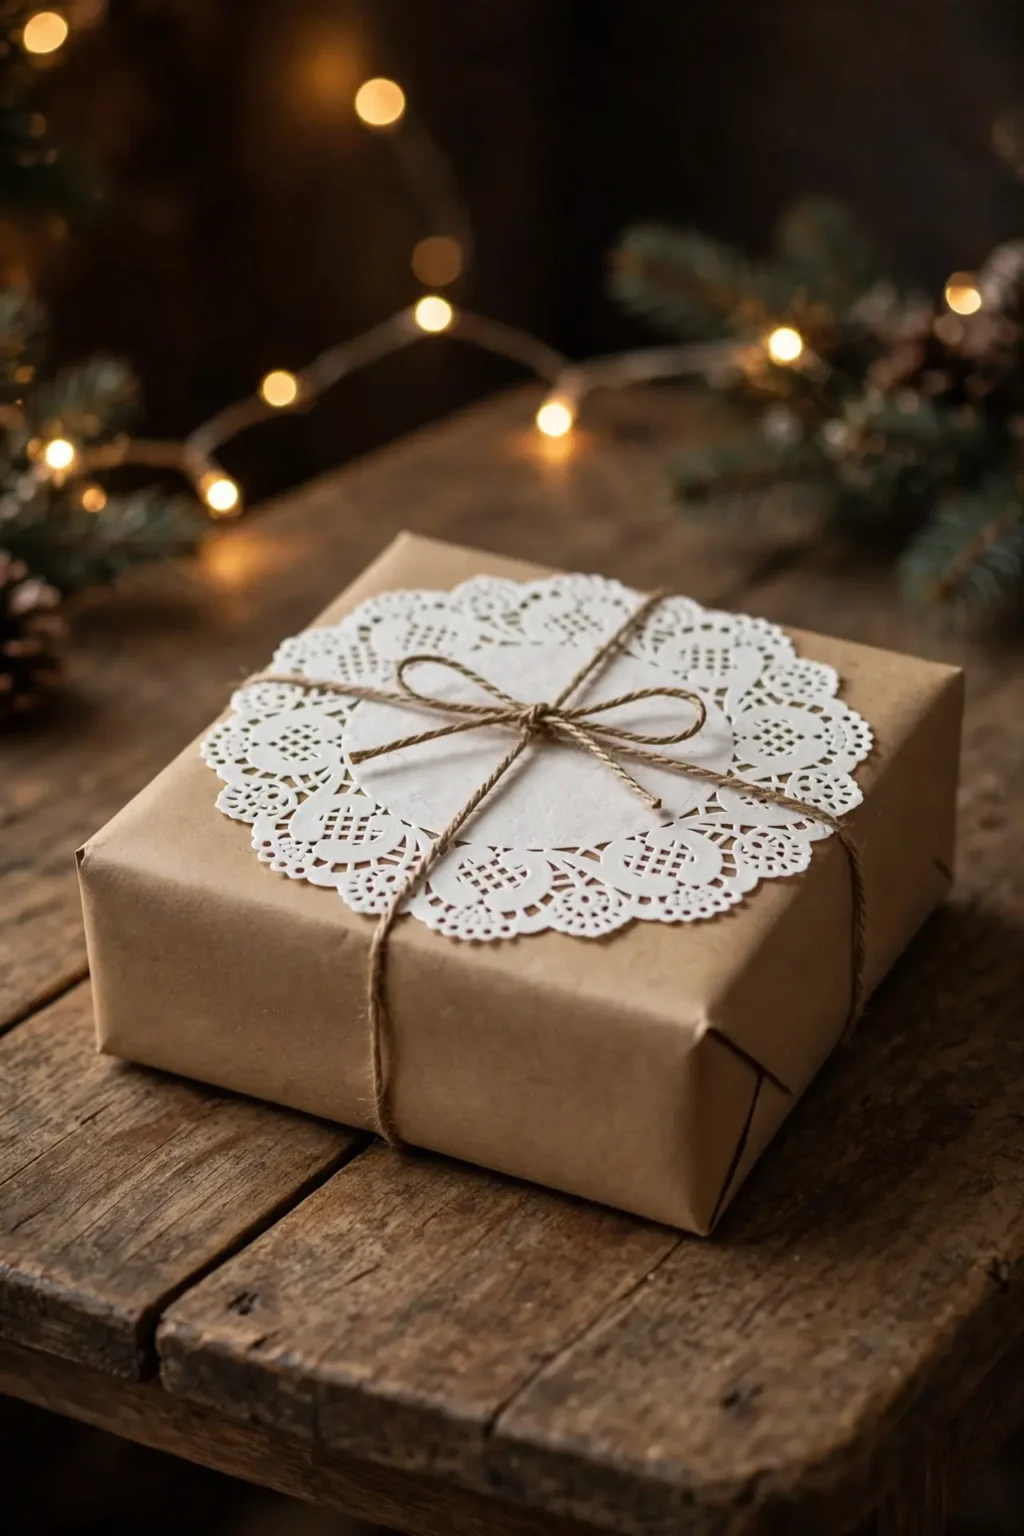
05
Doily Overlay Wrap
A gift wrapped in brown paper alone can look flat, because one layer of paper has no depth. A doily overlay, a white paper doily laid flat over the brown christmas gift wrap and held with a single piece of tape at the back, adds lace-like texture without any colour, because the white pattern sits on the brown like frost on a window. Wrap the gift in brown paper first, centre the doily on the top face, and finish with plain twine tied over the doily so it cannot slide.
Try it: Use a doily slightly smaller than the top face of the box. A doily that wraps over the edges tears at the folds, while a doily that sits flat on top reads as a deliberate layer.

06
Sheet Music Wrap
A gift for someone who loves music can look generic in plain brown paper, because nothing on the outside says anything about them. A sheet music wrap, a sheet of old music paper layered over the brown paper as a band around the middle of the box, makes the gift personal before it is opened, because the notes are the decoration and the brown paper is the frame. Wrap the gift in brown paper, wrap one band of sheet music around the middle, tape it at the back, and finish with plain twine over the band.
Try it: Use real old sheet music, not printed copies. Photocopied music looks flat and grey, while aged paper has the warmth and variation that makes the layer work.
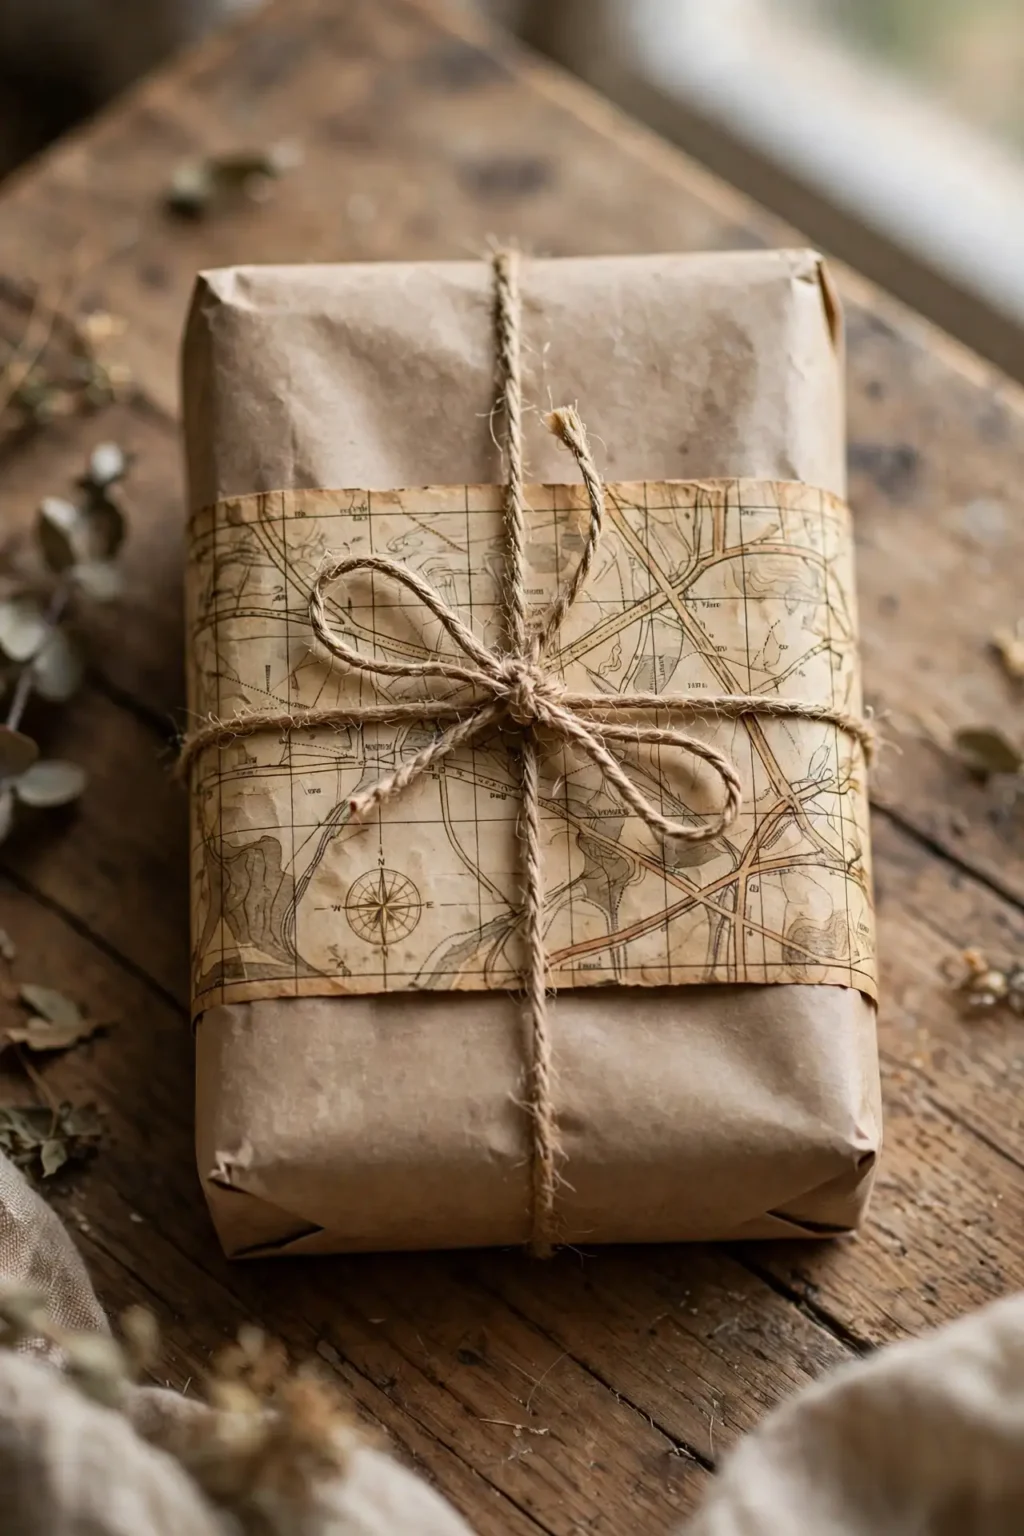
07
Old Map Wrap
A gift for a traveller can look dull in plain brown paper, because brown paper says nothing about where they have been. An old map layer, a section of an old road map wrapped as a band around kraft xmas wrapping paper, turns the gift into a story, because the roads and place names invite a closer look. Wrap the gift in brown paper, choose a map section with a place that matters to the recipient, wrap it as a band around the middle, and finish with twine.
Try it: Pick a map section with one town or coastline the recipient will recognise. A random map section looks like scrap paper, while a meaningful place turns the wrap into a message.
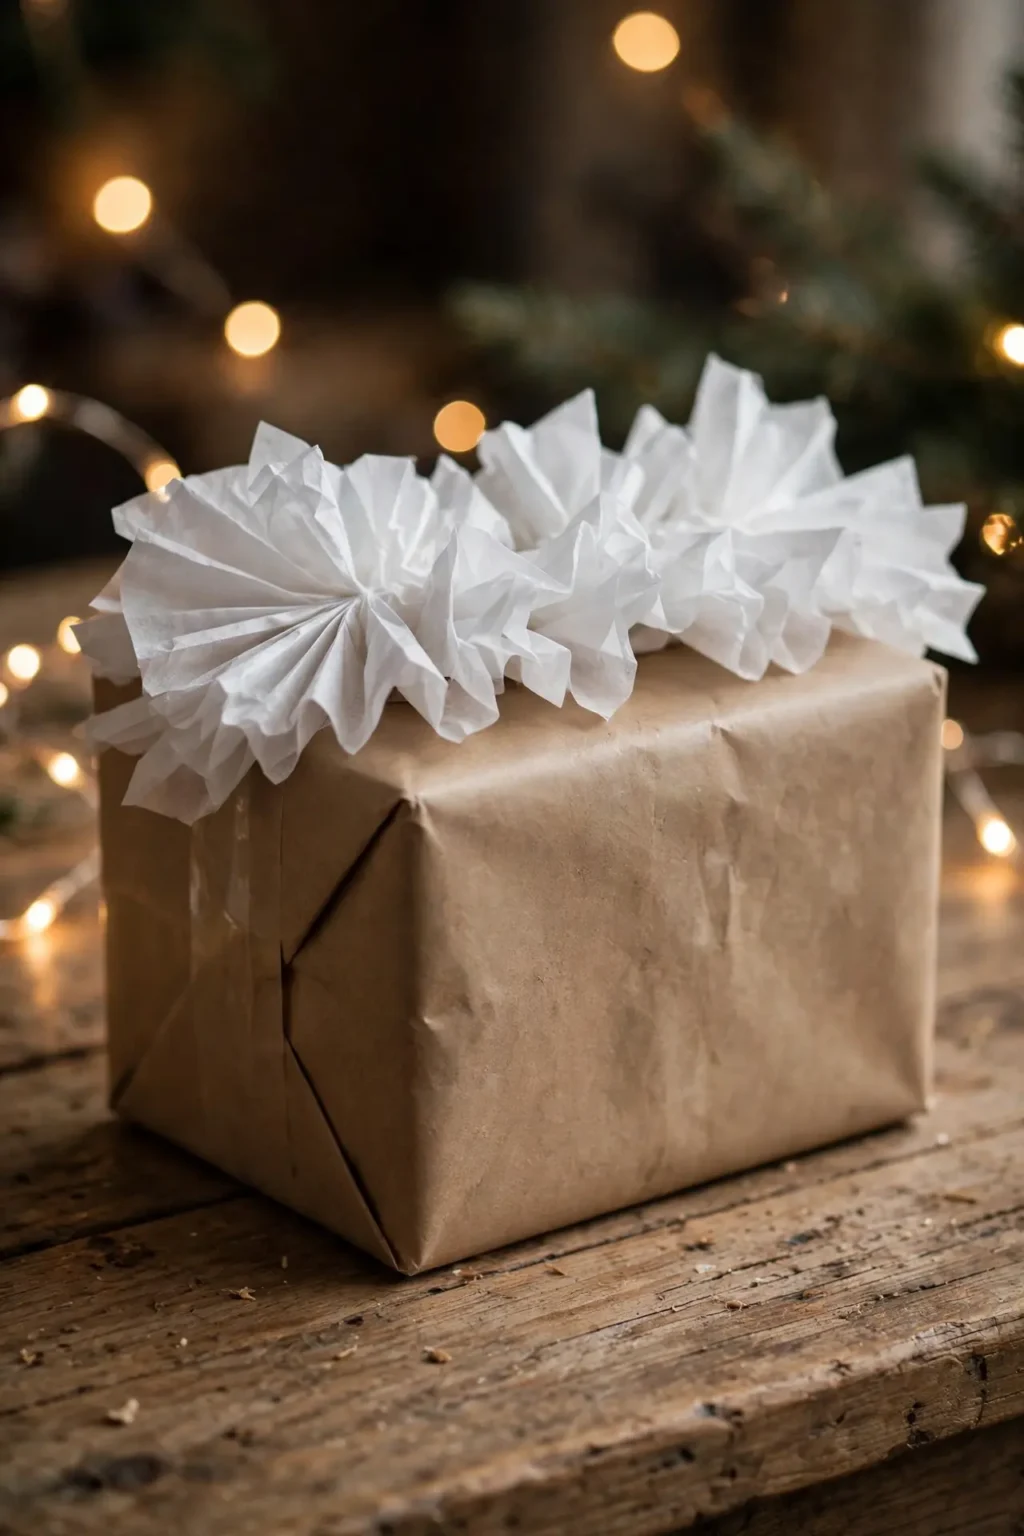
08
Tissue Paper Ruffle Wrap
A gift wrapped in brown paper for a celebration can look too plain, because brown paper has no softness to it. A tissue paper ruffle, strips of white or cream tissue gathered and glued along one edge of the box like a frill, softens the whole gift, because the tissue catches light and moves where brown paper stays flat. Wrap the gift in brown paper, fold tissue strips into fans, glue them in a row along the top edge, and leave the rest of the box plain so the ruffle stays the focus.
Try it: Glue the ruffle to the box, not to the paper seam. A ruffle glued over a seam pulls the seam open when the gift is lifted, while a ruffle glued to a flat face stays put.
Colour Pairings

09
Brown and Gold Foil Accents
A pile of gifts in plain brown paper can look dull under warm lights, because brown absorbs light instead of reflecting it. Brown and gold christmas wrapping paper style accents, small gold foil stars or dots pressed onto the brown paper, or a single gold foil band, give the pile its glow, because gold is the one colour that lifts brown without changing it. Wrap the gift in brown paper, press on gold foil stars in a loose scatter on the top face, and finish with no ribbon, so the foil carries the whole gift.
Try it: Use foil sparingly, no more than five stars per gift. A scatter of gold reads as luxury, while a sheet of gold turns brown paper into gold paper.

10
Brown and Red Gingham Bow
A gift wrapped in brown paper with plain twine can look like a farm shop parcel, because twine is practical, not festive. A brown and red christmas wrapping paper pairing with a gingham bow changes the register completely, because red gingham ribbon is the one pattern that reads as Christmas at a glance. Wrap the gift in brown paper, tie a wide red gingham ribbon around it in a cross, and finish with a full bow on top, keeping the rest of the gift plain so the bow stays the star.
Try it: Use wide gingham, at least 4 cm, not narrow ribbon. Narrow gingham reads as string, while wide gingham shows the check pattern that makes the pairing work.

11
Brown and Green Velvet Ribbon
A gift wrapped in brown paper with a brown ribbon can disappear into itself, because brown on brown has no contrast. Brown and green wrapping paper style pairing with a deep green velvet ribbon solves this, because green is the natural partner of brown, and velvet is the one ribbon material that reads as expensive even in a single strand. Wrap the gift in brown paper, tie one deep green velvet ribbon around it, and finish with a simple flat knot, not a bow, so the ribbon reads as a line of colour.
Try it: Cut the velvet ribbon ends at an angle, not straight across. Angled ends look finished and intentional, while straight ends look snipped in a hurry.
12
Brown and White Striped Twine Crosshatch
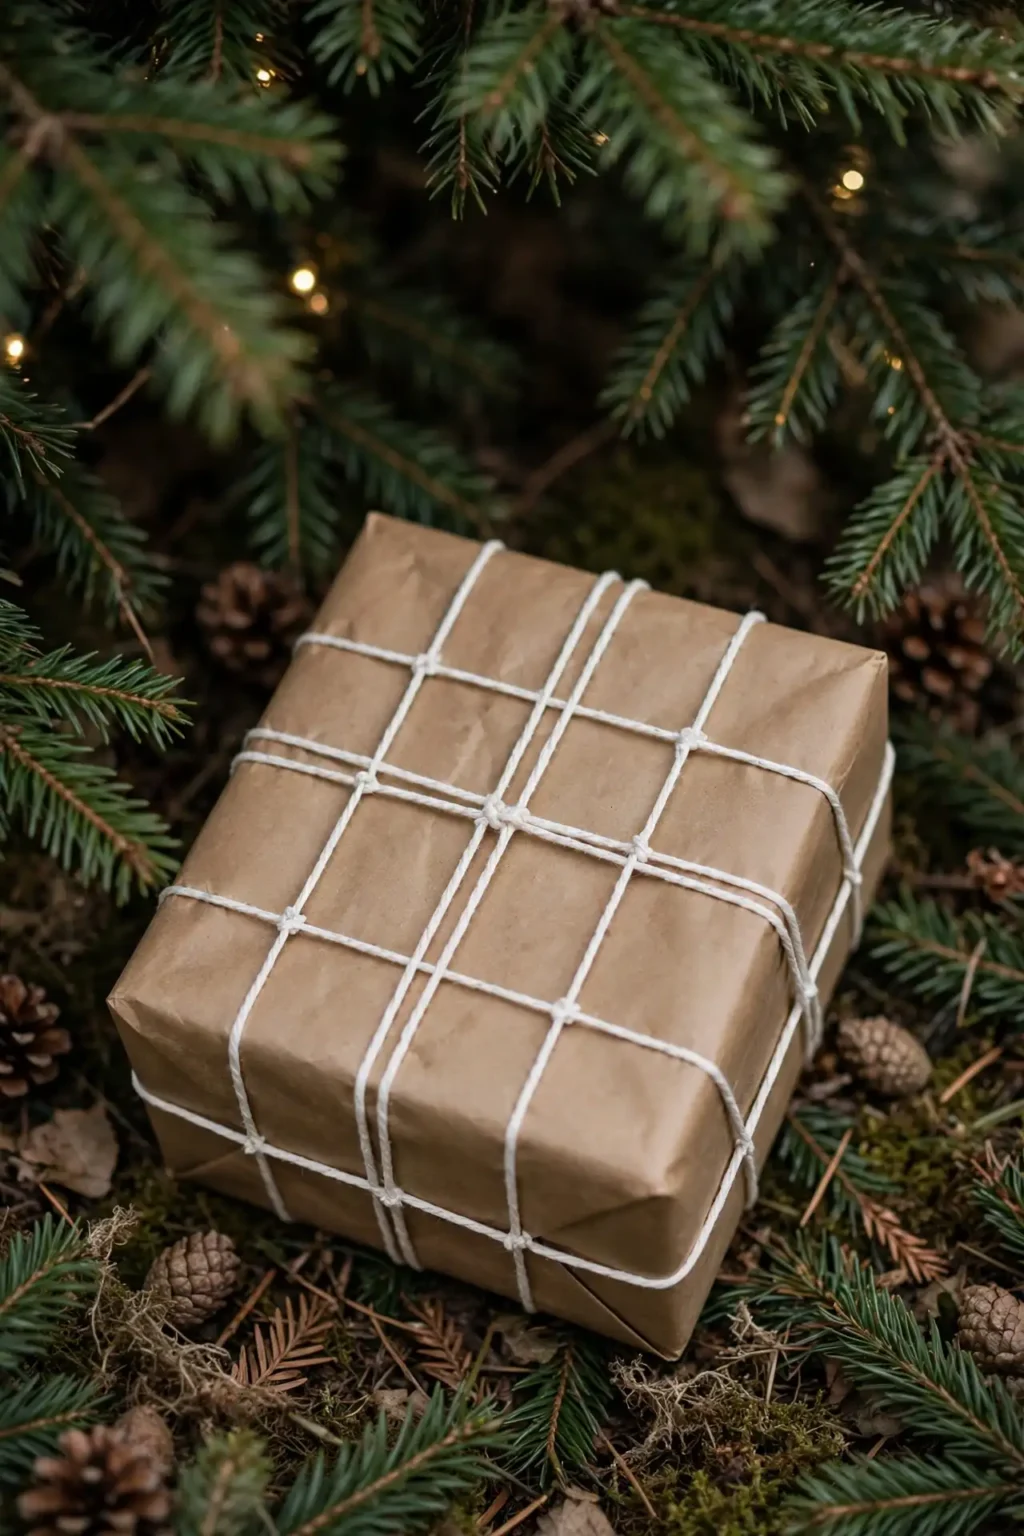
A gift wrapped in brown paper with a single loop of twine can look like an afterthought, because one strand of twine is barely a decoration. A brown and white christmas wrapping paper crosshatch, white twine wrapped around the box in both directions so the strands cross in a grid, turns the twine itself into the pattern, because the grid reads as woven. Wrap the gift in brown paper, wind white twine around it lengthwise three times, then crosswise three times, and knot the ends at the back.
Try it: Keep the twine tension even on every pass. Loose strands sag and tangle, while evenly tensioned twine reads as a woven lattice.
Natural Toppers
13
Dried Citrus Garland Across the Box
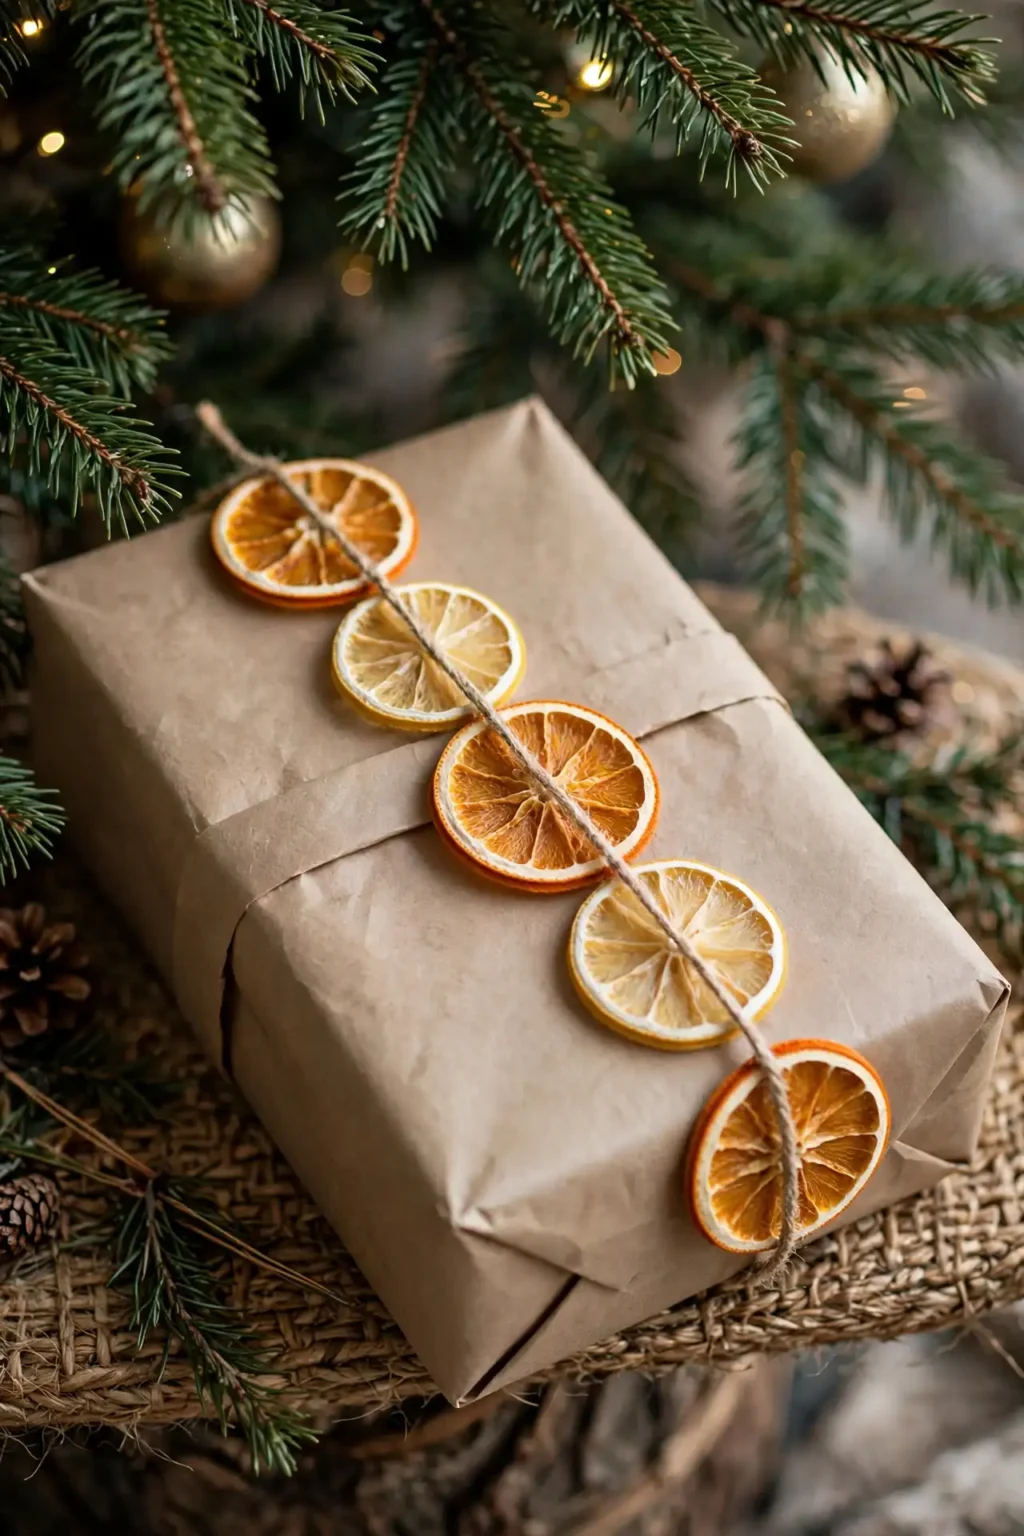
A gift topped with a single dried orange slice can look sparse, because one slice is a detail, not a design. A dried citrus garland across the box, five or six dried orange and lemon slices threaded on twine and laid diagonally across the top face, gives the gift colour, scent, and a translucent glow in one line, because the slices catch light like stained glass. Wrap the gift in brown paper, thread the slices onto twine with knots between them so they stay spaced, and lay the garland diagonally across the top, taping the twine ends underneath.
Try it: Dry the slices until fully crisp, not leathery. Leathery slices droop and darken, while crisp slices hold their shape and glow in the light.
14
Mini Rosemary Wreath Topper
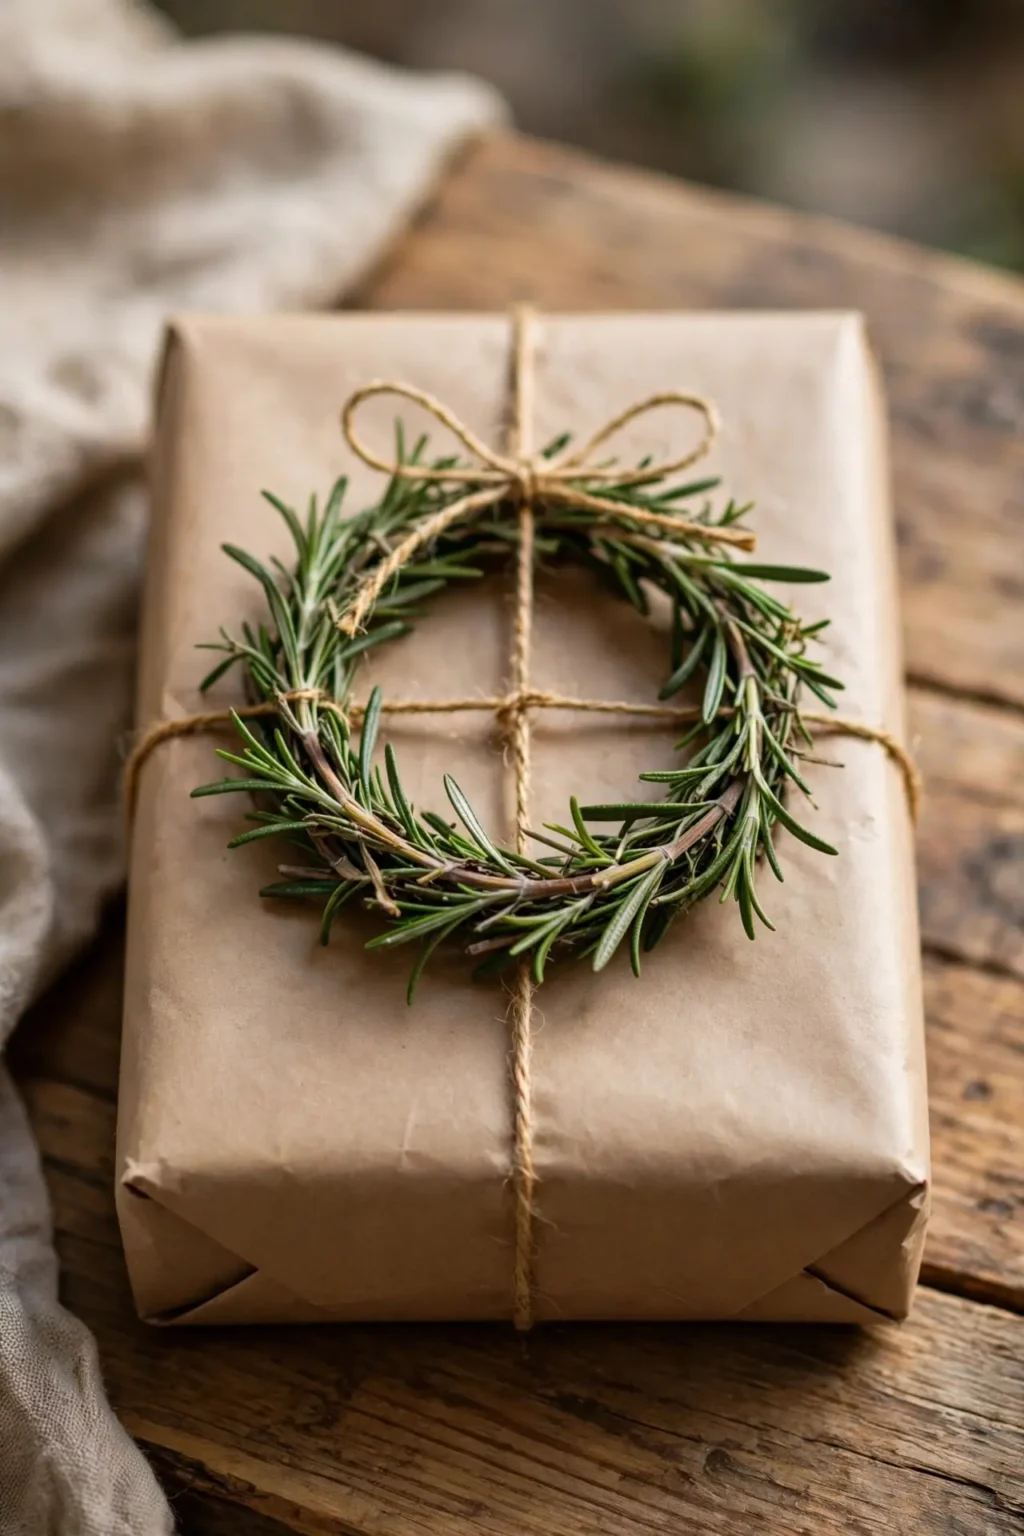
A gift topped with a loose sprig can look like it drifted there, because a single stem has no shape. A mini rosemary wreath topper, a small ring of rosemary stems wired into a circle and laid flat on top of the brown christmas wrap, gives the gift a finished shape, because the ring reads as a wreath in miniature. Bend two rosemary stems into a circle, wire the ends together, and lay the ring flat on the top face, held with one loop of twine around the whole box.
Try it: Make the ring no wider than a third of the box. A ring that spans the whole box looks like a wreath laid on a gift, while a small ring reads as a topper.
15
Cinnamon and Star Anise Cluster
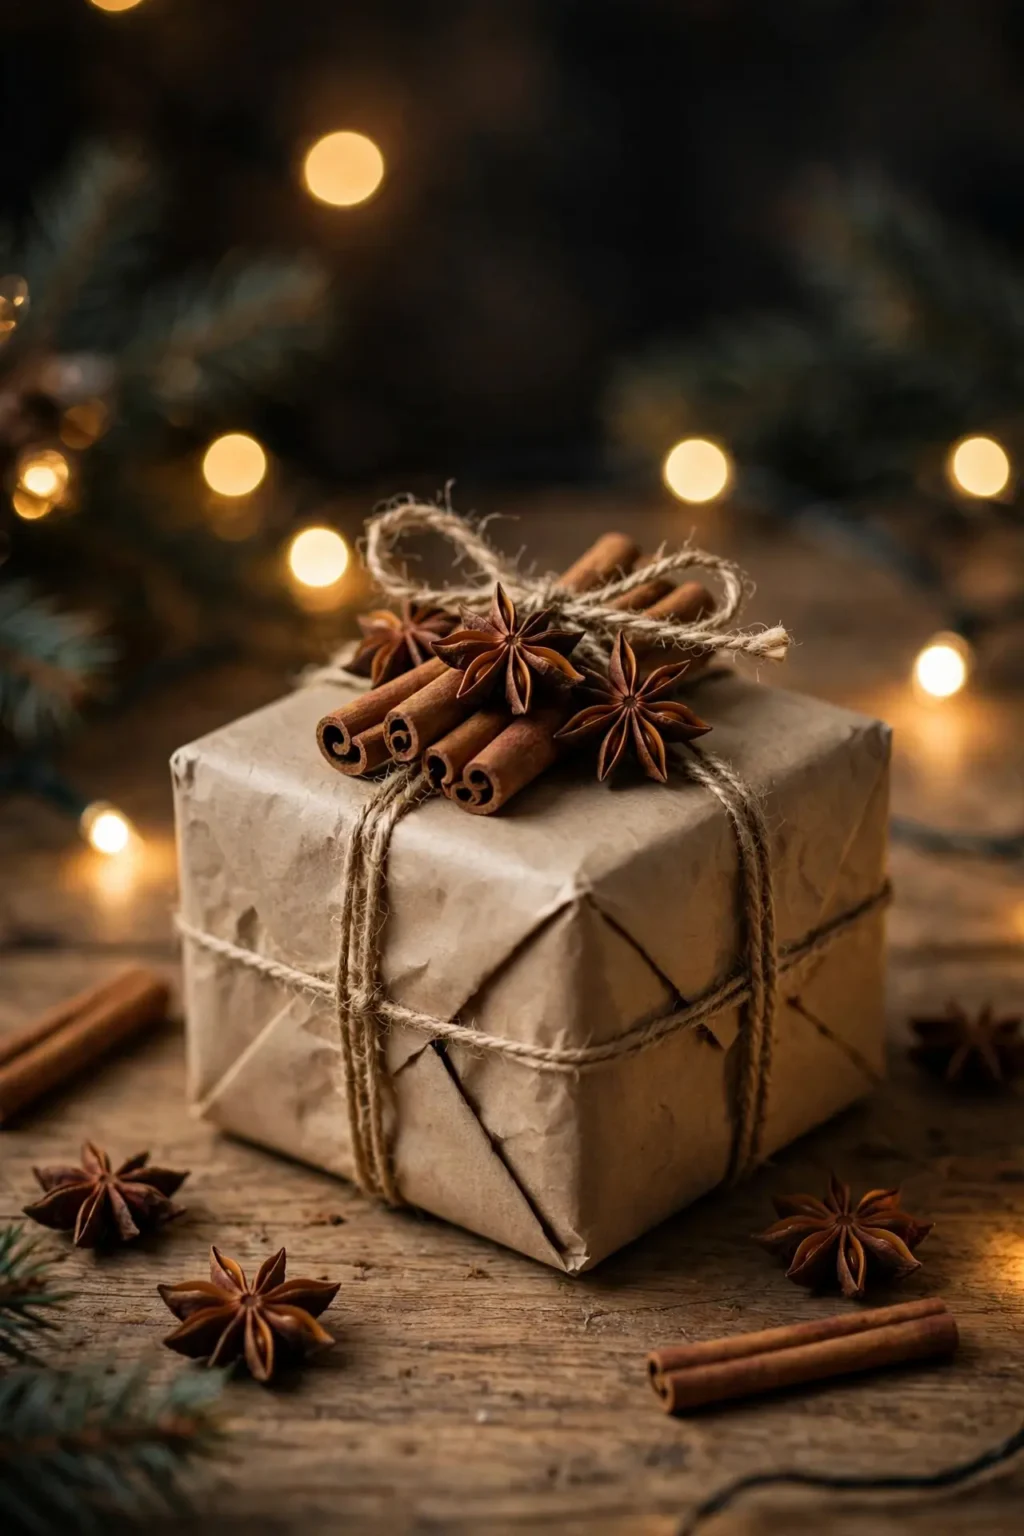
A gift scented with one cinnamon stick can smell wonderful and look thin, because a single stick is a line, not a cluster. A cinnamon and star anise cluster, three cinnamon sticks bundled with two star anise and tied with twine, gives the gift scent and shape in one bundle, because the star shapes break up the straight lines of the sticks. Wrap the gift in brown paper, bundle the sticks and star anise, tie with twine, and lay the cluster diagonally on the top face.
Try it: Tie the bundle at both ends, not just the middle. A bundle tied once in the middle splays open, while a bundle tied at both ends holds its shape all season.

16
Holly and Red Berry Sprig
A gift topped with greenery alone can look flat, because green on brown has little contrast. A holly and red berry sprig, a short stem of glossy holly leaves with bright red berries, gives the gift its Christmas colour in one stem, because the red berries are the only bright colour on the box. Wrap the gift in brown kraft christmas wrapping paper, lay the holly sprig diagonally across the top face, and hold it with one loop of twine around the box.
Try it: Choose a sprig with berries still firmly attached. Loose berries drop off in transit and stain the paper, while firm berries stay put until the gift is opened.
Tags and Trims
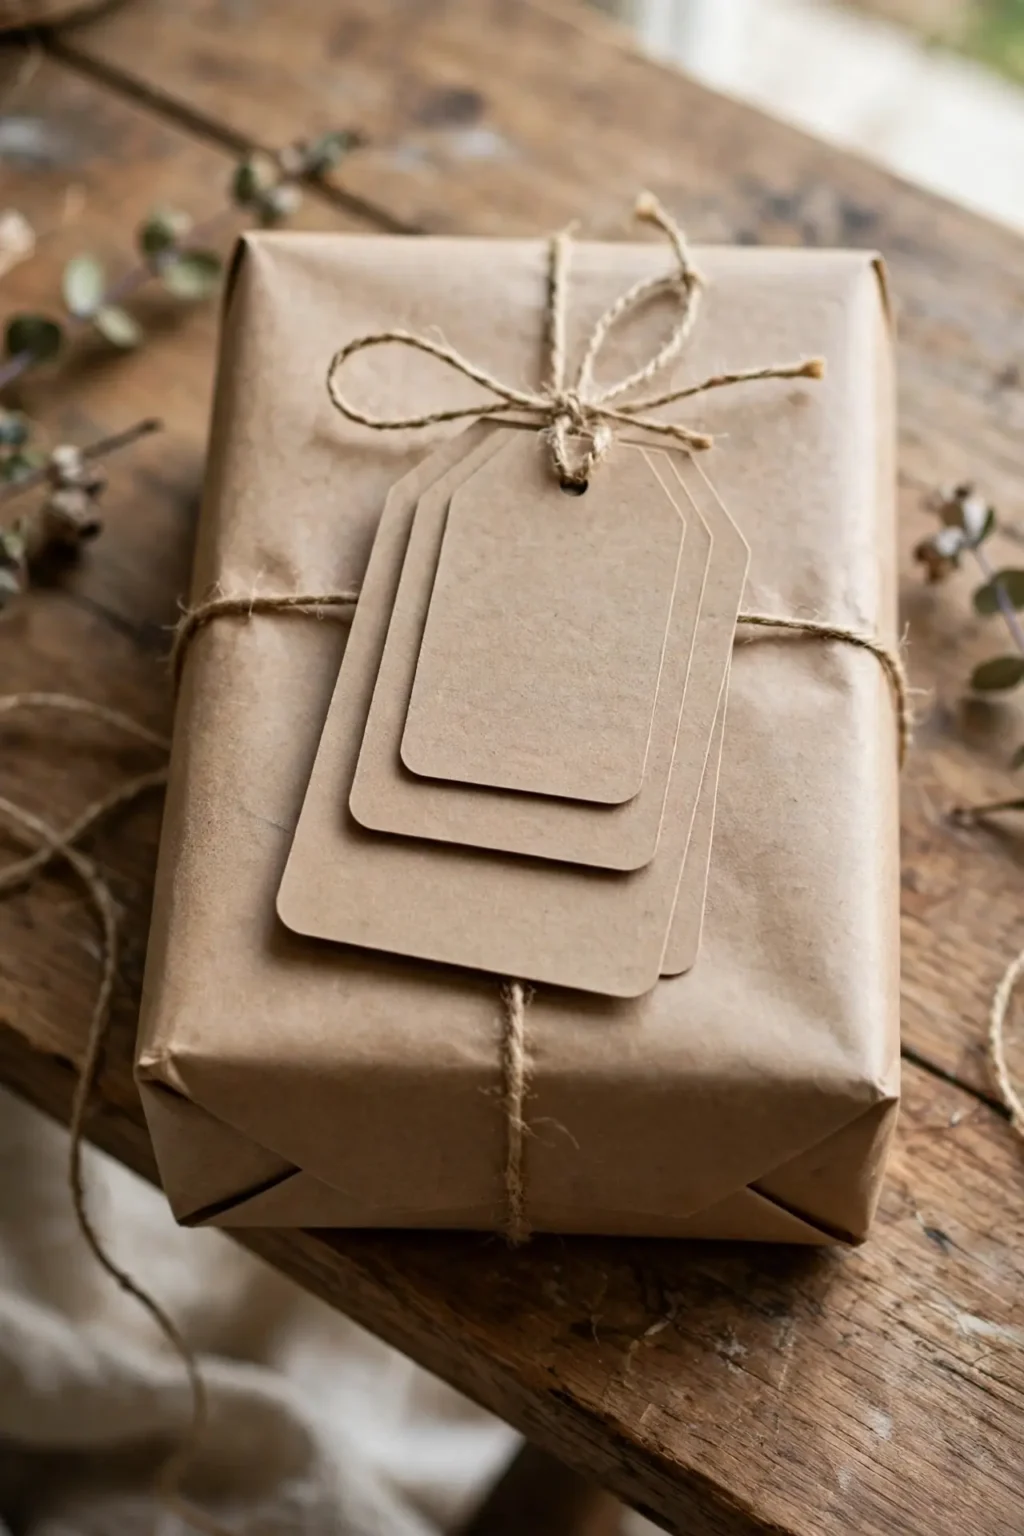
17
Layered Kraft Tag Stack
A gift with a single small tag can look like an afterthought, because one tag is barely visible on a large box. A layered kraft tag stack, three kraft tags in decreasing sizes layered on top of each other and tied with one piece of twine, turns the tag into the decoration, because the layers give depth that a single tag never has. Cut three tags from kraft card, large, medium, and small, write the name on the smallest, stack them, punch one hole through all three, and tie them to the gift with twine.
Try it: Write the name on the smallest tag only, and leave the larger tags blank. A name on every layer looks repetitive, while a name on the top layer reads as a label on a stack.

18
Photo Tag on Twine
A gift with a plain name tag can look impersonal, because a name tag could belong to anyone. A photo tag on twine, a small printed photo trimmed into a tag shape and tied to the gift, makes the gift personal before it is opened, because the face on the tag is unmistakably the recipient. Print a small photo, trim it into a tag shape with a hole at one end, thread twine through the hole, and tie it to the gift, keeping the rest of the wrapping plain so the photo stays the focus.
Try it: Use a photo from the past year, not an old favourite. A recent photo reads as this Christmas, while an old photo can feel like a different occasion.

19
Jingle Bell Cluster Trim
A gift wrapped silently in brown paper can feel like it is missing something, because gifts at Christmas should announce themselves. A jingle bell cluster trim, five small bells threaded onto twine and tied around the box like a bracelet, rings softly every time the gift is lifted, so the wrapping becomes part of the surprise. Wrap the gift in brown paper, thread five bells onto twine, tie the twine around the box in a cross, and knot it at the back so the bells sit on top.
Try it: Use small bells, not large ones. Large bells dominate the gift and ring too loudly, while small bells give a soft jingle that suits a present.
Fabric and Texture
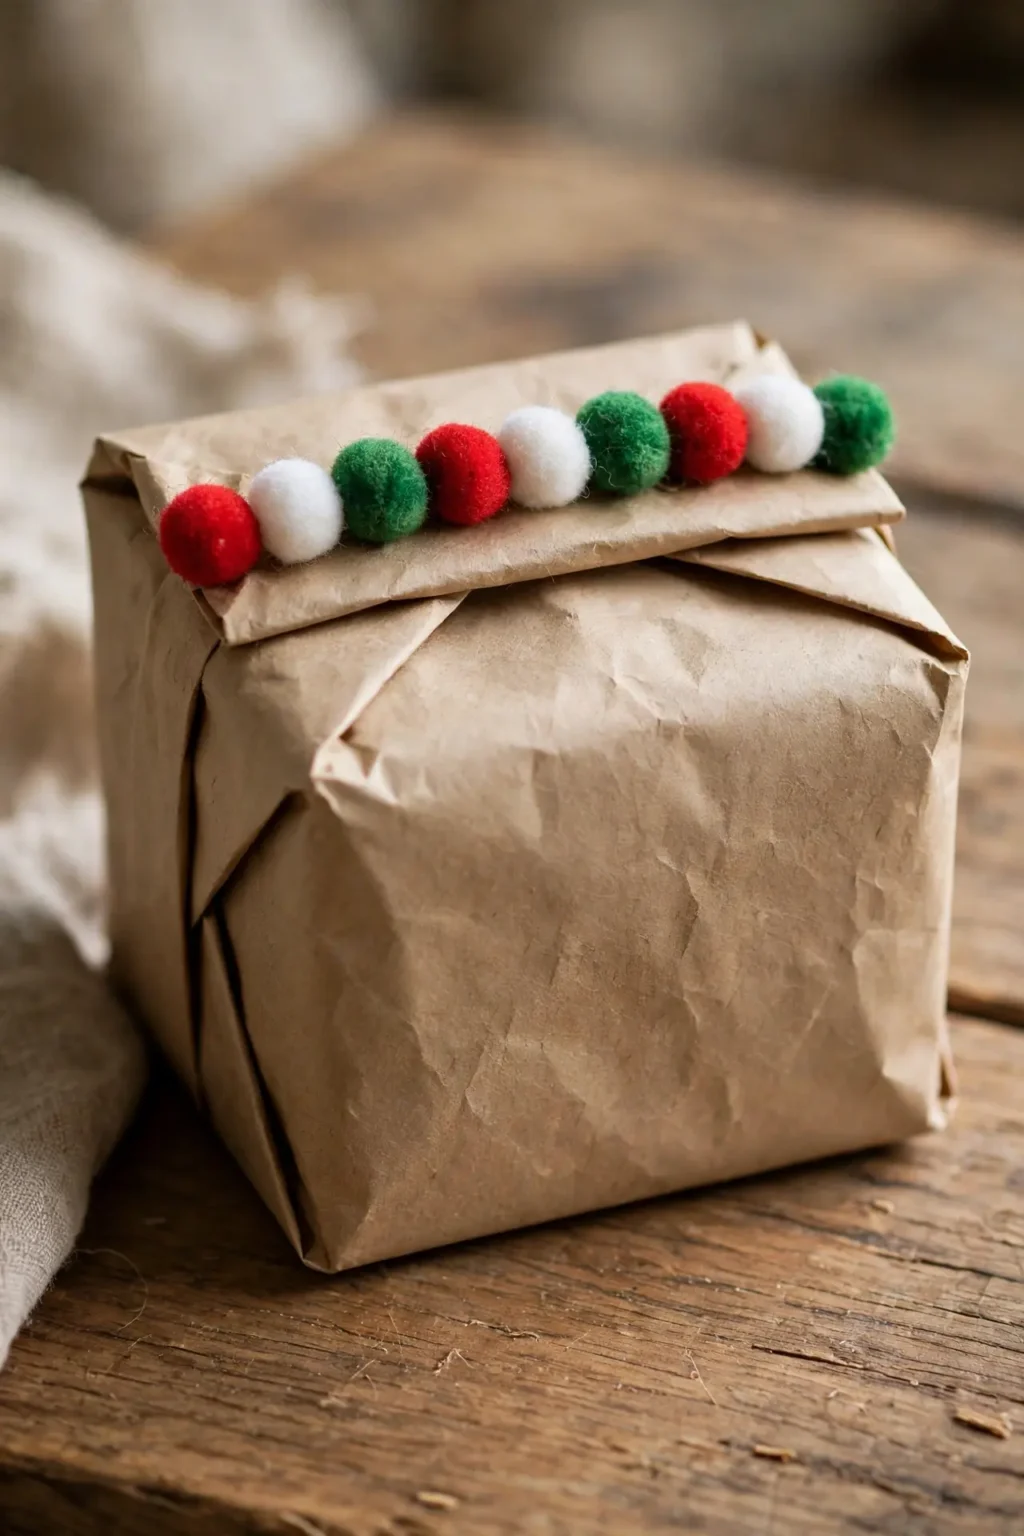
20
Pom-Pom Trim
A gift wrapped in brown paper for a child can look too serious, because brown paper is a grown-up material. A pom-pom trim, small wool pom-poms in red, white, and green glued along the top edge of the box, makes the gift playful at a glance, because pom-poms are soft, round, and impossible to take seriously. Wrap the gift in brown paper, glue five pom-poms in a row along the top edge, alternating colours, and leave the rest of the box plain.
Try it: Glue the pom-poms to the box, not to the paper seam. Pom-poms glued over a seam pull the seam open when the gift is lifted, while pom-poms glued to a flat face stay put.
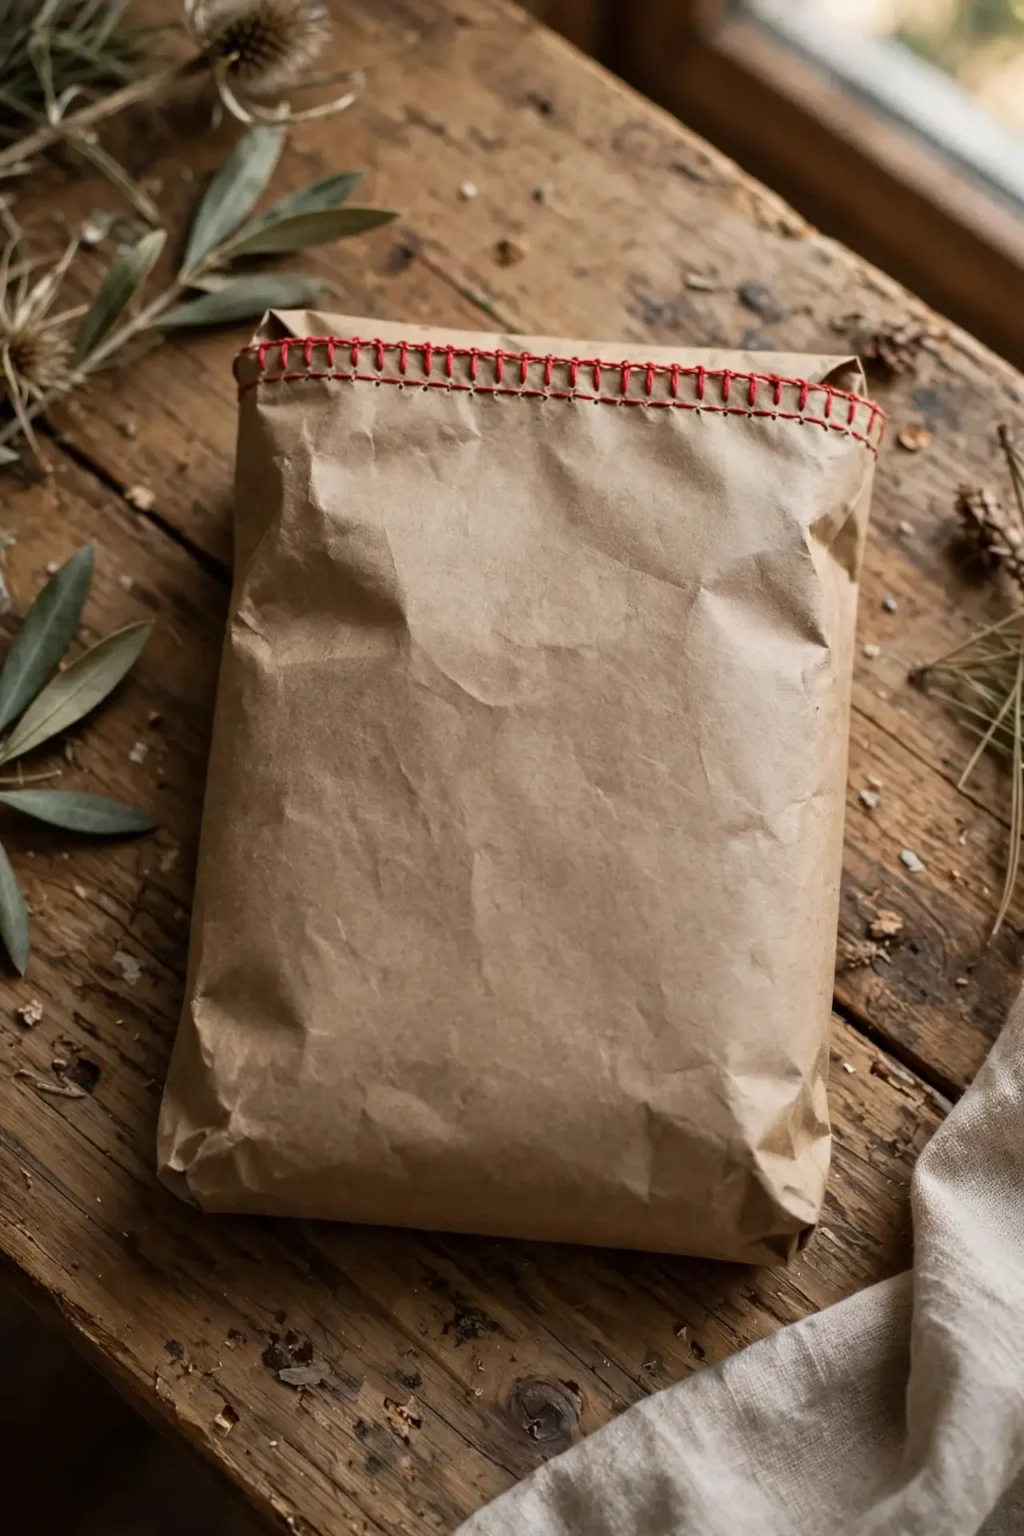
21
Embroidered Running Stitch Border
A gift wrapped in brown paper can look machine-made, because brown paper from a roll has no hand in it. An embroidered running stitch border, a line of simple running stitches in red or cream thread sewn through the brown paper along the top edge, proves the gift was wrapped by hand, because no machine makes that stitch. Wrap the gift, then sew a running stitch along the top face near the edge, using a thick needle and doubled thread, and knot the thread ends underneath the paper flap.
Try it: Keep the stitches even, about 1 cm long with 1 cm gaps. Uneven stitches look like a repair, while even stitches read as embroidery.
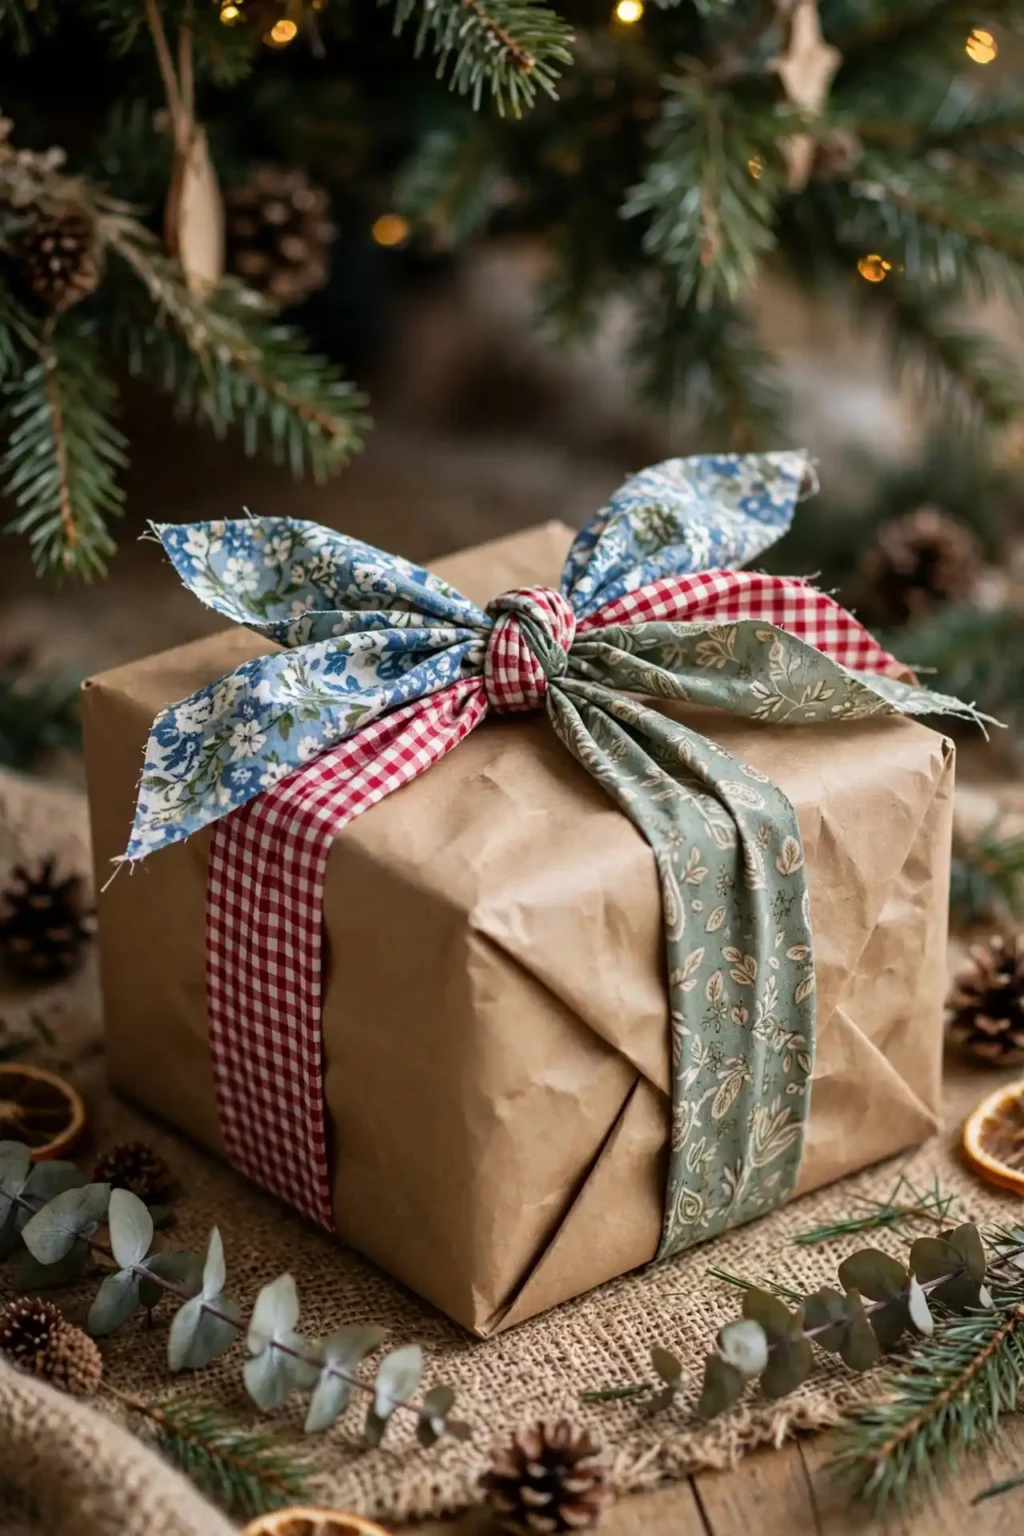
22
Fabric Strip Bow
A gift wrapped in brown paper with a ribbon bow can look like every other gift, because ribbon bows repeat everywhere. A fabric strip bow, three strips of cotton fabric in coordinating prints tied together into a bow, gives the gift a softer, handmade finish, because fabric has texture that ribbon never gives. Wrap the gift in brown paper, cut three fabric strips, tie them together at the centre with twine, fan out the ends, and attach the bow to the top face with a single stitch or a dot of glue.
Try it: Choose fabric prints in one colour family, so the bow reads as one decoration. Mixed prints in clashing colours look like scraps, while one family reads as a designed bow.
Pro tip: Step back and look at your pile of gifts together, not one gift at a time. If you can still pick out one treatment per gift, stamps, layers, a colour pairing, or a topper, the pile is brown paper done well. If the gifts blur into one brown mass, add one decoration system to the whole pile and repeat it.
Three rules for brown paper wrapping that looks intentional, not plain
Most brown paper gifts look unfinished for the same three reasons, and all three are fixable.
- First, pick one treatment per pile. One decoration system, repeated consistently across every gift, looks intentional, while a different treatment on every gift looks like leftovers.
- Second, use thick paper. Thick kraft paper holds crisp folds, carries stamps cleanly, and survives handling, because thin paper tears at the corners and wrinkles under paint.
- Third, finish one face properly. The top face is the face guests see, so put the decoration there and keep the sides and back plain, because a gift decorated on every side looks fussy, while a gift with one finished face reads as designed.
Storing and reusing your brown paper wrapping supplies
Brown paper wrapping supplies last for years if you store them properly, and the storage step is part of the making, not an afterthought.
- First, roll, never fold, your paper. Brown kraft paper creases permanently when folded, so rolled tubes kept upright stay smooth for next December.
- Second, keep stamps and stencils clean and flat. Dried paint on a stamp ruins the next print, so wash stamps after use and store stencils flat between sheets of card.
- Third, store naturals apart from paper. Dried citrus, cinnamon, and rosemary scent everything around them, so keep them in their own sealed bag, and keep paper, ribbon, and tags scent free.
Questions readers ask
What is brown paper christmas wrapping?
Brown paper christmas wrapping is gift wrapping that uses plain brown kraft paper as its base, decorated with stamps, stencils, ribbons, natural toppers, or tags, so the gift reads as rustic and handmade rather than shop bought. The style favours one warm brown base with one decoration system across the whole pile.
How do I decorate brown paper wrapping?
You decorate brown paper wrapping by choosing one treatment and repeating it, such as potato prints, stencil snowflakes, a colour pairing like brown and gold, or a natural topper like a holly sprig. A pile with one repeated treatment reads as designed, while a pile with a different decoration on every gift reads as random.
What ribbon goes with brown paper?
Red gingham, deep green velvet, and white twine go with brown paper best, because each one gives contrast without fighting the brown. A brown and red pairing reads as classic Christmas, brown and green reads as natural, and brown and white reads as clean and modern.
How do I stamp brown paper without smudging?
You stamp brown paper without smudging by stamping the paper flat before wrapping, using a dabbed ink pad rather than a wet one, and letting the ink dry fully before folding. Stamps made on a wrapped box smudge at the corners, while stamps made on flat paper stay crisp.
Is brown paper wrapping recyclable?
Yes, brown paper wrapping is recyclable when it is plain kraft paper with no foil, glitter, or plastic coating, since brown recycled wrapping paper is made to be pulped again. Remove twine, ribbon, and tape before recycling, and keep foil-accented gifts out of the paper bin.
How do I keep brown paper from tearing when wrapping?
You keep brown paper from tearing when wrapping by using thick kraft paper, folding slowly along one crease at a time, and taping seams on the inside rather than pulling the paper tight. Thin brown paper tears at the corners, while thick paper holds a crisp fold.
How do I wrap odd-shaped gifts in brown paper?
You wrap odd-shaped gifts in brown paper by choosing a fabric strip bow or a paper bag in brown kraft, finished with one topper and one tag, instead of forcing flat paper around curves. A bottle or a soft toy in a brown paper bag with a holly sprig looks intentional without any box at all.
How do I store brown paper wrapping supplies so they last?
You store brown paper wrapping supplies so they last by rolling the paper, never folding it, keeping rolls upright in a tall tube, washing stamps after use, and storing dried naturals in a separate sealed bag away from paper. Stored this way, kraft paper and stamps will stay usable for many seasons.
People Also Ask
What is the 70/30 rule for brown paper wrapping?
The 70/30 rule for brown paper wrapping means roughly 70 percent of the gift stays plain brown paper, and 30 percent carries the decoration, stamps, ribbon, topper, or tag. The rule is a guide, not a law, but a gift that follows it will read as rustic rather than bare or cluttered.
How do I make brown paper gifts look expensive, not plain?
You make brown paper gifts look expensive, not plain, by using thick kraft paper, folding crisply with a single clean seam, and adding one quality detail such as gold foil accents, velvet ribbon, or a layered kraft tag stack. A gift with thick paper, sharp folds, and one good detail reads as designed, while a gift with thin paper and soft folds reads as a parcel.
What brown paper wrapping should beginners avoid?
Beginners should avoid embroidered stitch borders and hand-carved stamp borders on wrapped gifts, because each of those needs practice to look even and is hard to fix once started. Start with potato prints, stencils, and natural toppers on flat paper, and save stitched and carved borders for a second year.
loved these ideas? ✿
Save this guide for later
Pin it to your board so it’s there when you’re ready to recreate it.

Curated by
Hey! I'm Sanaullah — visual curator and content creator. I search, curate, and test the best aesthetic ideas across Pinterest so you can easily transform your living space, style daily outfits, and try simple creative DIYs without the overwhelm.