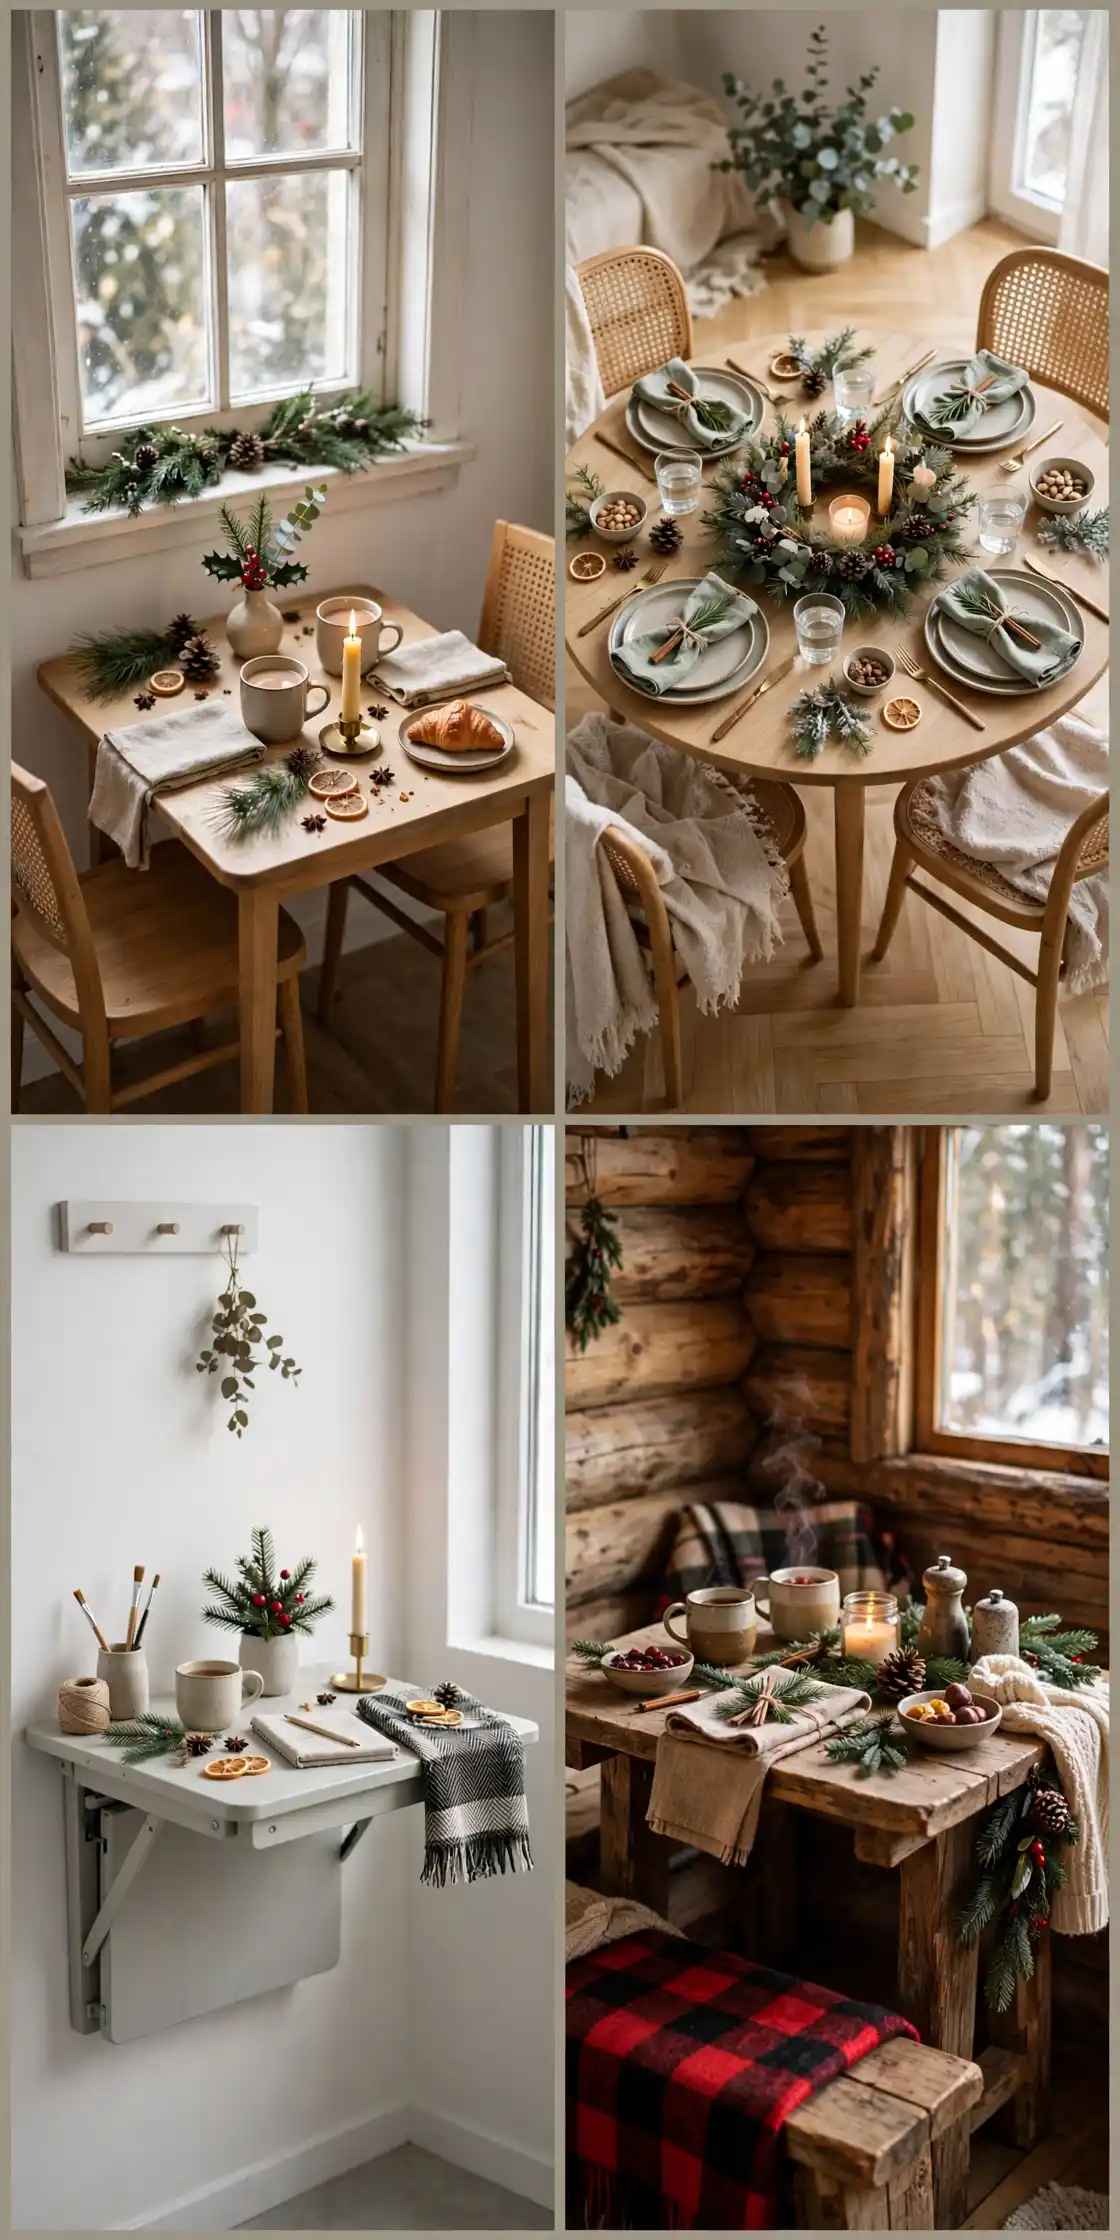

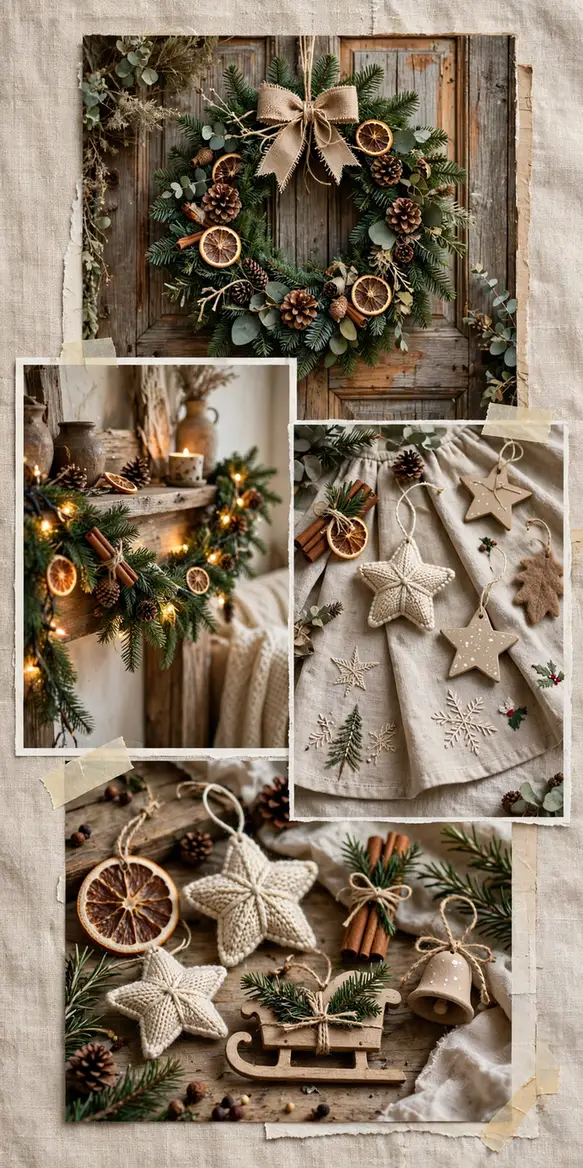
A house dressed only with shop-bought decorations can feel like a showroom, because every piece looks the same as every other house on the street. A house dressed with things you made yourself feels like Christmas at your house, because every wreath, garland, and ornament carries a decision you made. Most diy christmas decor fails in the same way: people start with a vague idea, buy supplies with no plan, and end up with a half-finished project and a messy table. This list works the other way around. These 24 diy christmas decor ideas are grouped by zone, tree, door, mantel, table, ornaments, and outdoors, and every make comes with real steps, so you can pick one zone, finish it, and move on. If you want the fullest version of this list, start with the tree and work outward, and your whole house will look intentional by Christmas Eve, not half decorated.
- The key takeaway: One finished zone beats five started ones. A complete mantel and a bare table look like a plan, while a half-made wreath, a half-strung garland, and a half-painted ornament look like a mess.
- The detail most people miss: The finish step is the decoration. A wreath with its wire hidden, a garland with its ends tucked, and a tree skirt with a hemmed edge look shop bought, while the same projects with loose ends showing look unfinished.
- What it costs or how long it takes: Most of these 24 ideas cost $5 to $30 in supplies, and each takes 30 minutes to 2 hours to make. A diy christmas decor project is often the cheapest decoration in the house, because you already own half the supplies in a junk drawer.
At a glance
| Group | Ideas | Materials | Best for |
|---|---|---|---|
| Tree | 01-04 | Wood, felt, fabric, paper | Small rooms and kid-friendly trees |
| Door and Entry | 05-08 | Greenery, ornaments, hoop, ribbon | First impressions and porches |
| Mantel and Walls | 09-12 | Garland, orange slices, baubles | Fireplaces and long walls |
| Table | 13-16 | Candles, jars, pinecones, cranberries | Christmas dinner and coffee tables |
| Ornaments and Crafts | 17-20 | Felt, baubles, photos, cardboard | Tree dressing and handmade gifts |
| Outdoors and Budget | 21-24 | Lights, yard stakes, dollar store finds | Porches, yards, and tight budgets |
Jump to an idea ↓
- 01 DIY Wooden Christmas Tree
- 02 Felt Christmas Tree with Velcro Ornaments
- 03 DIY Christmas Tree Skirt
- 04 DIY Christmas Tree Topper
- 05 DIY Christmas Wreath
- 06 DIY Ornament Wreath
- 07 Christmas Hoop Wreath
- 08 DIY Christmas Door Decorations
- 09 Fireplace Mantel Garland
- 10 DIY Christmas Garland
- 11 Orange Garland
- 12 Ornament Garland DIY
- 13 DIY Christmas Centerpiece on a Budget
- 14 Easy Christmas Table Decorations
- 15 DIY Christmas Centerpiece Ideas
- 16 Christmas Decoration Ideas DIY for the Table
- 17 DIY Felt Ornaments
- 18 DIY Christmas Baubles
- 19 Photo Christmas Ornaments DIY
- 20 DIY Nutcracker Soldier
- 21 DIY Outdoor Christmas Decorations
- 22 DIY Christmas Yard Decorations
- 23 Dollar Tree Christmas Decorations
- 24 DIY Christmas Lights Outdoor
Tree
01
DIY Wooden Christmas Tree
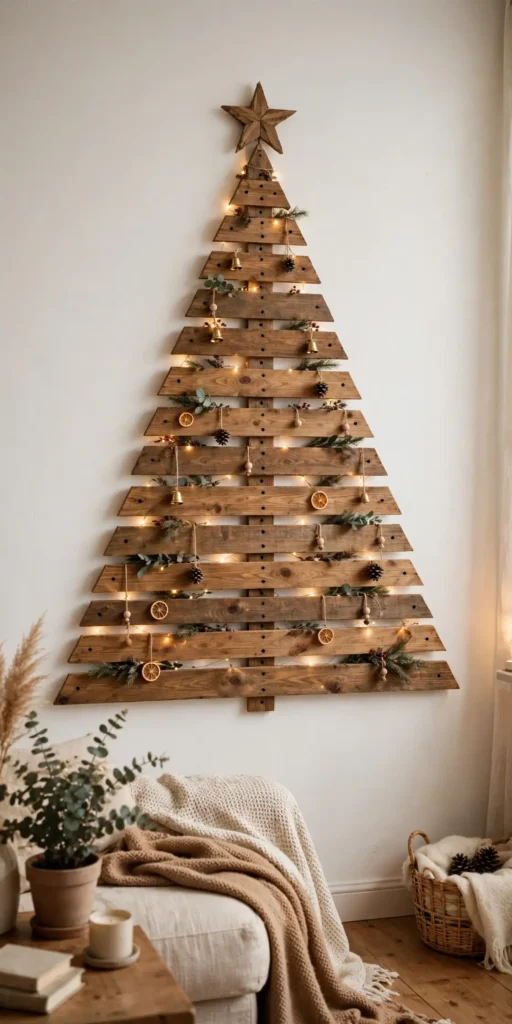
A small flat with no room for a real tree can feel left out of Christmas, because a full tree needs floor space you do not have. A diy wooden christmas tree, made from planks or dowels fixed to a wall in a triangle, solves this completely, because it takes no floor space and still gives you a tree shape to decorate. Steps: 1. Cut five planks in decreasing lengths, from 90 cm down to 20 cm. 2. Fix them to the wall with small brackets, widest at the bottom, narrowest at the top, with 15 cm gaps between them. 3. Add a star at the top and hang ornaments from small hooks screwed into each plank.
Try it: Paint the planks white before you fix them to the wall. White planks read as a tree silhouette, while raw wood can read as shelving.
02
Felt Christmas Tree with Velcro Ornaments
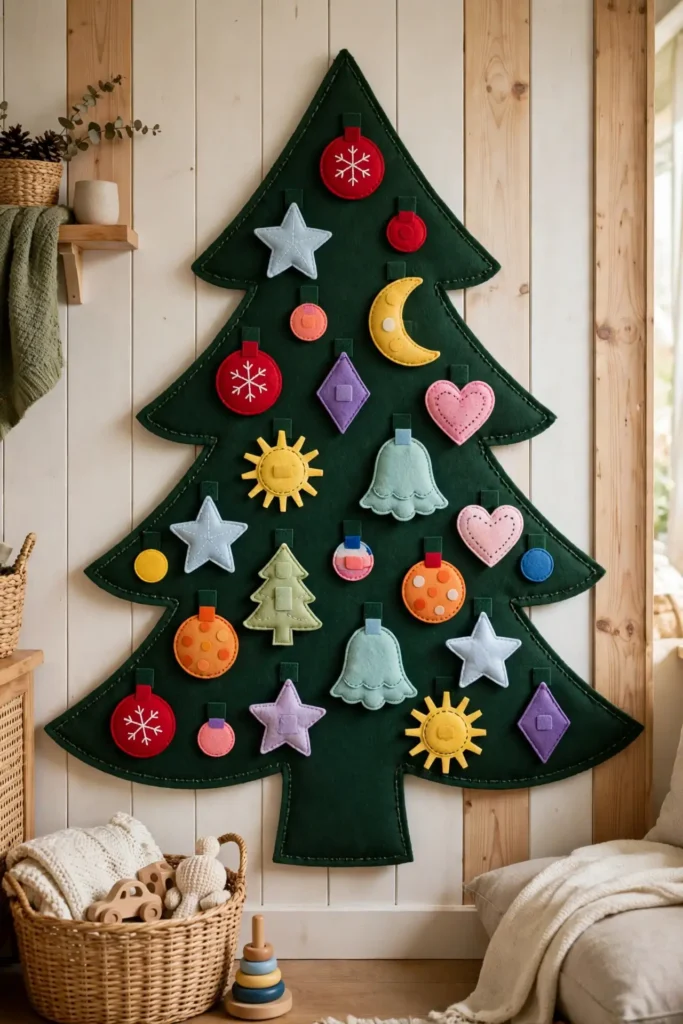
A house with toddlers and a real tree can feel like a daily rescue mission, because small hands pull ornaments off faster than you can hang them. A felt christmas tree with velcro ornaments solves this, because the tree hangs flat on a wall and children can stick ornaments on and pull them off all day without breaking anything. Steps: 1. Cut a large triangle from dark green felt and fix it to the wall with adhesive strips. 2. Cut ornament shapes from coloured felt and sew a small velcro dot to the back of each one. 3. Stick matching velcro dots to the tree, and let children decorate and redecorate as often as they like.
Try it: Make twice as many ornaments as the tree holds. A box of spare ornaments keeps the game going, while a tree with exactly enough ornaments ends the game fast.
03
DIY Christmas Tree Skirt
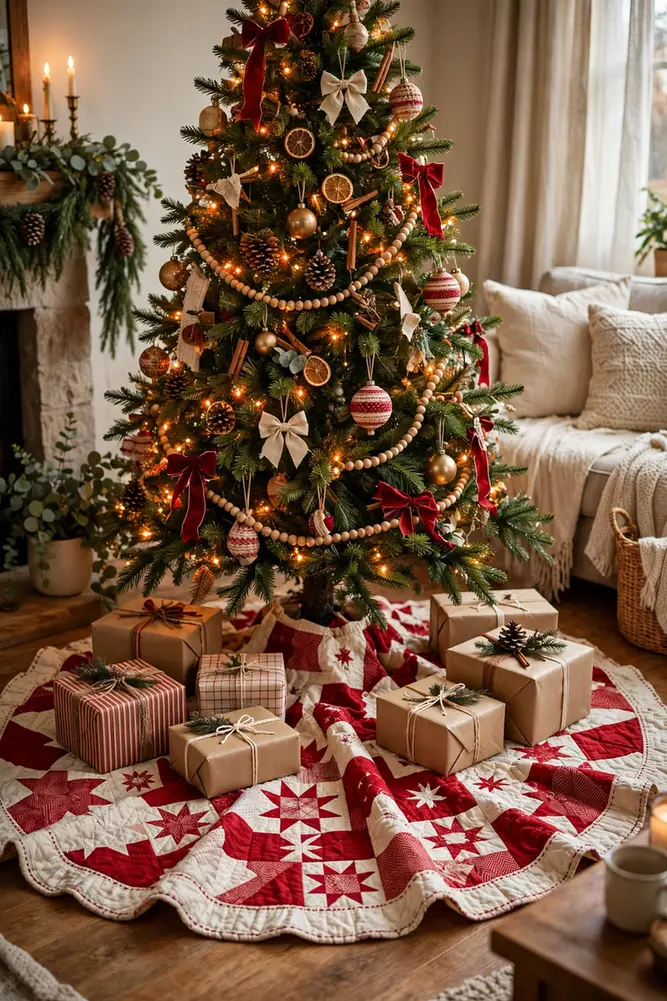
A tree standing in a bare metal stand can look unfinished from the sofa, because the stand and the tangle of light cables show under the lowest branches. A diy christmas tree skirt, a circle of fabric with a slit to the centre, hides all of that and gives presents a clean surface to sit on. Steps: 1. Cut a circle of fabric 120 cm across, then cut a slit from one edge to the centre and a small circle out of the middle. 2. Hem the outer edge and both slit edges so the fabric does not fray. 3. Lay the skirt around the tree stand, slit at the back, and smooth it flat.
Try it: Use a fabric with a pattern on one side only, and keep the plain side down. A patterned top with a plain underside looks finished from every angle, while a double-sided print can look busy where it folds.
04
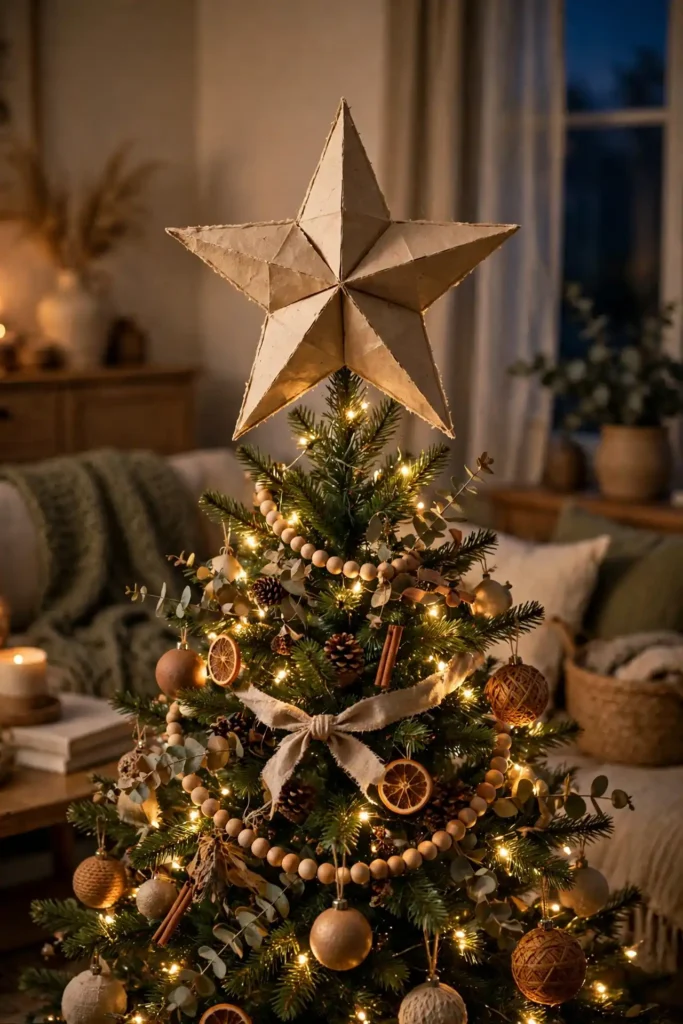
DIY Christmas Tree Topper
A tree topped with a shop-bought star can look like every other tree, because the same star sits on thousands of trees. A diy christmas tree topper, a star folded from paper, a wooden star, or a simple angel made from fabric, makes the top of your tree the one part nobody else has. Steps: 1. Choose one material that matches your tree, paper for a light tree, wood for a rustic tree, fabric for a soft tree. 2. Make the topper slightly larger than you think you need, about 25 cm across for a 180 cm tree. 3. Fix it firmly to the top branch with wire, not string, so it stays upright all season.
Try it: Test the topper on the tree before Christmas Eve. A topper that leans on the day looks like an accident, while a topper fixed straight in November looks deliberate all month.
Door and Entry
05
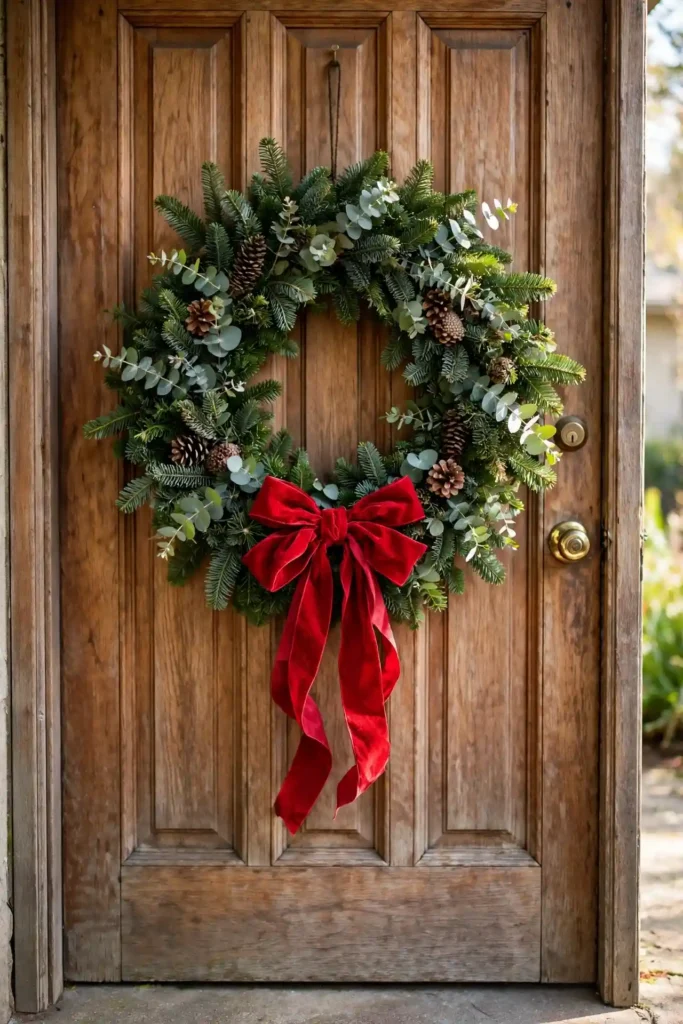
DIY Christmas Wreath
A front door with no wreath can look like the house forgot Christmas, because the door is the first thing guests see. A diy christmas wreath, built on a wire frame with fresh greenery, is the single decoration with the biggest effect on the whole house. Steps: 1. Buy a wire wreath frame and three bunches of mixed greenery, fir, pine, and eucalyptus. 2. Wire small bundles of greenery to the frame, overlapping each bundle over the last, working all the way around. 3. Add a bow at the bottom and three ornaments wired in, then hang the wreath on a hook or an over-door hanger.
Try it: Mix at least two types of greenery. A wreath of one fir type looks flat, while fir mixed with eucalyptus or pine has depth and texture.
06
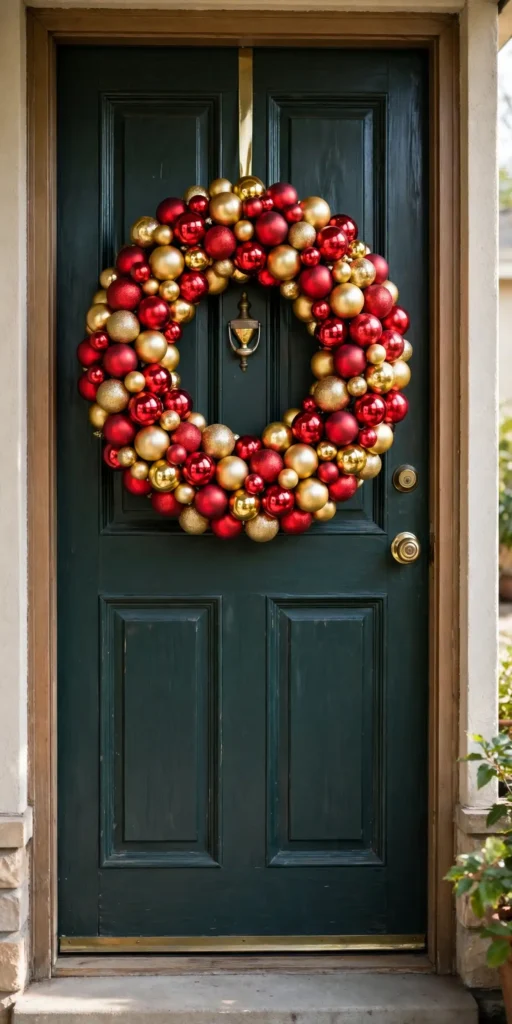
DIY Ornament Wreath
A box of old baubles with no tree to hang them on can feel like clutter, because mismatched ornaments in a box look like leftovers. A diy ornament wreath turns that box into a door decoration, because the ornaments become the wreath itself. Steps: 1. Thread a wire coat hanger into a circle, or buy a foam wreath form. 2. Hot glue baubles to the form in rings, largest at the back, smallest at the front, filling every gap. 3. Glue a ribbon loop to the back for hanging, and hang the wreath where it will not be knocked, since baubles break.
Try it: Use one colour family, all reds or all golds, even if the baubles differ in size and finish. One colour family reads as a design, while mixed colours read as a box emptied onto a ring.
07
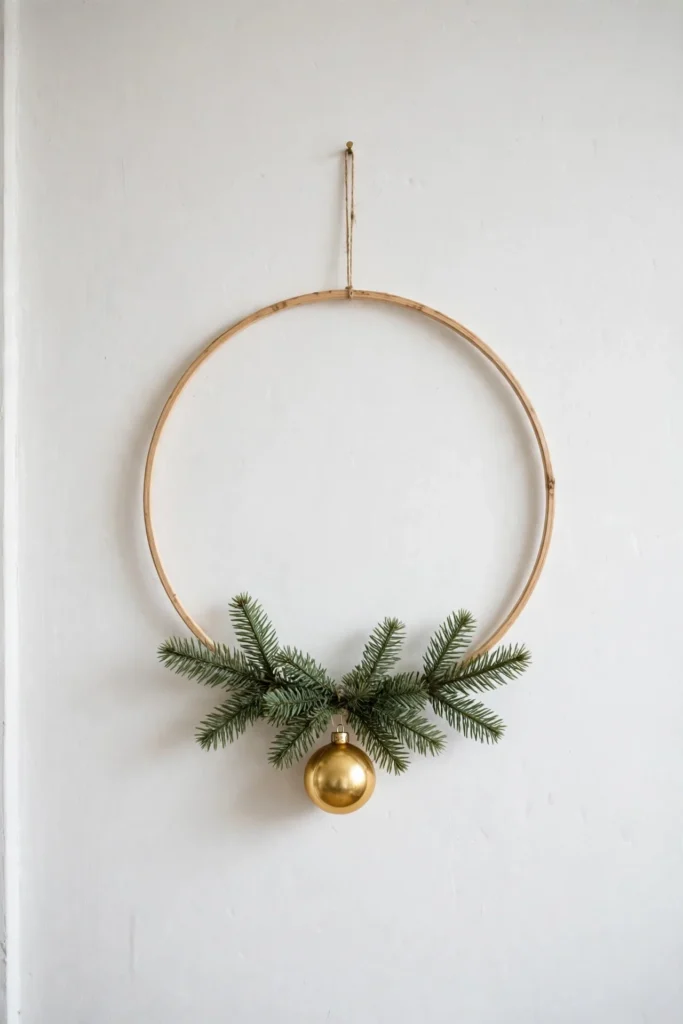
Christmas Hoop Wreath
A full wreath can feel too heavy for an interior door or a small hallway, because a thick ring of greenery dominates a narrow space. A christmas hoop wreath, a thin wooden or metal hoop with greenery on only the bottom third, is the lighter answer, because most of the hoop stays empty and the decoration reads as modern. Steps: 1. Buy a wooden embroidery hoop or a metal ring, about 30 cm across. 2. Wire a small bunch of greenery and one ornament to the bottom of the hoop, leaving the top bare. 3. Hang it from a ribbon tied at the top of the hoop.
Try it: Keep the greenery to one side of the bottom, not centred. An off-centre bunch looks designed, while a centred bunch looks like a badge.
08
DIY Christmas Door Decorations
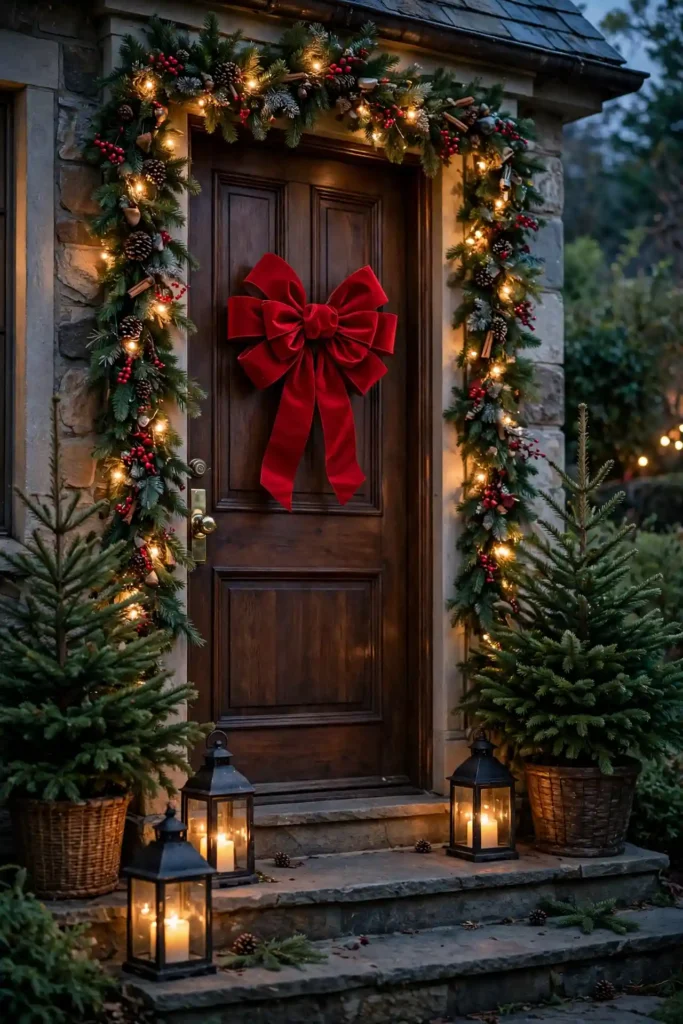
A front door dressed with only a wreath can look finished but plain, because the door frame and the porch around it stay bare. Diy christmas door decorations, a garland around the frame, a bow on the handle, and a doormat with a Christmas message, dress the whole entrance, not just the door. Steps: 1. Fix a garland around the door frame with adhesive hooks, starting at the top and working down both sides. 2. Tie a large bow to the door handle or the knocker. 3. Add a lantern or a pair of small potted firs beside the door to finish the entrance.
Try it: Light the porch if you decorate it. A decorated entrance in the dark looks like a silhouette, while one warm light makes every detail show.
Mantel and Walls
09
Fireplace Mantel Garland
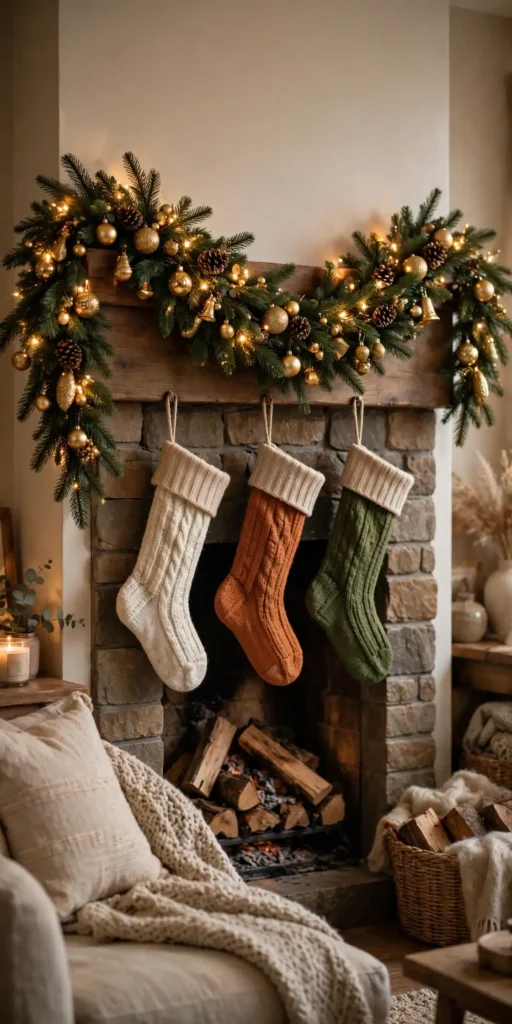
A bare mantel at Christmas can look like the room forgot the fireplace, because the mantel is the natural focal point of a living room. A fireplace mantel garland, draped across the mantel with a swag in the middle, gives the room its centrepiece. Steps: 1. Choose a garland at least 30 cm longer than the mantel, so the ends can drape down both sides. 2. Fix it with adhesive hooks at each end and one in the middle, letting the middle sag into a swag. 3. Weave in fairy lights and tuck in three ornaments or pinecones along the swag.
Try it: Let the garland ends hang at least 20 cm below the mantel edge. Ends that stop exactly at the edge look measured, while ends that drape look generous.
10
DIY Christmas Garland
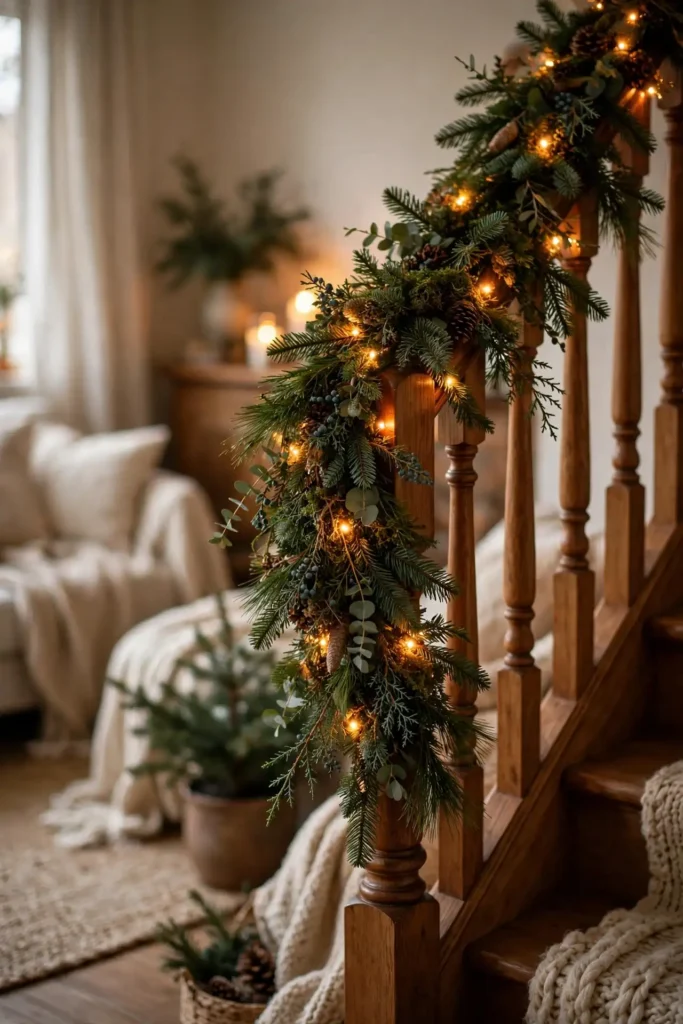
A shop-bought garland can look thin and plastic, because factory garlands use sparse greenery on a visible wire core. A diy christmas garland, made by wiring fresh branches to a rope core, looks full and smells like a forest. Steps: 1. Lay a length of rope on a table as your core. 2. Wire small bundles of fir and pine to the rope, overlapping each bundle over the last, until the rope is fully hidden. 3. Add lights by wrapping them around the garland, then hang it along a mantel, a staircase, or a doorway.
Try it: Work with the branches pointing one way, like roof tiles. Bundles pointing in mixed directions look messy, while bundles all pointing one way look professionally made.
11
Orange Garland
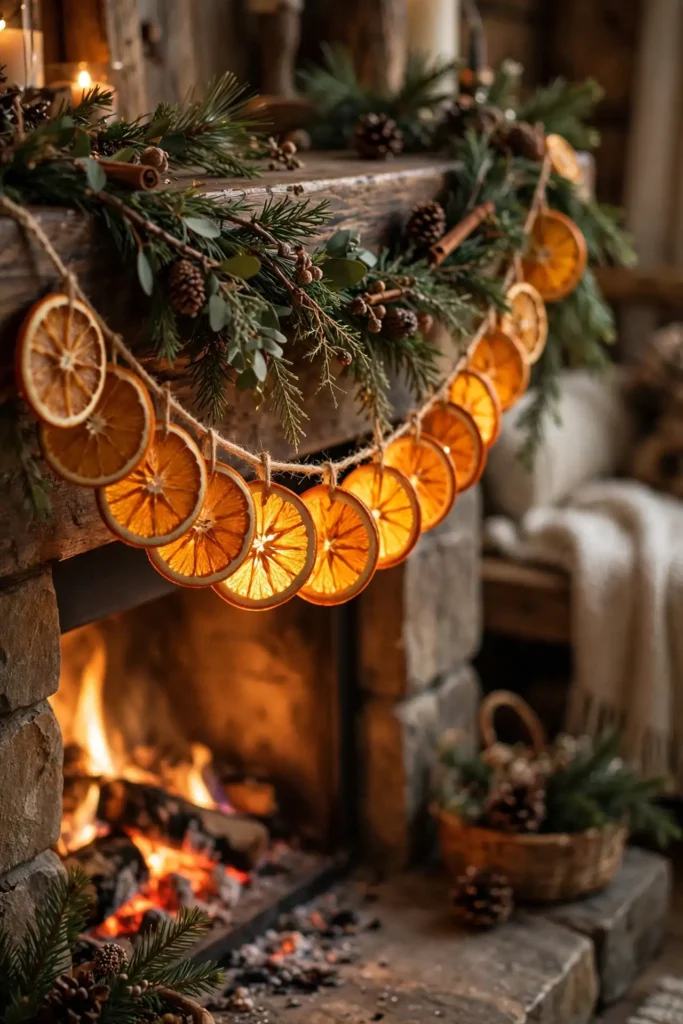
A room dressed only in green and red can feel like every other Christmas room, because green and red are the default palette. An orange garland, dried orange slices threaded on string, adds warm amber colour and a citrus scent that no other decoration gives. Steps: 1. Slice oranges 5 mm thick and dry them in the oven at 100 degrees for 2 to 3 hours, turning once, until fully crisp. 2. Thread a needle with strong string and pass it through the top of each slice. 3. Knot the string after every third slice so the slices stay spaced, and hang the garland along a mantel or a window.
Try it: Dry the slices until they are fully crisp, not leathery. A leathery slice droops and darkens, while a crisp slice holds its shape and glows in the light.
12
Ornament Garland DIY
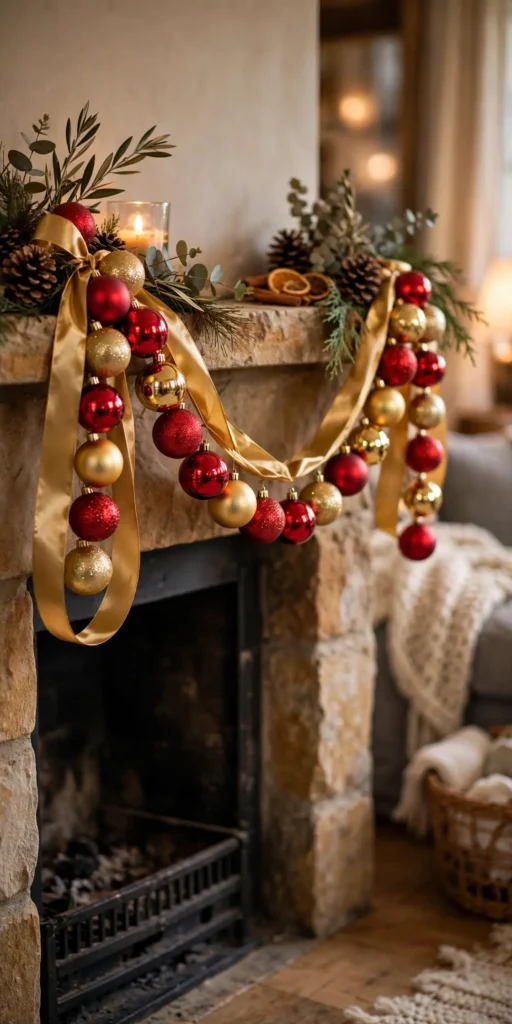
A mantel with only a greenery garland can look like the tree got all the ornaments, because the baubles stay on the branches. An ornament garland diy project, baubles strung on ribbon or wire, moves some of that sparkle to the mantel, the staircase, or a doorway. Steps: 1. Choose baubles in one colour family and two sizes. 2. Thread them onto strong ribbon or wire, alternating sizes, and knot the ribbon after every few baubles to stop them sliding. 3. Drape the finished garland with a swag in the middle, and fix the ends with adhesive hooks.
Try it: Mix matte and shiny baubles in the same colour. The mix catches light in two ways, while all-matte or all-shiny baubles can look flat.
Table
13
DIY Christmas Centerpiece on a Budget
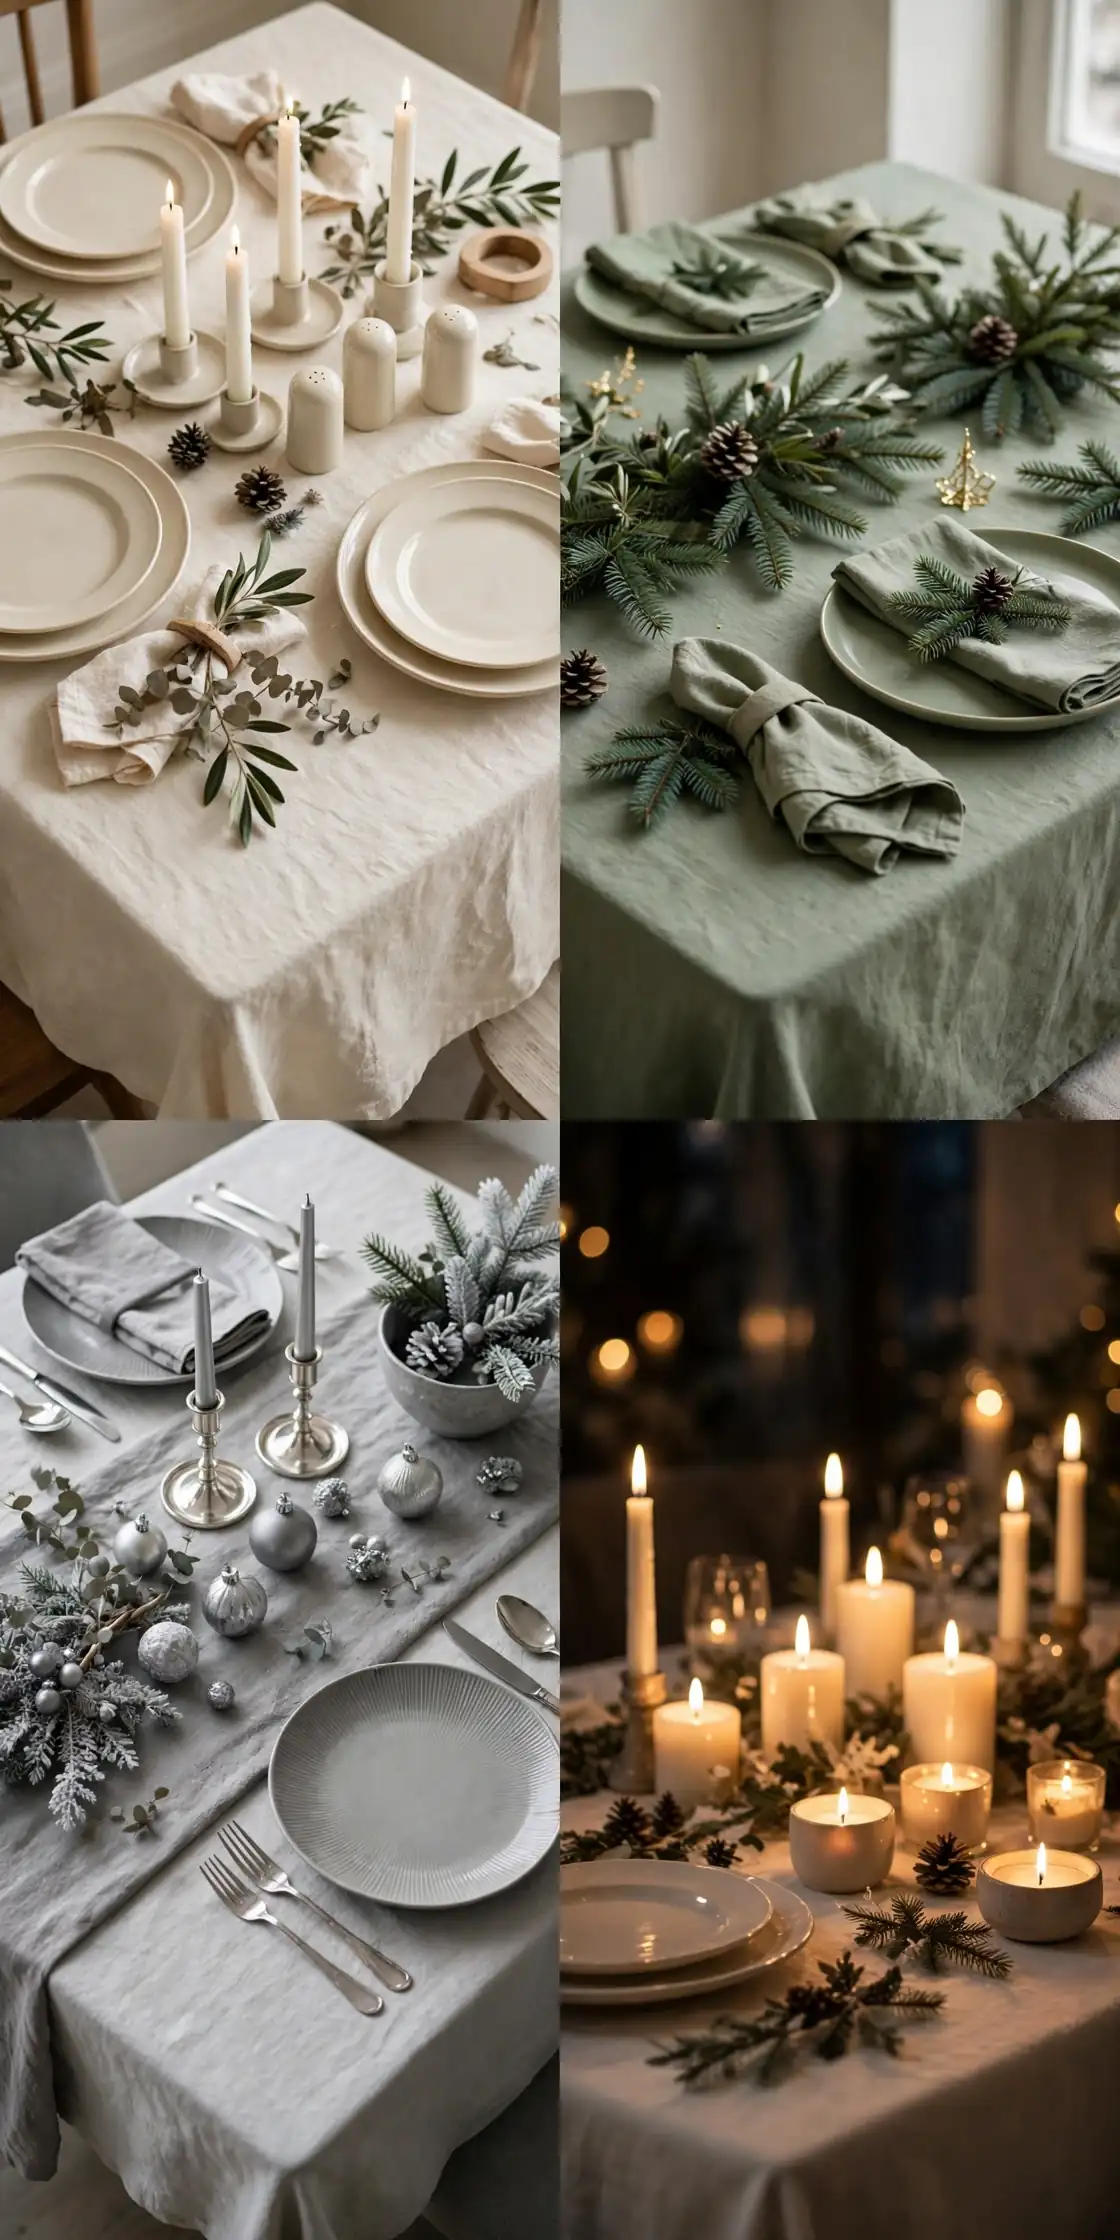
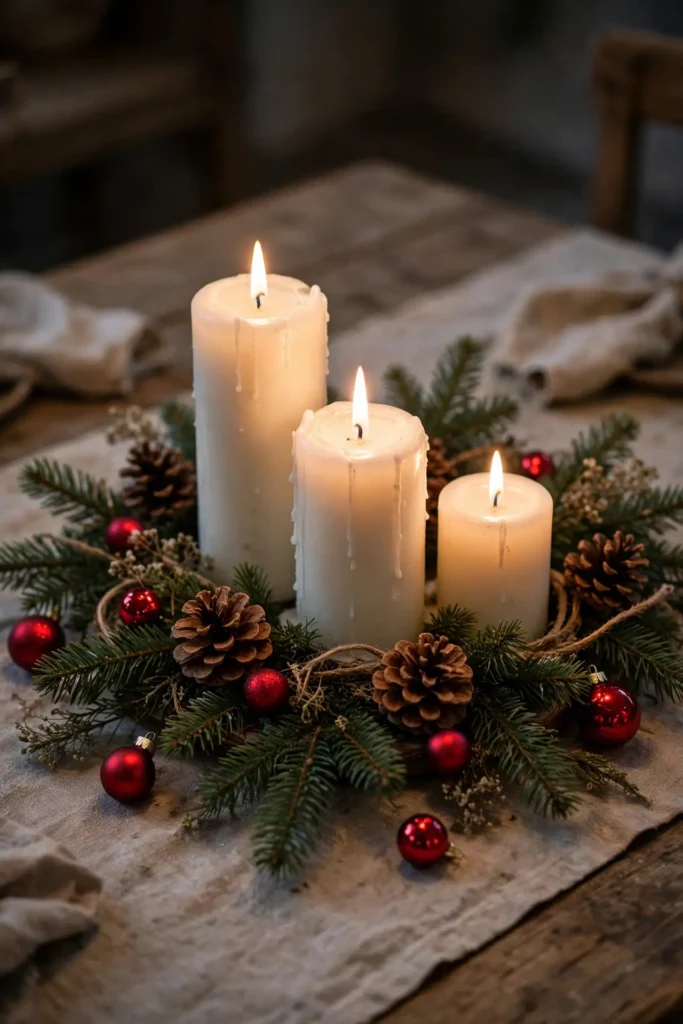
A Christmas table with no centrepiece can look like a meal, not a celebration, because the middle of the table stays empty. A diy christmas centerpiece on a budget, greenery from the garden, candles you already own, and a few baubles, fills the middle for almost nothing. Steps: 1. Lay a runner or a piece of fabric down the middle of the table. 2. Place three pillar candles of different heights in the centre. 3. Tuck fir sprigs, pinecones, and baubles around the candles, keeping everything below eye level so guests can see each other across the table.
Try it: Keep the centrepiece narrow, no wider than 30 cm. A wide centrepiece steals plate space, while a narrow one leaves room for food and elbows.
14
Easy Christmas Table Decorations
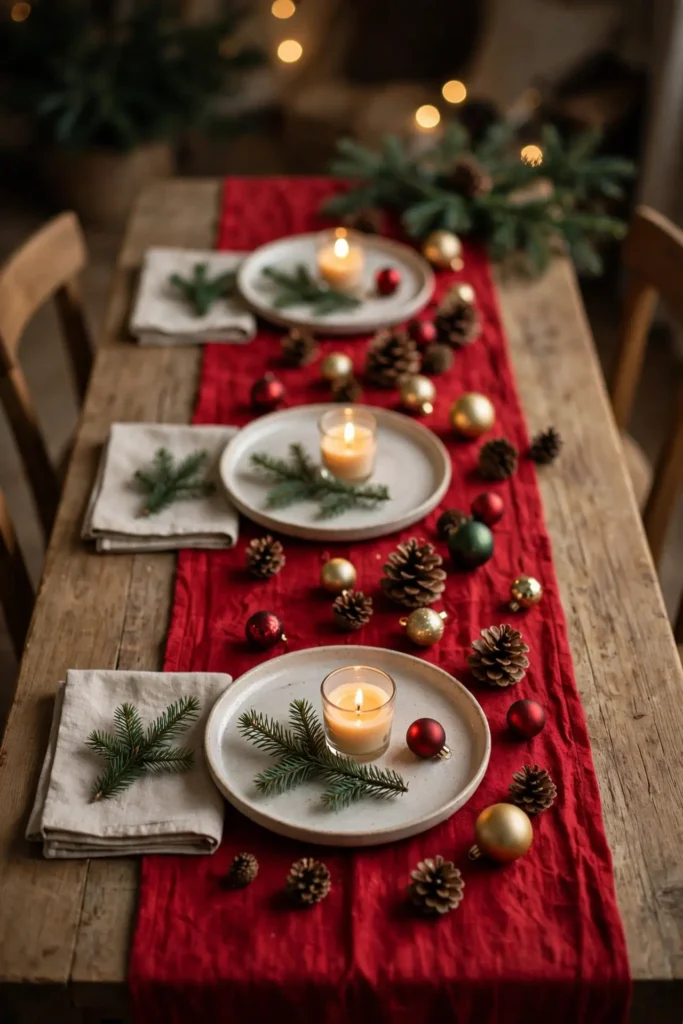
A table dressed only with a tablecloth can look bare even when the food is beautiful, because the table itself carries no Christmas. Easy christmas table decorations, a runner, scattered baubles, and a candle at each place, dress the table in ten minutes. Steps: 1. Lay a runner in a Christmas colour, red, green, or gold, down the centre. 2. Scatter a few baubles and pinecones along the runner, keeping them away from plates. 3. Place a small candle or a sprig of fir at each setting, and light the candles just before guests sit down.
Try it: Use an odd number of candles down the runner, three or five. Odd numbers read as a design, while even numbers can look like a row of soldiers.
15
DIY Christmas Centerpiece Ideas
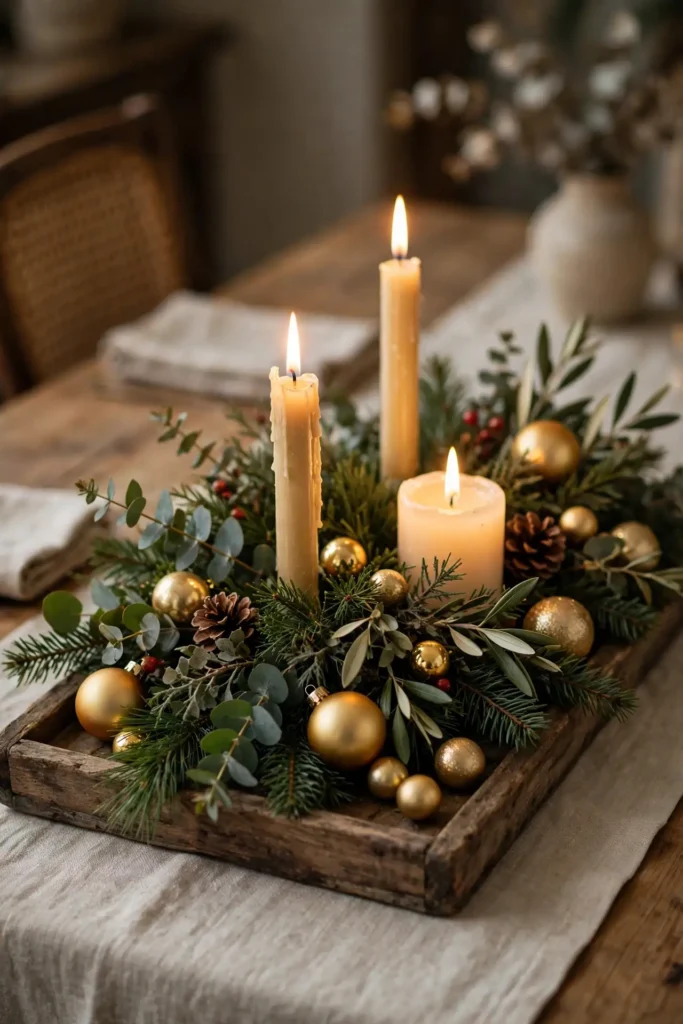
A centrepiece that is only candles can look plain by the main course, because candles alone give light but no shape. A fuller diy christmas centerpiece, candles plus a base of greenery, a wooden slice, or a tray, gives the table a shape that lasts the whole meal. Steps: 1. Choose a base, a wooden slice, a tray, or a shallow bowl. 2. Build the centrepiece on the base, candles in the middle, greenery around them, baubles tucked into the gaps. 3. Check the height from a seated position, and trim anything that blocks a face across the table.
Try it: Build the centrepiece on a tray. A tray lets you lift the whole decoration off the table in one move when the food arrives, while a loose arrangement has to be dismantled piece by piece.
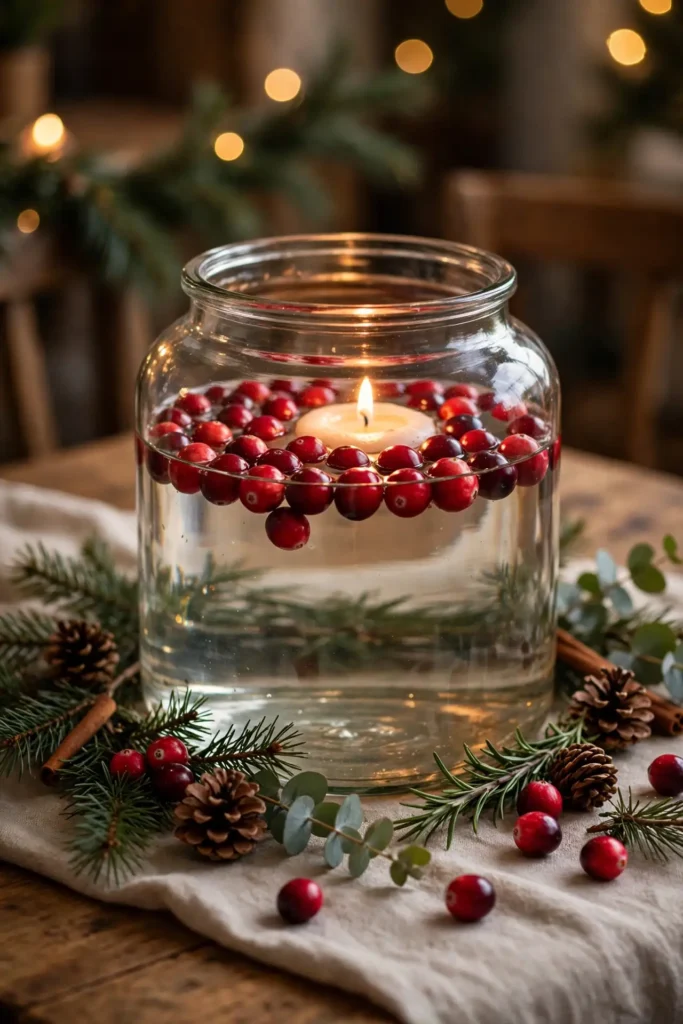
16
Christmas Decoration Ideas DIY for the Table
A table that looks perfect before dinner and chaotic after can feel like the decoration failed, because most table decorations fall apart once plates and glasses arrive. A table decoration built to survive the meal, a cranberry and candle water centrepiece in a sturdy jar, stays beautiful from starter to dessert. Steps: 1. Fill a wide glass jar two thirds full with water and drop in a handful of fresh cranberries. 2. Place a floating candle on top of the water. 3. Set the jar on a small plate to catch drips, and light the candle when guests sit down.
Try it: Use fresh cranberries, not frozen ones. Frozen cranberries cloud the water as they thaw, while fresh ones float clear and bright all evening.
Ornaments and Crafts

17
DIY Felt Ornaments
A tree dressed only in glass baubles can feel fragile and formal, because glass breaks and glass looks the same every year. Diy felt ornaments, stars, trees, and stockings cut from felt and stitched by hand, give the tree softness, colour, and a handmade feel that glass never gives. Steps: 1. Draw simple shapes on paper, stars, trees, hearts, and cut them out as templates. 2. Pin each template to felt, cut two copies, and stitch them together around the edge with blanket stitch, leaving a small gap. 3. Stuff lightly with cotton wool, stitch the gap closed, and add a loop of ribbon for hanging.
Try it: Use a contrasting thread colour for the stitching. Contrasting stitches look like embroidery, while matching thread disappears and the ornament looks machine made.

18
DIY Christmas Baubles
A tree covered in plain shop baubles can look like a catalogue page, because identical baubles repeat with no variation. Diy christmas baubles, clear baubles filled with something personal, give the tree ornaments nobody else owns. Steps: 1. Buy clear plastic baubles that open in halves. 2. Fill each one with one thing, fake snow, a small photo, dried flowers, or glitter, and close the halves firmly. 3. Replace the shop cap with a ribbon loop, and hang the baubles where guests can see the filling, not hidden inside the branches.
Try it: Fill each bauble with one thing only. A bauble filled with three things looks like a lucky dip, while a bauble filled with one thing reads as a design.
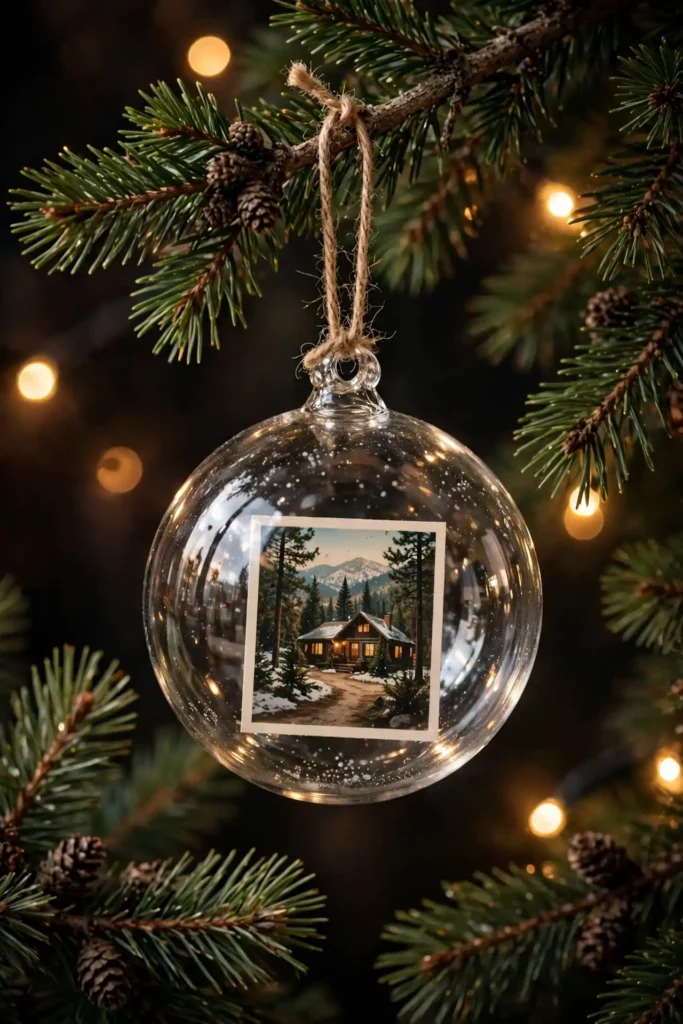
19
Photo Christmas Ornaments DIY
A tree with no personal ornaments can feel like a display, because nothing on it belongs to your family. Photo christmas ornaments diy projects, small photos set into baubles or frames, turn the tree into a family album. Steps: 1. Print small photos, about 5 cm across, on ordinary paper, not photo paper, so they sit flat. 2. Roll each photo gently and slide it into a clear bauble, then shake the bauble until the photo unrolls against the inside. 3. Add a ribbon loop and hang the photo baubles at eye level, where guests will actually see the faces.
Try it: Choose one photo per bauble and one year per tree if you can. A tree of mixed years looks like a box of prints, while a tree of one year tells one story.
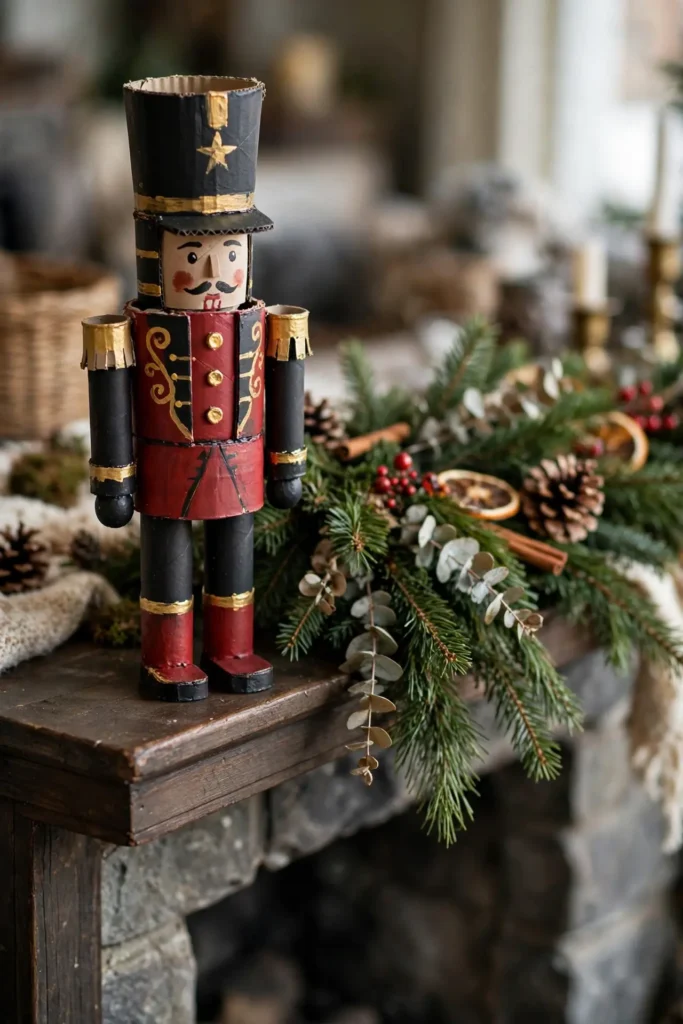
20
DIY Nutcracker Soldier
A mantel with only candles and garland can look soft, because nothing on it stands upright with a shape. A diy nutcracker soldier, built from cardboard tubes, paint, and fabric, gives the mantel a tall, colourful figure that children love. Steps: 1. Paint a tall cardboard tube red for the body and a smaller tube black for the hat. 2. Glue the hat tube to the top of the body tube, and add a face with paint or paper, eyes, a moustache, and teeth. 3. Add arms from smaller tubes, epaulettes from gold card, and a base from a wooden disc so the soldier stands upright.
Try it: Make two soldiers, not one. A single soldier looks lost on a mantel, while a pair flanking a garland or a mirror looks like a guard of honour.
Outdoors and Budget
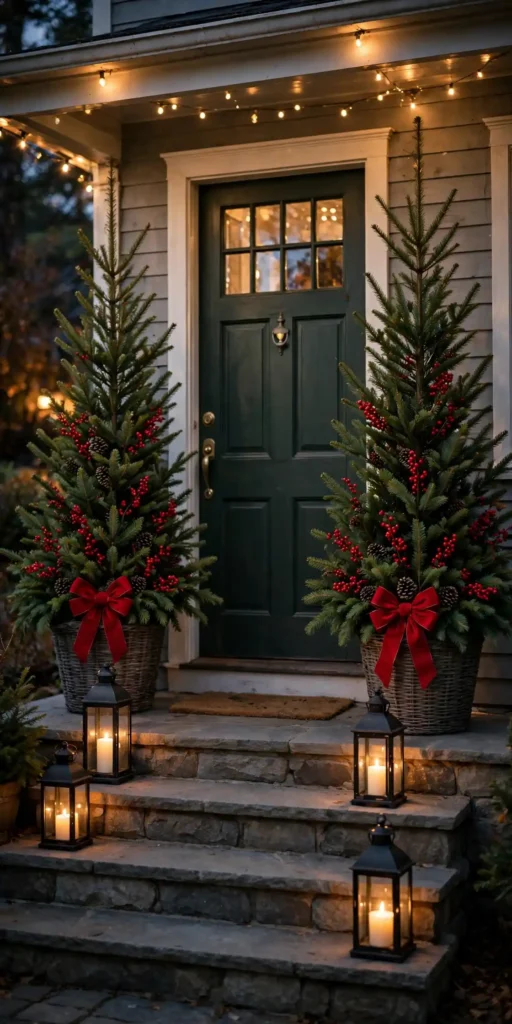
21
DIY Outdoor Christmas Decorations
A house with a bare porch at Christmas can look dark from the street, because the inside glows while the outside gives nothing away. Diy outdoor christmas decorations, planters filled with branches, lanterns on the steps, and a wreath on the door, make the house welcoming before anyone comes inside. Steps: 1. Fill two planters with soil or sand for weight. 2. Push tall fir branches into the centre of each planter, then shorter branches around them, and add red berries and a bow. 3. Place one planter each side of the door, add a lantern on each step, and check the display from the street after dark.
Try it: Weigh the planters down well. A planter that blows over in the first wind looks worse than no planter at all, while a heavy one stands all season.
22
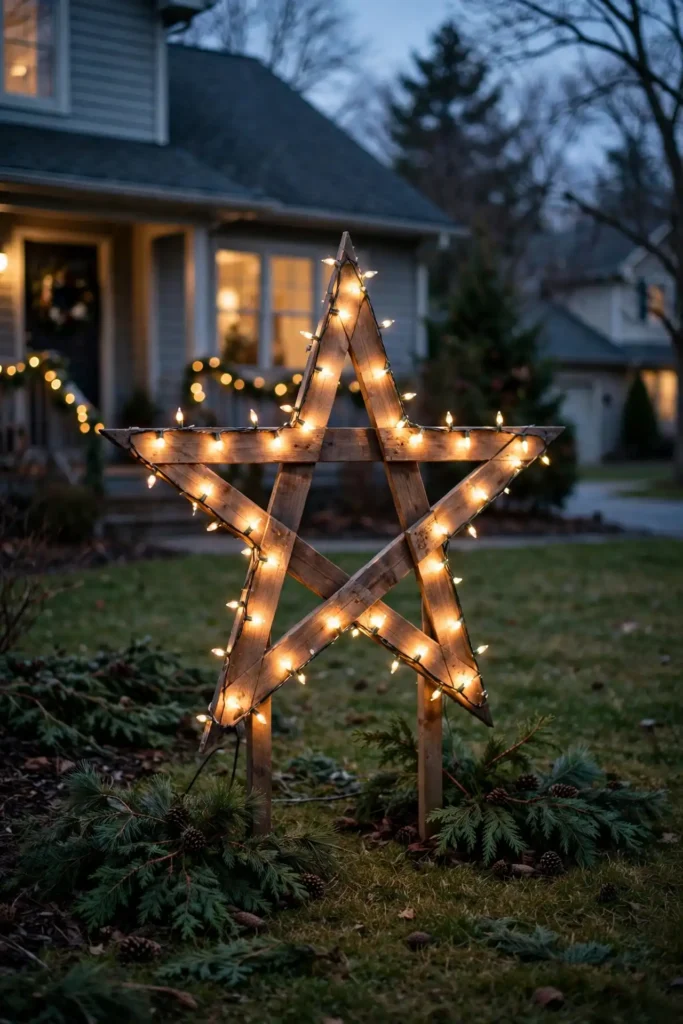
DIY Christmas Yard Decorations
A yard with only a string of lights can look like an afterthought, because lights alone give glow but no shape. Diy christmas yard decorations, wooden stars on stakes, a simple reindeer silhouette, or tomato cages wrapped as trees, give the yard shapes that show up from the road. Steps: 1. Build one large shape, a star from wooden battens, a tree from a tomato cage wrapped in lights, or a reindeer from plywood. 2. Paint or wrap the shape in lights, and fix it firmly to the ground with stakes. 3. Add a spotlight or a string of lights aimed at the shape, so it reads clearly after dark.
Try it: Build one big shape rather than five small ones. One large star reads from the road, while five small decorations blur into clutter at a distance.
23
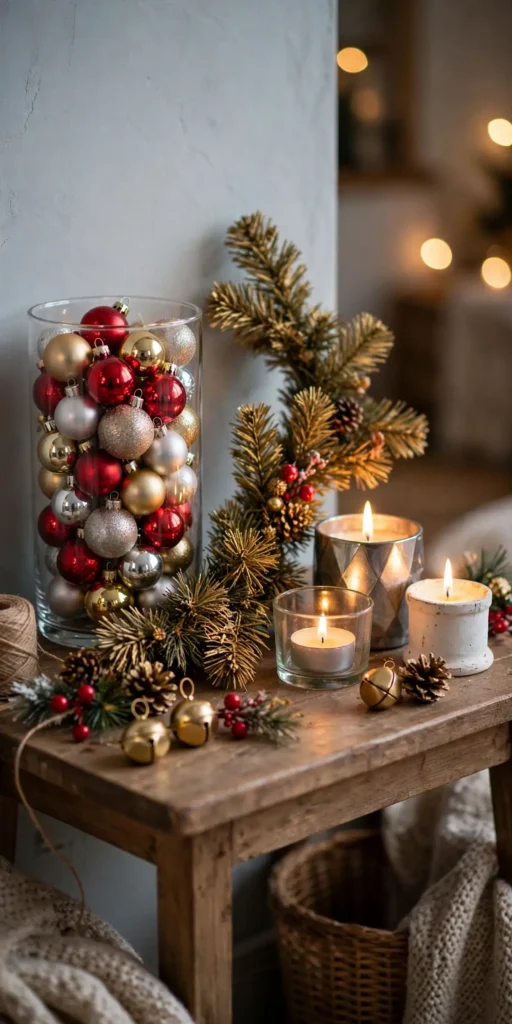
Dollar Tree Christmas Decorations
A Christmas budget blown on one shop display can leave the rest of the house bare, because one expensive piece eats the whole budget. Dollar tree christmas decorations, cheap baubles, garlands, candle holders, and craft supplies, let you dress every room for the price of one shop-bought wreath. Steps: 1. Buy the basics in bulk, baubles, garland, ribbon, and candle holders, all in one colour family. 2. Upgrade the cheap pieces with one step each, spray paint a garland, add ribbon to a candle holder, or fill a glass vase with baubles. 3. Group the upgraded pieces together, since a cluster of dollar store pieces reads as a display, while one piece alone reads as cheap.
Try it: Spend the saved money on lights, not more decorations. Good lights make cheap decorations look expensive, while poor lights make expensive decorations look dull.
24
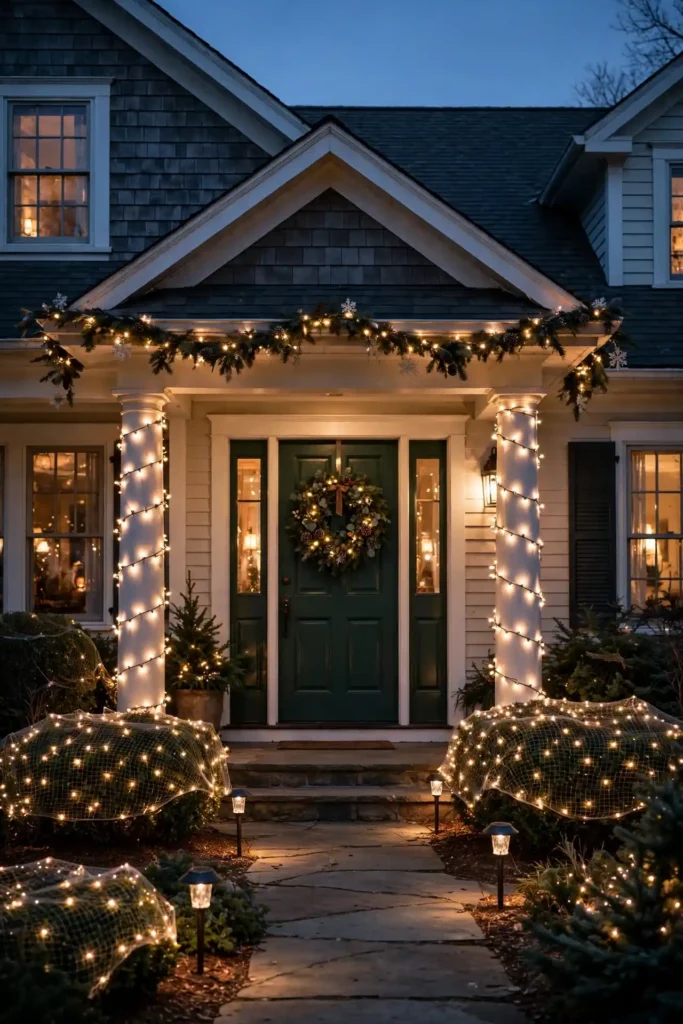
DIY Christmas Lights Outdoor
A house with lights only on the roof edge can look like a outline drawing, because the roofline glows while the porch, the bushes, and the path stay dark. Diy christmas lights outdoor projects, lights wrapped around porch columns, net lights over bushes, and path markers, spread the glow across the whole front of the house. Steps: 1. Measure each area before buying lights, columns, bushes, and path length, so you buy the right lengths. 2. Start at the power source and work outward, fixing lights with clips, never nails, which damage cables. 3. Use a timer so the lights come on at dusk and off at bedtime, and check the whole display from the street on the first night.
Try it: Use warm white lights for the whole house. Mixed colours across different areas look patchy, while one warm white everywhere reads as one design.
Pro tip: Finish one zone completely before starting the next. A finished mantel, a finished door, and a finished table make the house feel done, while five half-finished projects make it feel chaotic, even if you spent the same hours.
Three rules for DIY Christmas decor that looks intentional, not homemade
Most DIY Christmas decor looks unfinished for the same three reasons, and all three are fixable.
- First, limit the palette. One or two colours per zone, repeated consistently, look intentional, while a few decorations in unrelated colours look like leftovers.
- Second, hide the fixings. Wire, glue, tape, and clips should never show, because visible fixings are what separate a handmade decoration from a shop-bought one.
- Third, match the scale to the space. A huge wreath on a small door dominates it, and a tiny garland on a long mantel disappears, so choose decorations sized to the space you actually have, not the space you wish you had.
Storing and reusing your DIY Christmas decor
DIY Christmas decorations last for years if you store them properly, and the storage step is part of the making, not an afterthought.
- First, label every box by zone and year. A box labelled “2025 mantel garland” is easy to find next December, while a box labelled “Christmas stuff” means unpacking everything to find one wreath.
- Second, wrap fragile pieces separately. Glass baubles, photo ornaments, and dried orange garlands crush against each other, so tissue paper between pieces is worth the minute it takes.
- Third, keep naturals apart from keepsakes. Dried orange slices and fir branches scent and shed onto everything around them, so store them in their own sealed bag, and keep fabric, felt, and paper pieces clean and dry.
Questions readers ask
What is the easiest diy christmas decor for beginners?
The easiest diy christmas decor for beginners is a garland, a wreath, or a centrepiece made from fresh greenery, because all three need only branches, wire, and a frame, and mistakes hide easily under more branches. Start with a mantel garland, since it is flat, forgiving, and finishes in under an hour.
How do I decorate for Christmas on a budget?
You decorate for Christmas on a budget by starting with greenery from the garden, candles you already own, and dollar store basics in one colour family, and by making one statement piece per room instead of buying many small ones. A diy christmas decor budget of $30 to $50 dresses a whole house when you make the big pieces yourself.
What can I make for Christmas with things at home?
You can make Christmas decor with things at home by using cardboard tubes for nutcracker soldiers, jars for candle centrepieces, old baubles for an ornament wreath, and fabric scraps for a tree skirt. The best diy christmas decor starts in a junk drawer, not a craft shop, because the materials are free and the result is personal.
How do I make a Christmas wreath at home?
You make a Christmas wreath at home by wiring small bundles of greenery to a wire frame, overlapping each bundle over the last, all the way around, then adding a bow and three ornaments. A handmade christmas wreath takes about an hour, and mixing two types of greenery gives it depth that a single fir type lacks.
What are the best diy outdoor christmas decorations?
The best diy outdoor christmas decorations are planters filled with branches, lanterns on the steps, and one large lit shape in the yard, because all three show up from the street and survive winter weather. Weigh planters down well, and use outdoor-rated lights with a timer for safety.
How long does homemade Christmas decor last?
Homemade Christmas decor lasts for many seasons when stored properly, with felt, wood, and fabric pieces lasting the longest, and fresh greenery lasting one season only. Store each piece separately in a labelled box, keep naturals apart from keepsakes, and dried orange garlands will last two to three seasons if kept dry.
Can I make Christmas decorations with kids?
Yes, you can make Christmas decorations with kids, and the best projects are a felt tree with velcro ornaments, felt ornaments, and photo baubles, because all three are safe, forgiving, and genuinely useful on the tree. Keep hot glue and sharp tools for adults, and let children choose colours and placements.
How do I store DIY Christmas decorations so they last?
You store DIY Christmas decorations so they last by labelling every box by zone and year, wrapping fragile pieces separately in tissue paper, and keeping dried naturals in a separate sealed bag away from fabric and paper. Stored this way, felt, wood, and fabric decorations will last for many seasons.
People Also Ask
What is the 70/30 rule for DIY Christmas decor?
The 70/30 rule for DIY Christmas decor means roughly 70 percent of the room stays as it is, and 30 percent carries Christmas decoration. The rule is a guide, not a law, but a room that follows it will read as festive rather than cluttered.
How do I make my DIY decor look shop bought, not homemade?
You make your DIY decor look shop bought, not homemade, by hiding every fixing, limiting each zone to one or two colours, and finishing every edge, hem, and cut. A decoration with hidden wire, a clear palette, and finished edges reads as designed, while visible glue and mixed colours read as a craft project.
What DIY Christmas decorations should beginners avoid?
Beginners should avoid projects that need power tools, hot glue on large surfaces, or fresh greenery that must stay alive for weeks, because each of those adds risk and frustration. Start with garlands, wreaths, and centrepieces, and save wooden trees and outdoor builds for a second year.
loved these ideas? ✿
Save this guide for later
Pin it to your board so it’s there when you’re ready to recreate it.

Curated by
Hey! I'm Sanaullah — visual curator and content creator. I search, curate, and test the best aesthetic ideas across Pinterest so you can easily transform your living space, style daily outfits, and try simple creative DIYs without the overwhelm.