


If you want one cookie that can wear fifteen different centers, this is it. These christmas thumbprint cookie recipes start from one reliable buttery dough and fan out into jam, icing, ganache, caramel, curd and candy fillings, including the gingerbread thumbprint cookies, grinch thumbprint cookies and santa thumbprint cookies kids ask for by name. Every recipe below is an easy christmas thumbprint cookies bake with exact amounts and real timings, so you can press, fill and bake your way to a tin that looks like the best christmas thumbprint cookie recipe collection on the counter.
Quick Idea Summary
- The key takeaway: One base dough gives you all 15 cookies. What changes is the filling and when it goes in: jam bakes inside the cookie, while icing, ganache, caramel, curd and kisses go on after baking so they stay glossy and set properly.
- The detail most people miss: The wells puff up and shallow out in the oven. Re-press each well gently with the back of a round teaspoon the moment the tray comes out, while the cookies are still soft, and every center stays deep enough to hold a real spoonful of filling.
- What it costs or how long it takes: A batch costs $3 to $7 in pantry basics and jam. Most recipes take about 15 minutes of hands-on work, a 30 minute chill, and 12 to 15 minutes in the oven.
At a Glance
| Recipe | Makes | Bake time | Total time |
|---|---|---|---|
| 1. Classic Raspberry Jam Thumbprints | 30 cookies | 13 to 15 min | 1 hr 10 min |
| 2. Strawberry Jam Thumbprints | 30 cookies | 13 to 15 min | 1 hr 10 min |
| 3. Apricot Jam Thumbprints | 30 cookies | 13 to 15 min | 1 hr 10 min |
| 4. Icing-Filled Thumbprints | 30 cookies | 12 to 14 min | 1 hr 20 min |
| 5. Chocolate Thumbprints | 28 cookies | 12 to 14 min | 1 hr 25 min |
| 6. Chocolate Peppermint Thumbprints | 28 cookies | 12 to 14 min | 1 hr 25 min |
| 7. Hershey Kiss Thumbprints | 30 cookies | 10 to 12 min | 1 hr 5 min |
| 8. Gingerbread Thumbprints | 30 cookies | 11 to 13 min | 1 hr 15 min |
| 9. Salted Caramel Thumbprints | 30 cookies | 12 to 14 min | 1 hr 20 min |
| 10. Cherry Thumbprints | 30 cookies | 14 to 16 min | 1 hr 15 min |
| 11. Shortbread Thumbprints | 24 cookies | 16 to 18 min | 1 hr 15 min |
| 12. Sprinkle Thumbprints | 30 cookies | 12 to 14 min | 1 hr 10 min |
| 13. Grinch Thumbprints | 30 cookies | 12 to 14 min | 1 hr 10 min |
| 14. Santa Thumbprints | 30 cookies | 12 to 14 min | 1 hr 20 min |
| 15. Lemon Curd Thumbprints | 30 cookies | 12 to 14 min | 1 hr 15 min |
The Recipes: 15 Christmas Thumbprint Cookie Recipes
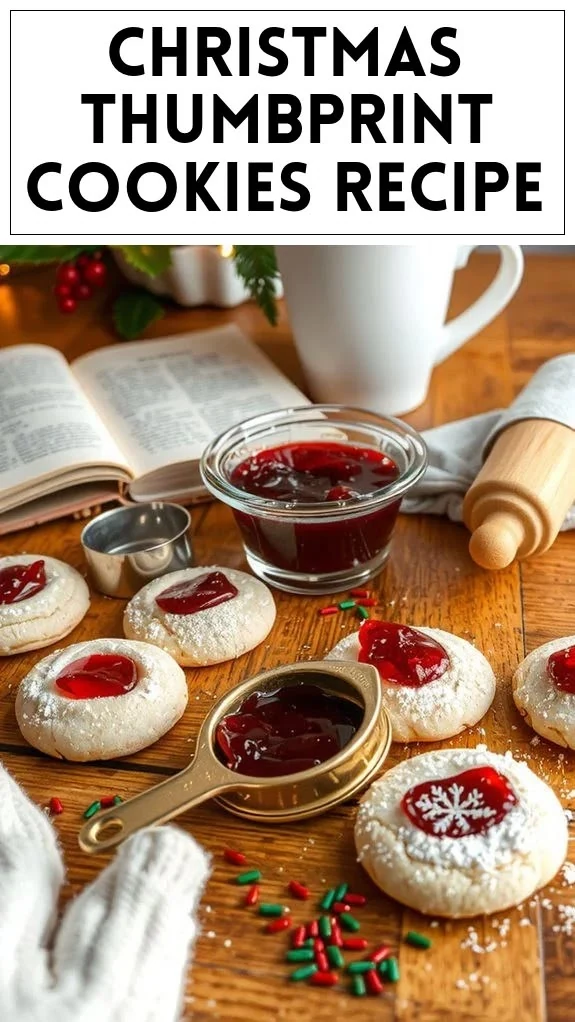
01
1. Classic Raspberry Jam Thumbprints
The original jelly thumbprint cookie recipe and still the one that disappears first: tender vanilla butter cookies with a jewel-red well of raspberry jam baked right in. This is the benchmark christmas cookie jam bake, sharp, sweet and buttery in one bite.
Makes: 30 cookies · Bake: 13 to 15 min · Total: 1 hr 10 min
Ingredients
- 1 cup (226 g) unsalted butter, softened
- 2/3 cup (135 g) granulated sugar
- 2 large egg yolks, room temperature
- 1 teaspoon vanilla extract
- 2 1/4 cups (280 g) all-purpose flour
- 1/2 teaspoon fine salt
- 1/2 cup (160 g) seedless raspberry jam
Steps
- Beat the butter and sugar with a mixer on medium for 2 to 3 minutes, until pale and fluffy. Beat in the egg yolks and vanilla until smooth.
- Add the flour and salt on low speed and mix just until a soft dough forms. Cover and chill for 30 minutes; cold dough cracks less and spreads less.
- Heat the oven to 350°F (175°C) and line two baking sheets with parchment. Roll the dough into 1-inch balls, about 1 tablespoon each, and set them 2 inches apart.
- Press a deep well into the center of each ball with your thumb or the round end of a wooden spoon, going about halfway down. Smooth any big cracks with your fingers.
- Stir the jam until loose, then fill each well with about 1/2 teaspoon. Do not mound it; level jam stays put, heaped jam bubbles over.
- Bake 13 to 15 minutes, until the edges are set and the bottoms are pale golden. The tops should still look light.
- Re-press the wells gently with a round teaspoon while warm if any puffed up. Cool on the pan 5 minutes, then move to a rack to cool completely.
Try it: Stir 1 teaspoon of lemon juice into the jam before filling. The cookies with raspberry jam taste noticeably brighter, and the acid helps the jam set glossy instead of dull.

02
2. Strawberry Jam Thumbprints
The softer, sweeter sibling of the raspberry classic, built for anyone who searches christmas cookies with strawberry jam every December. A little lemon zest in the dough keeps the strawberry thumbprint cookies tasting like fruit, not candy.
Makes: 30 cookies · Bake: 13 to 15 min · Total: 1 hr 10 min
Ingredients
- 1 cup (226 g) unsalted butter, softened
- 2/3 cup (135 g) granulated sugar
- 2 large egg yolks, room temperature
- 1 teaspoon vanilla extract
- 1 teaspoon finely grated lemon zest
- 2 1/4 cups (280 g) all-purpose flour
- 1/2 teaspoon fine salt
- 1/2 cup (160 g) strawberry jam or preserves
Steps
- Beat the butter and sugar on medium for 2 to 3 minutes until pale. Beat in the yolks, vanilla and lemon zest.
- Mix in the flour and salt on low until just combined. Cover and chill 30 minutes.
- Heat the oven to 350°F (175°C) and line two sheets with parchment. Roll the dough into 1-inch balls and space them 2 inches apart.
- Press a well halfway into each ball and pinch closed any cracks around the rim.
- Spoon about 1/2 teaspoon of strawberry jam into each well. If your preserves are chunky, mash the fruit pieces small so the wells fill evenly.
- Bake 13 to 15 minutes, until the edges look set and the bottoms are lightly golden.
- Cool 5 minutes on the pan, re-pressing any shallow wells while warm, then transfer to a rack.
Try it: Roll the dough balls in 1/3 cup of coarse sparkling sugar before pressing the wells. You get a bakery-style crunch around the edges that plain christmas jam filled cookies do not have.

03
3. Apricot Jam Thumbprints
Golden wells, an almond-scented dough and a filling that reads like a little sunset on the tray. Apricot is the most underrated of the christmas cookie recipes with jam, sweet-tart and never cloying, and it makes a multi-jam assortment look planned instead of random.
Makes: 30 cookies · Bake: 13 to 15 min · Total: 1 hr 10 min
Ingredients
- 1 cup (226 g) unsalted butter, softened
- 2/3 cup (135 g) granulated sugar
- 2 large egg yolks, room temperature
- 1 teaspoon vanilla extract
- 1/2 teaspoon almond extract
- 2 1/4 cups (280 g) all-purpose flour
- 1/2 teaspoon fine salt
- 1/2 cup (160 g) apricot preserves, pushed through a sieve or finely chopped
Steps
- Beat the butter and sugar on medium for 2 to 3 minutes until fluffy. Beat in the yolks, vanilla and almond extract.
- Add the flour and salt on low and mix just until the dough holds together. Chill, covered, for 30 minutes.
- Heat the oven to 350°F (175°C) and line two sheets with parchment. Roll the dough into 1-inch balls, spaced 2 inches apart.
- Press a deep well into each ball, about halfway down, and smooth the rims.
- Fill each well with about 1/2 teaspoon of apricot preserves, kept level with the top of the cookie.
- Bake 13 to 15 minutes, until the edges are set and the bottoms are pale gold.
- Cool on the pan for 5 minutes, then move to a rack. The apricot centers firm up as they cool.
Try it: Bake a mixed tray of recipes 1 to 3 and serve them as one assorted batch. Raspberry, strawberry and apricot side by side is the classic jam cookies christmas trio, and guests treat it like three different cookies.
04
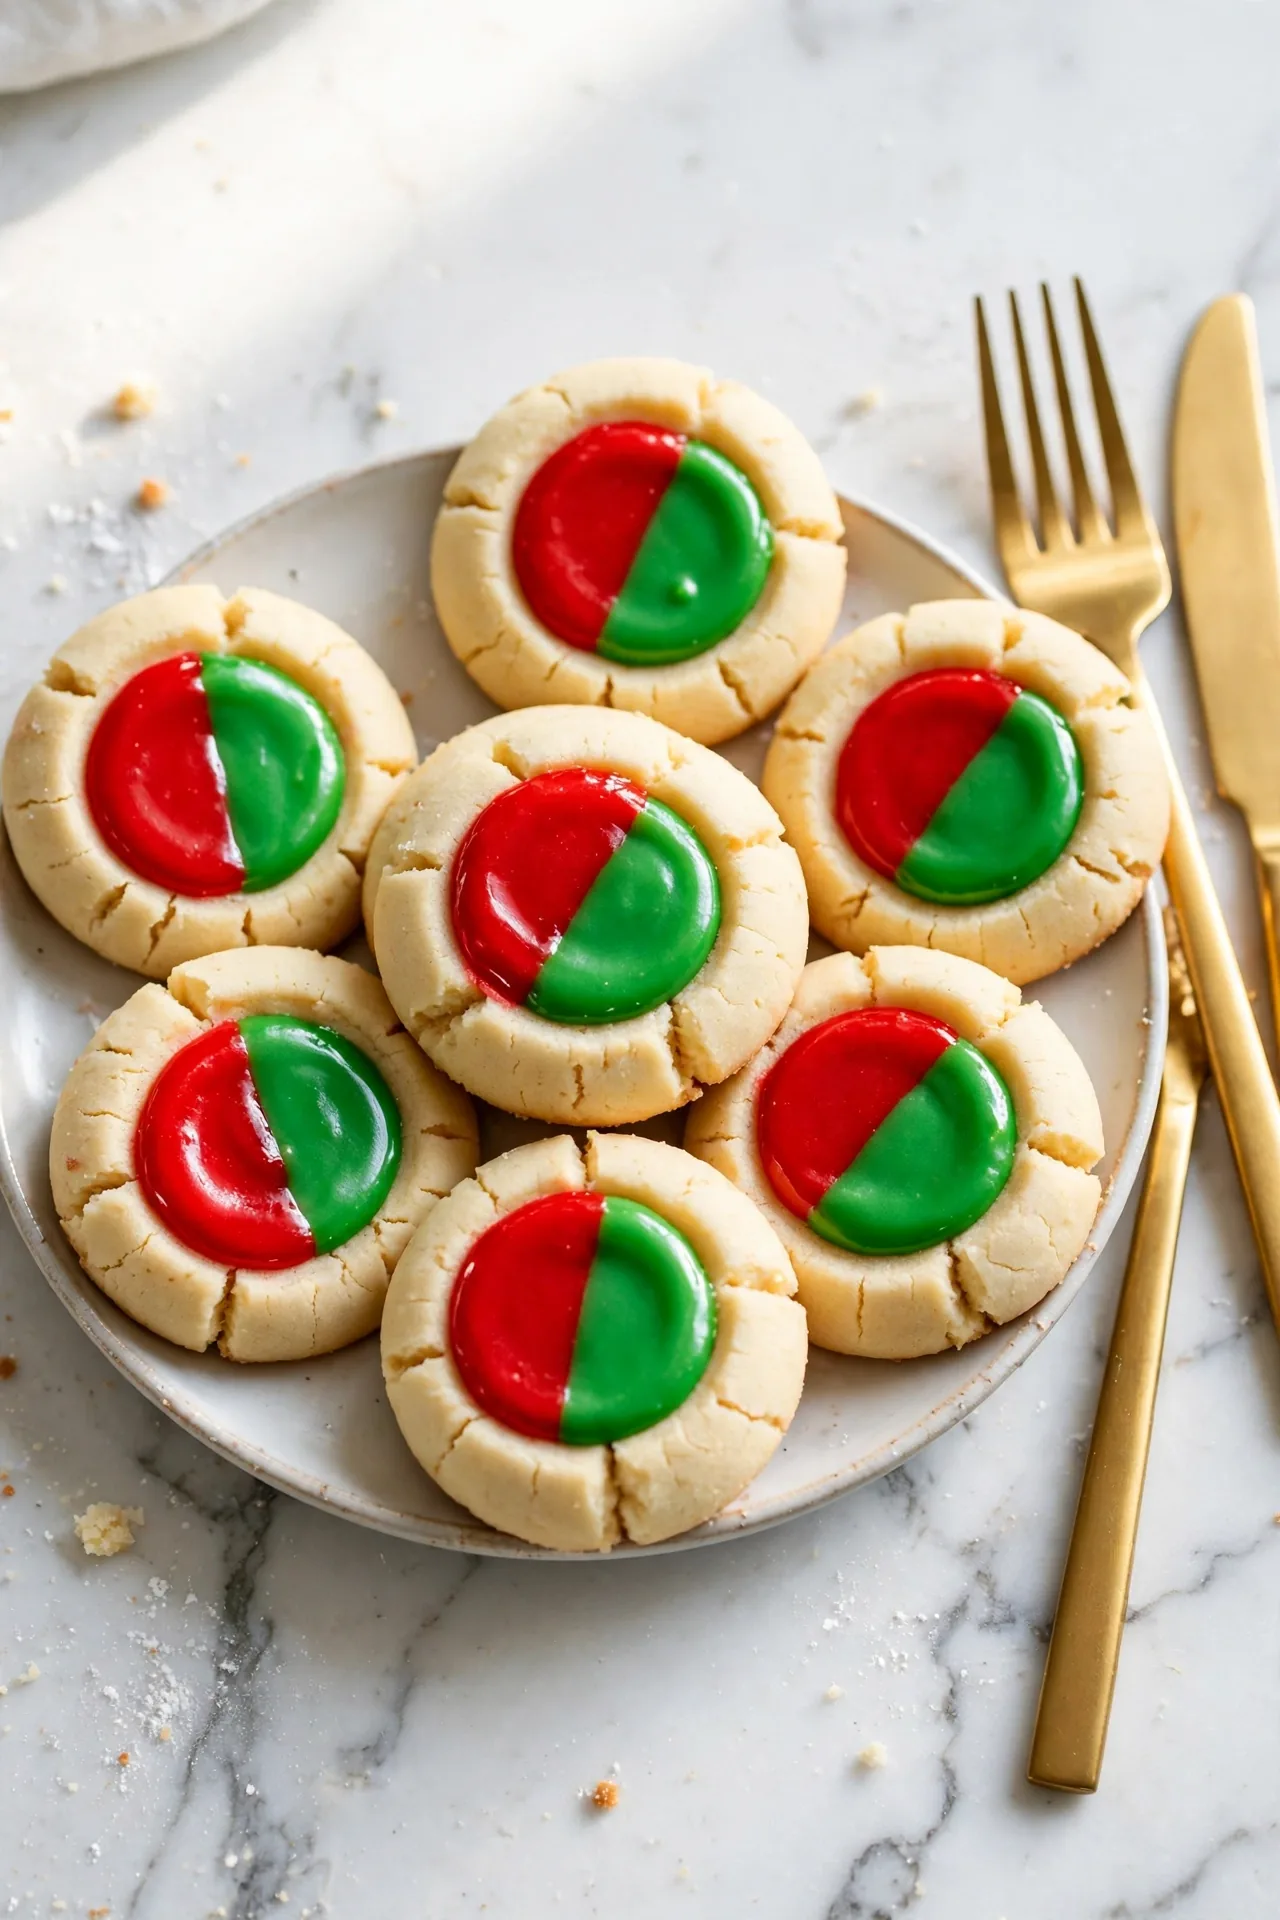
4. Icing-Filled Thumbprints
These are the christmas thumbprint cookies with icing you see in bakery windows: snowy vanilla cookies with red and green icing pooled in the wells after baking. Because the icing never enters the oven, the colors stay bright and the finish stays shiny.
Makes: 30 cookies · Bake: 12 to 14 min · Total: 1 hr 20 min
Ingredients
- 1 cup (226 g) unsalted butter, softened
- 2/3 cup (135 g) granulated sugar
- 2 large egg yolks, room temperature
- 1 teaspoon vanilla extract
- 2 1/4 cups (280 g) all-purpose flour
- 1/2 teaspoon fine salt
- 1 cup (120 g) powdered sugar, for the icing
- 2 tablespoons unsalted butter, very soft, for the icing
- 2 to 3 tablespoons milk
- 1/2 teaspoon vanilla extract, for the icing
- Red and green gel food coloring
Steps
- Beat the butter and sugar on medium for 2 to 3 minutes. Beat in the yolks and vanilla, then mix in the flour and salt on low until just combined. Chill 30 minutes.
- Heat the oven to 350°F (175°C) and line two sheets with parchment. Roll 1-inch balls, space 2 inches apart, and press a deep well into each.
- Bake the cookies unfilled for 12 to 14 minutes, until the edges are set and the bottoms are pale golden.
- Re-press every well with a round teaspoon straight out of the oven, then cool the cookies completely on a rack, about 30 minutes. Warm cookies melt icing into puddles.
- Whisk the powdered sugar, soft butter, vanilla and 2 tablespoons of milk into a thick icing that falls slowly off the spoon; add the last tablespoon of milk only if needed.
- Split the icing between two bowls and tint one red and one green with gel coloring.
- Pipe or spoon the icing into the wells, alternating colors, and let the cookies sit 30 minutes until the icing skins over.
Try it: Use gel coloring, never liquid. Liquid icing color thins the icing and turns red into pink; gel keeps christmas cookies thumbprint trays looking boldly red and green.
05
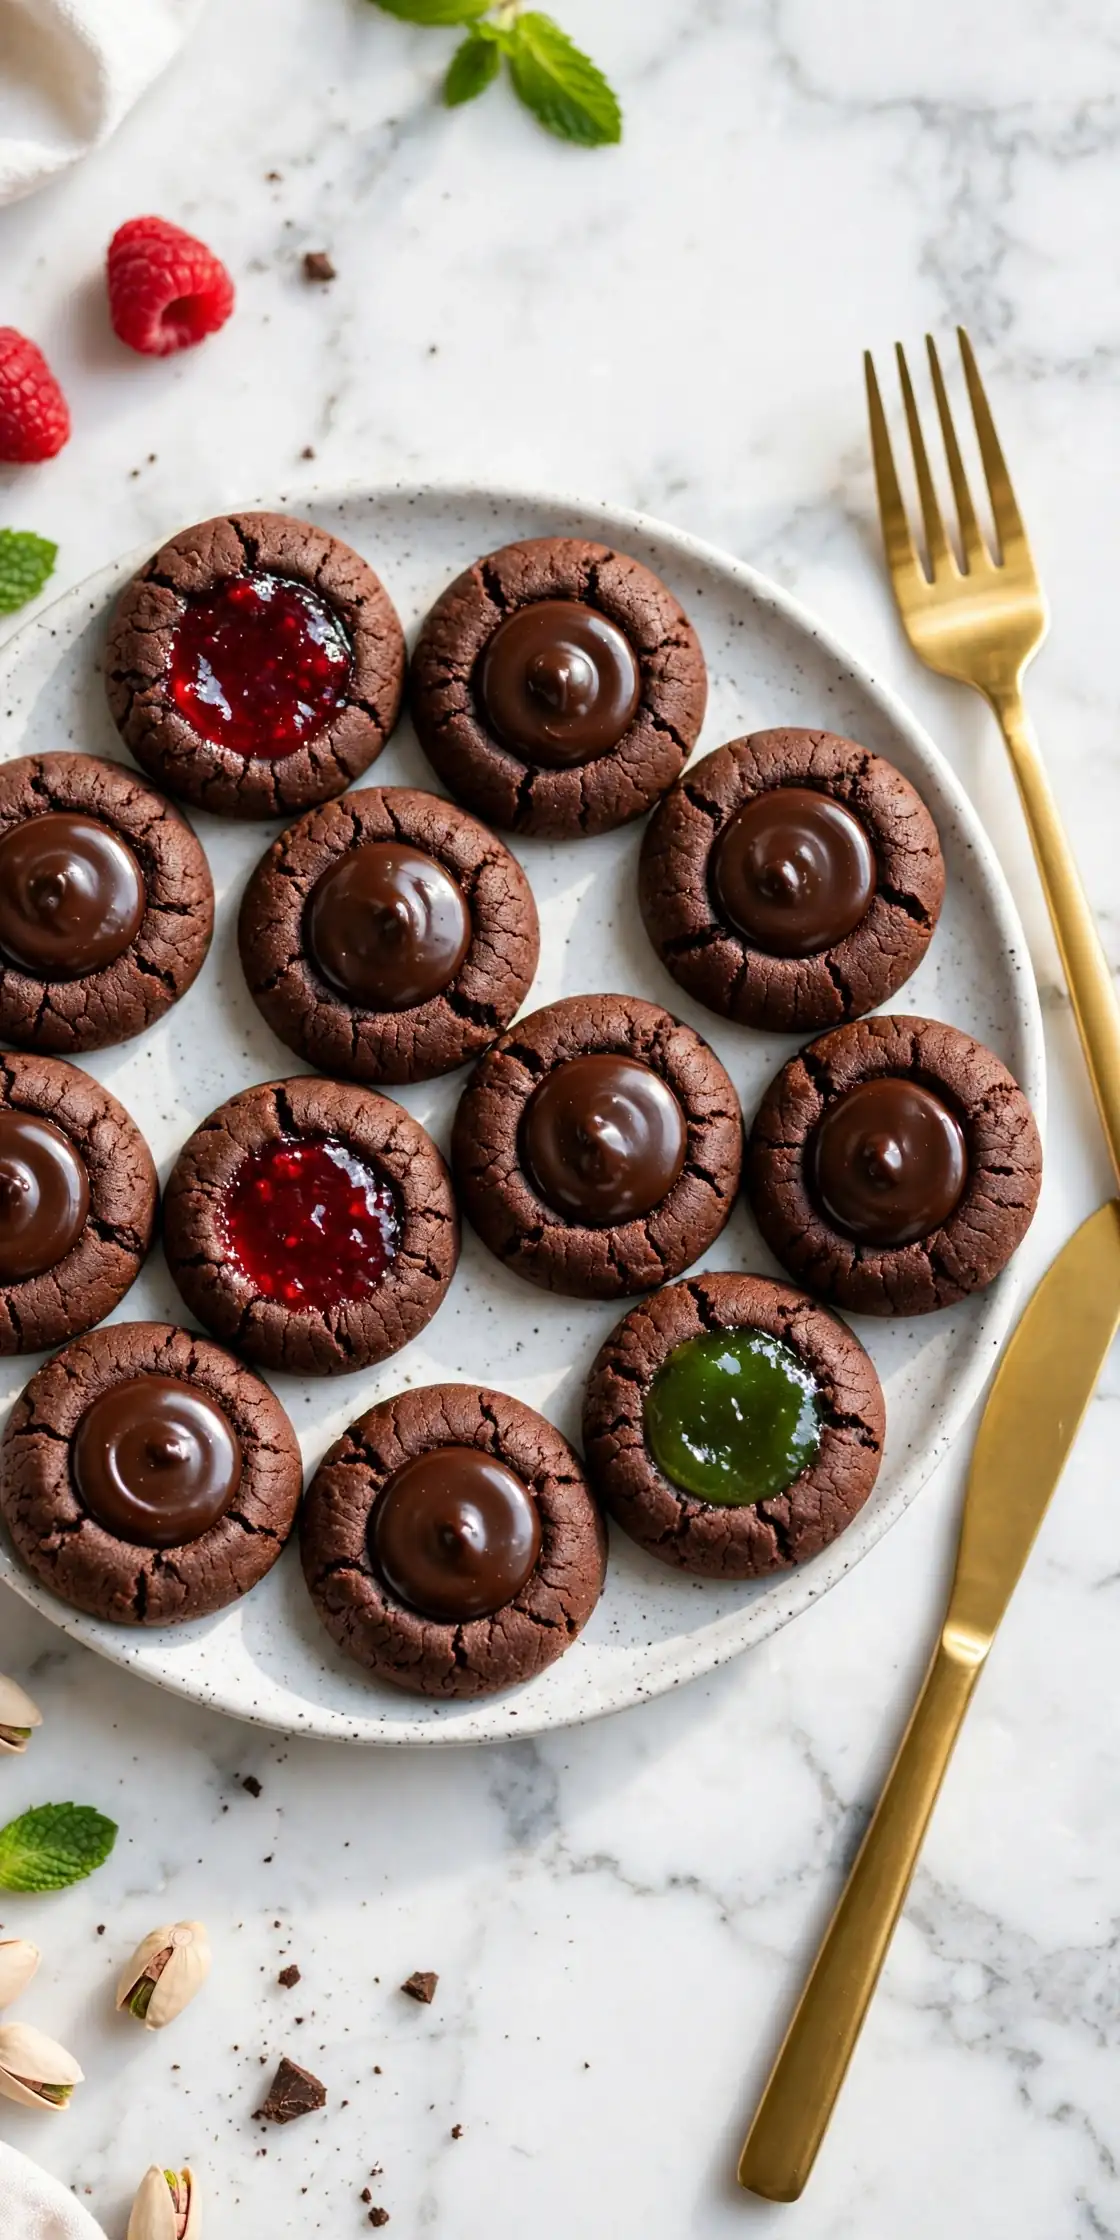
5. Chocolate Thumbprints
A proper chocolate thumbprint christmas cookies bake: cocoa dough, a baked well, and a spoonful of two-ingredient ganache that sets into a truffle-like center. If your household rates cookies by chocolate depth, this is your recipe.
Makes: 28 cookies · Bake: 12 to 14 min · Total: 1 hr 25 min
Ingredients
- 1 cup (226 g) unsalted butter, softened
- 2/3 cup (135 g) granulated sugar
- 2 large egg yolks, room temperature
- 1 teaspoon vanilla extract
- 2 cups (250 g) all-purpose flour
- 1/3 cup (30 g) unsweetened cocoa powder
- 1/2 teaspoon fine salt
- 1/2 cup (85 g) semisweet chocolate chips, for the ganache
- 1/4 cup (60 ml) heavy cream, for the ganache
Steps
- Beat the butter and sugar on medium for 2 to 3 minutes until pale. Beat in the yolks and vanilla.
- Whisk the flour, cocoa and salt together, then mix into the butter mixture on low until a dark, soft dough forms. Chill 30 minutes; cocoa dough firms up a lot and shapes better cold.
- Heat the oven to 350°F (175°C) and line two sheets with parchment. Roll 1-inch balls, space 2 inches apart, and press deep wells into each.
- Bake 12 to 14 minutes, until the tops look matte and the edges feel set. The centers will look slightly soft, which is right.
- Re-press the wells while warm and cool the cookies completely on a rack.
- Heat the cream until steaming, pour it over the chocolate chips, rest 2 minutes, then stir from the center until smooth and glossy.
- Spoon about 1 teaspoon of ganache into each well and let stand 30 minutes until the centers lose their wet shine.
Try it: Add 1/2 teaspoon of espresso powder to the ganache. You will not taste coffee; the chocolate simply tastes more like chocolate, which is the whole point of a chocolate thumbprint.
06
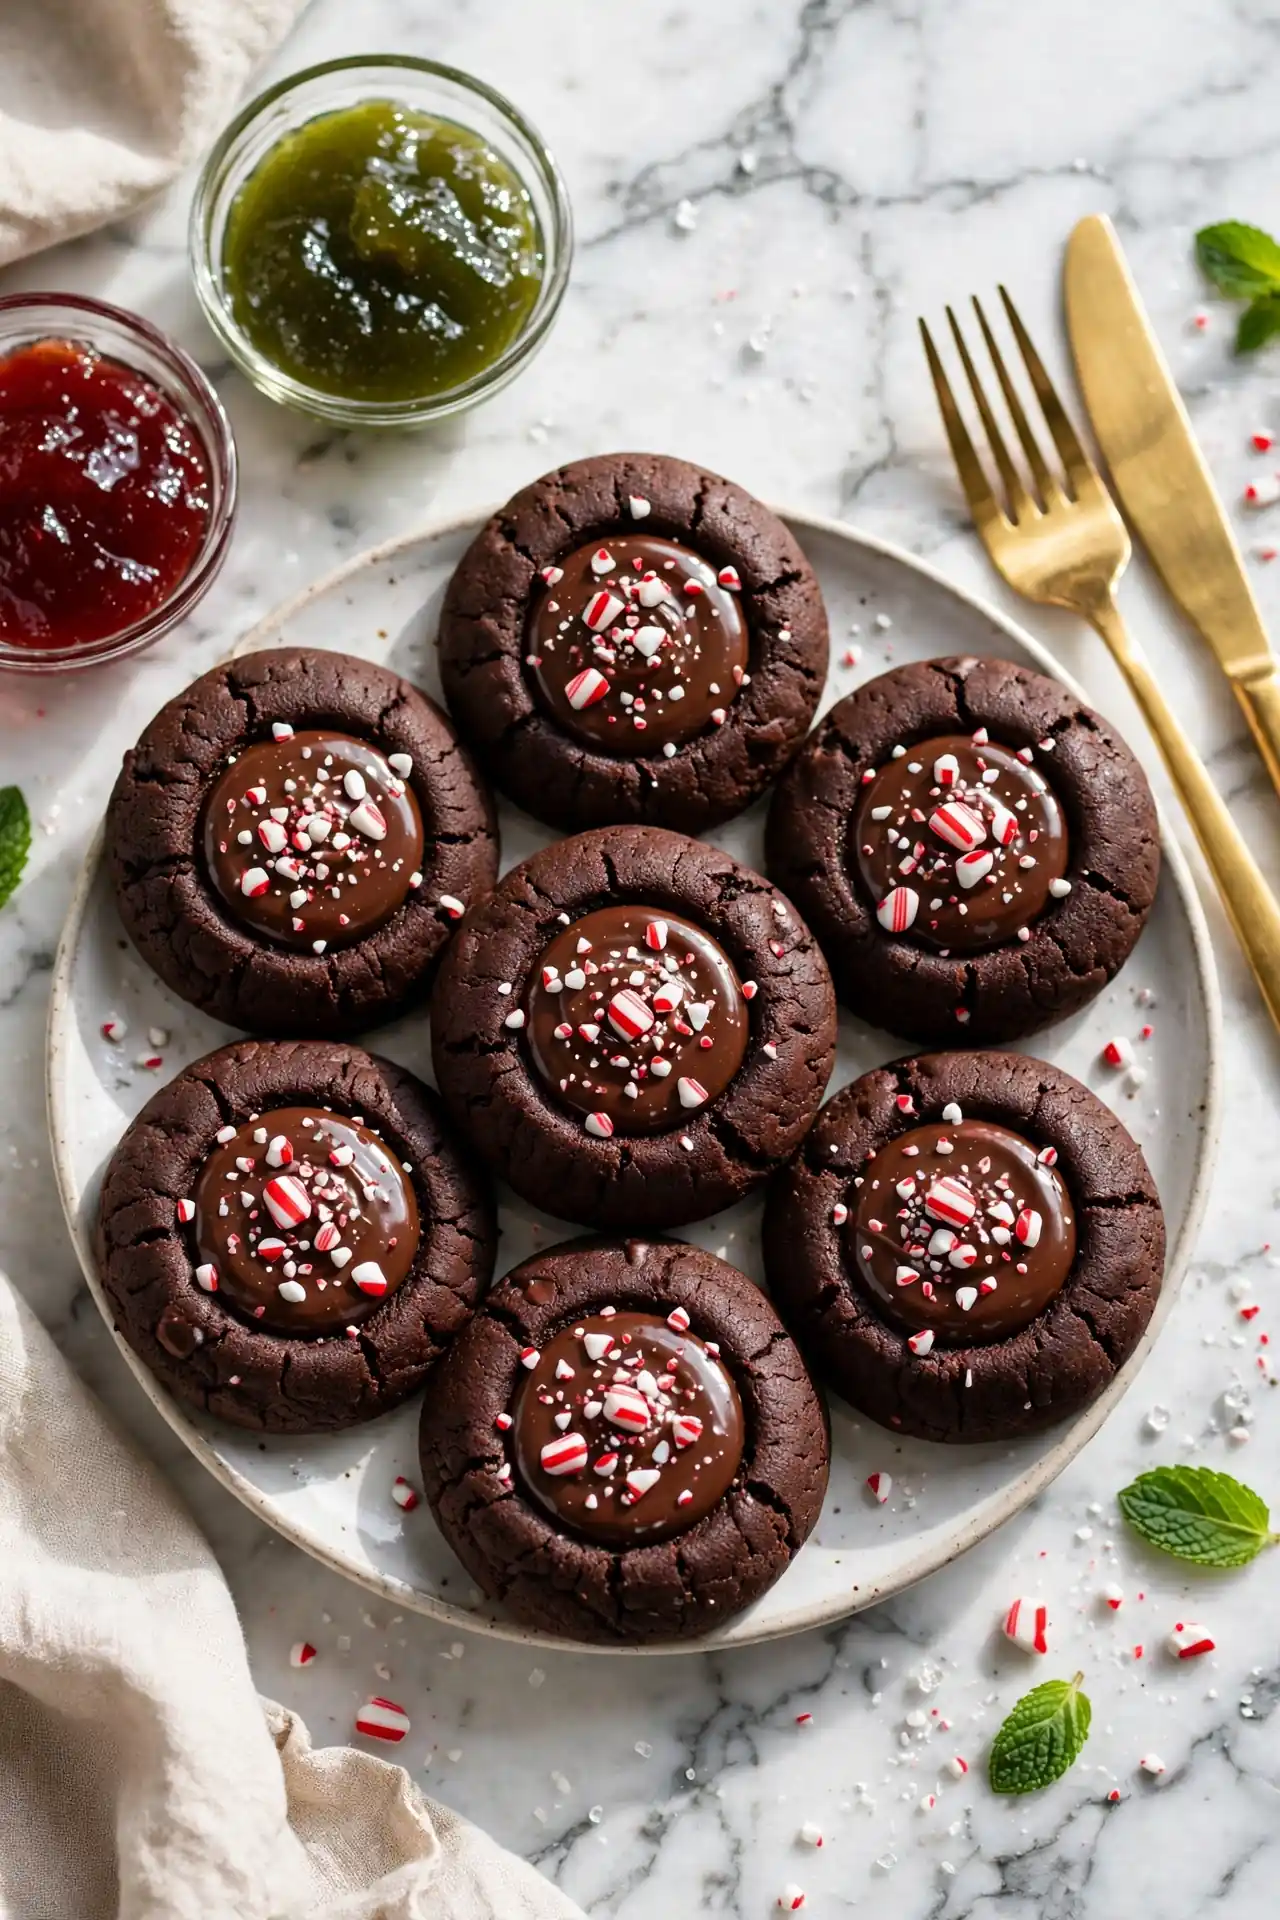
6. Chocolate Peppermint Thumbprints
The chocolate peppermint thumbprint cookies version of recipe 5, dressed for December: peppermint ganache under a snowfall of crushed candy cane. It eats like a peppermint patty that went to baking school.
Makes: 28 cookies · Bake: 12 to 14 min · Total: 1 hr 25 min
Ingredients
- 1 cup (226 g) unsalted butter, softened
- 2/3 cup (135 g) granulated sugar
- 2 large egg yolks, room temperature
- 1 teaspoon vanilla extract
- 2 cups (250 g) all-purpose flour
- 1/3 cup (30 g) unsweetened cocoa powder
- 1/2 teaspoon fine salt
- 1/2 cup (85 g) semisweet chocolate chips, for the filling
- 1/4 cup (60 ml) heavy cream, for the filling
- 1/2 teaspoon peppermint extract
- 3 tablespoons finely crushed candy canes
Steps
- Beat the butter and sugar on medium for 2 to 3 minutes. Beat in the yolks and vanilla, then mix in the flour, cocoa and salt on low. Chill the dough 30 minutes.
- Heat the oven to 350°F (175°C) and line two sheets with parchment. Roll 1-inch balls, space 2 inches apart, and press deep wells into each.
- Bake 12 to 14 minutes, until matte on top and set at the edges. Re-press the wells while warm and cool completely.
- Heat the cream until steaming, pour over the chips, rest 2 minutes and stir smooth. Stir in the peppermint extract.
- Fill each well with about 1 teaspoon of the peppermint ganache.
- While the ganache is still wet, sprinkle a pinch of crushed candy cane over each center. Let stand 30 minutes to set.
Try it: Crush the candy canes inside a zip bag with a rolling pin, using the flat side, not the edge. You want peppermint dust and tiny shards; big chunks slide off the ganache and go sticky overnight.
07
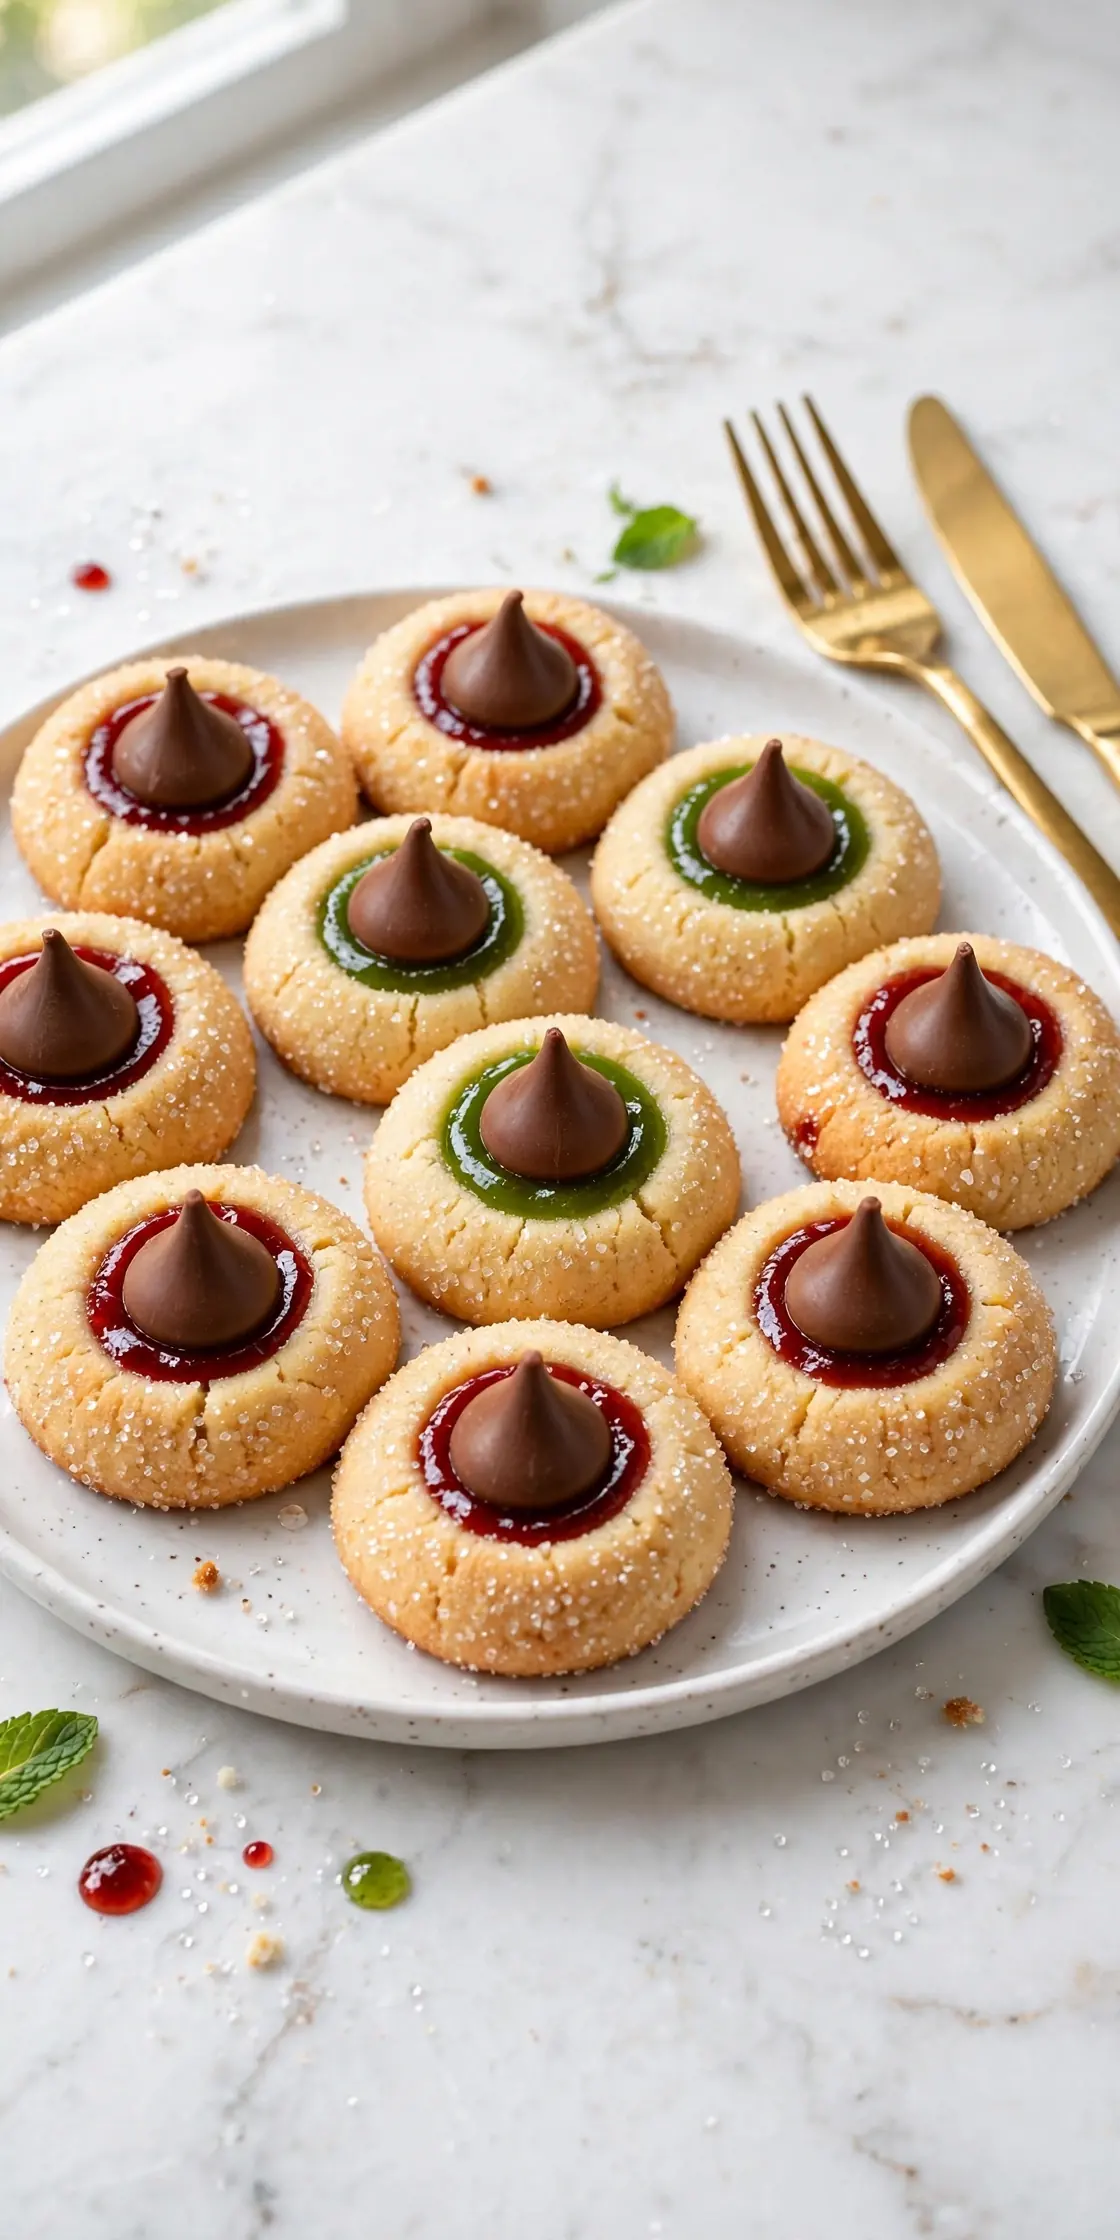
7. Hershey Kiss Thumbprints
Part blossom, part thumbprint: sugar-rolled vanilla cookies whose wells are sized exactly for a chocolate kiss. These thumbprint cookies with kisses are the fastest fancy-looking bake in the whole list, because the filling needs no mixing at all.
Makes: 30 cookies · Bake: 10 to 12 min · Total: 1 hr 5 min
Ingredients
- 1 cup (226 g) unsalted butter, softened
- 2/3 cup (135 g) granulated sugar, plus 1/4 cup (50 g) for rolling
- 2 large egg yolks, room temperature
- 1 teaspoon vanilla extract
- 2 1/4 cups (280 g) all-purpose flour
- 1/2 teaspoon fine salt
- 30 chocolate kisses, unwrapped
Steps
- Beat the butter and 2/3 cup sugar on medium for 2 to 3 minutes until fluffy. Beat in the yolks and vanilla, then the flour and salt on low. Chill 30 minutes.
- Heat the oven to 350°F (175°C) and line two sheets with parchment. Put the extra 1/4 cup sugar in a small bowl.
- Roll the dough into 1-inch balls, roll each ball in the sugar, and space them 2 inches apart on the sheets.
- Press a well into each ball, slightly wider than usual; a kiss needs room to sit down into the cookie.
- Bake 10 to 12 minutes, until the edges are just set and the bottoms are barely golden.
- Working quickly, press one kiss point-down into each warm well, pushing until the chocolate meets the cookie. The heat softens the base so it fuses as it cools.
- Leave the tray completely alone for at least 30 minutes. Moving a cookie while the kiss is melty smears the point.
Try it: Use the candy cane or caramel-filled kisses for half the tray. The hershey kiss thumbprint cookies christmas spread then reads as two flavors, and nobody believes it took one dough.
08
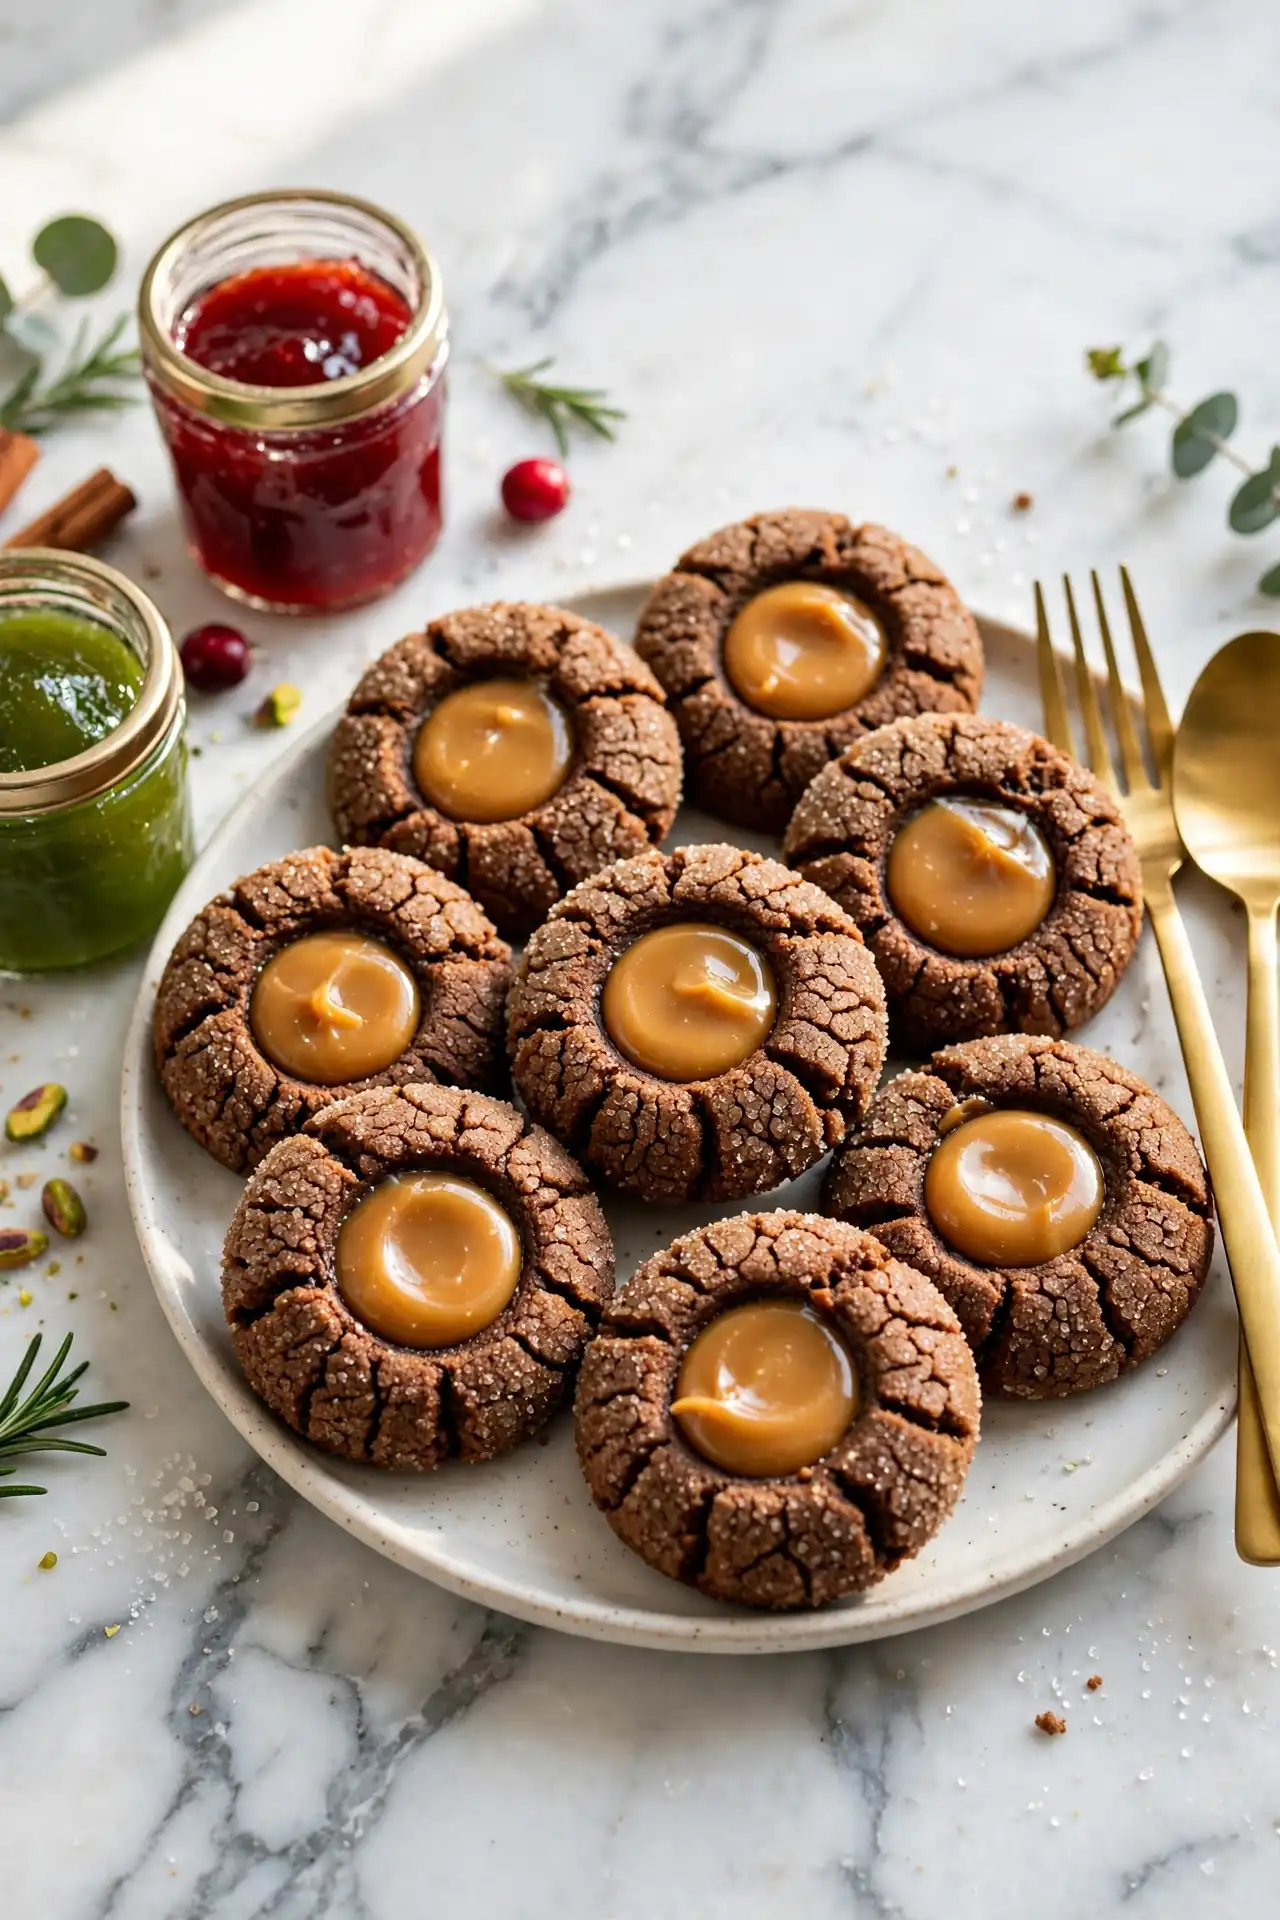
8. Gingerbread Thumbprints
All the spice of a gingerbread cookie with none of the rolling and cutting. The gingerbread thumbprint cookies dough is molasses-dark and warmly spiced, and the well holds dulce de leche, the caramel the gingerbread thumbprint cookies with dulce de leche fans swear by.
Makes: 30 cookies · Bake: 11 to 13 min · Total: 1 hr 15 min
Ingredients
- 3/4 cup (170 g) unsalted butter, softened
- 1/2 cup (100 g) packed brown sugar
- 1/4 cup (85 g) unsulphured molasses
- 1 large egg yolk
- 1 teaspoon vanilla extract
- 2 1/2 cups (310 g) all-purpose flour
- 2 teaspoons ground ginger
- 1 teaspoon ground cinnamon
- 1/4 teaspoon ground cloves
- 1/2 teaspoon baking soda
- 1/2 teaspoon fine salt
- 1/2 cup (150 g) dulce de leche, store-bought or tinned
Steps
- Beat the butter and brown sugar on medium for 2 minutes. Beat in the molasses, yolk and vanilla; the mixture will look dark and glossy.
- Whisk the flour, spices, baking soda and salt, then mix into the butter mixture on low until a firm dough forms. Chill 30 minutes; spiced dough is sticky when warm.
- Heat the oven to 350°F (175°C) and line two sheets with parchment. Roll 1-inch balls and space 2 inches apart.
- Press deep wells into each ball and smooth the rims.
- Bake 11 to 13 minutes, until the edges feel firm and the tops have fine cracks. Gingerbread darkens fast, so judge by touch, not color.
- Re-press the wells while warm and cool completely on a rack.
- Warm the dulce de leche for 10 seconds in the microwave so it pours, then spoon about 1 teaspoon into each well. Let stand 20 minutes to settle.
Try it: Roll the balls in granulated sugar before pressing for a crackled, sparkly crust, the same finish as a good molasses crinkle, and the wells stay easier to press.
09
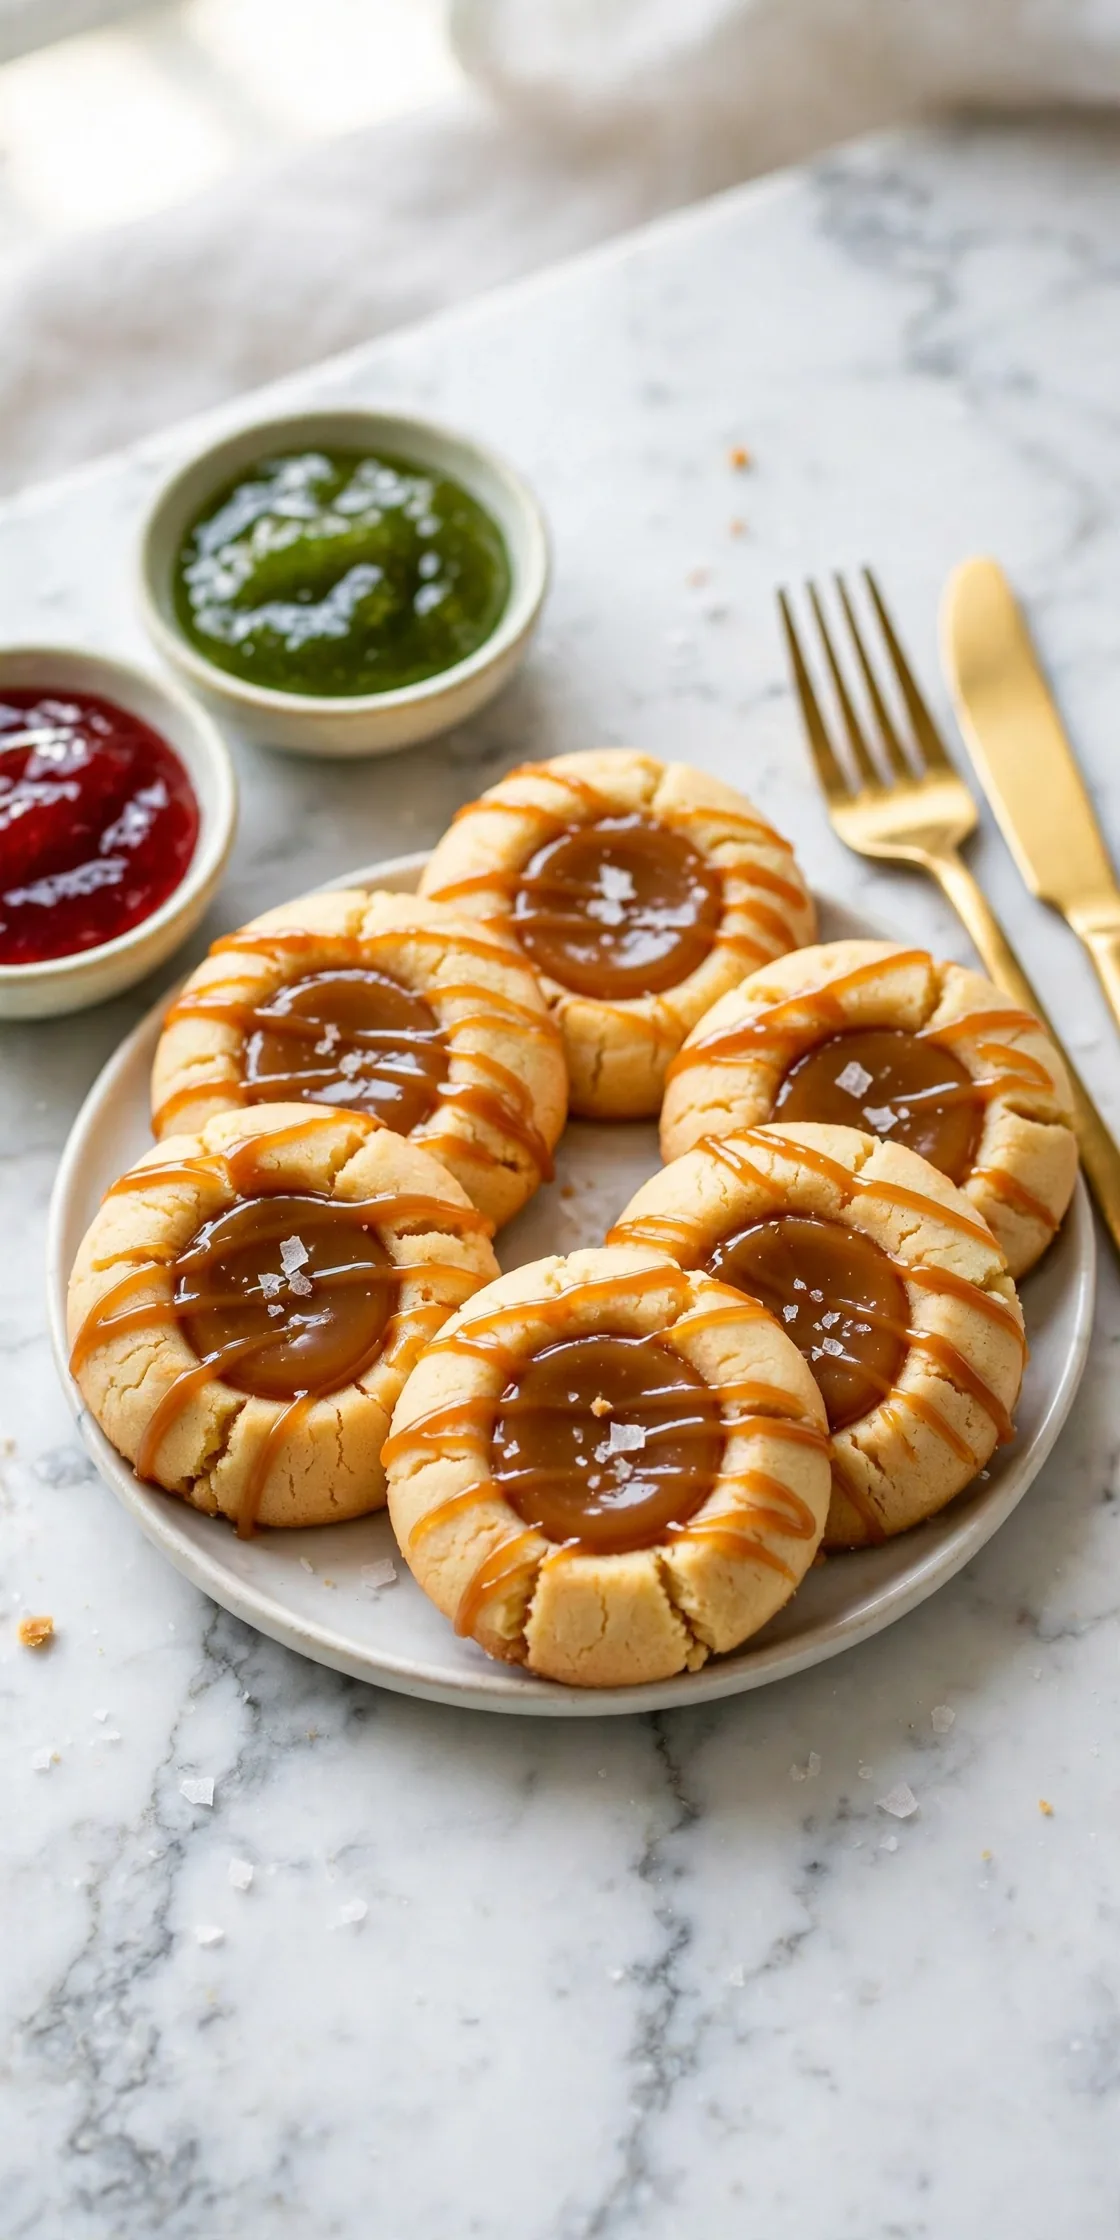
9. Salted Caramel Thumbprints
Buttery vanilla wells filled with thick, glossy caramel and finished with a snow of flaky salt. Salted caramel is the grown-up filling of the christmas cookies thumbprint family, and it sets firm enough to stack, which jam never quite does.
Makes: 30 cookies · Bake: 12 to 14 min · Total: 1 hr 20 min
Ingredients
- 1 cup (226 g) unsalted butter, softened
- 2/3 cup (135 g) granulated sugar
- 2 large egg yolks, room temperature
- 1 teaspoon vanilla extract
- 2 1/4 cups (280 g) all-purpose flour
- 1/2 teaspoon fine salt
- 20 soft caramel candies (about 150 g), unwrapped, for the filling
- 2 tablespoons heavy cream, for the filling
- Flaky sea salt, for sprinkling
Steps
- Beat the butter and sugar on medium for 2 to 3 minutes until pale. Beat in the yolks and vanilla, then the flour and salt on low. Chill 30 minutes.
- Heat the oven to 350°F (175°C) and line two sheets with parchment. Roll 1-inch balls, space 2 inches apart, and press deep wells into each.
- Bake unfilled for 12 to 14 minutes, until the edges are set and the bottoms are pale golden. Re-press the wells while warm and cool completely.
- Melt the caramels with the cream in a small saucepan over low heat, stirring constantly, 4 to 5 minutes, until completely smooth. Work on low; caramel scorches in seconds on high.
- Spoon about 1 teaspoon of caramel into each well, filling to just below the rim.
- Rest 5 minutes, then sprinkle a few flakes of sea salt over each center. Let the cookies stand 30 minutes until the caramel is set but still glossy.
Try it: Keep the filled cookies in a single layer until the caramel firms up, then stack with parchment between layers. Warm caramel welds stacked cookies into one delicious brick.
10
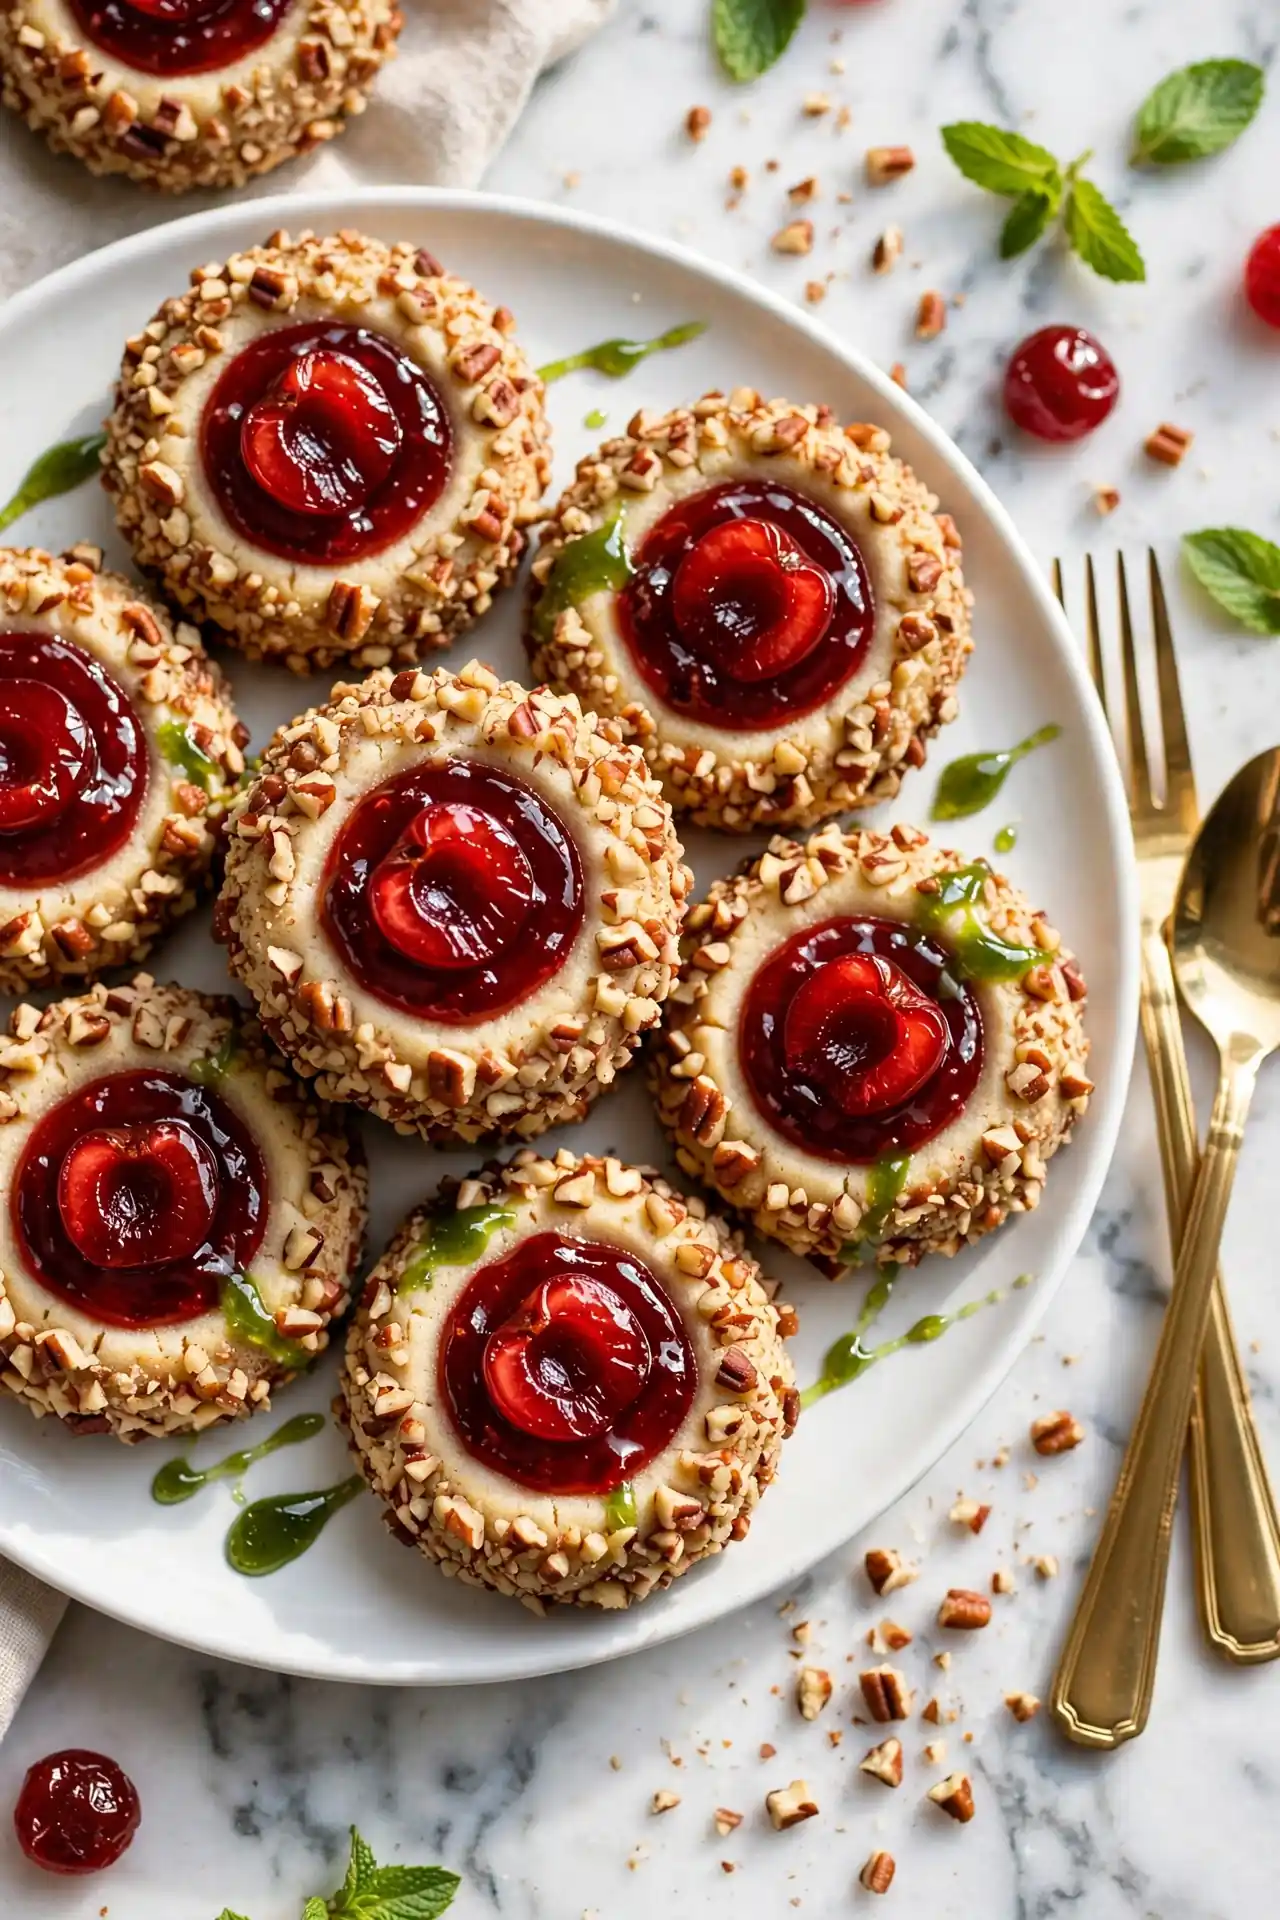
10. Cherry Thumbprints
The vintage tray cookie: nut-rolled butter cookies with a red cherry heart. These thumbprint cookies with candied cherries have been on Christmas plates for generations, and the chopped pecan crust gives them the crunch every other thumbprint lacks.
Makes: 30 cookies · Bake: 14 to 16 min · Total: 1 hr 15 min
Ingredients
- 1 cup (226 g) unsalted butter, softened
- 2/3 cup (135 g) granulated sugar
- 2 large egg yolks, room temperature, plus 1 egg white for coating
- 1 teaspoon vanilla extract
- 2 1/4 cups (280 g) all-purpose flour
- 1/2 teaspoon fine salt
- 1 cup (110 g) pecans or walnuts, very finely chopped
- 1/3 cup (105 g) cherry jam or preserves
- 15 candied cherries, halved
Steps
- Beat the butter and sugar on medium for 2 to 3 minutes until pale. Beat in the yolks and vanilla, then mix in the flour and salt on low. Chill 30 minutes.
- Heat the oven to 350°F (175°C) and line two sheets with parchment. Lightly beat the egg white with 1 teaspoon of water in a small bowl, and put the chopped nuts in another.
- Roll the dough into 1-inch balls. Dip each ball in the egg white, then roll in the nuts until coated, and set 2 inches apart on the sheets.
- Press a deep well into each nut-crusted ball. Work slowly; the nut coating makes the dough more likely to crack, and cracks can be pinched shut.
- Fill each well with about 1/2 teaspoon of cherry jam and press a candied cherry half, cut side down, into the center.
- Bake 14 to 16 minutes, until the nuts smell toasted and the bottoms are golden.
- Cool on the pan 5 minutes, then move to a rack. The cherry centers set as they cool.
Try it: Chop the nuts almost to crumbs in a food processor. Fine nuts coat evenly and stay on the cookie; coarse chunks fall off in the tin and leave bald patches.
11
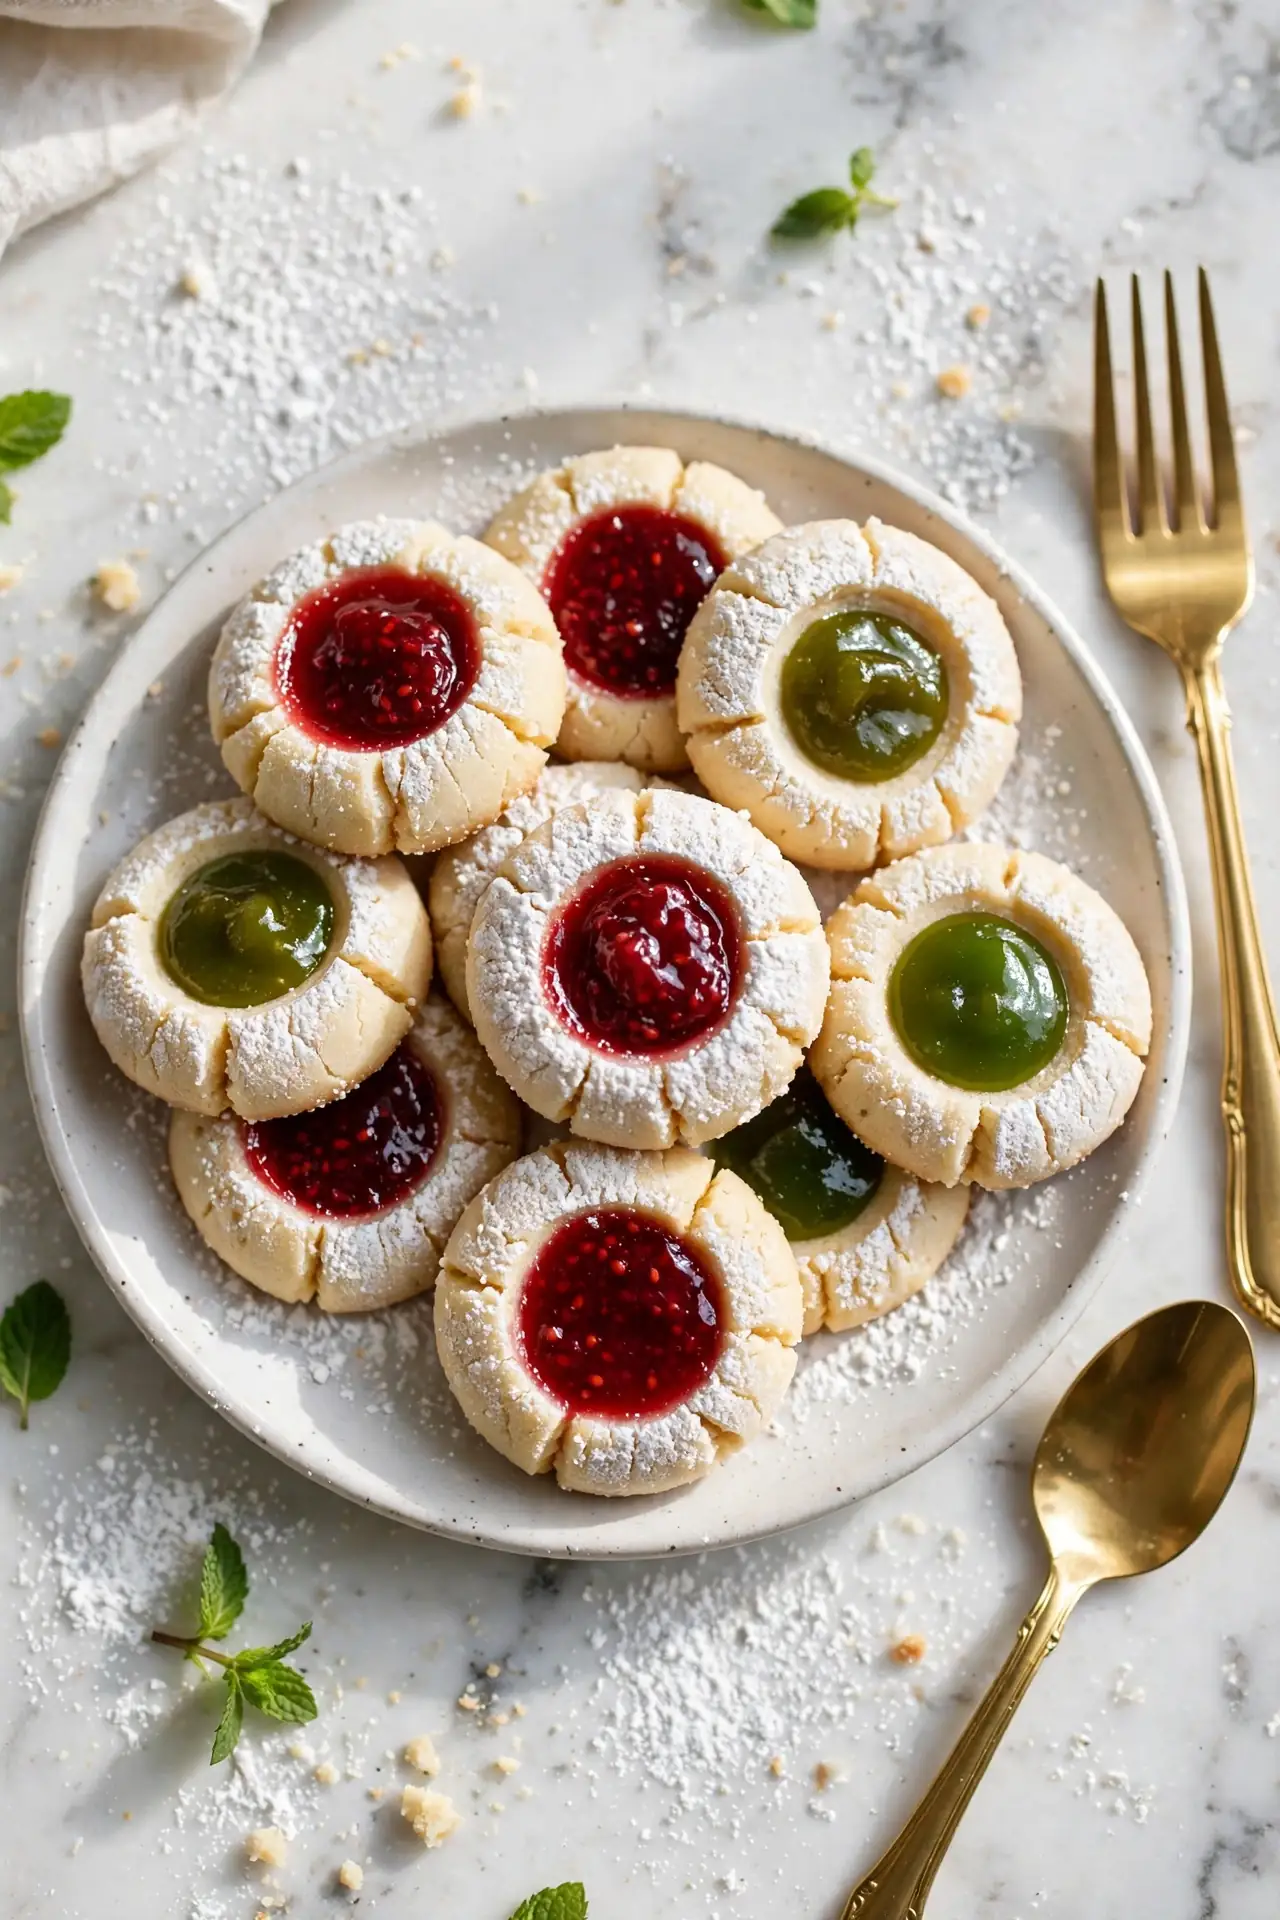
11. Shortbread Thumbprints (Powdered Sugar)
The egg-free member of the family: a crumbly, melt-away shortbread thumbprint cookies christmas bake with a small spoon of jam and a heavy snowfall of powdered sugar. If you loved the jam thumbprint shortbread in our christmas shortbread recipes, this is its closest cousin, pressed by thumb instead of sliced.
Makes: 24 cookies · Bake: 16 to 18 min · Total: 1 hr 15 min
Ingredients
- 1 cup (226 g) unsalted butter, softened
- 1/2 cup (60 g) powdered sugar, plus 1/3 cup (40 g) for dusting
- 1 teaspoon vanilla extract
- 2 cups (250 g) all-purpose flour
- 1/4 cup (30 g) cornstarch
- 1/2 teaspoon fine salt
- 1/3 cup (105 g) raspberry or mixed-berry jam
Steps
- Beat the butter and 1/2 cup powdered sugar on medium for 2 minutes, until smooth and pale. Beat in the vanilla.
- Add the flour, cornstarch and salt on low and mix just until the dough clumps. It will look crumbly, then come together as you press it. Chill 30 minutes.
- Heat the oven to 325°F (165°C) and line two sheets with parchment. Roll the dough into 1-inch balls and space 2 inches apart.
- Press a well into each ball with a floured thumb. Shortbread cracks more than butter dough, so press slowly and patch the rims as you go.
- Fill each well with about 1/2 teaspoon of jam, no more; shortbread wells are delicate and overflow stains the pale dough.
- Bake 16 to 18 minutes, until the cookies are set and matte but barely colored. Shortbread should stay pale, never golden on top.
- Cool completely on the pan, about 20 minutes, because warm shortbread shatters. Dust generously with the remaining powdered sugar just before serving.
Try it: Dust the sugar through a small sieve held high above the tray. A high sieve gives an even snowfall; a low one dumps white patches that hide the jam centers you worked for.

12
12. Sprinkle Thumbprints
The party batch: christmas sprinkle thumbprint cookies rolled in red and green sprinkles, then filled with melted white chocolate. Kids read these as candy, adults eat three, and the sprinkle coat means zero decorating after baking.
Makes: 30 cookies · Bake: 12 to 14 min · Total: 1 hr 10 min
Ingredients
- 1 cup (226 g) unsalted butter, softened
- 2/3 cup (135 g) granulated sugar
- 2 large egg yolks, room temperature
- 1 teaspoon vanilla extract
- 2 1/4 cups (280 g) all-purpose flour
- 1/2 teaspoon fine salt
- 1 cup (160 g) red and green jimmies or nonpareils
- 1/2 cup (85 g) white chocolate chips, for the filling
- 1 teaspoon coconut oil or shortening, for the filling
Steps
- Beat the butter and sugar on medium for 2 to 3 minutes until pale. Beat in the yolks and vanilla, then the flour and salt on low. Chill 30 minutes.
- Heat the oven to 350°F (175°C) and line two sheets with parchment. Put the sprinkles in a shallow bowl.
- Roll the dough into 1-inch balls and roll each in the sprinkles, pressing gently so they stick all over. Space 2 inches apart.
- Press a well into each ball. The sprinkle crust resists a little; use the round end of a wooden spoon for a clean well.
- Bake 12 to 14 minutes, until the edges are set and the bottoms are pale golden. Re-press the wells while warm and cool completely.
- Melt the white chocolate chips with the coconut oil in 20-second microwave bursts, stirring between each, until smooth.
- Spoon about 1 teaspoon of white chocolate into each well and let stand 30 minutes to set.
Try it: Use jimmies, not nonpareils, if your oven runs hot. Nonpareils bleed their color into pale dough as they bake; jimmies hold their red and green and stay crunchy.

13
13. Grinch Thumbprints
A green cookie with a red heart two sizes too small, or exactly the right size, depending on who you ask. Grinch thumbprint cookies are the novelty bake of the season for a reason: one gel-colored dough, one red center, instant recognition across the room.
Makes: 30 cookies · Bake: 12 to 14 min · Total: 1 hr 10 min
Ingredients
- 1 cup (226 g) unsalted butter, softened
- 2/3 cup (135 g) granulated sugar
- 2 large egg yolks, room temperature
- 1 teaspoon vanilla extract
- 2 1/4 cups (280 g) all-purpose flour
- 1/2 teaspoon fine salt
- Green gel food coloring
- 30 red heart sprinkles, or 1/4 cup (80 g) red raspberry jam for the centers
Steps
- Beat the butter and sugar on medium for 2 to 3 minutes until pale. Beat in the yolks and vanilla.
- Mix in the flour and salt on low until just combined, then knead in green gel coloring a few drops at a time until the dough is a clear Grinch green. Chill 30 minutes.
- Heat the oven to 350°F (175°C) and line two sheets with parchment. Roll 1-inch balls and space 2 inches apart.
- Press a small, shallow well into each ball, heart-sized rather than jam-sized.
- Bake 12 to 14 minutes, until the edges are set and the bottoms are pale. Green dough hides browning, so pull them on time, not on color.
- While the cookies are warm, press one red heart sprinkle into each well. The soft cookie grabs the heart as it cools. If you are using jam instead, fill the wells with 1/4 teaspoon of jam before baking and skip this step.
Try it: Tint the dough one shade darker than you want. Green cookies bake out lighter than the raw dough looks, and a weak green reads as plain mint rather than unmistakably Grinch.
14
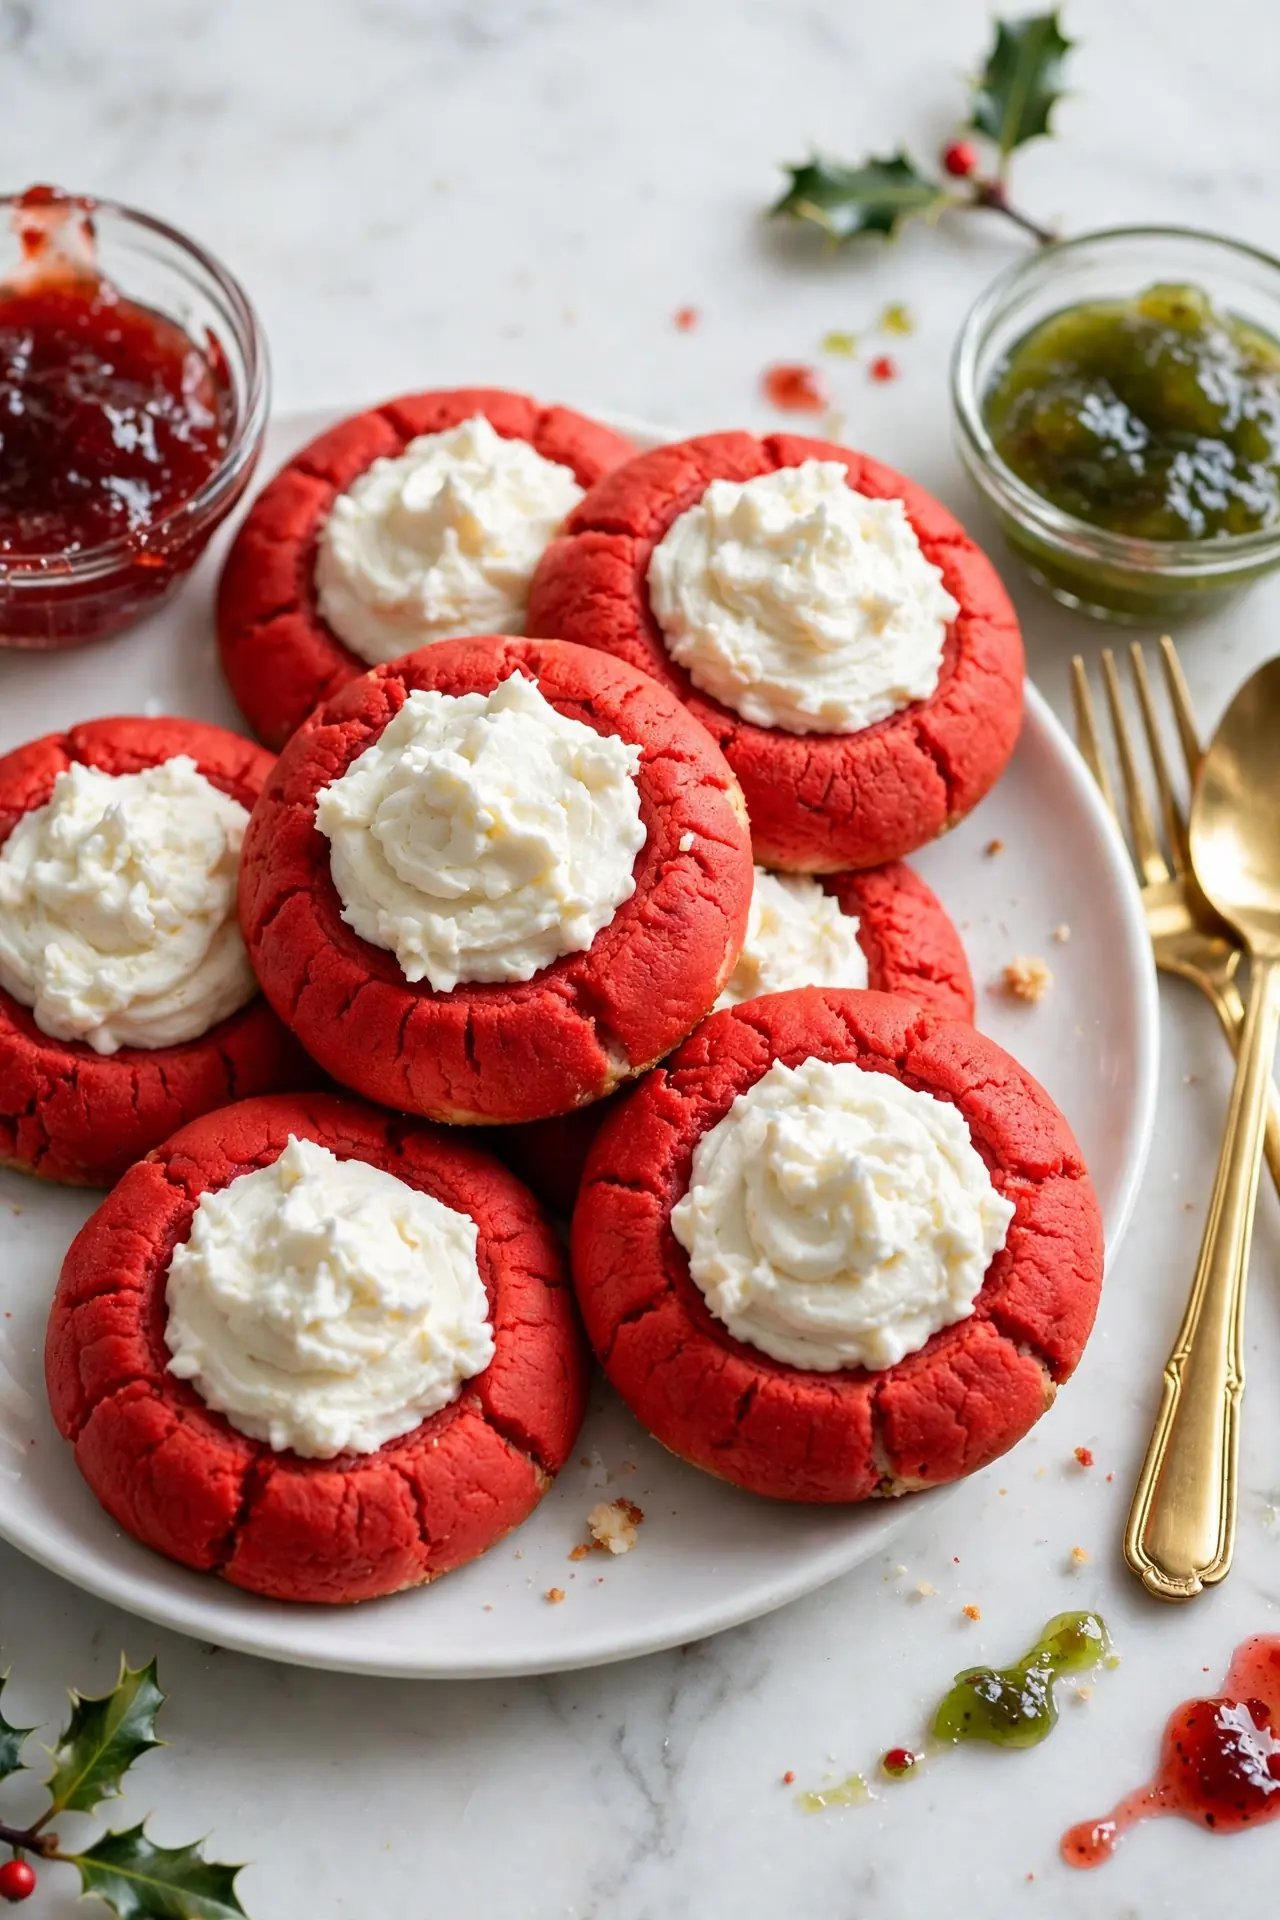
14. Santa Thumbprints
The red half of the novelty pair: santa thumbprint cookies in a cheerful red dough with a white cream cheese icing center that reads as the trim on Santa’s suit. Bake them on the same tray day as the Grinch batch and the tin photographs itself.
Makes: 30 cookies · Bake: 12 to 14 min · Total: 1 hr 20 min
Ingredients
- 1 cup (226 g) unsalted butter, softened
- 2/3 cup (135 g) granulated sugar
- 2 large egg yolks, room temperature
- 1 teaspoon vanilla extract
- 2 1/4 cups (280 g) all-purpose flour
- 1/2 teaspoon fine salt
- Red gel food coloring
- 4 oz (115 g) cream cheese, softened, for the icing
- 2 tablespoons unsalted butter, softened, for the icing
- 3/4 cup (90 g) powdered sugar, for the icing
- 1/2 teaspoon vanilla extract, for the icing
Steps
- Beat the butter and sugar on medium for 2 to 3 minutes until pale. Beat in the yolks and vanilla.
- Mix in the flour and salt on low, then work in red gel coloring until the dough is an even Santa red, remembering it bakes out slightly lighter. Chill 30 minutes.
- Heat the oven to 350°F (175°C) and line two sheets with parchment. Roll 1-inch balls, space 2 inches apart, and press deep wells into each.
- Bake unfilled for 12 to 14 minutes, until the edges are set. Judge doneness by the set edges; the red dough will not show browning.
- Re-press the wells while warm and cool the cookies completely, about 30 minutes.
- Beat the cream cheese and butter until smooth, then beat in the powdered sugar and vanilla to a thick, pipeable icing.
- Pipe or spoon the icing into the wells in a neat mound and rest 20 minutes before stacking or serving.
Try it: Chill the filled cookies for 15 minutes before the cookie exchange run. Cream cheese icing travels soft; a short chill firms the centers so the red and white contrast survives the car ride.

15
15. Lemon Curd Thumbprints
The bright finish to a heavy December tray: lemon-zested butter cookies filled with glossy lemon curd after baking. Every christmas cookie with jelly in the middle is sweet on sweet; this one adds real citrus bite, and it is the cookie adults quietly take two of.
Makes: 30 cookies · Bake: 12 to 14 min · Total: 1 hr 15 min
Ingredients
- 1 cup (226 g) unsalted butter, softened
- 2/3 cup (135 g) granulated sugar
- 2 large egg yolks, room temperature
- 1 tablespoon finely grated lemon zest
- 1 teaspoon vanilla extract
- 2 1/4 cups (280 g) all-purpose flour
- 1/2 teaspoon fine salt
- 2/3 cup (200 g) lemon curd, store-bought from a jar
- Extra lemon zest curls, to finish
Steps
- Beat the butter and sugar on medium for 2 to 3 minutes until pale. Beat in the yolks, lemon zest and vanilla; the dough should smell like lemonade.
- Mix in the flour and salt on low until just combined. Chill 30 minutes.
- Heat the oven to 350°F (175°C) and line two sheets with parchment. Roll 1-inch balls, space 2 inches apart, and press deep wells into each.
- Bake unfilled for 12 to 14 minutes, until the edges are set and the bottoms are pale golden. Re-press the wells while warm and cool completely.
- Stir the lemon curd until smooth and pourable. Spoon about 1 teaspoon into each well, filling right to the rim; curd settles slightly as it sits.
- Rest 15 minutes, then top each center with a curl or two of fresh lemon zest.
- Serve within 2 days, or refrigerate the filled cookies in a single layer; curd is a fresh filling, not a pantry one.
Try it: Warm the jar of curd for 10 seconds in the microwave before filling. Room-temperature curd can tear the delicate wells as you spoon; loosened curd flows in cleanly and levels itself.
Pro tip: Press the wells twice, once before baking with your thumb and once straight out of the oven with the back of a round measuring teaspoon. The first press shapes the cookie, the second press is the one that actually decides how much filling each cookie holds, and it takes ten seconds per tray.
Three rules for thumbprint cookies that hold their well
Thumbprints fail in predictable ways: cracks at the rim, wells that vanish, cookies that spread into puddles. These three rules cover nearly every failed batch you will ever read about.
- Chill the dough, every time: Thirty minutes in the fridge firms the butter so the balls roll smooth, press without cracking and bake up instead of out. Warm dough is the root cause of both spreading and cracked rims, and no filling trick fixes it after the fact.
- Press gently and patch early: A slow press with a thumb or a round teaspoon handle lets the dough stretch instead of split. If a rim cracks anyway, pinch and smooth it before baking; cracks patched before the oven disappear, cracks found after baking are permanent.
- Match the filling to the moment: Jam, preserves and curd-style fruit fillings that can take heat go in before baking and set into the cookie. Icing, ganache, caramel, melted chocolate and kisses go in after, because the oven would melt, dull or scorch every one of them.
Storing and making ahead
Thumbprints keep better than most decorated cookies, because the cookie itself is sturdy and most fillings are shelf-stable. A little planning turns one baking day into two weeks of ready cookies.
- On the counter: Store baked cookies in an airtight tin at room temperature for up to 5 days, with parchment between layers so jam and caramel centers do not stick. Lemon curd and cream cheese icing cookies are the exception; refrigerate those after day one and eat within 3 days.
- In the freezer: Freeze scooped, pressed dough balls on a tray, then bag them for up to 3 months and bake from frozen, adding 1 to 2 minutes. Baked jam-filled cookies also freeze well for up to 3 months; freeze icing, ganache and caramel cookies unfilled and add the filling after thawing for the cleanest finish.
- For gifting and shipping: Jam, cherry and gingerbread thumbprints travel best and survive mailing in tins with parchment between layers. Kiss-topped and sprinkle cookies are sturdy too, but keep them cool in transit so the chocolate centers do not soften against the tin lid.
Questions readers ask
Why do my thumbprint cookies crack when I press them?
They crack because the dough is too cold or too dry at the moment you press it. Dough straight from a long chill is stiff, and stiff dough splits instead of stretching. Let chilled dough stand at room temperature for 5 to 10 minutes, roll each ball between your palms until it is perfectly smooth and warm from your hands, then press slowly. If cracks appear, pinch them closed before baking.
Should I put the jam in before or after baking?
Put jam in before baking, and put almost everything else in after. Jam and preserves thicken in the oven and set into the well as the cookie cools, which is why a classic christmas cookies with jelly bake always fills first. Icing, ganache, caramel, lemon curd and chocolate kisses would melt, dull or slide in the oven, so those cookies bake empty and get filled once cool.
Why did my thumbprint cookies spread flat?
Too-warm butter and skipped chilling cause nearly all spreading. If the dough felt soft and greasy when you rolled it, the cookies were always going to relax into puddles. Chill the mixed dough for a full 30 minutes, chill the shaped tray for 10 more minutes if your kitchen is warm, and measure flour by spooning and leveling so the dough is not accidentally short on flour.
How deep should the well in a thumbprint cookie be?
About halfway through the cookie, roughly 1/2 inch deep on a 1-inch ball, is the right depth. Shallower wells hold only a smear of filling and the jam bakes over the rim; deeper wells split the base and the cookie leaks or breaks. Press to halfway, then re-press after baking while the crumb is still soft if the well puffed up.
Can I freeze thumbprint cookies?
Yes, both the dough and the baked cookies freeze well for up to 3 months. Freeze shaped dough balls on a tray and bake from frozen with 1 to 2 extra minutes, or freeze baked jam-filled cookies in a single layer before bagging. Freeze cookies with icing, ganache or caramel centers after thawing instead: fill them fresh and the centers look and taste freshly made.
What can I fill thumbprint cookies with besides jam?
Caramel, dulce de leche, ganache, lemon curd, icing and a chocolate kiss are the best non-jam fillings, and recipes 4 to 9 and 15 above use every one of them. Nutella, peanut butter cups cut to size, and thick fruit curds also work. Whatever you choose, keep the filling thick: runny fillings soak into the crumb and turn the center soggy by day two.
How do I stop the jam bubbling over the sides?
Use thick jam or preserves, fill level, and never heaped. A scant 1/2 teaspoon per cookie is enough; jam expands as it heats and finds the lowest crack in the rim to escape through. Stir the jam smooth before filling so it sits flat, and patch rim cracks before the tray goes in. Thin jelly is the worst offender, so if yours is loose, simmer it for 2 minutes to thicken, cool, then fill.
How long do thumbprint cookies stay fresh?
About 5 days in an airtight tin at room temperature for jam, cherry, sprinkle and plain filled cookies, and they are often better on day two as the crumb softens slightly. Ganache and caramel cookies keep 4 to 5 days. Lemon curd and cream cheese icing cookies should be refrigerated and eaten within 3 days. For anything longer, freeze and thaw in the closed tin.
People Also Ask
What is the difference between jam and jelly in thumbprint cookies?
Jam is made from crushed fruit and jelly from strained juice, so jam is thick and textured while jelly is clear and loose. For a christmas cookie with jelly in the middle, jam or preserves are honestly the better bake: they sit higher in the well, bubble less and taste fruitier. Jelly works if you simmer it briefly to thicken it first, and it gives the glassiest, most traditional look to a jelly thumbprint cookie recipe.
Can I make thumbprint cookies without eggs?
Yes, shortbread-style thumbprints like recipe 11 need no eggs at all. Butter, powdered sugar, flour, cornstarch and salt make a dough that holds a well and bakes up crumbly and rich. Keep the dough well chilled and press the wells with a floured thumb, because egg-free dough cracks more easily, and expect a shorter, more delicate cookie than the egg-yolk version.
Do thumbprint cookies need to be refrigerated?
Most do not; jam, caramel, ganache and icing thumbprints keep happily in a tin at room temperature for up to 5 days. The exceptions are lemon curd and cream cheese icing fillings, which are fresh dairy and fruit fillings: refrigerate those cookies after the first day and bring them back to room temperature for 20 minutes before serving so the butter crumb softens again.
loved these ideas? ✿
Save this guide for later
Pin it to your board so it’s there when you’re ready to recreate it.

Curated by
Hey! I'm Sanaullah — visual curator and content creator. I search, curate, and test the best aesthetic ideas across Pinterest so you can easily transform your living space, style daily outfits, and try simple creative DIYs without the overwhelm.